Customize app manifest for Microsoft Visual Studio
The app manifest (previously called Teams app manifest) describes how your app integrates into Microsoft Teams and is shared between local and remote environments. The default app manifest file is available at the appPackage/manifest.json file and the environment variables available from the env/.env.{env} file.
The app manifest file contains some environment variables with the ${{XX_XX}} format. You can define your own environment variables and add placeholders in the manifest.json file. The following are the .env and .json file examples:
TEAMS_APP_DESCRIPTION=This is an amazing app
{
    "$schema": "https://developer.microsoft.com/en-us/json-schemas/teams/v1.16/MicrosoftTeams.schema.json",
    "manifestVersion": "1.16",
    "description": {
        "short": "${{TEAMS_APP_DESCRIPTION}}",
        "full": "Full description of tab0418"
    },
}
Preview app manifest file
You can preview the app manifest file either For Local or For Azure. To preview the app manifest file, follow these steps:
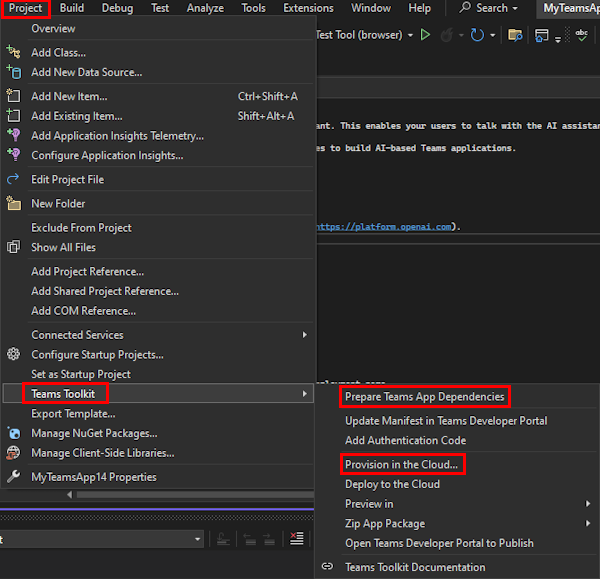
Select Project > Teams Toolkit.
Select Prepare Teams App Dependencies or Provision in the Cloud... to generate environment variables for local or remote Teams app.
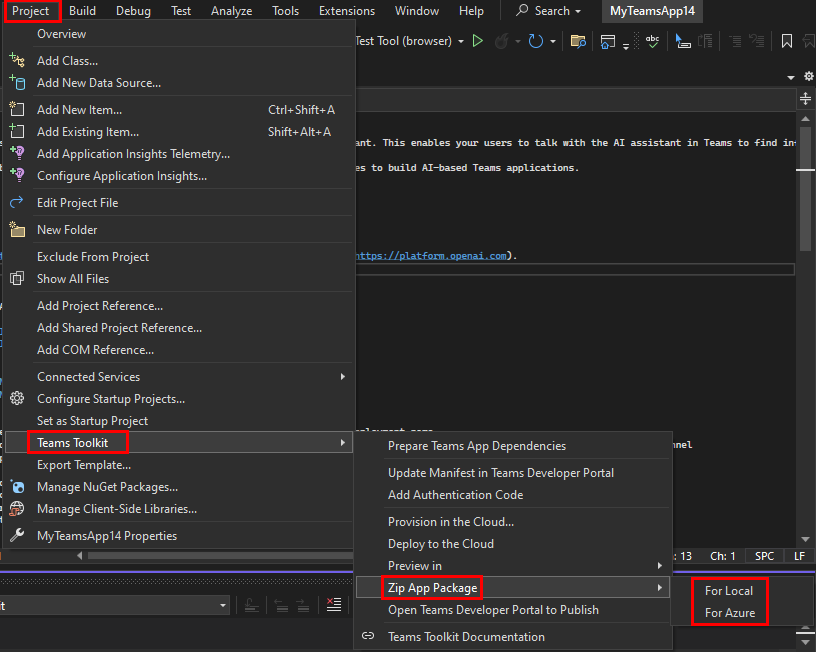
Upload the Zip App Package in the following ways:
Select Project > Teams Toolkit > Zip App Package and then select either For Local or For Azure
From Solution Explorer, right-click on MyTeamsApp14 (in this scenario the project name is MyTeamsApp14). Go to Teams Toolkit > Zip App Package and then select either For Local or For Azure.
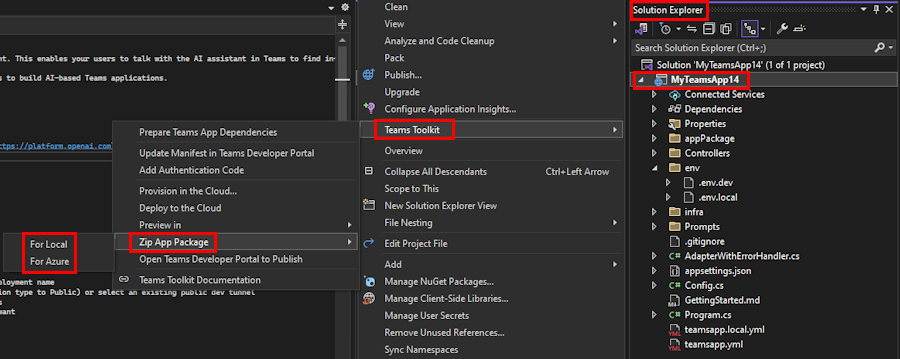
Teams Toolkit generates the zip app package.
Under
appPackagefolder, right-click on themanifest.jsonfile.Select Preview Manifest File.
Select either For Local or For Azure.

You can preview app manifest file under appPackage/build in Visual Studio.
Sync local changes to Developer Portal
After you've previewed the app manifest file in Visual Studio, you can sync the local changes to Developer Portal. To sync changes to Developer Portal follow these steps:
- Select Project.
- Select Teams Toolkit.
- Select Update Manifest in Teams Developer Portal.
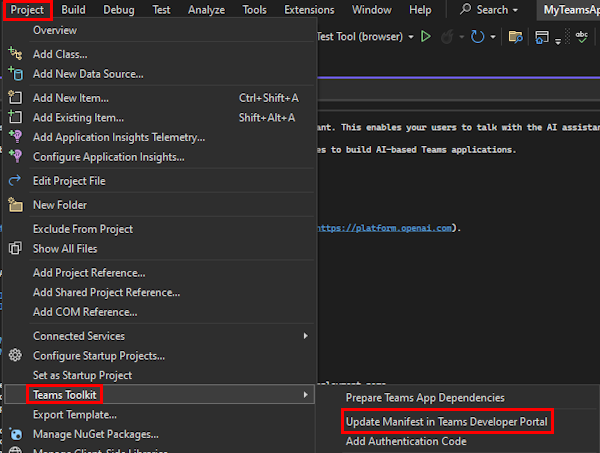
You can also sync the local changes to Developer Portal from Solution Explorer:
- Right-click on MyTeamsApp14.
- Select Teams Toolkit.
- Select Update Manifest in Teams Developer Portal

The changes are updated to Developer Portal.
Tip
If you want to make any manual updates that can be overwritten in Teams Developer Portal, from the Warning dialog box select Overwrite and update.

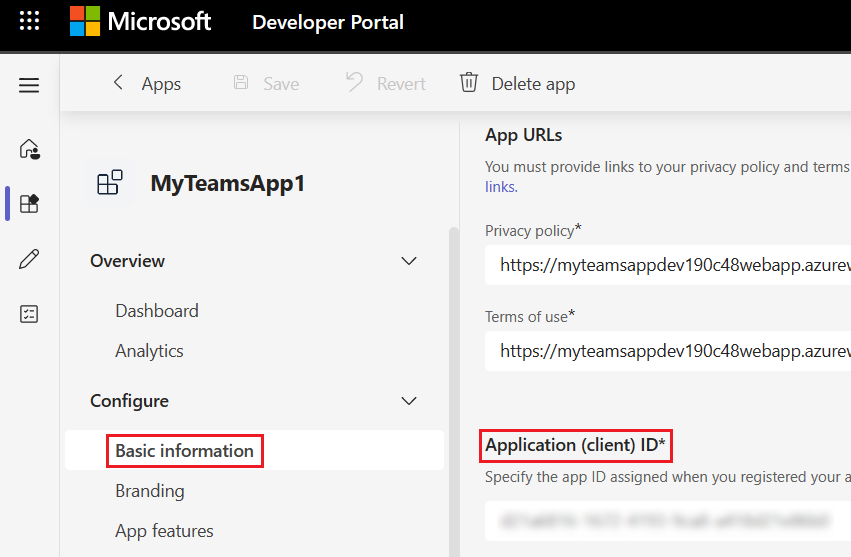
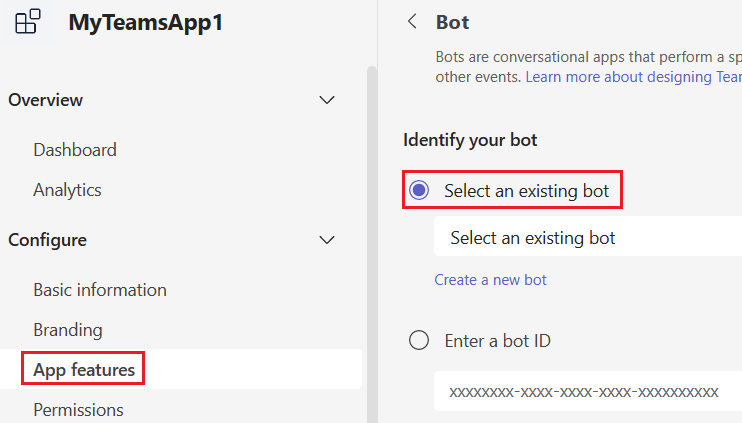
When you create a Teams command bot using Visual Studio, two app IDs are registered in Microsoft Entra ID. You can identify the app IDs in Developer Portal as Application (client) ID under Basic information and existing bot ID under App features.
See also
Platform Docs