Update app manifest for SSO and preview app
Before you update the app manifest (previously called Teams app manifest), ensure your tab app code is configured to enable single sign-on (SSO).
You've registered your tab app in Microsoft Entra ID, and obtained an app ID. You've also configured your code to call getAuthToken() and handle the access token. Now, you must update the app manifest to enable SSO for your tab app. The app manifest describes how an app integrates into Teams.
webApplicationInfo property
Configure the webApplicationInfo property in the app manifest file. This property enables SSO for your app to help app users access your tab app seamlessly.
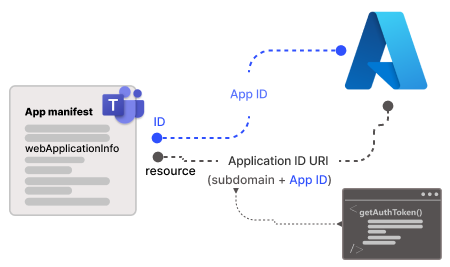
webApplicationInfo has two elements, id and resource.
| Element | Description |
|---|---|
| id | Enter the app ID (GUID) that you created in Microsoft Entra ID. |
| resource | Enter your app's subdomain URI and the application ID URI that you created in Microsoft Entra ID when creating scope. You can copy it from the Microsoft Entra ID > Expose an API section. |
Note
Use the app manifest version 1.5 or later to implement the webApplicationInfo property.
The application ID URI that you registered in Microsoft Entra ID is configured with the scope of the API you exposed. Configure your app's subdomain URI in resource to ensure that the authentication request using getAuthToken() is from the domain given in the app manifest.
For more information, see webApplicationInfo.
To configure app manifest
Open the tab app project.
Open the app manifest folder.
Note
- The app manifest folder should be at the root of your project. For more information, see Create a Microsoft Teams app package.
- For more information on learning how to create a manifest.json, see the app manifest schema.
Open the
manifest.jsonfileAdd the following code snippet to the app manifest file to add the new property:
"webApplicationInfo":
{
"id": "{Microsoft Entra AppId}",
"resource": "api://subdomain.example.com/{Microsoft Entra AppId}"
}
where,
{Microsoft Entra AppId}is the app ID you created when you registered your app in Microsoft Entra ID. It's the GUID.subdomain.example.comis the application ID URI that you registered when creating scope in Microsoft Entra ID.
Update the app ID from Microsoft Entra ID in the id property.
Update the subdomain URL in the following properties:
contentUrlconfigurationUrlvalidDomains
Save the app manifest file. For more information, see app manifest.
Here's an example of the updated app manifest
{
  "$schema": "https://developer.microsoft.com/json-schemas/teams/v1.11/MicrosoftTeams.schema.json",
  "manifestVersion": "1.11",
  "version": "1.0.0",
  "id": "bccfbe67-e08b-4ec1-a7fd-e0aaf41a097c",
  "developer": {
    "name": "Microsoft",
    "websiteUrl": "https://www.microsoft.com",
    "privacyUrl": "https://www.microsoft.com/privacy",
    "termsOfUseUrl": "https://www.microsoft.com/termsofuse"
  },
  "name": {
    "short": "Teams Auth SSO",
    "full": "Teams Auth SSO"
  },
  "description": {
    "short": "Teams Auth SSO app",
    "full": "The Teams Auth SSO app"
  },
  "icons": {
    "outline": "outline.png",
    "color": "color.png"
  },
  "accentColor": "#60A18E",
  "staticTabs": [
    {
      "entityId": "auth",
      "name": "Auth",
      "contentUrl": "https://contoso.com/Home/Index",
      "scopes": [ "personal" ]
    }
  ],
  "configurableTabs": [
    {
      "configurationUrl": "https://contoso.com/Home/Configure",
      "canUpdateConfiguration": true,
      "scopes": [
        "team"
      ]
    }
  ],
  "permissions": [ "identity", "messageTeamMembers" ],
  "validDomains": [
    "contoso.com"
  ],
  "webApplicationInfo": {
    "id": "bccfbe67-e08b-4ec1-a7fd-e0aaf41a097c",
    "resource": "api://contoso.com/bccfbe67-e08b-4ec1-a7fd-e0aaf41a097c"
  }
}
Note
During debug, you can use ngrok to test your app in Microsoft Entra ID. In that case, you need to replace the subdomain in api://subdomain.example.com/00000000-0000-0000-0000-000000000000 with the ngrok URL. You'll need to update the URL whenever your ngrok subdomain changes. For example, api://23c3-103-50-148-128.ngrok.io/bccfbe67-e08b-4ec1-a7fd-e0aaf41a097c.
Upload a custom app and preview in Teams
You've configured the tab app to enable SSO in Microsoft Entra ID, in app code, and in the app manifest file. You can now upload your custom tab app in Teams, and preview it in Teams environment.
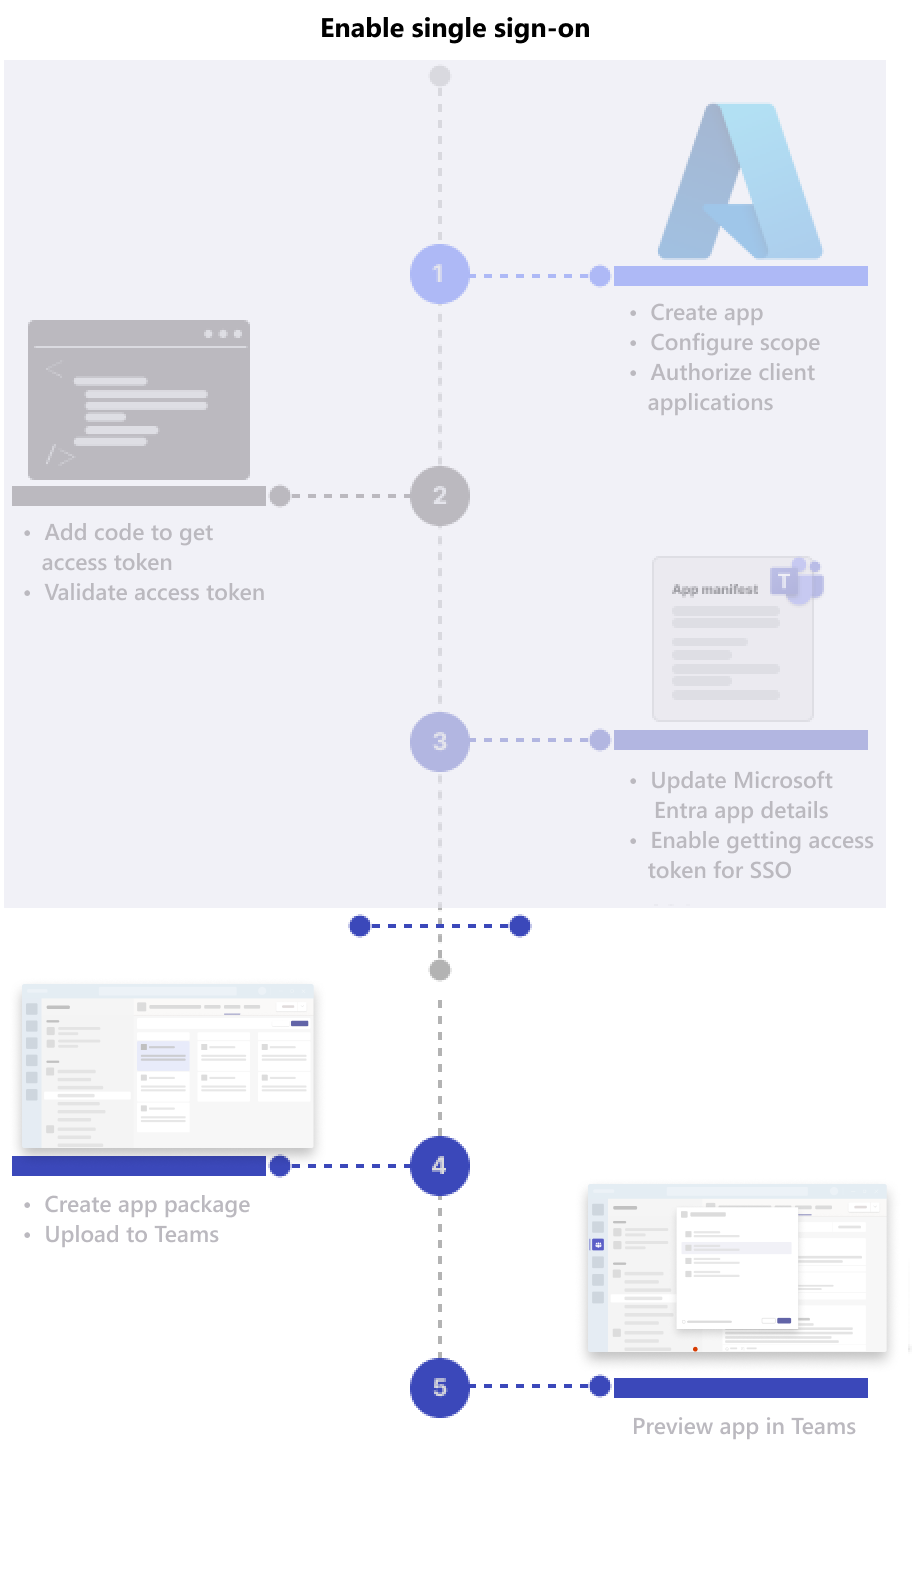
To preview your tab app in Teams:
Create an app package.
The app package is a zip file that contains the app manifest file and app icons.
Open Teams.
Select Apps > Manage your apps > Upload an app.
The options to upload an app appear.
Select Upload a custom app to upload the custom tab app to Teams.
Select your app package zip file, and then select Add.
Your custom tab app is uploaded and the dialog appears to inform you of the additional permissions that might be required.
Select Continue.
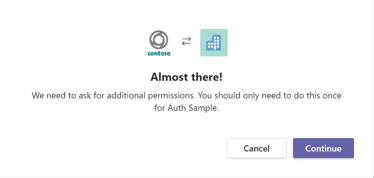
The Microsoft Entra consent dialog appears.
Select Accept to give consent for open-id scopes.
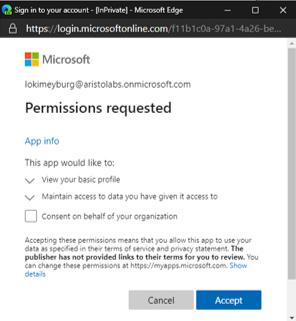
Teams opens the tab app and you can use it.
Congratulations! You've enabled SSO for your tab app.
See also
Platform Docs