Quickstart: View enterprise applications
In this quickstart, you learn how to use the Microsoft Entra admin center to search for and view the enterprise applications that are already configured in your Microsoft Entra tenant.
We recommend that you use a nonproduction environment to test the steps in this quickstart.
Prerequisites
To view applications registered in your Microsoft Entra tenant, you need:
- A Microsoft Entra user account. If you don't already have one, you can Create an account for free.
- One of the following roles: Cloud Application Administrator, or owner of the service principal.
- Completion of the steps in Quickstart: Add an enterprise application.
View a list of applications
Tip
Steps in this article might vary slightly based on the portal you start from.
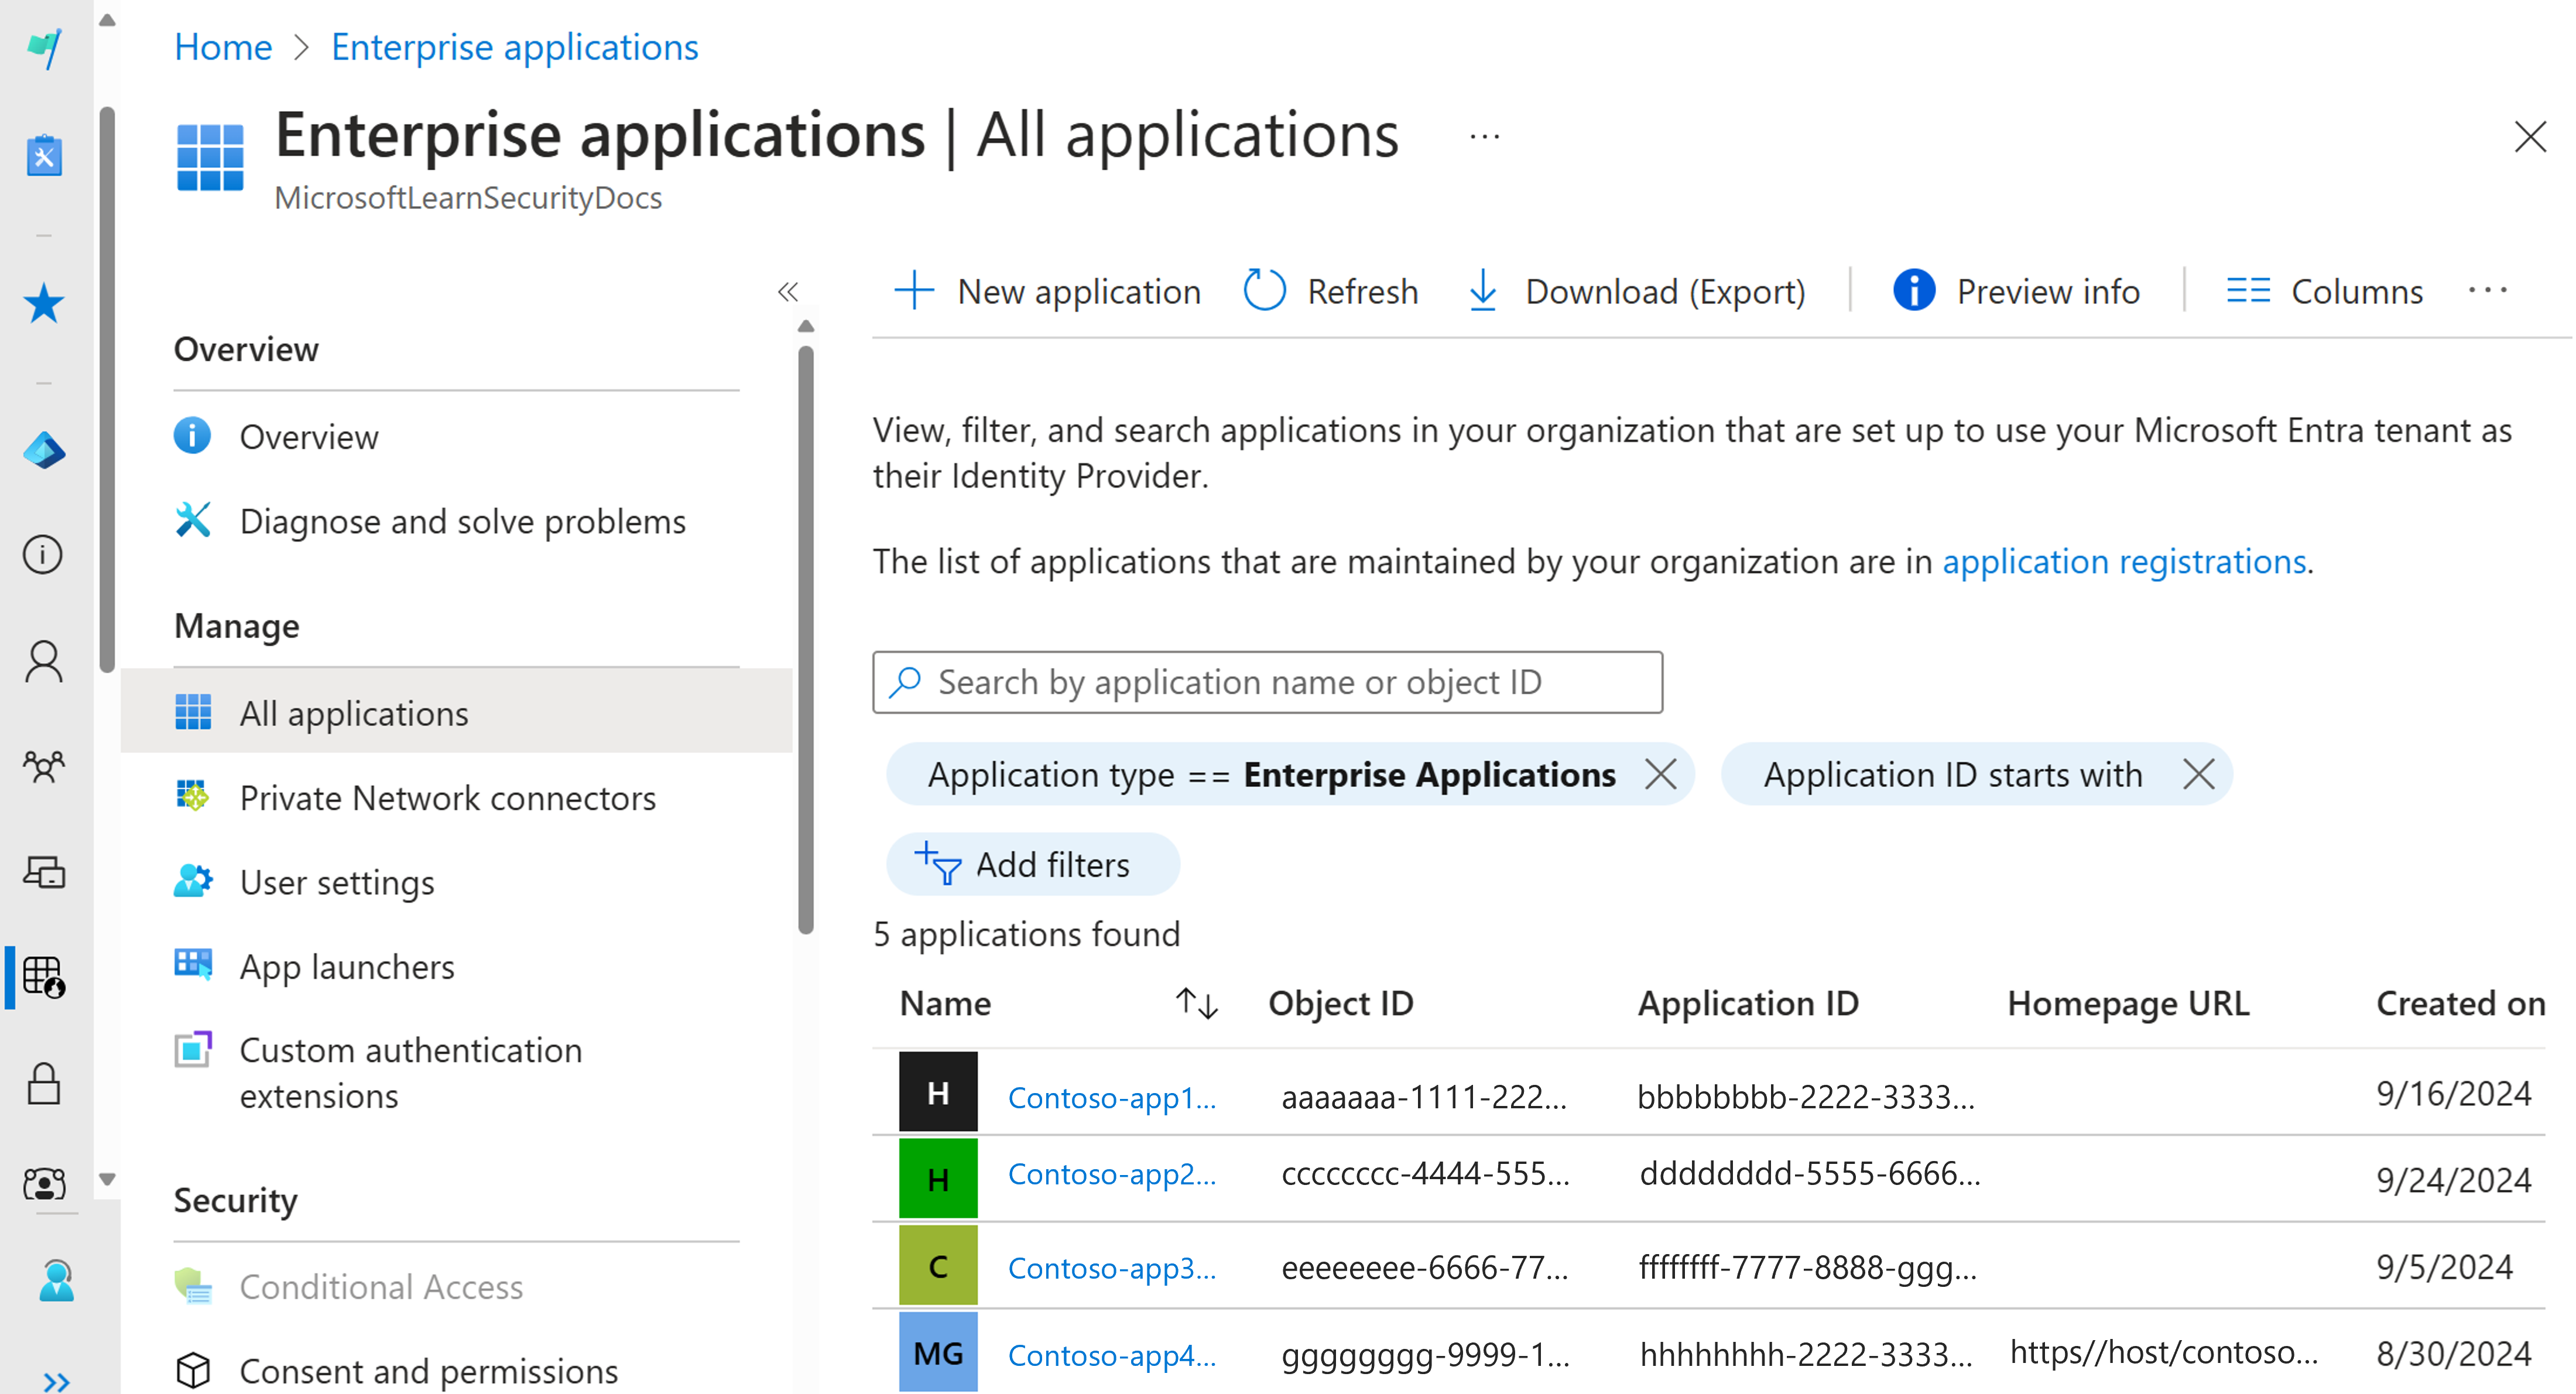
To view the enterprise applications registered in your tenant:
- Sign in to the Microsoft Entra admin center as at least a Cloud Application Administrator.
- Browse to Identity > Applications > Enterprise applications > All applications.

- To view more applications, select Load more at the bottom of the list. If there are many applications in your tenant, it might be easier to search for a particular application instead of scrolling through the list.
Search for an application
To search for a particular application:
- Select the Application Type filter option. Select All applications from the Application Type drop-down menu, and choose Apply.
- Enter the name of the application you want to find. If the application is already in your Microsoft Entra tenant, it appears in the search results. For example, you can search for the Azure AD SAML Toolkit 1 application that is used in the previous quickstarts.
- Try entering the first few letters of an application name.
Select viewing options
Select options according to what you're looking for:
- The default filters are Application Type and Application ID starts with.
- Under Application Type, choose one of these options:
- Enterprise Applications shows non-Microsoft applications.
- Microsoft Applications shows Microsoft applications.
- Managed Identities shows applications that are used to authenticate to services that support Microsoft Entra authentication.
- All Applications shows both non-Microsoft and Microsoft applications.
- Under Application ID starts with, enter the first few digits of the application ID if you know the application ID.
- After choosing the options you want, select Apply.
- Select Add filters to add more options for filtering the search results. The other options include:
- Application Visibility
- Created on
- Assignment required
- Is app Proxy
- Owner
- To remove any of the filter options already added, select the X icon next to the filter option.
Clean up resources
If you created a test application named Azure AD SAML Toolkit 1 that was used throughout the quickstarts, you can consider deleting it now to clean up your tenant. For more information, see Delete an application.
Next steps
Learn how to delete an enterprise application.