Set up click-to-run outbound calls with Omnichannel for Dynamics 365 Customer Service
Applies to: Dynamics 365 Customer Service
This article outlines the steps to use a custom control so that users can make outbound calls from a Customer Interaction Center (CIF) provider in Omnichannel for Dynamics 365 Customer Service. The sample solution is a resource that helps optimize the Dynamics 365 implementation. It includes a custom control that provides the capability to format a phone number and initiate an outbound call from a text or phone number field.
Important
The CIF provider doesn't offer any specific support method for outbound calls. Therefore, the custom control uses the Omnichannel capabilities to facilitate this functionality.
With the custom control, users can conveniently format phone numbers and initiate outbound calls directly from relevant fields. Therefore, the overall user experience is better, users can more efficiently handle customer interactions in Customer Service.
Prerequisites
Configuration steps
Download the package at ClickToDial.
Select either the managed package or the unmanaged package. Extract the files, and then open OutBoundDialerControl in Power Apps. Learn more in Import solutions.
Add the custom control to the relevant field in the relevant entity. For example, add it to the Mobile Phone field in the Contact entity.
If the component isn't listed, select Add component.
In the Field Properties pane, on the Controls tab, select the Add Control action.
Point to the Outbound Dialer Control control, and add it to the field properties.
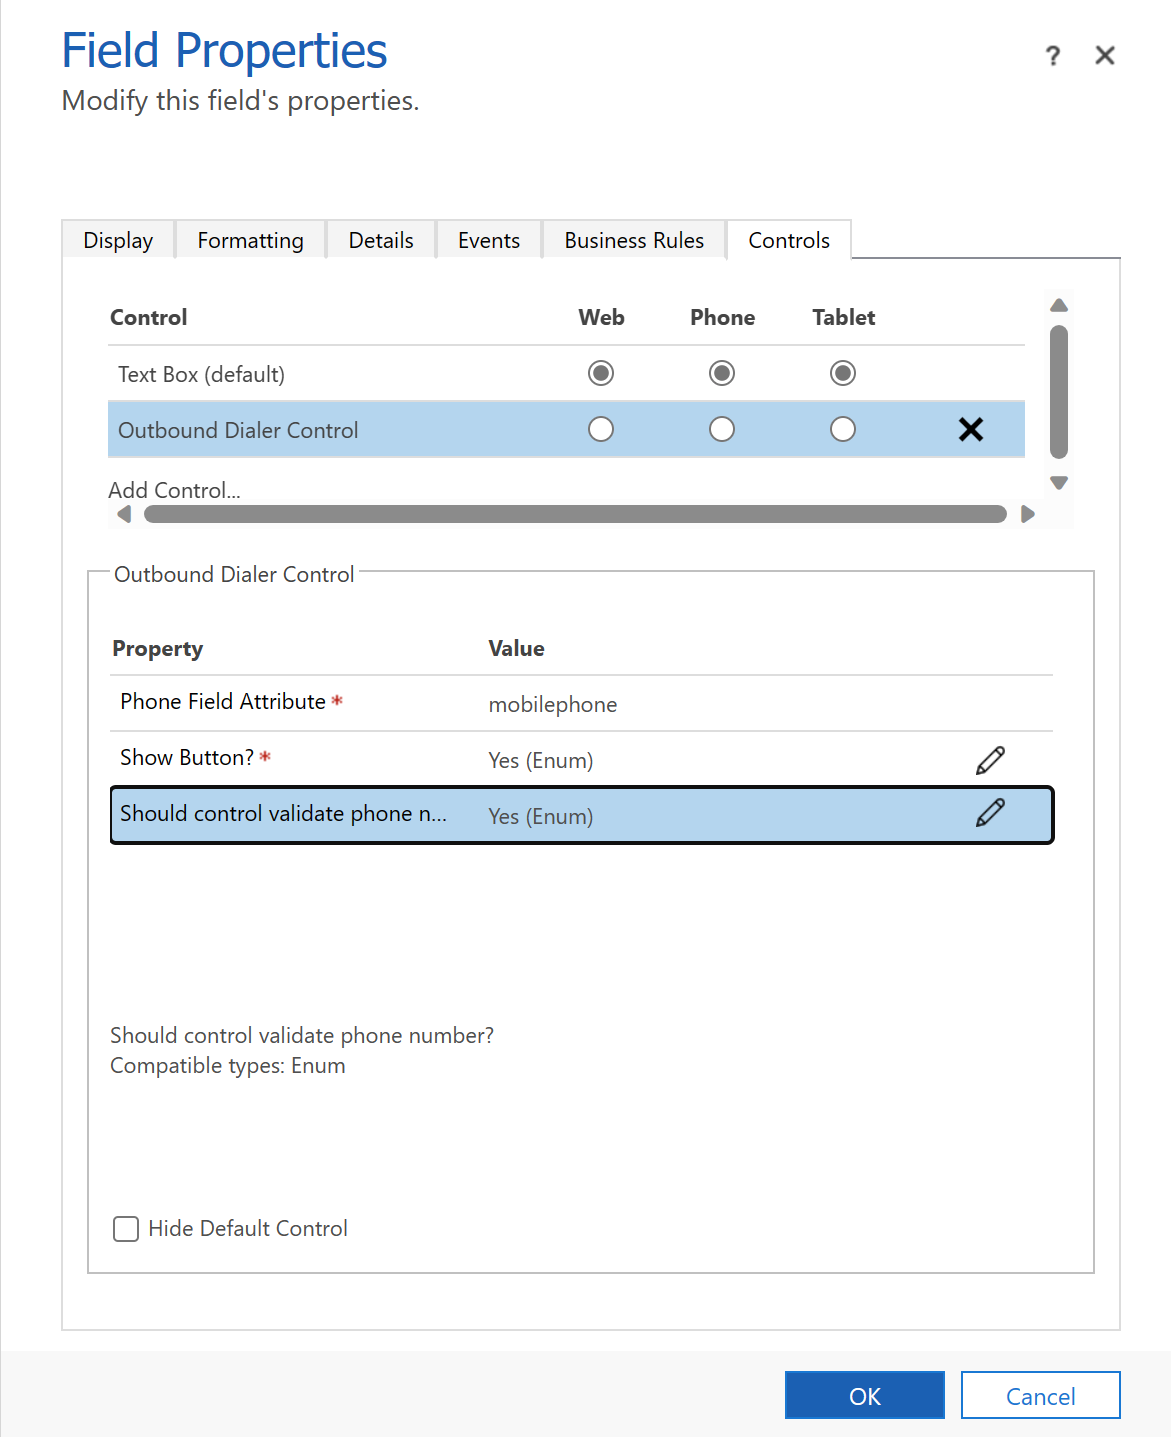
In the Field Properties pane, on the Controls tab, select the Outbound Dialer Control control, and then configure the relevant settings. The following screenshot shows an example of the settings that you can configure.
For example, specify whether the control validates phone numbers. In addition, select whether the control is available only on phones and tablets, or whether it's also available in browsers.
Select OK, and then save and publish the form.
Test the control
Open the relevant app where the form is configured with the control.
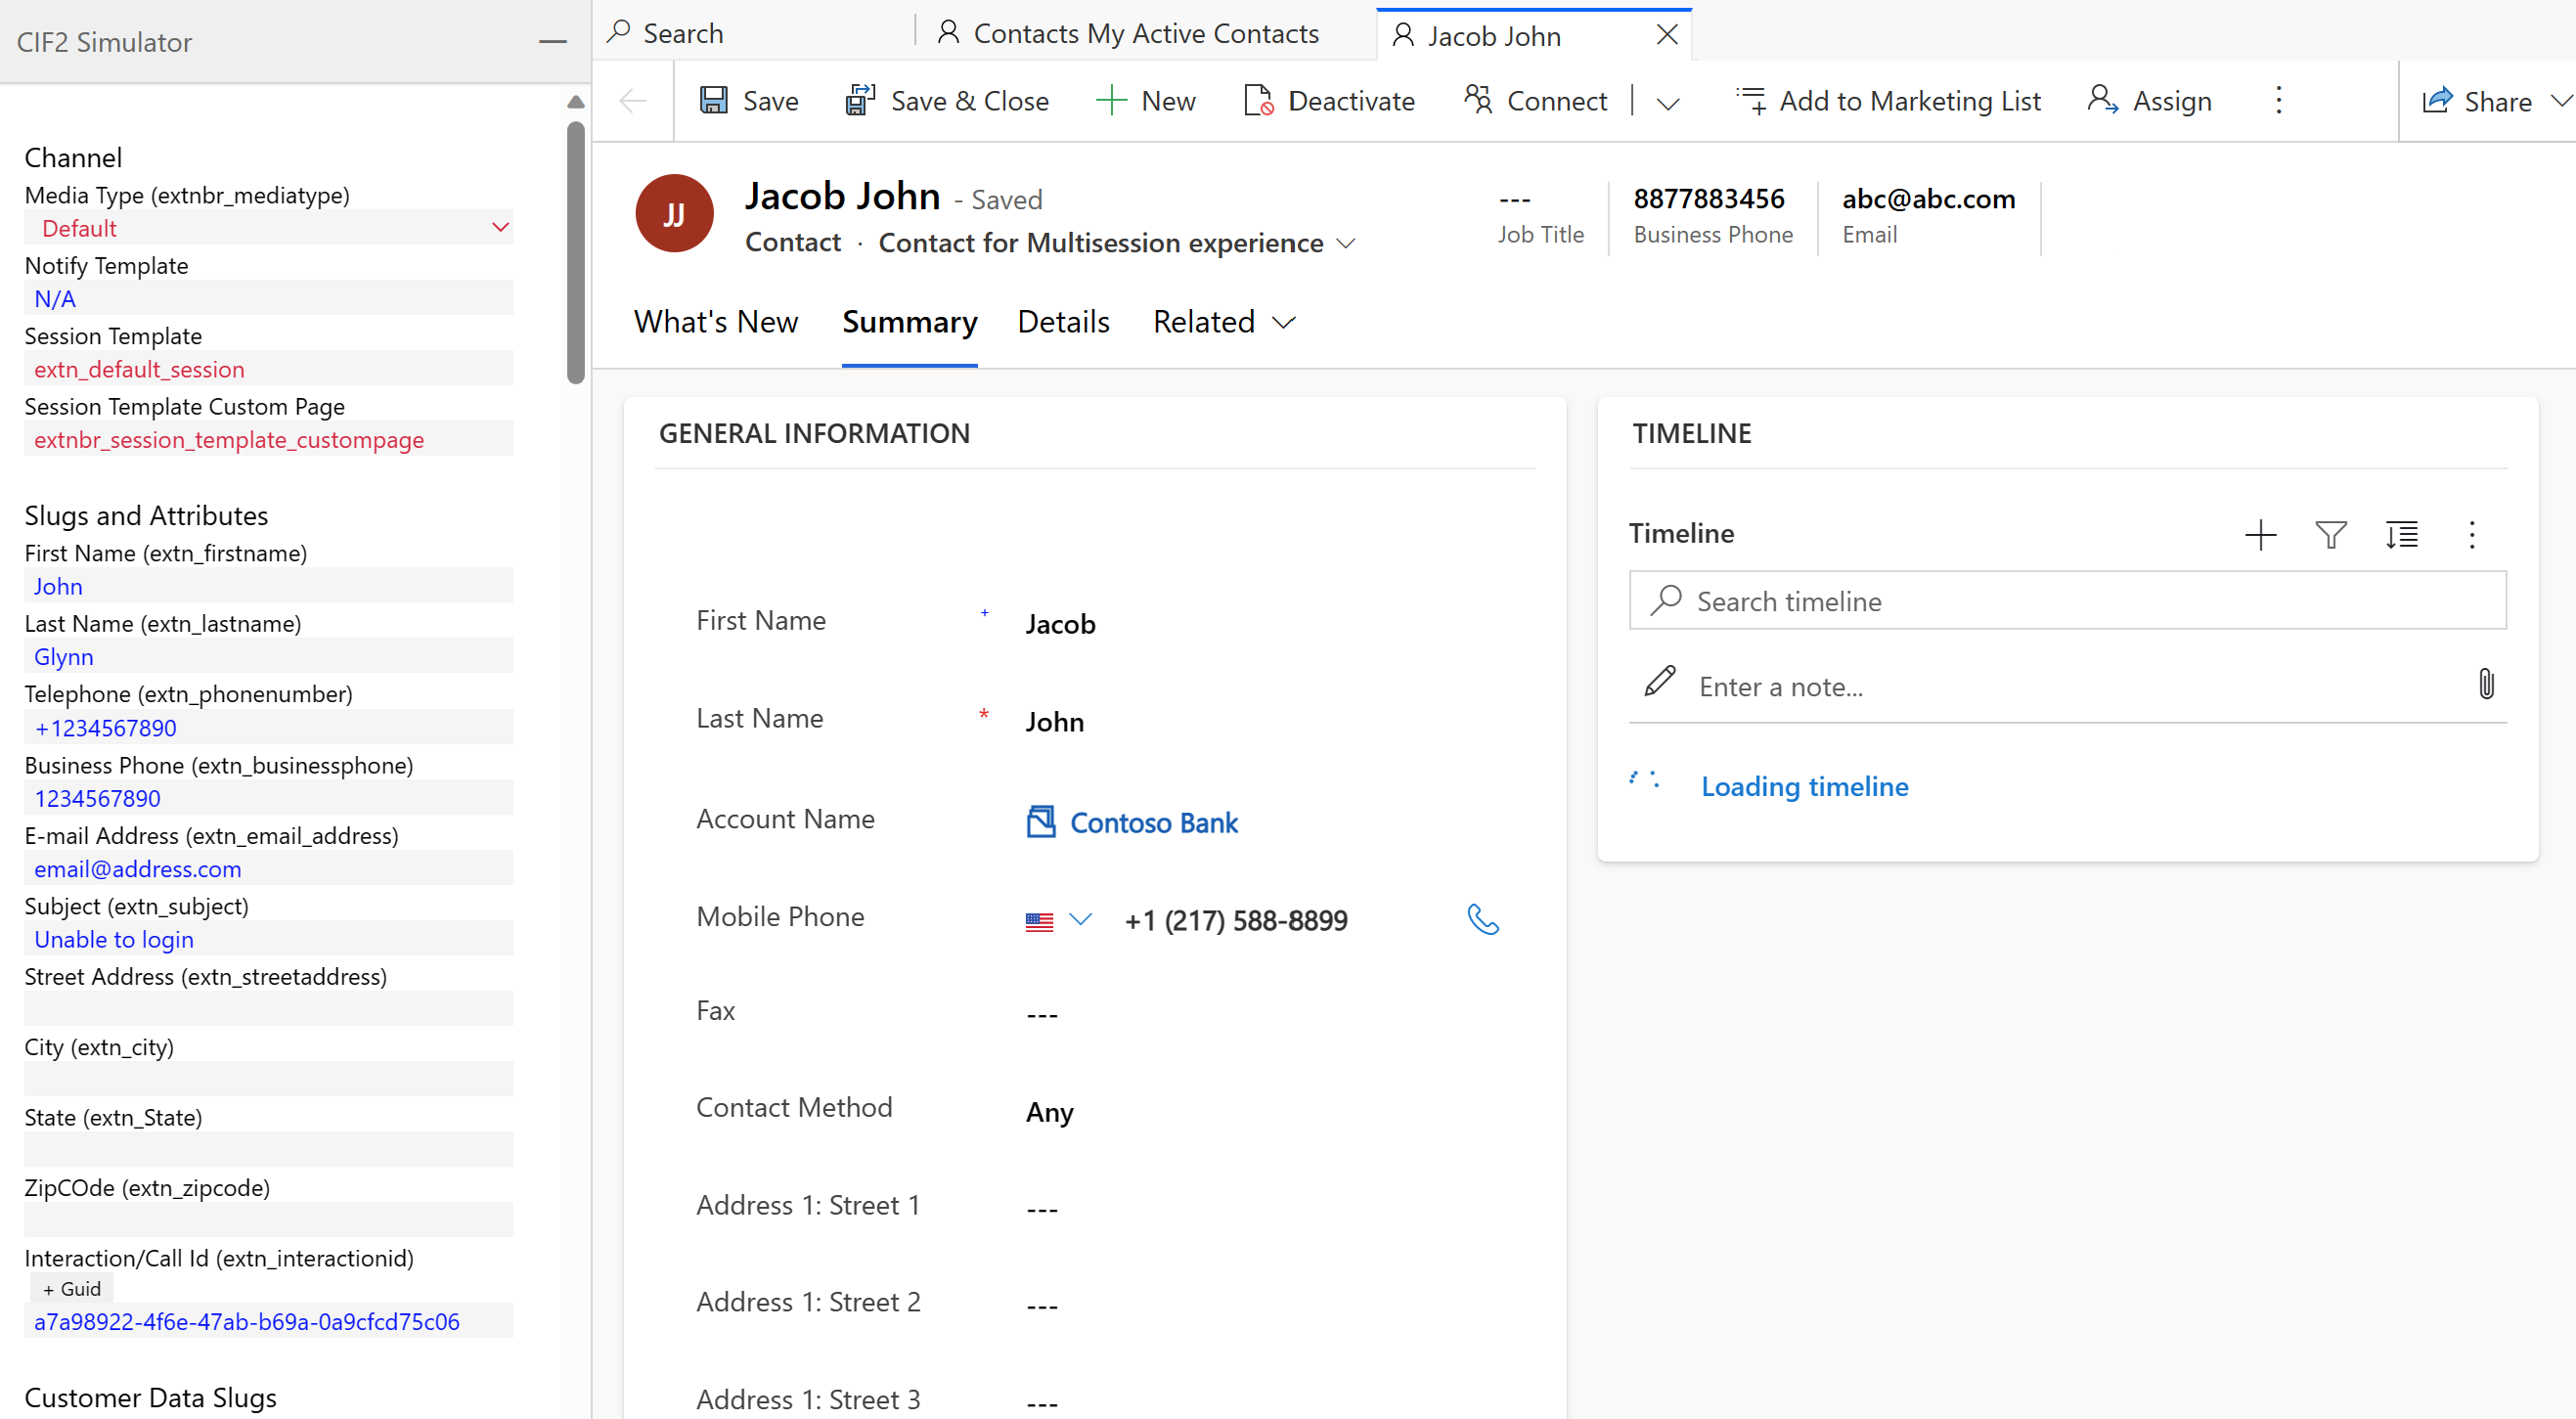
For example, if you've set up the Simulator for Channel Integration Framework v. 2.0 and Dynamics 365 Customer Service, and you added the control to the Contact form, open the simulator, and go to the Contact form.
In the relevant form, select the phone symbol to call the contact. The information is passed to the CIF provider.
The following screenshot shows the control that renders a phone symbol for a contact in the simulator for Channel Integration Framework and Customer Service.

