Quickstart: Create a search index in the Azure portal
In this Azure AI Search quickstart, create your first search index by using the Import data wizard and a built-in sample data source consisting of fictitious hotel data hosted by Microsoft. The wizard guides you through the no-code creation of a search index to help you write interesting queries within minutes.
The wizard creates multiple objects on your search service - searchable index - but also an indexer and data source connection for automated data retrieval. At the end of this quickstart, we review each object.
Note
The Import data wizard includes options for OCR, text translation, and other AI enrichments that aren't covered in this quickstart. For a similar walkthrough that focuses on applied AI, see Quickstart: Create a skillset in the Azure portal.
Prerequisites
An Azure account with an active subscription. Create an account for free.
An Azure AI Search service for any tier and any region. Create a service or find an existing service under your current subscription. You can use a free service for this quickstart.
Familiarity with the wizard. See Import data wizards in the Azure portal for details.
For this quickstart, which uses built-in sample data, make sure the search service doesn't have network access controls in place. the Azure portal controller uses the public endpoint to retrieve data and metadata from the built-in sample data source hosted by Microsoft. For more information, see Secure connections in the import wizards.
Check for space
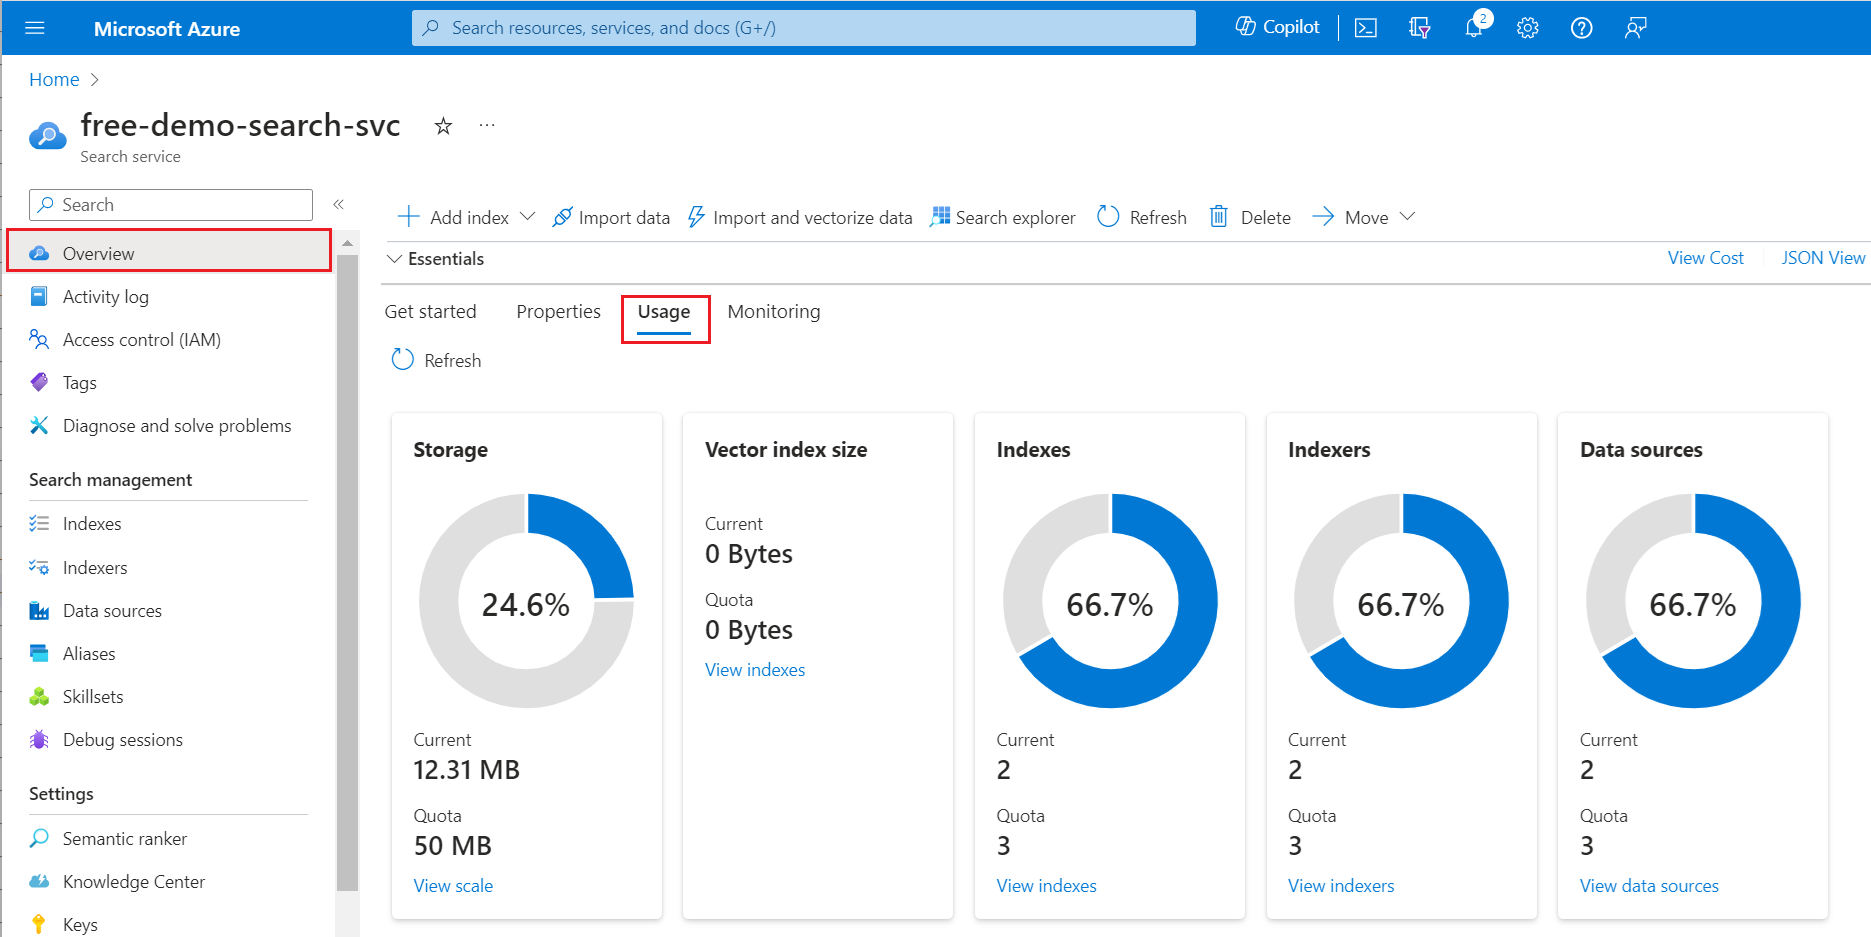
Many customers start with the free service. The free tier is limited to three indexes, three data sources, and three indexers. Make sure you have room for extra items before you begin. This quickstart creates one of each object.
Check the Overview > Usage tab for the service to see how many indexes, indexers, and data sources you already have.
Start the wizard
Sign in to the Azure portal with your Azure account, and go to your Azure AI Search service.
On the Overview page, select Import data to start the wizard.

Create and load an index
In this section, create and load an index in four steps.
Connect to a data source
The wizard creates a data source connection to sample data hosted by Microsoft on Azure Cosmos DB. This sample data is retrieved accessed over a public endpoint. You don't need your own Azure Cosmos DB account or source files to run this quickstart.
On Connect to your data, expand the Data Source dropdown list and select Samples.
In the list of built-in samples, select hotels-sample.
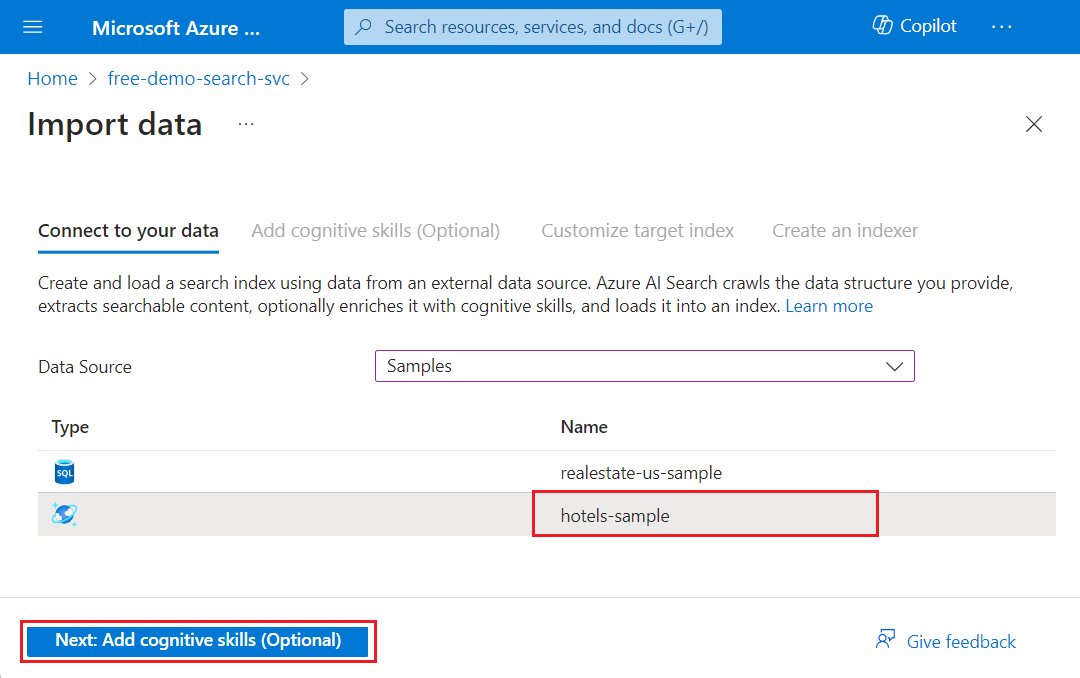
Select Next: Add cognitive skills (Optional) to continue.
Skip configuration for cognitive skills
The Import data wizard supports the creation of a skillset and AI-enrichment into indexing.
For this quickstart, ignore the AI enrichment configuration options on the Add cognitive skills tab.
Select Skip to: Customize target index to continue.

Tip
Interested in AI enrichment? Try this Quickstart: Create a skillset in the Azure portal
Configure the index
The wizard infers a schema for the built-in hotels-sample index. To configure the index, follow these steps:
Accept the system-generated values for the Index name (hotels-sample-index) and Key field (HotelId).
Accept the system-generated values for all field attributes.
Select Next: Create an indexer to continue.
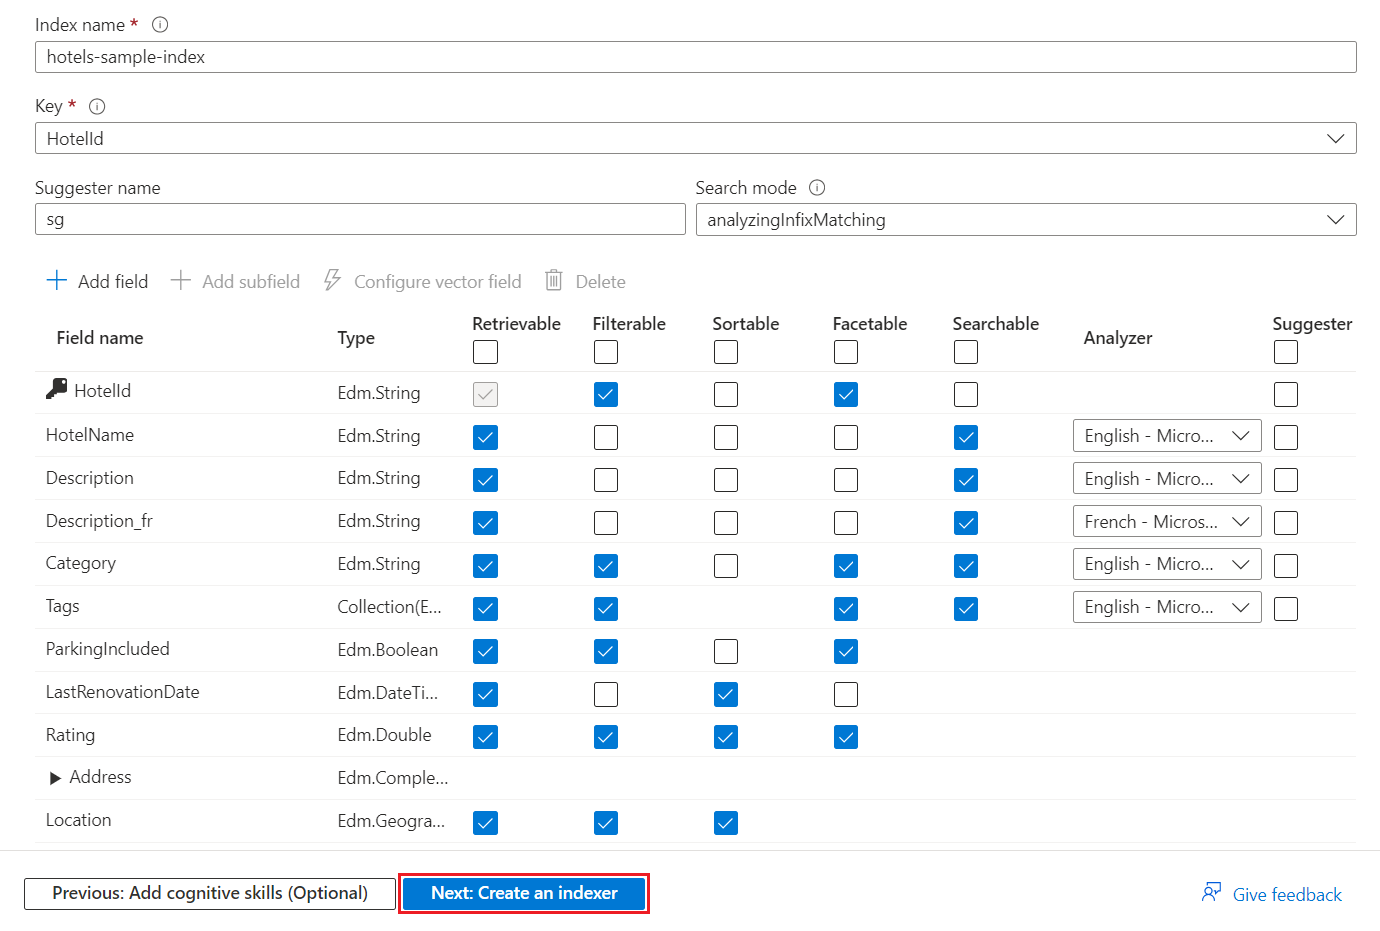
At a minimum, the index requires an Index name and a collection of Fields. One field must be marked as the document key to uniquely identify each document. The value is always a string. The wizard scans for unique string fields and chooses one for the key.
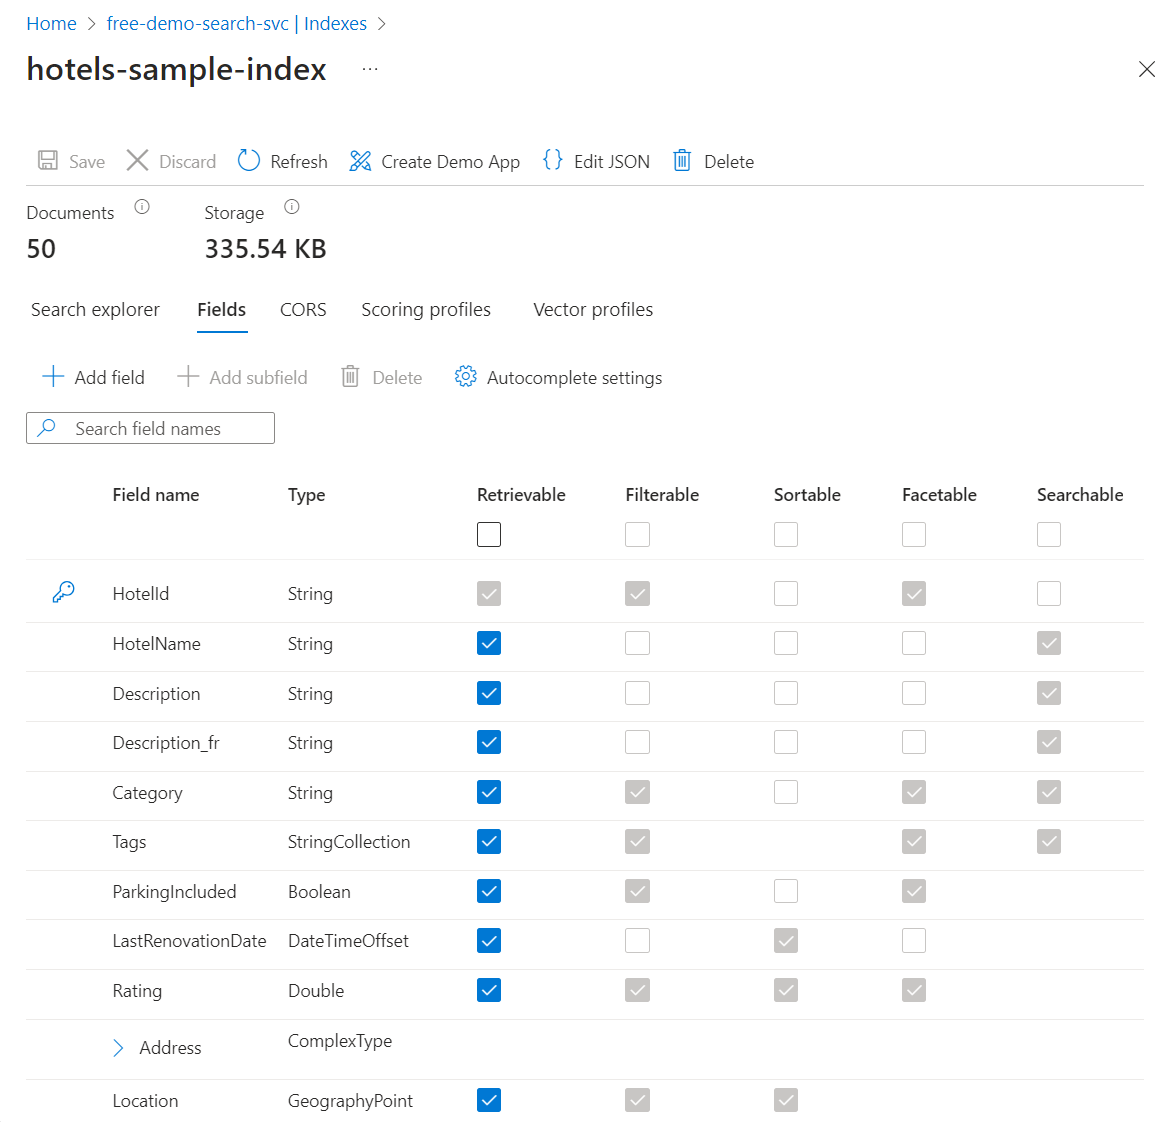
Each field has a name, data type, and attributes that control how to use the field in the search index. Checkboxes enable or disable the following attributes:
- Retrievable: Fields returned in a query response.
- Filterable: Fields that accept a filter expression.
- Sortable: Fields that accept an orderby expression.
- Facetable: Fields used in a faceted navigation structure.
- Searchable: Fields used in full text search. Strings are searchable. Numeric fields and Boolean fields are often marked as not searchable.
Strings are attributed as Retrievable and Searchable. Integers are attributed as Retrievable, Filterable, Sortable, and Facetable.
Attributes affect storage. Filterable fields consume extra storage, but Retrievable doesn't. For more information, see Example demonstrating the storage implications of attributes and suggesters.
If you want autocomplete or suggested queries, specify language Analyzers or Suggesters.
Configure and run the indexer
The last step configures and runs the indexer. This object defines an executable process. The data source, index, and indexer are created in this step.
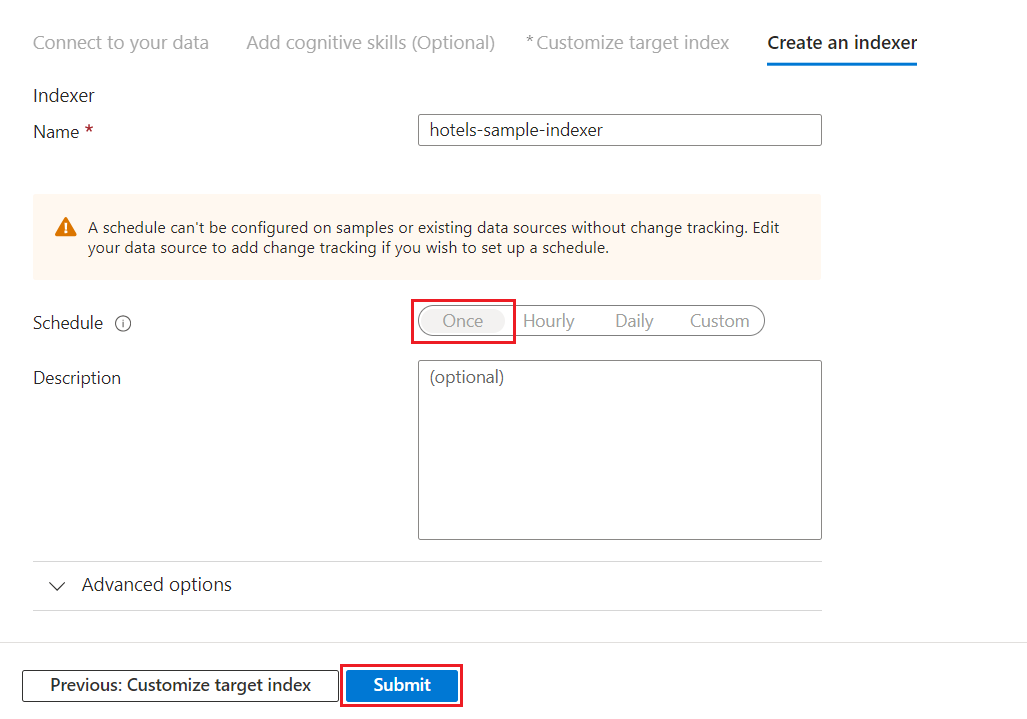
Accept the system-generated value for the Indexer name (hotels-sample-indexer).
For this quickstart, use the default option to run the indexer once, immediately. The hosted data is static so there's no change tracking enabled for it.
Select Submit to create and simultaneously run the indexer.
Monitor indexer progress
You can monitor creation of the indexer or index in the Azure portal. The service Overview page provides links to the resources created in your Azure AI Search service.
On the left, select Indexers.
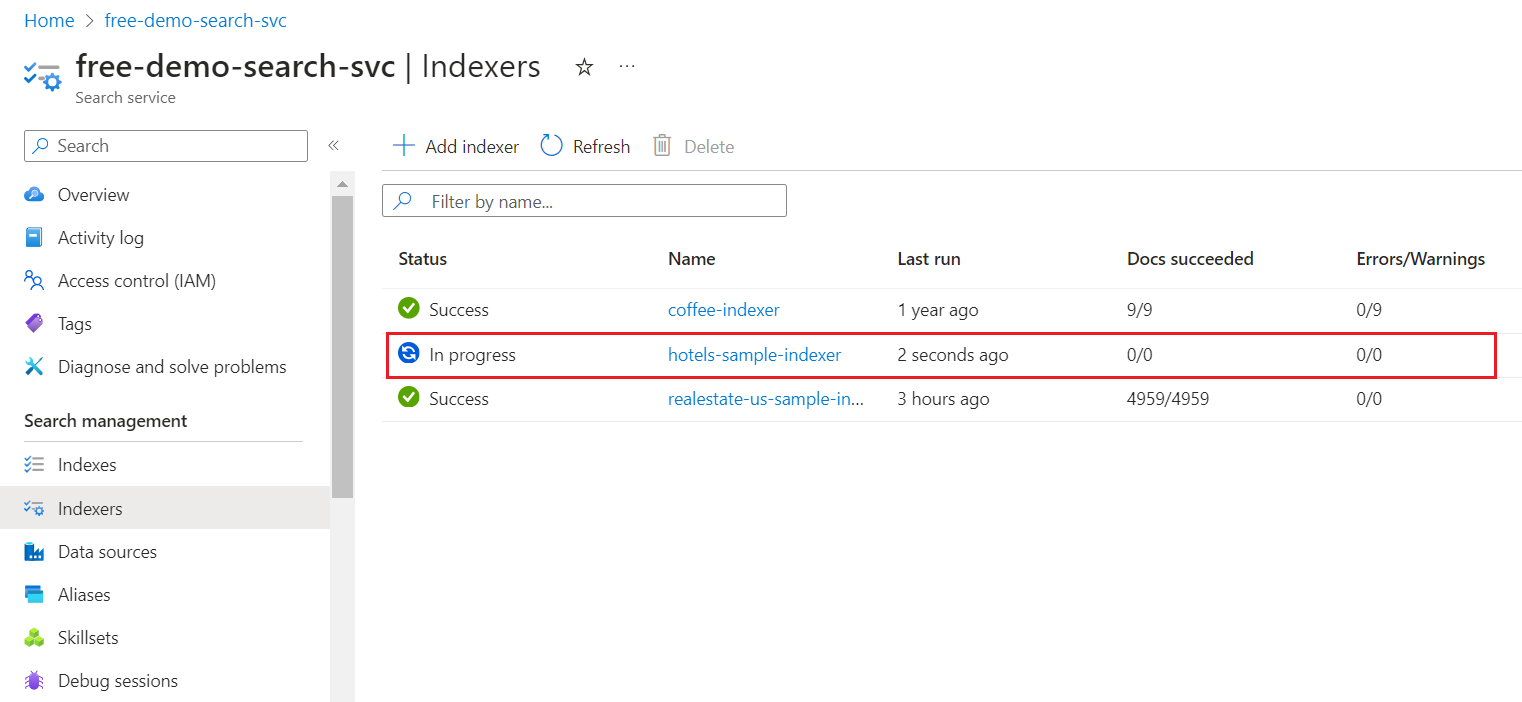
It can take a few minutes for the page results to update in the Azure portal. You should see the newly created indexer in the list with a status of In progress or Success. The list also shows the number of documents indexed.
Check search index results
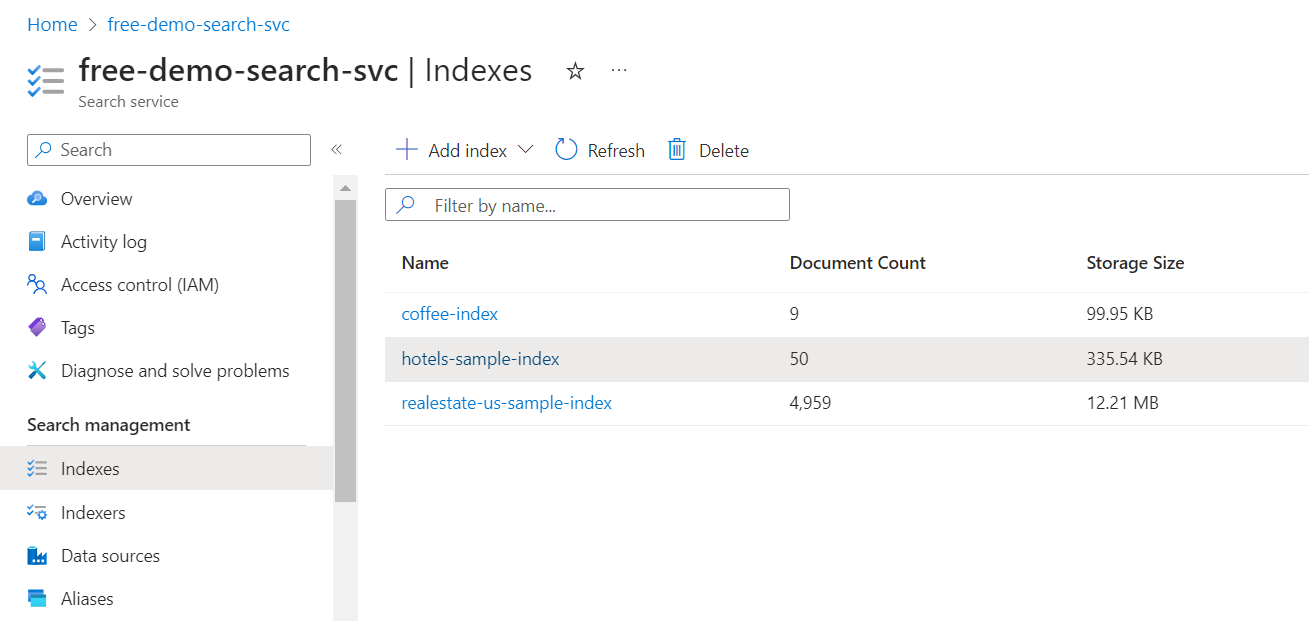
On the left, select Indexes.
Select hotels-sample-index.
Wait for the Azure portal page to refresh. You should see the index with a document count and storage size.
Select the Fields tab to view the index schema.
Check to see which fields are Filterable or Sortable so that you know what queries to write.
Add or change fields
On the Fields tab, you can create a new field using Add field with a name, supported data type, and attributions.
Changing existing fields is harder. Existing fields have a physical representation in the index so they aren't modifiable, not even in code. To fundamentally change an existing field, you need to create a new field that replaces the original. Other constructs, such as scoring profiles and CORS options, can be added to an index at any time.
To clearly understand what you can and can't edit during index design, take a minute to view the index definition options. Grayed options in the field list indicate values that can't be modified or deleted.
Query with Search explorer
You now have a search index that can be queried with Search explorer. Search explorer sends REST calls that conform to the Search POST REST API. The tool supports simple query syntax and full Lucene query syntax.
On the Search explorer tab, enter text to search on.
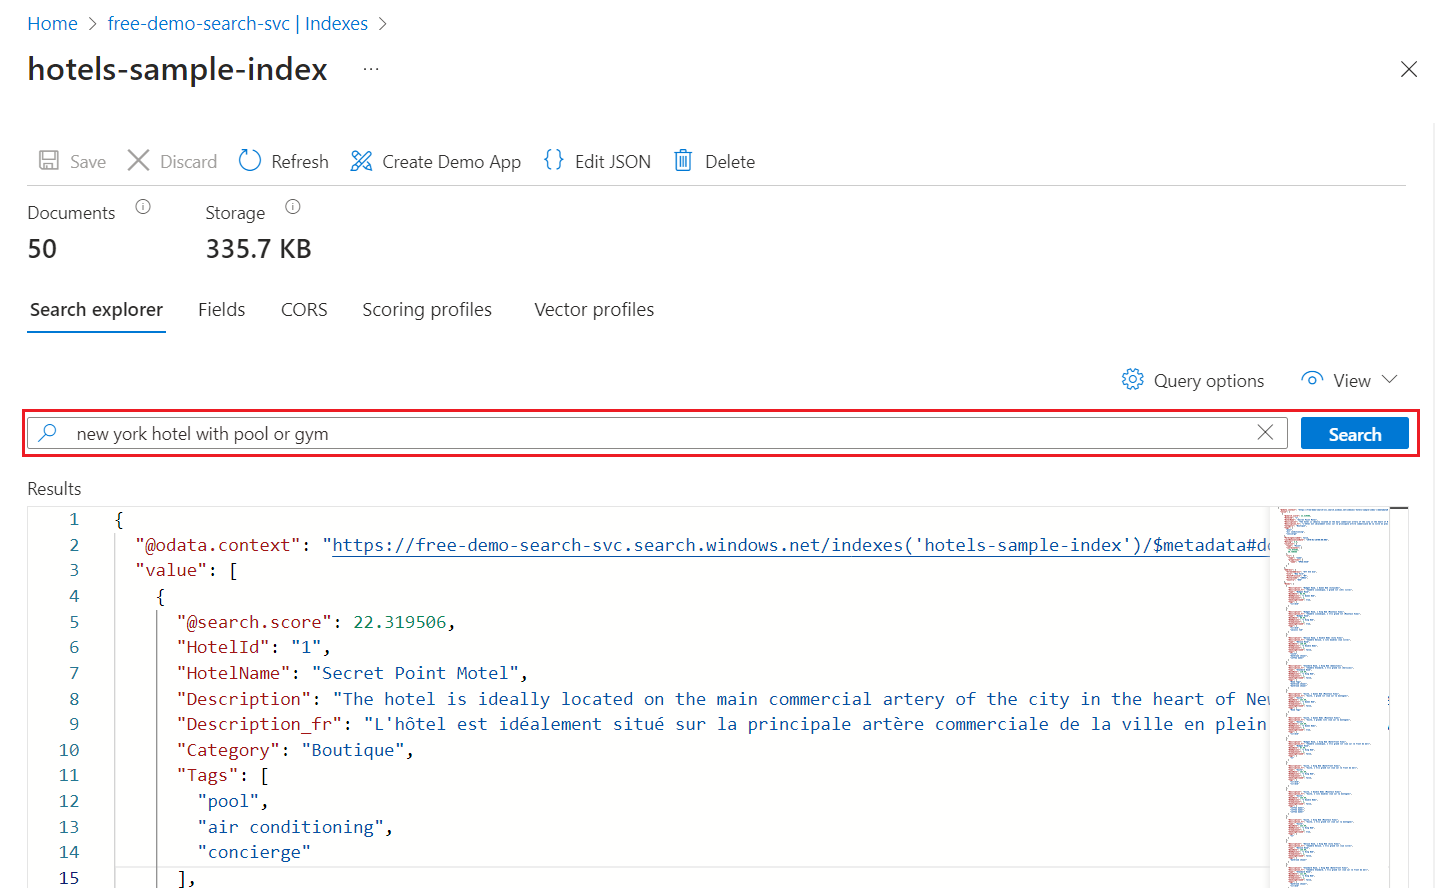
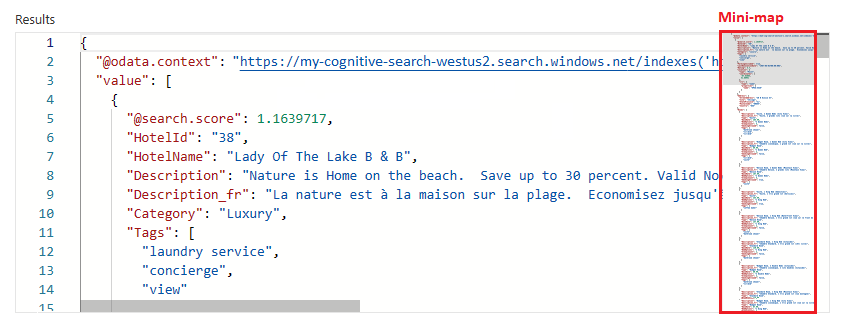
Use the Mini-map to jump quickly to nonvisible areas of the output.
To specify syntax, switch to the JSON view.

Example queries for hotels sample index
The following examples assume the JSON view and the 2024-05-01-preview REST API version.
Tip
JSON view now supports intellisense for parameter name completion. Place the cursor inside the JSON view and type a space character to show a list of all query parameters, or type a single letter like "s" to show just the query parameters starting with "s". Intellisense doesn't exclude invalid parameters so use your best judgement.
Filter examples
Parking, tags, renovation date, rating, and location are filterable.
{
    "search": "beach OR spa",
    "select": "HotelId, HotelName, Description, Rating",
    "count": true,
    "top": 10,
    "filter": "Rating gt 4"
}
Boolean filters assume "true" by default.
{
    "search": "beach OR spa",
    "select": "HotelId, HotelName, Description, Rating",
    "count": true,
    "top": 10,
    "filter": "ParkingIncluded"
}
Geospatial search is filter-based. The geo.distance function filters all results for positional data based on the specified Location and geography'POINT coordinates. The query seeks hotels that are within 5 kilometers of the latitude longitude coordinates -122.12 47.67, which is "Redmond, Washington, USA." The query displays the total number of matches &$count=true with the hotel names and address locations.
{
    "search": "*",
    "select": "HotelName, Address/City, Address/StateProvince",
    "count": true,
    "top": 10,
    "filter": "geo.distance(Location, geography'POINT(-122.12 47.67)') le 5"
}
Full Lucene syntax examples
The default syntax is simple syntax, but if you want fuzzy search or term boosting or regular expressions, specify the full syntax.
{
    "queryType": "full",
    "search": "seatle~",
    "select": "HotelId, HotelName,Address/City, Address/StateProvince",
    "count": true
}
By default, misspelled query terms like seatle for Seattle fail to return matches in a typical search. The queryType=full parameter invokes the full Lucene query parser, which supports the tilde ~ operand. When these parameters are present, the query performs a fuzzy search for the specified keyword. The query matches on documents that are similar to but not an exact match to the keyword.
Take a minute to try a few of these example queries for your index. To learn more about queries, see Querying in Azure AI Search.
Clean up resources
When you work in your own subscription, it's a good idea at the end of a project to identify whether you still need the resources you created. Resources left running can cost you money. You can delete resources individually or delete the resource group to delete the entire set of resources.
You can find and manage resources for your service in the Azure portal under All resources or Resource groups in the left pane.
If you use a free service, remember that the limit is three indexes, indexers, and data sources. You can delete individual items in the Azure portal to stay under the limit.
Next steps
Try an Azure portal wizard to generate a ready-to-use web app that runs in a browser. Use this wizard on the small index you created in this quickstart, or use one of the built-in sample data sets for a richer search experience.
