Hierarchical state override
In many cases, it's necessary to dynamically change the appearance of parts of a model, for example hiding sub graphs or switching parts to transparent rendering. Changing the materials of each part involved isn't practical since it requires to iterate over the whole scene graph, and manage material cloning and assignment on each node.
To accomplish this use case with the least possible overhead, use the HierarchicalStateOverrideComponent. This component implements hierarchical state updates on arbitrary branches of the scene graph. That means, a state can be defined on any level in the scene graph and it trickles down the hierarchy until it's either overridden by a new state, or applied to a leaf object.
As an example, consider the model of a car and you want to switch the whole car to be transparent, except for the inner engine part. This use case involves only two instances of the component:
- The first component is assigned to the model's root node and turns on transparent rendering for the whole car.
- The second component is assigned to the root node of the engine and overrides the state again by explicitly turning off see-through mode.
Note
Point clouds do not expose a full scene graph (see mesh type differences), so assigning a hierarchical override to the root entity of a point cloud model will apply the state to the full point cloud. Furthermore, some state override features are not supported for point clouds, as mentioned in the respective section.
Features
The fixed set of states that can be overridden are:
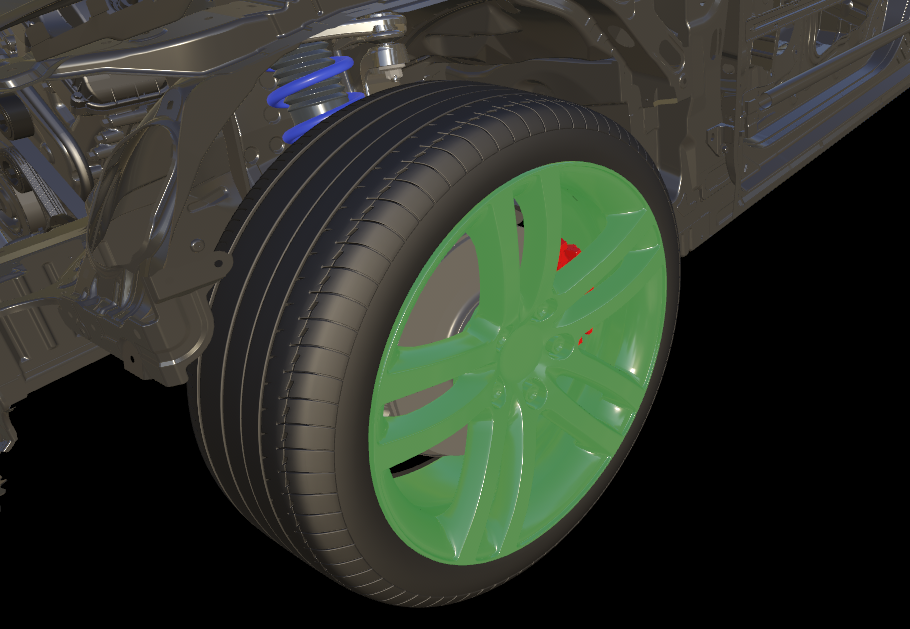
Hidden: Respective meshes in the scene graph are hidden or shown.Tint color: A rendered object can be color-tinted with its individual tint color and tint weight. The image below shows color tinting the rim of a wheel.
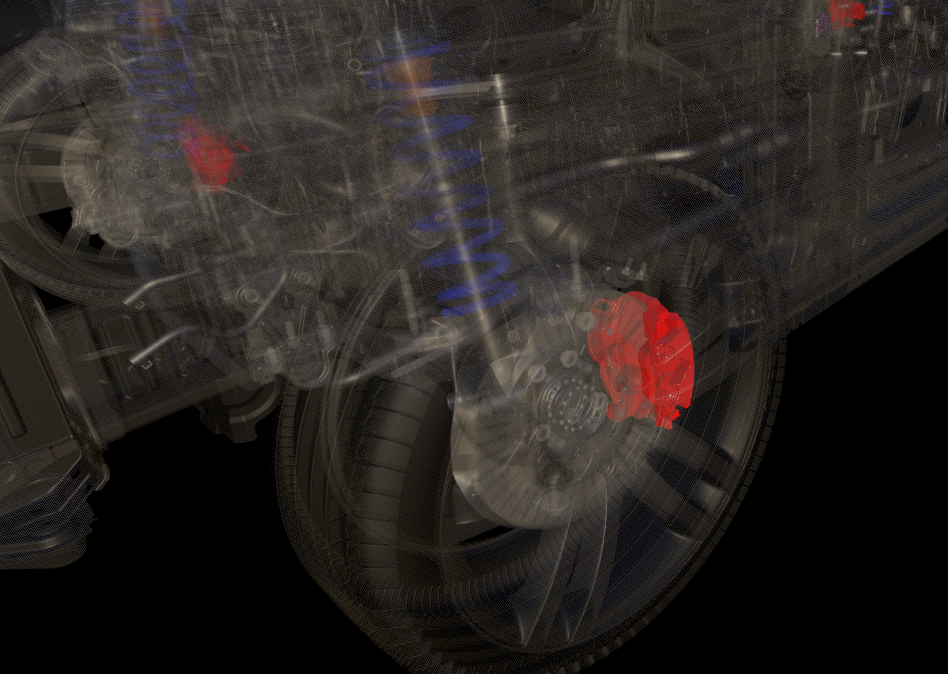
See-through: The geometry is rendered semi-transparently, for example to reveal the inner parts of an object. The following image shows the entire car being rendered in see-through mode, except for the red brake caliper:
Important
The see-through effect only works when the TileBasedComposition rendering mode is used.
Note
The see-through effect is ignored for point clouds.
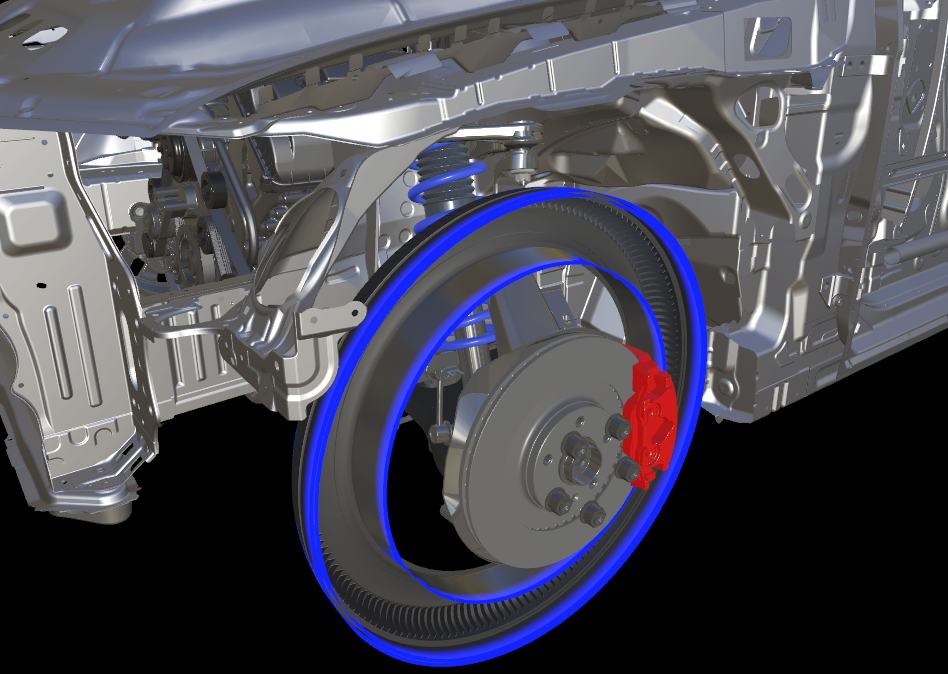
Shell: The geometry is rendered as a transparent, desaturated shell. This mode allows fading out unimportant parts of a scene while still retaining a sense of shape and relative positioning. To change the shell rendering's appearance, use the ShellRenderingSettings state. See the following image for the car model being entirely shell-rendered, except for the blue springs:
Important
The shell effect only works when the TileBasedComposition rendering mode is used.
Note
The shell effect is ignored for point clouds.
Selected: The geometry is rendered with a selection outline.
Note
Selection outline rendering is ignored for point clouds.
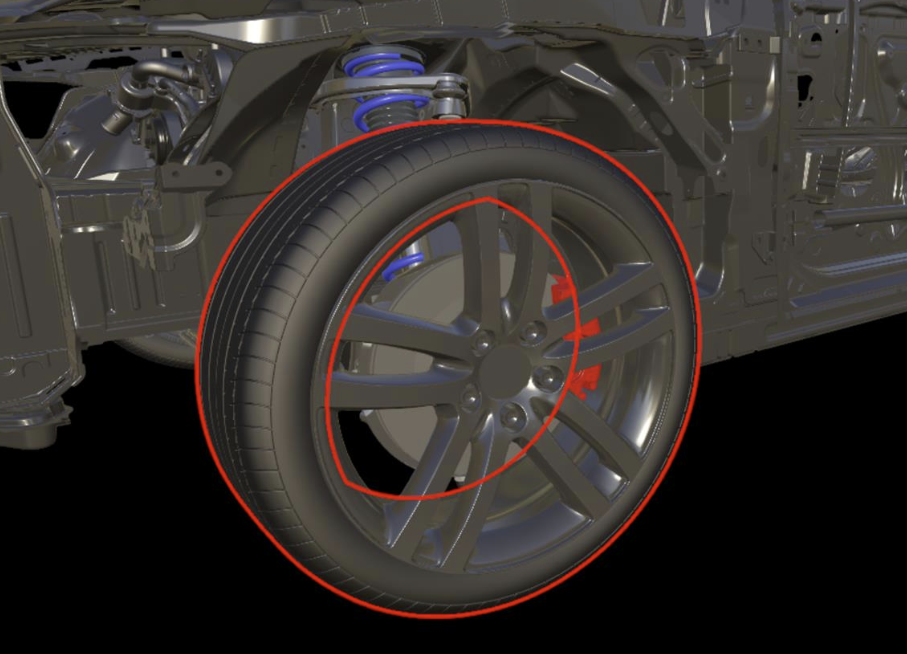
DisableCollision: The geometry is exempt from spatial queries. TheHiddenflag doesn't affect the collision state flag, so these two flags are often set together.TransparencyWritesDepth: Activates depth writing forSee-throughand material transparencies in the component's entity's scene-tree. Using this flag,See-throughtransparencies can have depth writing either enabled or disabled in a subtree, even ifTransparencyWritesDepthis globally forced. For material transparency, the flag behaves inclusively, meaning ifTransparencyWritesDepthis enabled with either override, globally forced or via the material's flags, depth writing is enabled for objects rendered with this material.UseCutPlaneFilterMask: Use an individual filter bit mask to control the cut plane selection. This flag determines whether the individual filter mask should be used or inherited from its parent. The filter bit mask itself is set via theCutPlaneFilterMaskproperty. For detailed information about how the filtering works, refer to the Selective cut planes paragraph. See the following example where only the tire and rim is cut while the rest of the scene remains unaffected.
UseOverrideMaterial: If enabled, the material stored inOverrideMaterialis used to render the geometry with that material. It's an efficient way to switch rendering of larger model parts to a dedicated material without actually switching individual part materials. Color materials may override PBR materials and vice versa. However, it must be guaranteed that the model provides mandatory vertex streams, for instance, the vertex normal in case the overridden material is a PBR material. Furthermore, overrides that toggle on transparency, only work reliably in the TileBasedComposition rendering mode.Note
The override material is ignored for point clouds.
Tip
As an alternative to turning off the visibility and spatial queries for a full sub graph, the enabled state of a game object can be toggled. If a hierarchy is disabled, this has preference over any HierarchicalStateOverrideComponent.
Hierarchical overrides
The HierarchicalStateOverrideComponent can be attached on multiple levels of an object hierarchy. Since there can only be one component of each type on an entity, each HierarchicalStateOverrideComponent manages the states for hidden, see-through, selected, color tint and collision.
Therefore each state can be set to one of:
ForceOn- the state is enabled for all mesh on and below this nodeForceOff- the state is disabled for all meshes on and below this nodeInheritFromParent- the state is unaffected by this override component
You can change states directly or through the SetState function:
HierarchicalStateOverrideComponent component = ...;

// set one state directly
component.HiddenState = HierarchicalEnableState.ForceOn;

// set a state with the SetState function
component.SetState(HierarchicalStates.SeeThrough, HierarchicalEnableState.InheritFromParent);

// set multiple states at once with the SetState function
component.SetState(HierarchicalStates.Hidden | HierarchicalStates.DisableCollision, HierarchicalEnableState.ForceOff);
ApiHandle<HierarchicalStateOverrideComponent> component = ...;

// set one state directly
component->SetHiddenState(HierarchicalEnableState::ForceOn);

// or: set a state with the SetState function
component->SetState(HierarchicalStates::SeeThrough, HierarchicalEnableState::InheritFromParent);

// set multiple states at once with the SetState function
component->SetState(
    (HierarchicalStates)((int32_t)HierarchicalStates::Hidden | (int32_t)HierarchicalStates::DisableCollision), HierarchicalEnableState::ForceOff);
Tint color
The tint color override is slightly special in that there's both an on/off/inherit state and a tint color property. The alpha portion of the tint color defines the weight of the tinting effect: If set to 0.0, no tint color is visible and if set to 1.0 the object is rendered with pure tint color. For in-between values, the final color is mixed with the tint color. The tint color can be changed on a per-frame basis to achieve a color animation.
Performance considerations
An instance of HierarchicalStateOverrideComponent itself doesn't add much runtime overhead. However, it's always good practice to keep the number of active components low. For instance, when implementing a selection system that highlights the picked object, it's recommended to delete the component when the highlight is removed. Keeping the components around with neutral features can quickly add up.
Transparent rendering puts more workload on the server's GPUs than standard rendering. If large parts of the scene graph are switched to see-through, with many layers of geometry being visible, it may become a performance bottleneck. The same is valid for objects with selection outlines and for shell rendering .