Troubleshoot private endpoint connection problems
When you connect to an Azure Machine Learning workspace configured with a private endpoint, you might encounter a 403 error or a message saying that access is forbidden. This article explains how you can check for common configuration problems that cause this error.
Tip
Before using the steps in this article, try the Azure Machine Learning workspace diagnostic API. It can help identify configuration problems with your workspace. For more information, see How to use workspace diagnostics.
DNS configuration
The troubleshooting steps for DNS configuration differ based on whether you use Azure DNS or a custom DNS. Use the following steps to determine which one you're using:
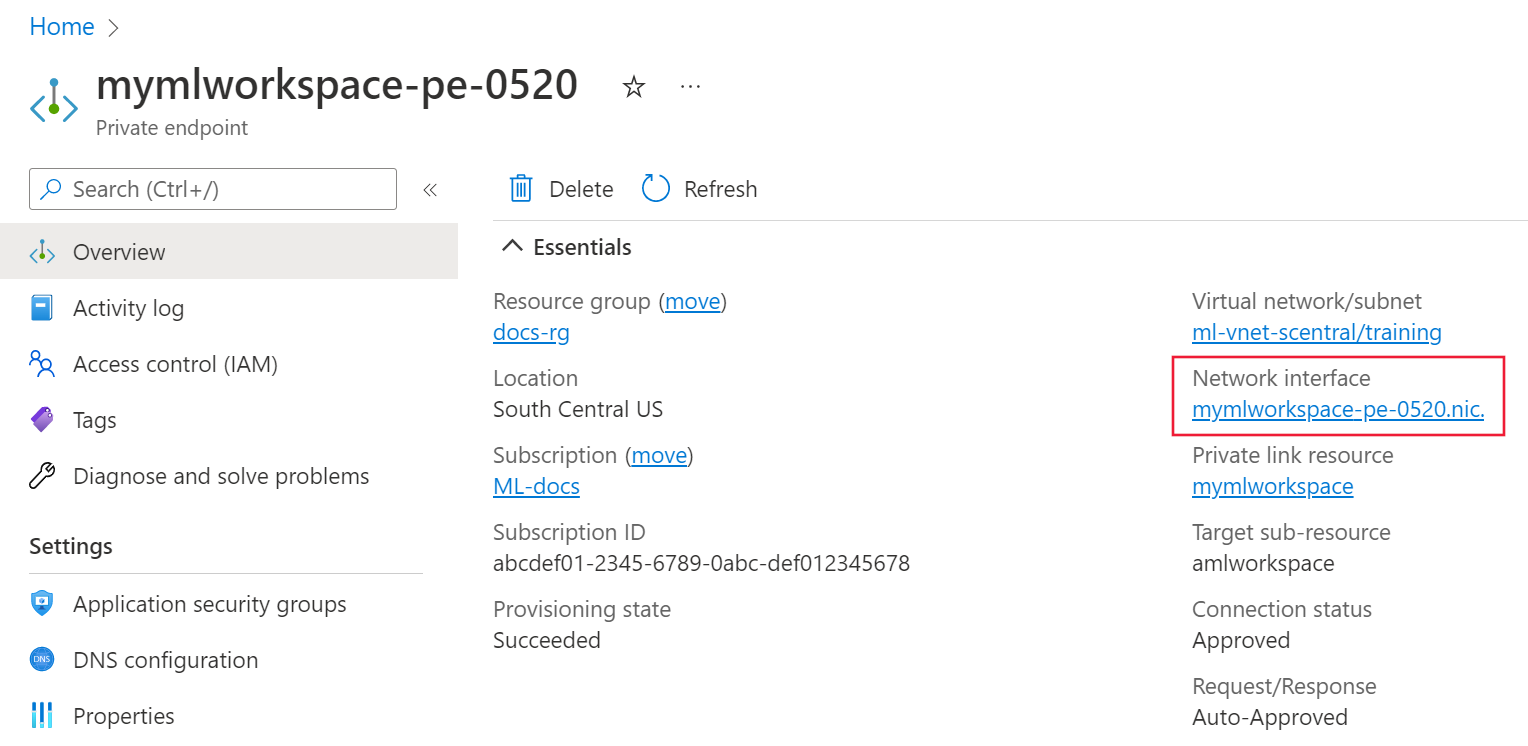
In the Azure portal, select the private endpoint for your Azure Machine Learning workspace.
From the Overview page, select the Network Interface link.
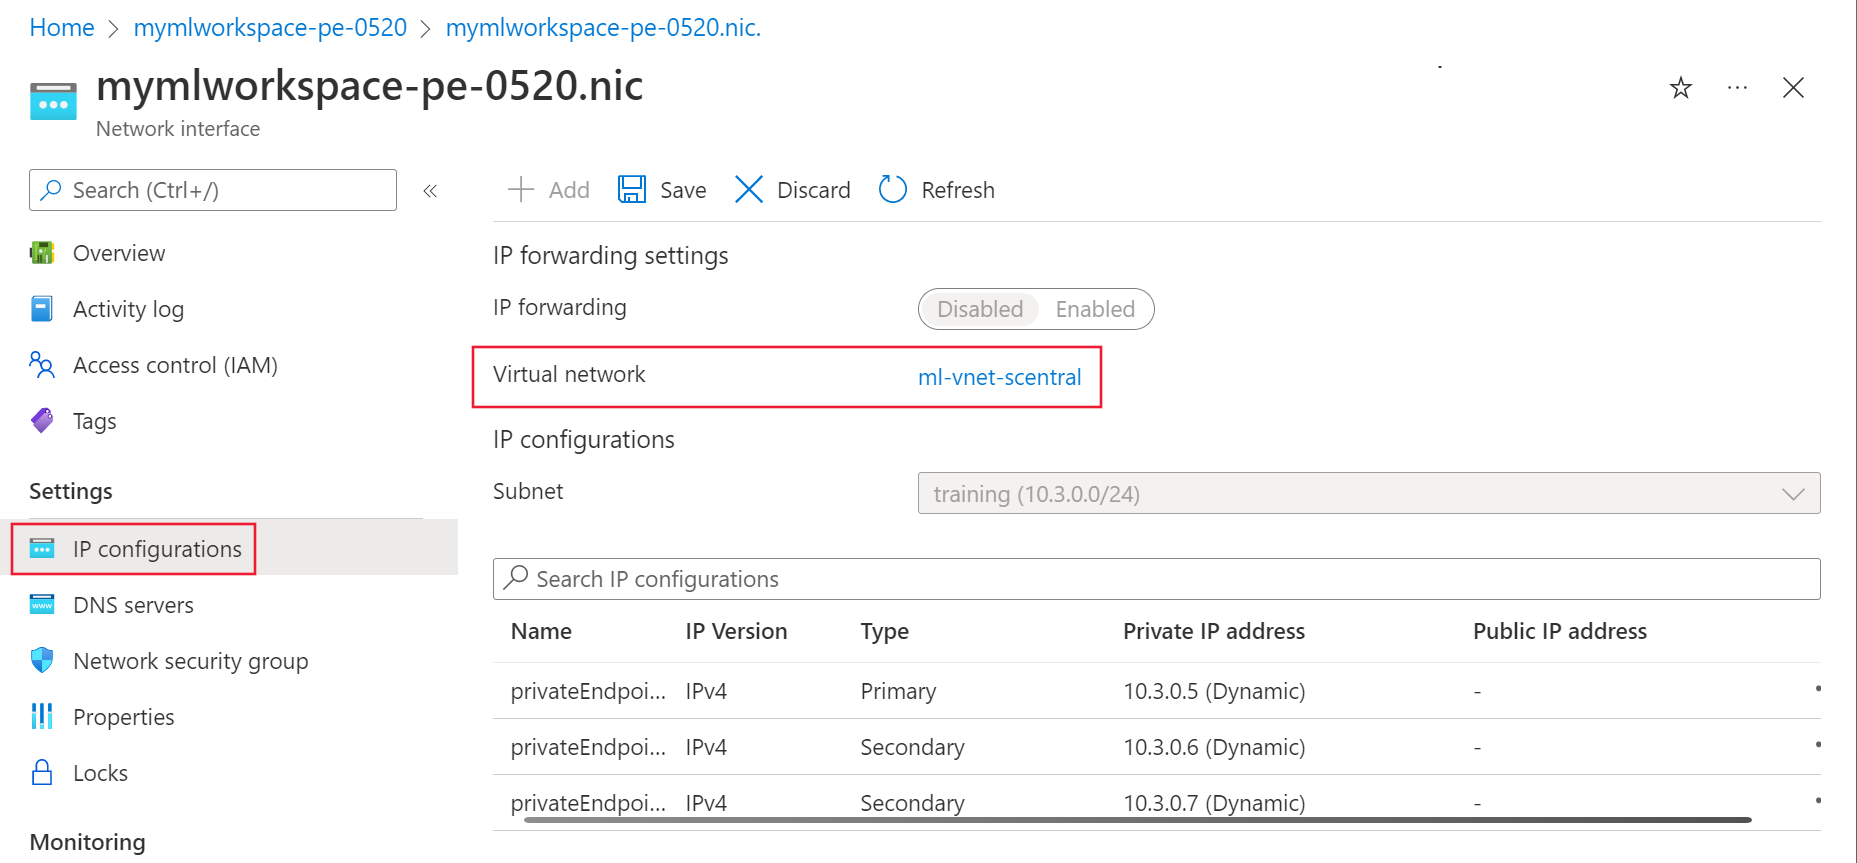
Under Settings, select IP Configurations and then select the Virtual network link.
From the Settings section on the left of the page, select the DNS servers entry.
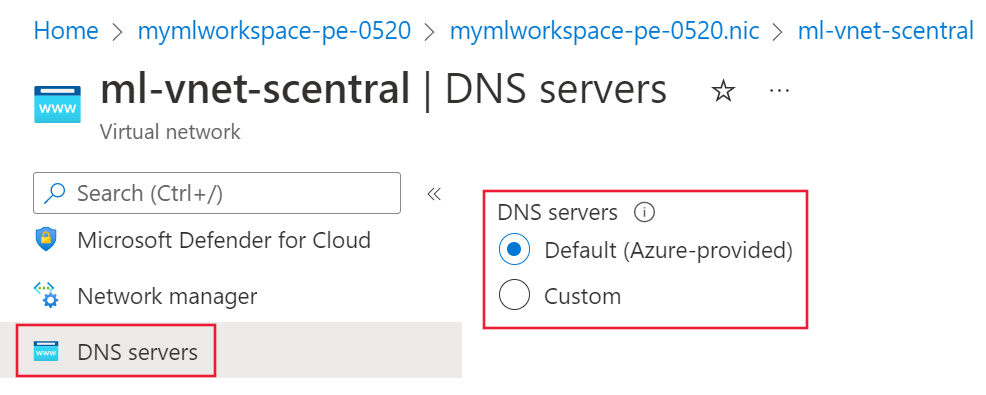
- If this value is Default (Azure-provided) or 168.63.129.16, then the virtual network is using Azure DNS. Skip to the Azure DNS troubleshooting section.
- If there's a different IP address listed, then the virtual network is using a custom DNS solution. Skip to the Custom DNS troubleshooting section.
Custom DNS troubleshooting
Use the following steps to verify if your custom DNS solution is correctly resolving names to IP addresses:
From a virtual machine, laptop, desktop, or other compute resource that has a working connection to the private endpoint, open a web browser. In the browser, use the URL for your Azure region:
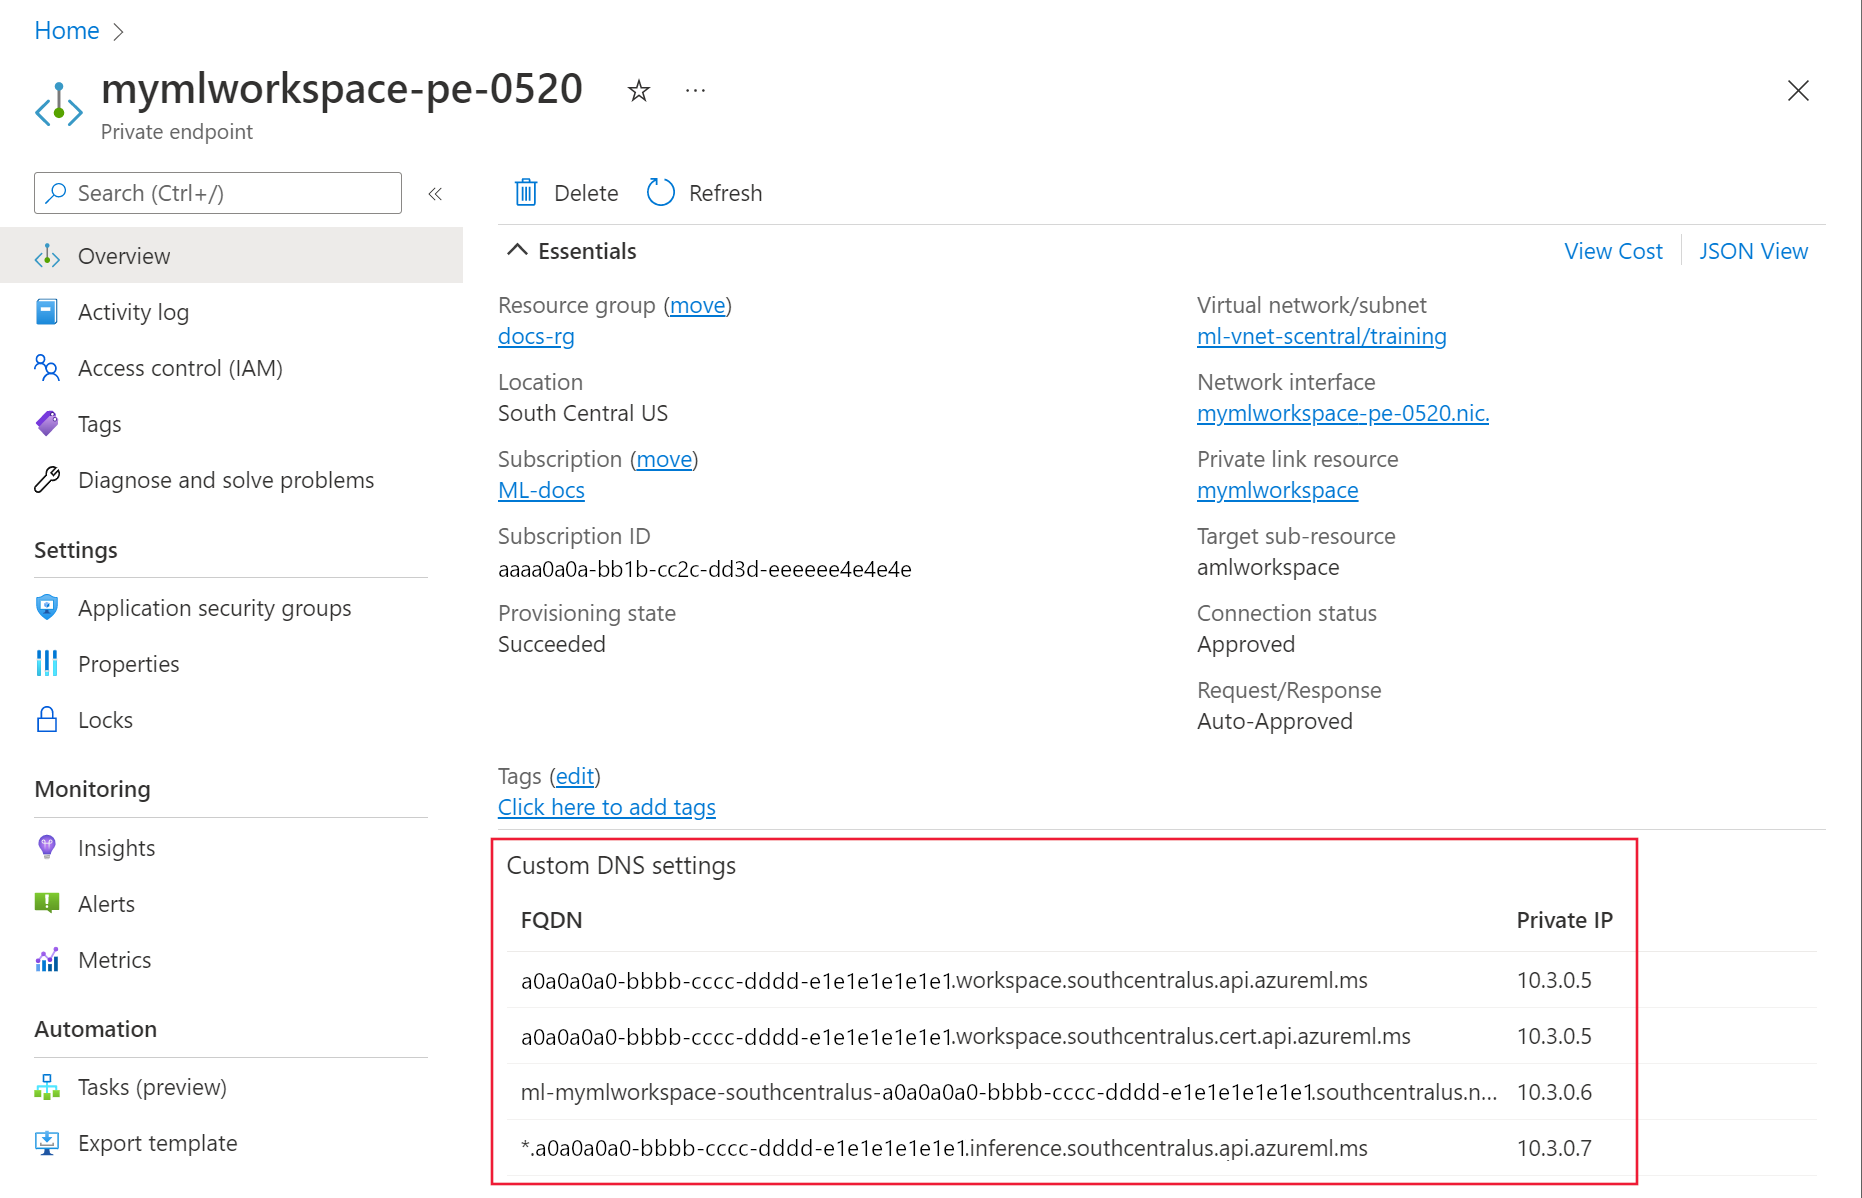
Azure region URL Azure Government https://portal.azure.us/?feature.privateendpointmanagedns=false Microsoft Azure operated by 21Vianet https://portal.azure.cn/?feature.privateendpointmanagedns=false All other regions https://portal.azure.com/?feature.privateendpointmanagedns=false In the portal, select the private endpoint for the workspace. Make a list of FQDNs listed for the private endpoint.
Open a command prompt, PowerShell, or other command line and run the following command for each FQDN returned from the previous step. Each time you run the command, verify that the IP address returned matches the IP address listed in the portal for the FQDN:
nslookup <fqdn>For example, running the command
nslookup a0a0a0a0-bbbb-cccc-dddd-e1e1e1e1e1e1.workspace.eastus.api.azureml.msreturns a value similar to the following text:Server: yourdnsserver Address: yourdnsserver-IP-address Name: a0a0a0a0-bbbb-cccc-dddd-e1e1e1e1e1e1.workspace.eastus.api.azureml.ms Address: 10.3.0.5If the
nslookupcommand returns an error, or returns a different IP address than displayed in the portal, then the custom DNS solution isn't configured correctly. For more information, see How to use your workspace with a custom DNS server.
Azure DNS troubleshooting
When using Azure DNS for name resolution, use the following steps to verify that the Private DNS integration is configured correctly:
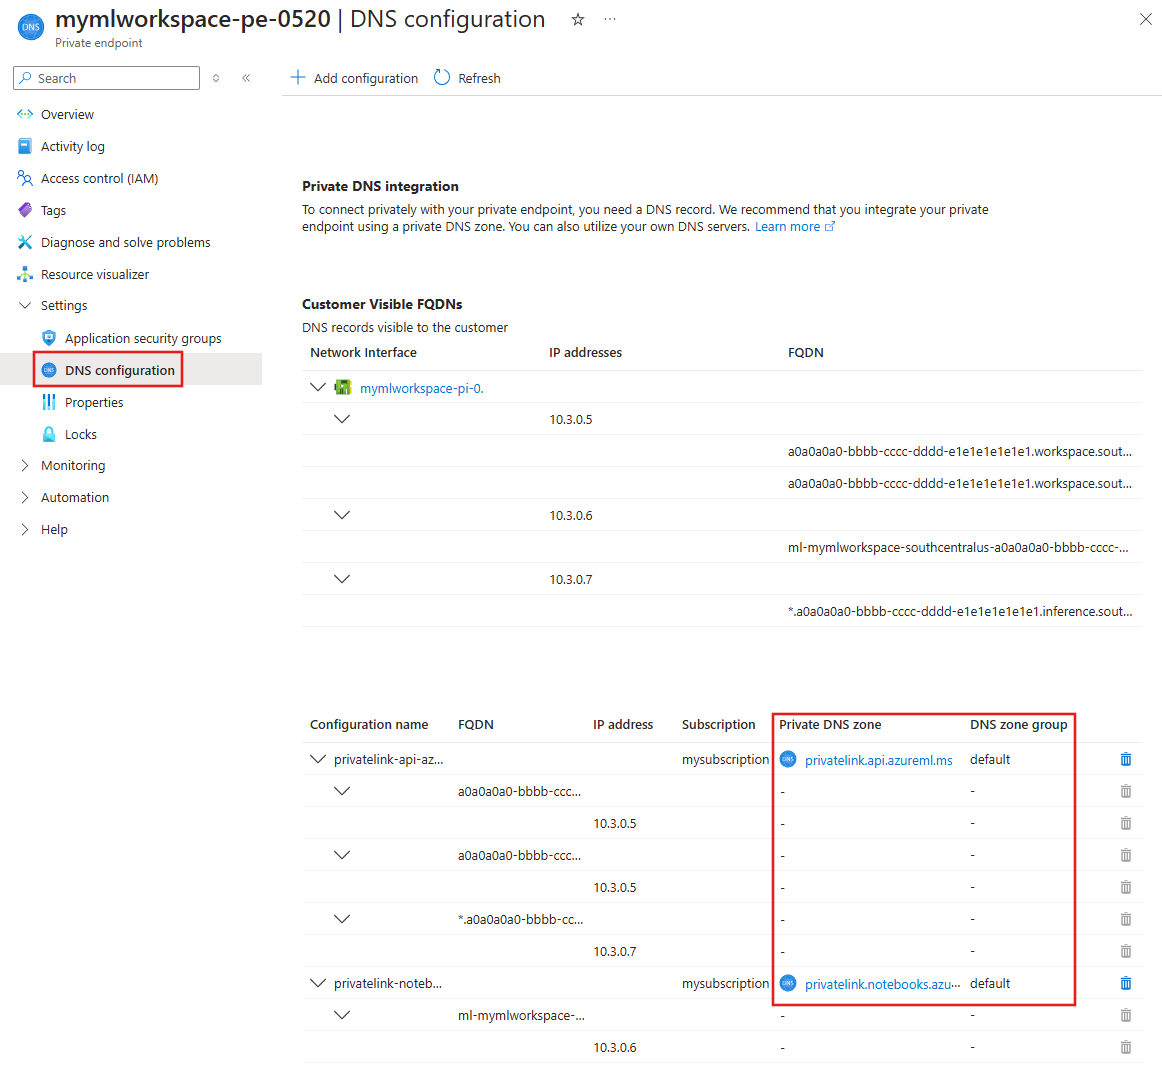
On the Private Endpoint, select DNS configuration. For each entry in the Private DNS zone column, there should also be an entry in the DNS zone group column.
If there's a Private DNS zone entry, but no DNS zone group entry, delete and recreate the Private Endpoint. When recreating the private endpoint, enable Private DNS zone integration.
If DNS zone group isn't empty, select the link for the Private DNS zone entry.
From the Private DNS zone, select Virtual network links. There should be a link to the virtual network. If there isn't one, then delete and recreate the private endpoint. When recreating it, select a Private DNS Zone linked to the virtual network or create a new one that is linked to it.
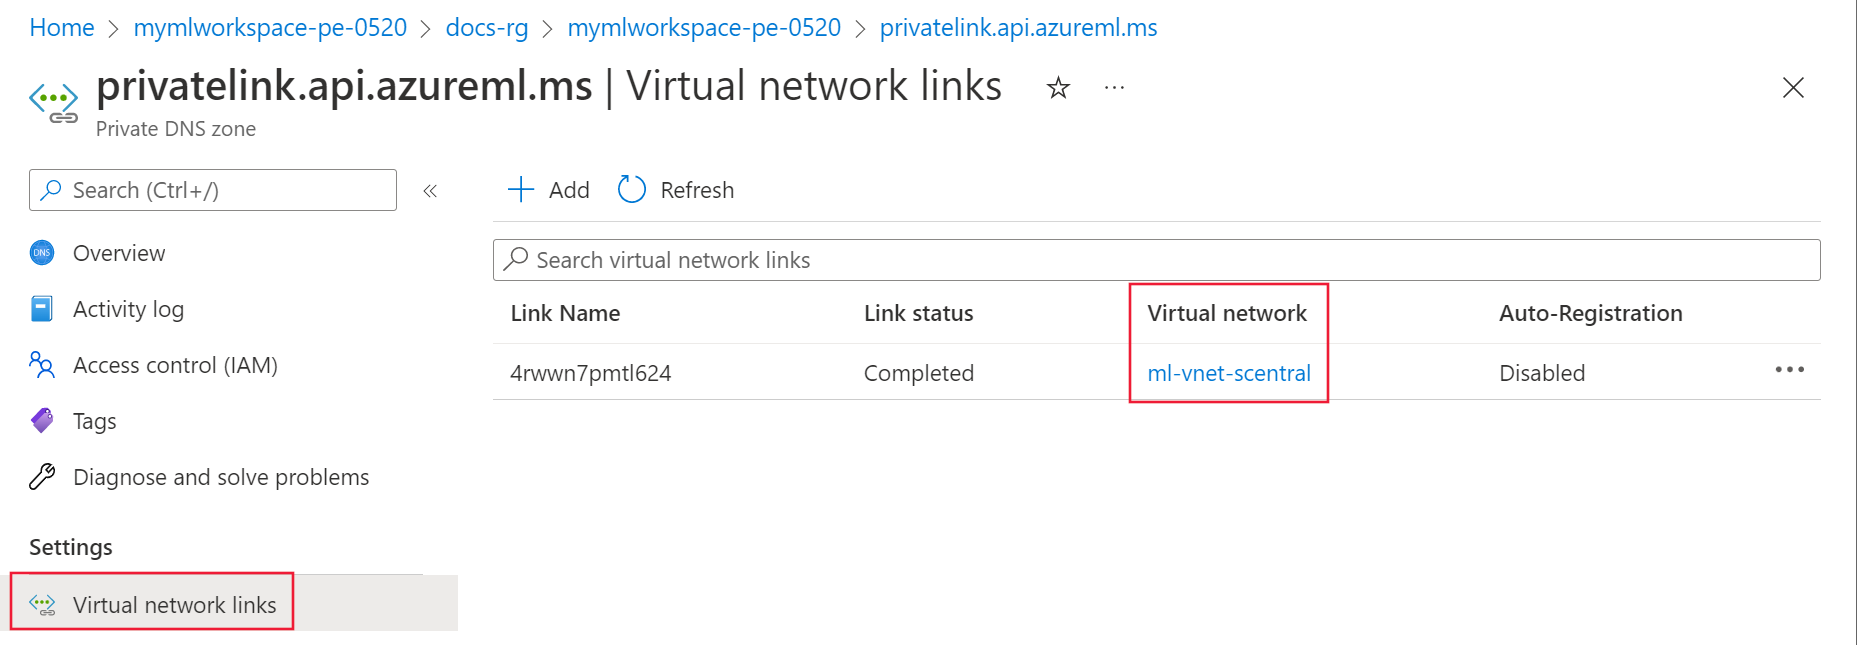
Repeat the previous steps for the rest of the Private DNS zone entries.
Browser configuration (DNS over HTTPS)
Check if DNS over HTTP is enabled in your web browser. DNS over HTTP can prevent Azure DNS from responding with the IP address of the Private Endpoint.
- Mozilla Firefox: For more information, see Disable DNS over HTTPS in Firefox.
- Microsoft Edge:
Select ... in the top right corner, then select Settings.
From settings, search for DNS and then disable Use secure DNS to specify how to look up the network address for websites.

Proxy configuration
If you use a proxy, it might prevent communication with a secured workspace. To test, use one of the following options:
- Temporarily disable the proxy setting and see if you can connect.
- Create a Proxy auto-config (PAC) file that allows direct access to the FQDNs listed on the private endpoint. It should also allow direct access to the FQDN for any compute instances.
- Configure your proxy server to forward DNS requests to Azure DNS.
