Azure HDInsight Accelerated Writes for Apache HBase
This article provides background on the Accelerated Writes feature for Apache HBase in Azure HDInsight, and how it can be used effectively to improve write performance. Accelerated Writes uses Azure premium SSD managed disks to improve performance of the Apache HBase Write Ahead Log (WAL). To learn more about Apache HBase, see What is Apache HBase in HDInsight.
Overview of HBase architecture
In HBase, a row consists of one or more columns and is identified by a row key. Multiple rows make up a table. Columns contain cells, which are timestamped versions of the value in that column. Columns are grouped into column families, and all columns in a column-family are stored together in storage files called HFiles.
Regions in HBase are used to balance the data processing load. HBase first stores the rows of a table in a single region. The rows are spread across multiple regions as the amount of data in the table increases. Region Servers can handle requests for multiple regions.
Write Ahead Log for Apache HBase
HBase first writes data updates to a type of commit log called a Write Ahead Log (WAL). After the update is stored in the WAL, it's written to the in-memory MemStore. When the data in memory reaches its maximum capacity, it's written to disk as an HFile.
If a RegionServer crashes or becomes unavailable before the MemStore is flushed, the Write Ahead Log can be used to replay updates. Without the WAL, if a RegionServer crashes before flushing updates to an HFile, all of those updates are lost.
Accelerated Writes feature in Azure HDInsight for Apache HBase
The Accelerated Writes feature solves the problem of higher write-latencies caused by using Write Ahead Logs that are in cloud storage. The Accelerated Writes feature for HDInsight Apache HBase clusters, attaches premium SSD-managed disks to every RegionServer (worker node). Write Ahead Logs are then written to the Hadoop File System (HDFS) mounted on these premium managed-disks instead of cloud storage. Premium managed-disks use Solid-State Disks (SSDs) and offer excellent I/O performance with fault tolerance. Unlike unmanaged disks, if one storage unit goes down, it won't affect other storage units in the same availability set. As a result, managed-disks provide low write-latency and better resiliency for your applications. To learn more about Azure-managed disks, see Introduction to Azure managed disks.
How to enable Accelerated Writes for HBase in HDInsight
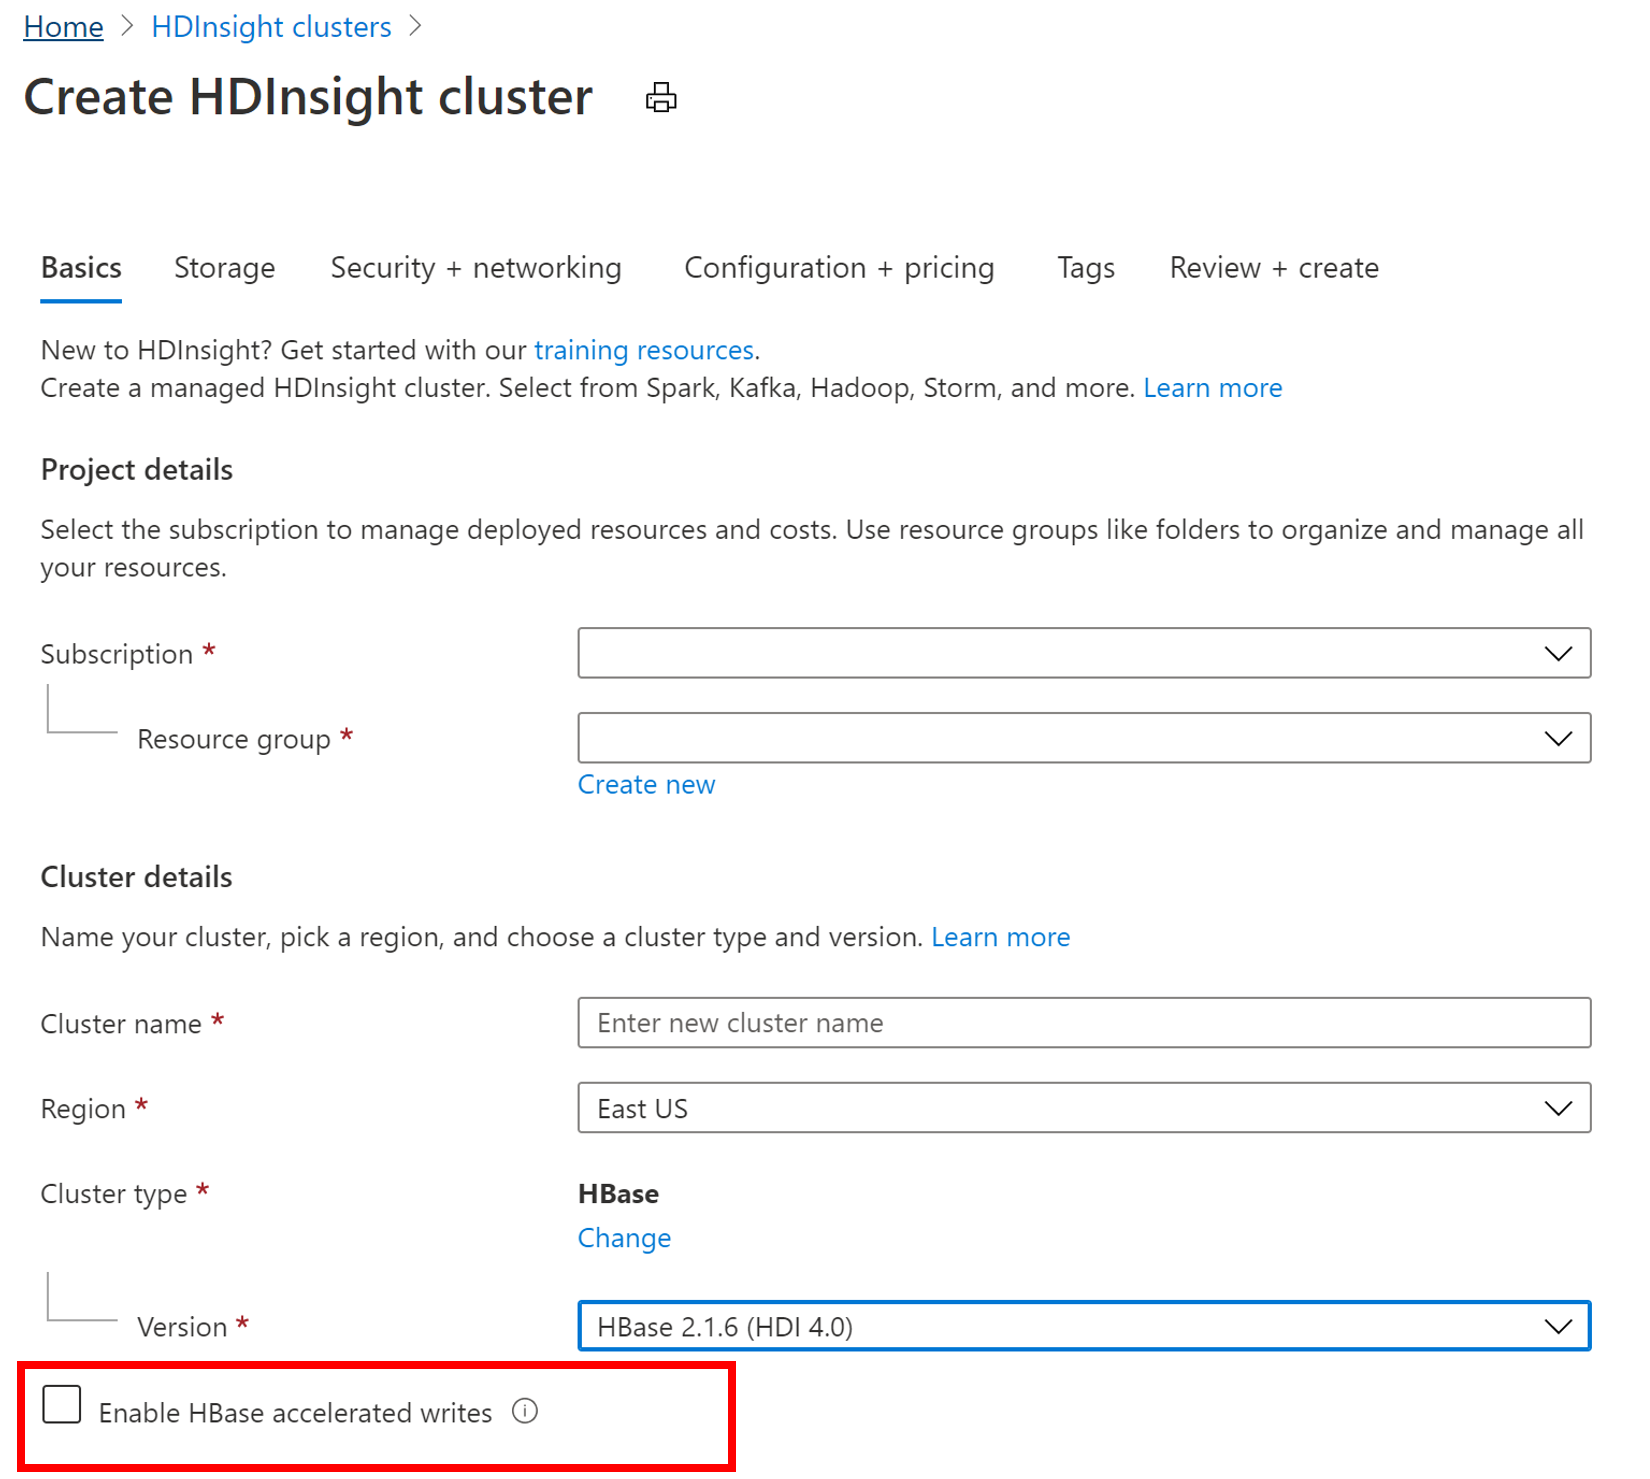
To create a new HBase cluster with the Accelerated Writes feature, follow the steps in Set up clusters in HDInsight. On the Basics tab select cluster type as HBase, specify a component version and then click on the checkbox next to Enable HBase accelerated writes. Then, continue with the remaining steps for cluster creation.

Verify Accelerated Writes feature was enabled
You can use the Azure portal to verify if the Accelerated Writes feature is enabled on an HBASE cluster.
- Search for your HBASE cluster in the Azure portal.
- Select the Cluster Size blade.
- Premium disks per worker node will be displayed.
Scaling HBASE clusters
To preserve data durability, create a cluster with a minimum of three worker nodes. Once created, you can't scale down the cluster to less than three worker nodes.
Flush or disable your HBase tables before deleting the cluster, so that you don't lose Write Ahead Log data.
flush 'mytable'
disable 'mytable'
Follow similar steps when scaling down your cluster: flush your tables and disable your tables to stop incoming data. You can't scale down your cluster to fewer than three nodes.
Following these steps will ensure a successful scale-down and avoid the possibility of a namenode going into safe mode due to under-replicated or temporary files.
If your namenode does go into safe mode after a scale down, use hdfs commands to re-replicate the under-replicated blocks and get hdfs out of safe mode. This re-replication will allow you to restart HBase successfully.
Next steps
- Official Apache HBase documentation on the Write Ahead Log feature
- To upgrade your HDInsight Apache HBase cluster to use Accelerated Writes, see Migrate an Apache HBase cluster to a new version.