Troubleshooting 4xx and 5xx errors using Reference String
A guide to understand and use Reference Strings for diagnosing and resolving issues with Azure Front Door.
Prerequisites
- You must have an Azure Front Door profile. To create a profile, see Creating an Azure Front Door profile.
What is a Reference String?
A Reference String, also known as a RefString, is a short string appended by Azure Front Door to the HTTP response headers of each request. It provides details on how the request was processed, including the point of presence (POP) and backend status.
Reference Strings can help you troubleshoot and resolve issues with Azure Front Door, such as cache misses, backend failures, and latency problems. You can identify the root cause and take appropriate actions to fix it by analyzing the Reference String of the requests.
Note
If you encounter an error page from Microsoft services, it will already include a Reference String for the request that generated the error page. In such cases, you can skip directly to the diagnostic step.
How to gather a Reference String
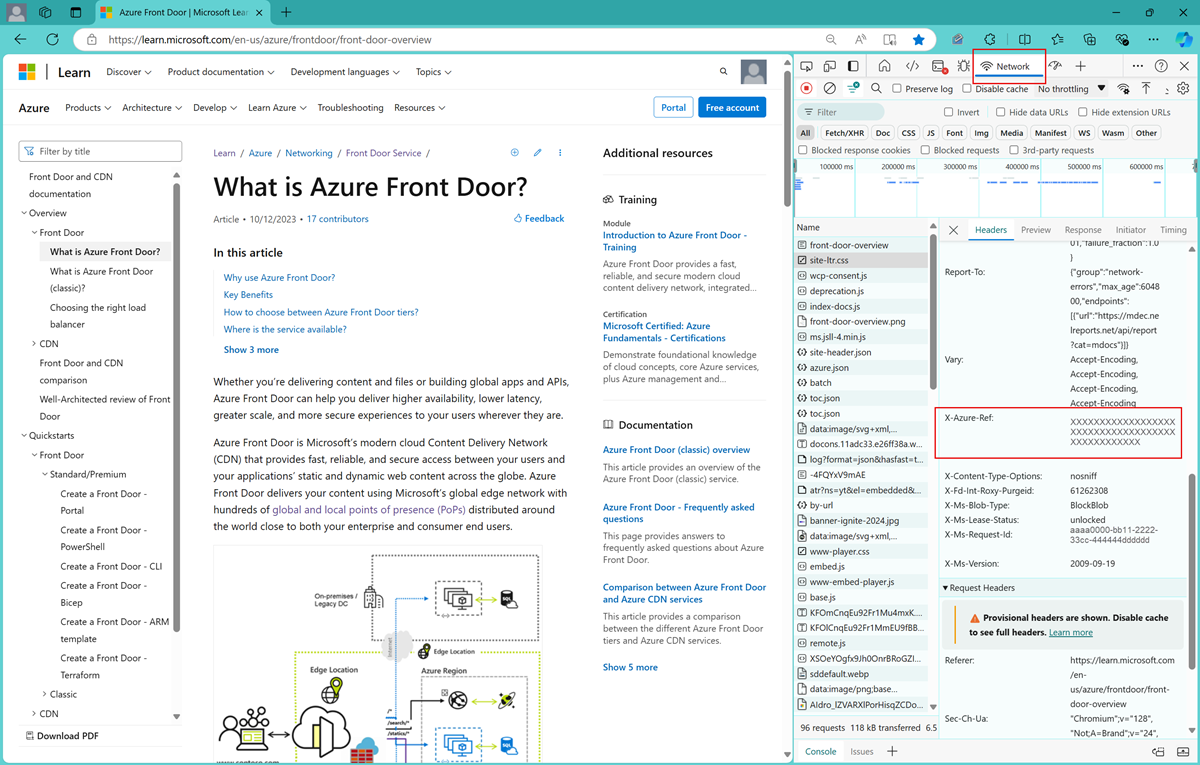
To gather a Reference String, you need to capture the HTTP response headers of the requests and look for the header named X-Azure-Ref. This header contains the Reference String, encoded in Base64. You can use different methods to capture the HTTP response headers, depending on your preference and situation. Here is an example of how to obtain a Reference String from the Microsoft Edge Browser:
Open the browser's developer tools by pressing
F12orCtrl+Shift+I.Go to the Network tab.
Refresh the page or perform the action that triggers the request.
Locate the specific request in the list and find the X-Azure-Ref header in the response headers section.
Copy the value of the X-Azure-Ref header to use with the Reference String troubleshooting tool in the Azure portal.
For more information, see Inspect network activity - Microsoft Edge Developer documentation.
Example of how to obtain a Reference String from Microsoft Edge Browser:
How to use a Reference String with some of our troubleshooting tools
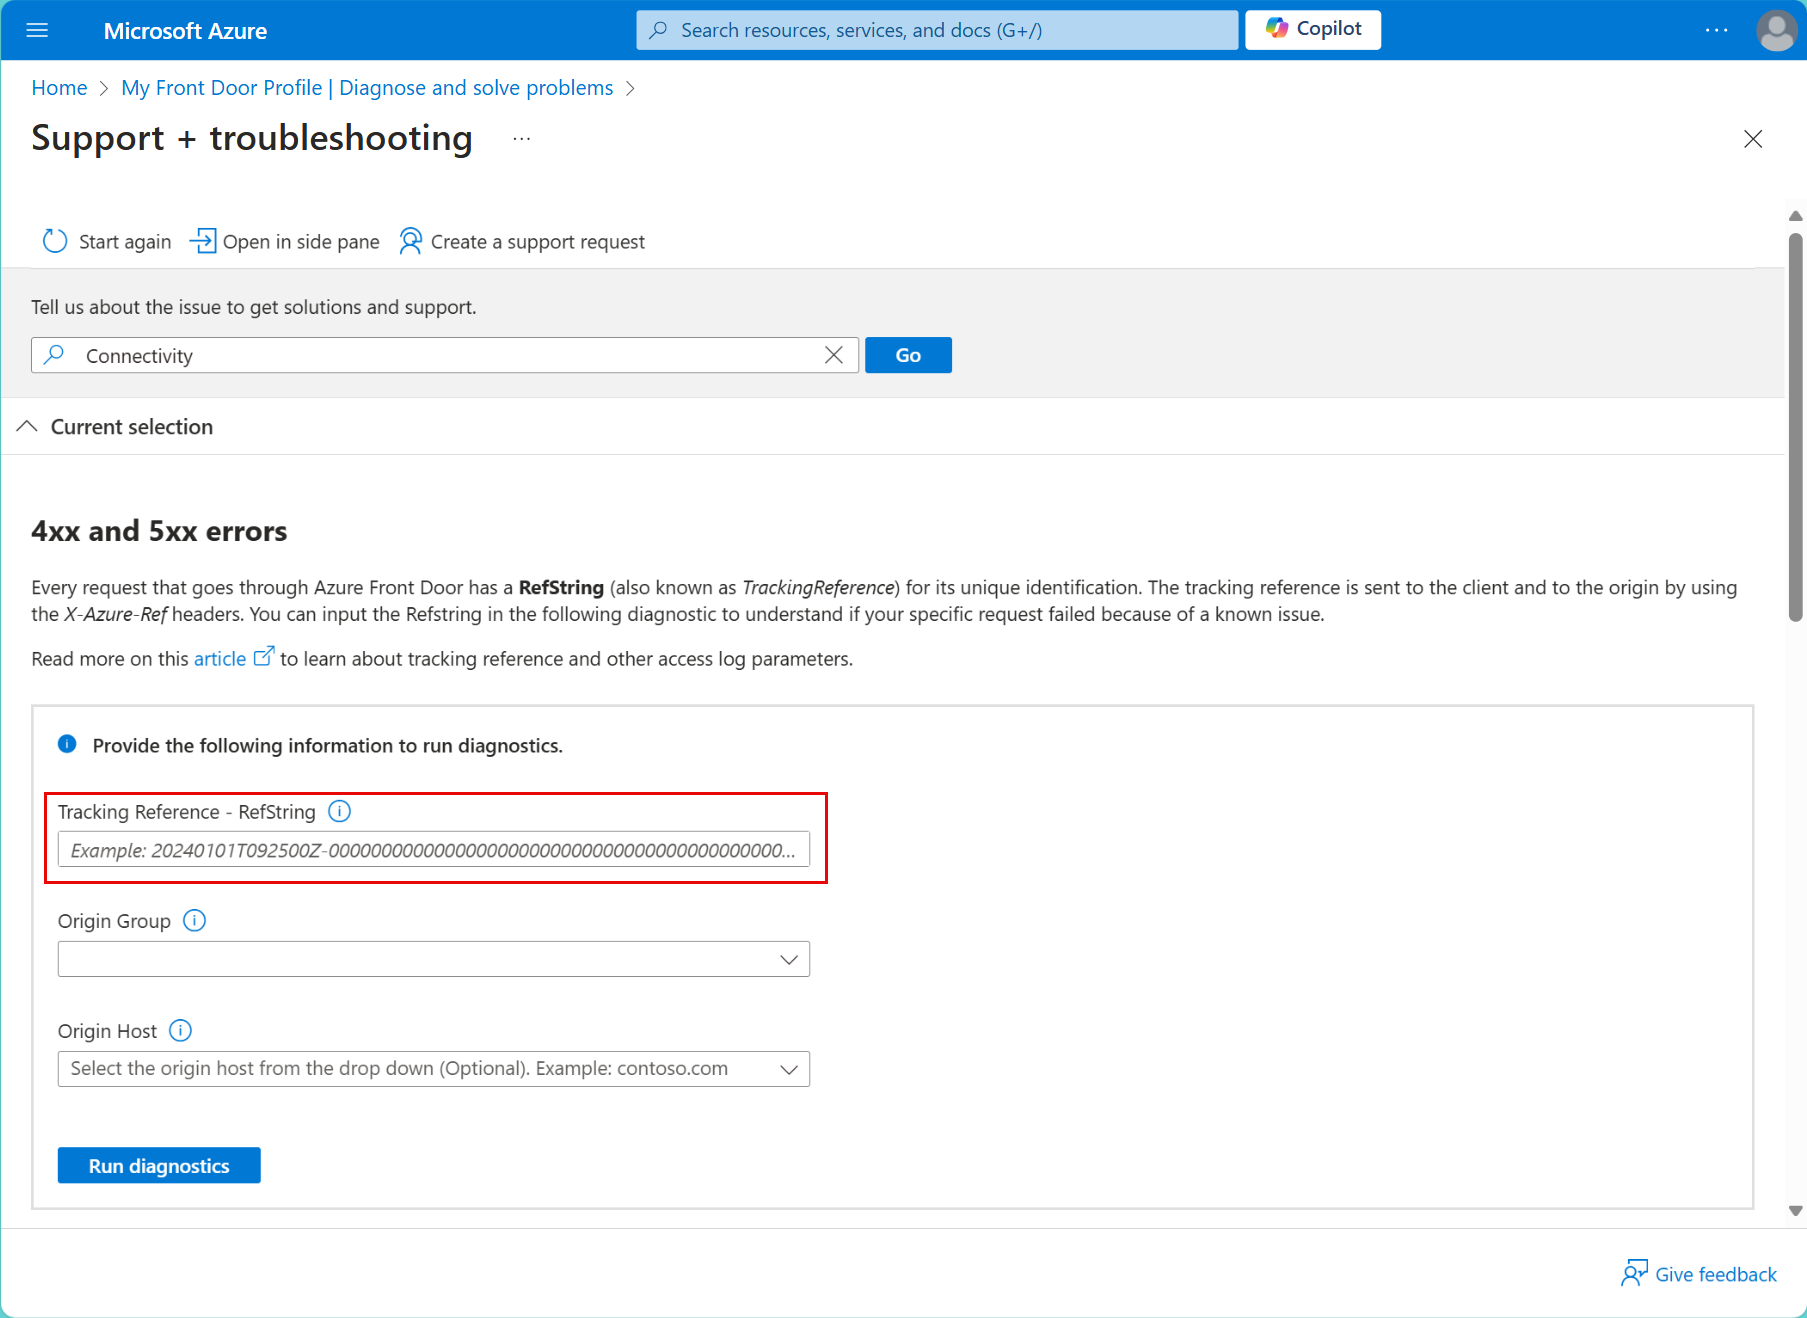
Azure Front Door uses a Reference String to manage 4xx and 5xx errors. The following are the steps to use the diagnostic tool with a Reference String for tracking and diagnosing connectivity issues:
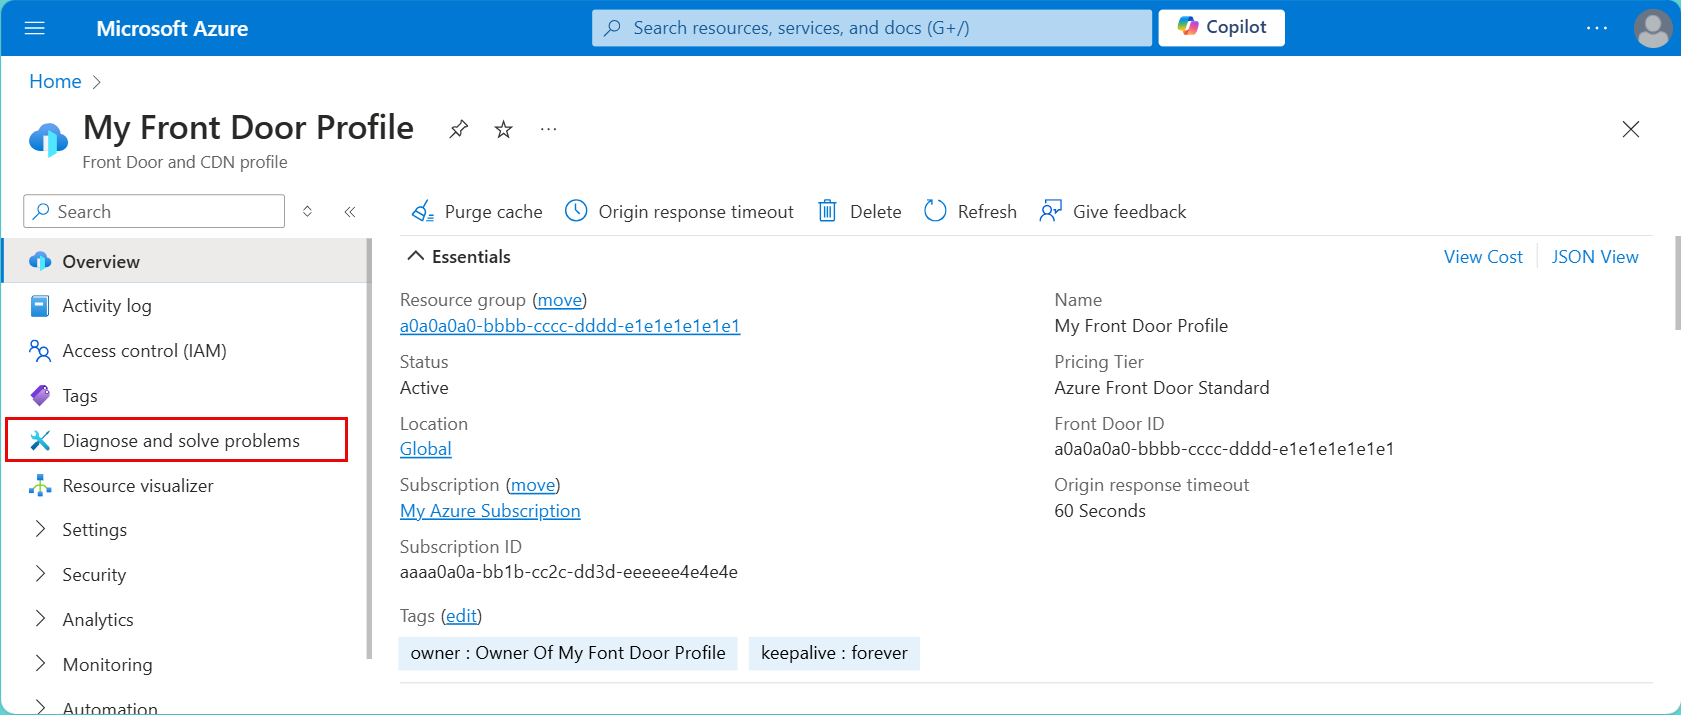
Navigate to your Azure Front Door Profile.
Select the Diagnose and solve problems menu.
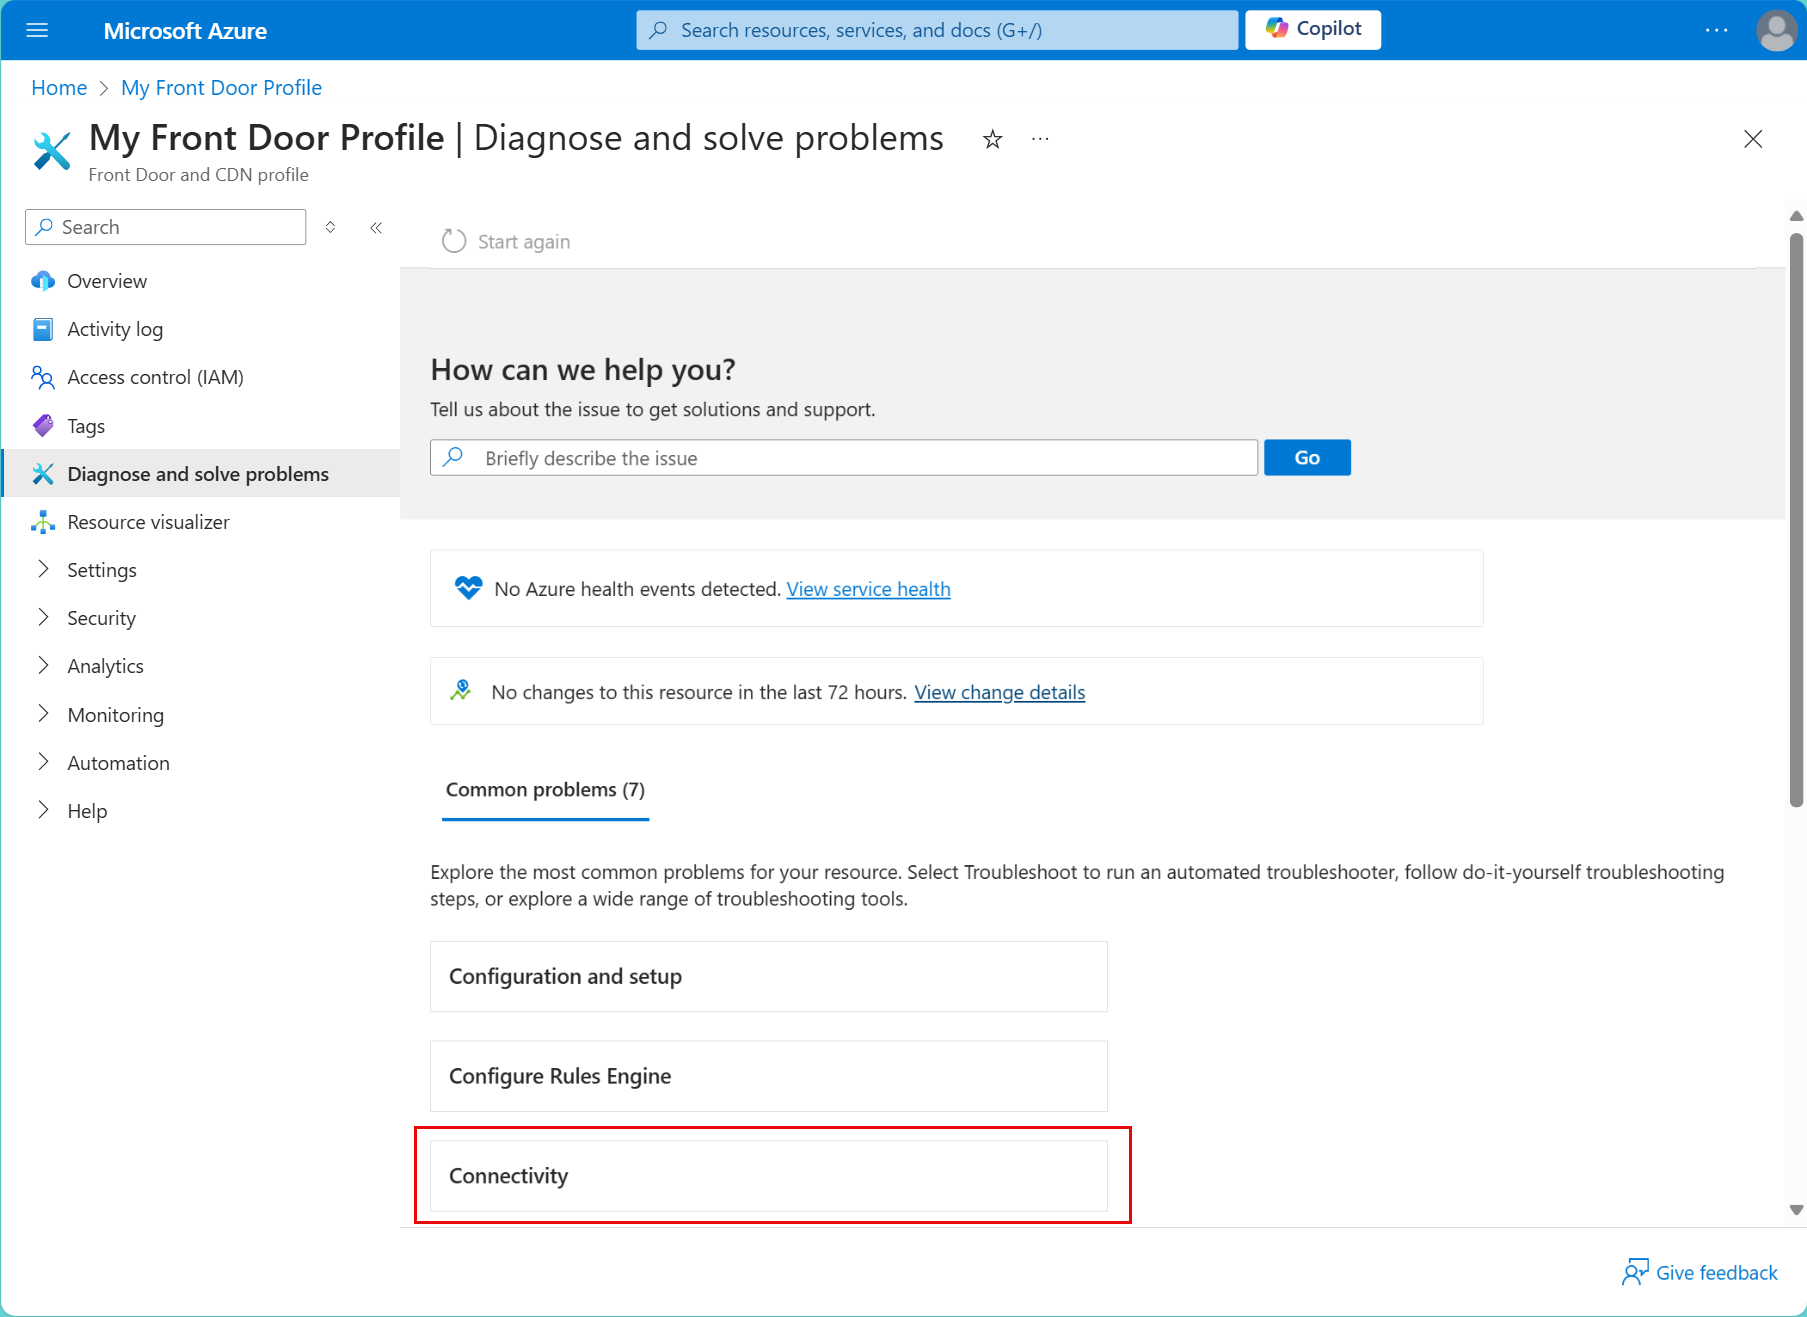
Scroll down and select Connectivity under the Common problems section.
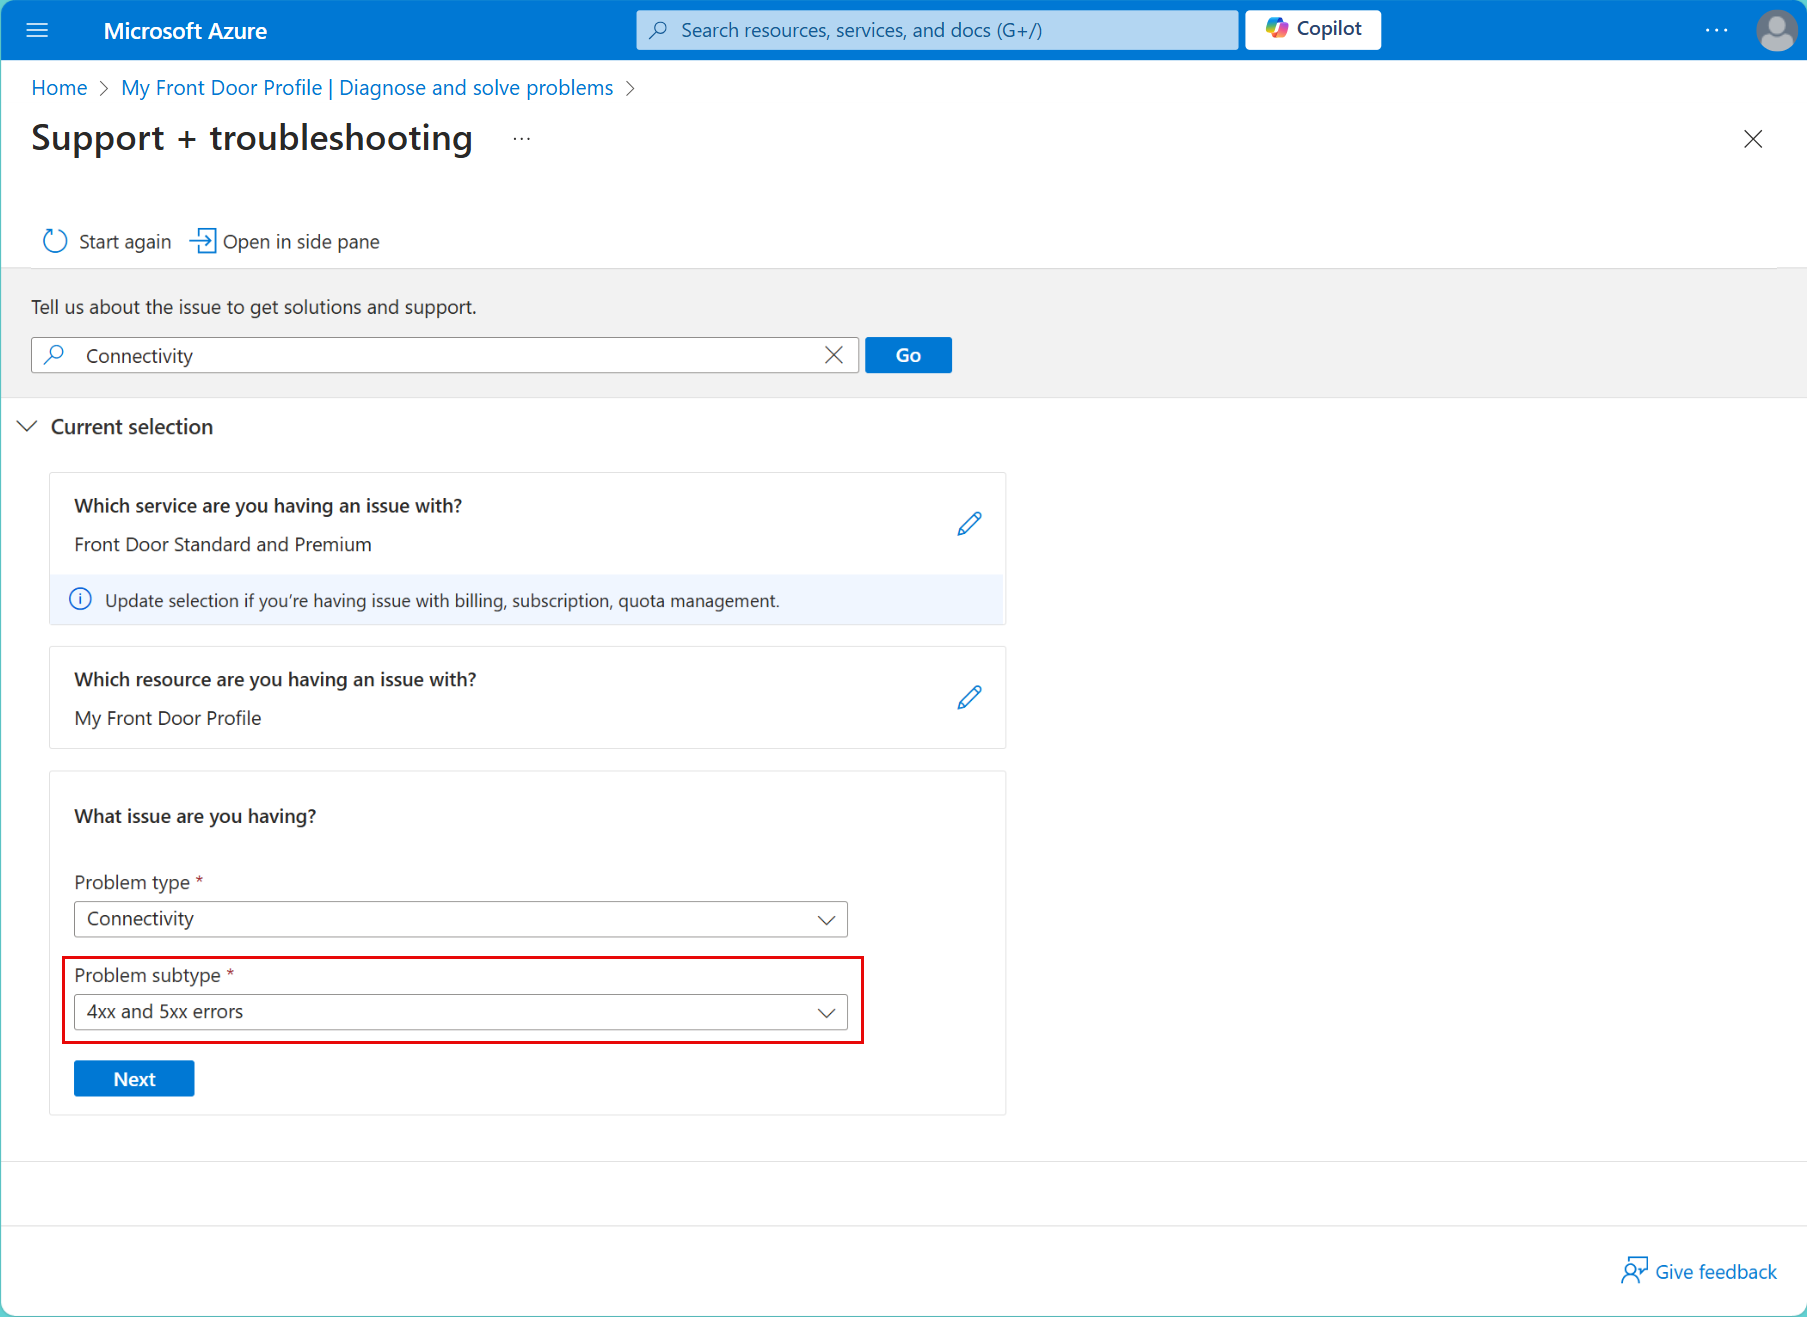
In the box What issue are you having? select Select a problem subtype and choose 4xx and 5xx errors on the drop down-menu, then select the Next.
Enter your Reference String in the box within the 4xx and 5xx errors section. You input the Reference String given to you from your request under the Tracking Reference – RefString field.
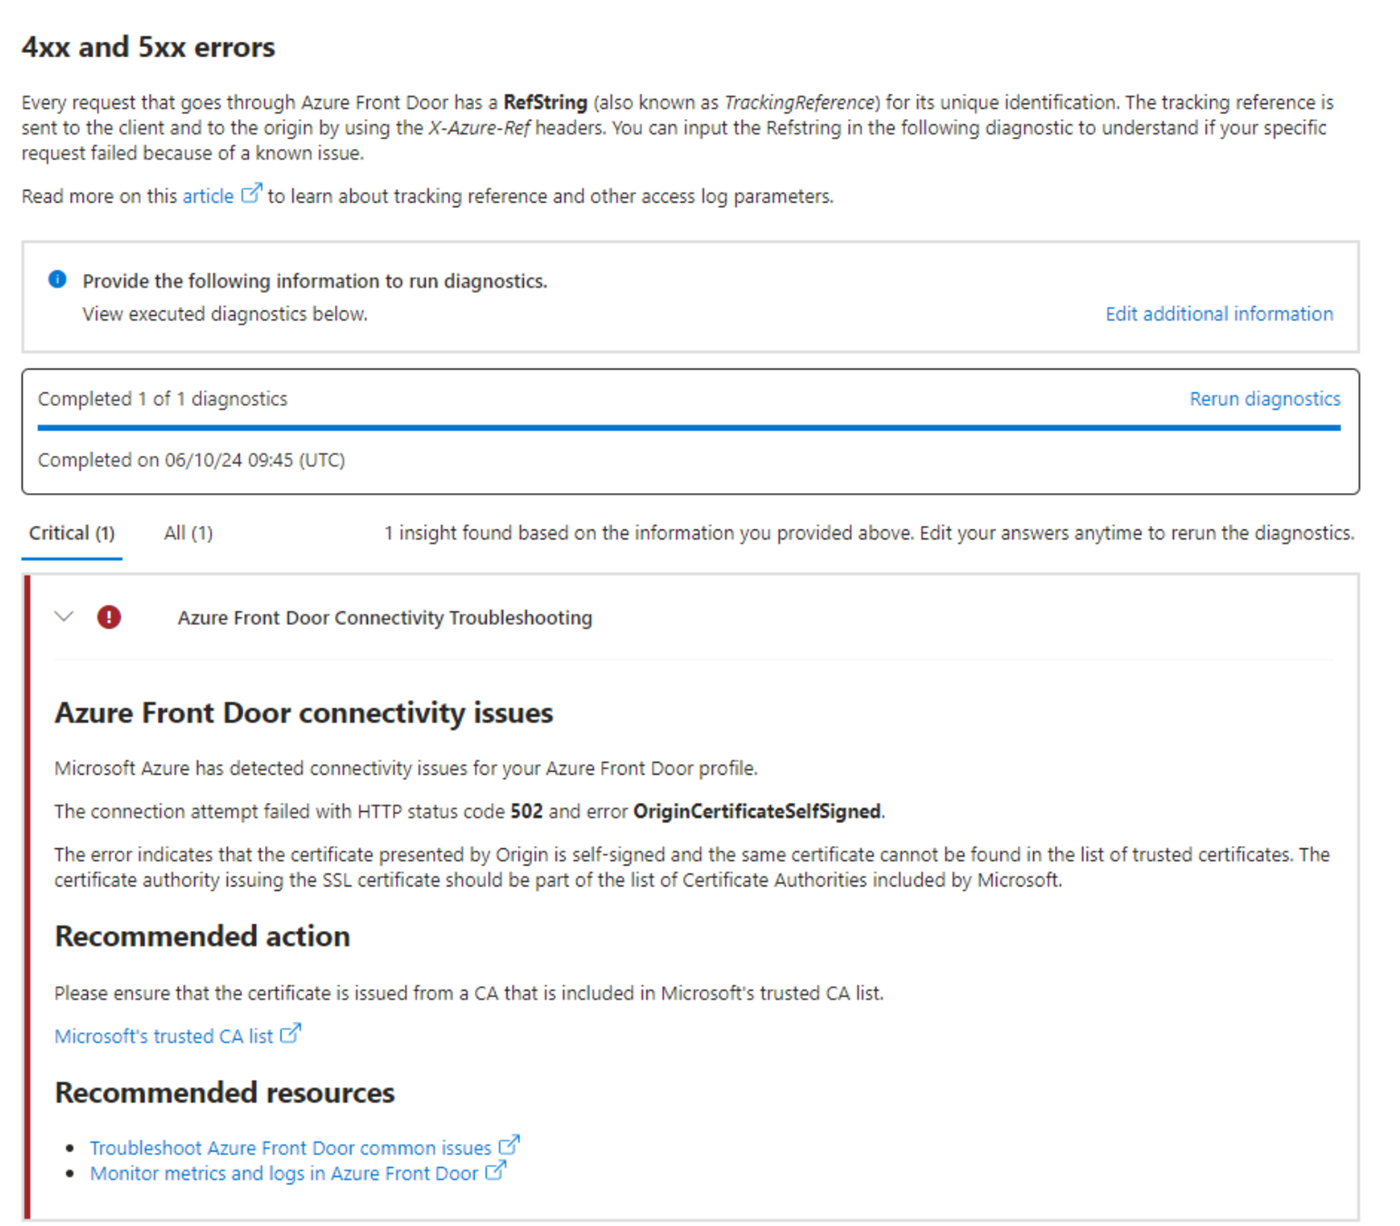
Finally, select Run Diagnostics to identify the cause of the issue, which explains the failure if it's a known problem.
An example of a result displaying an issue:
Note
The diagnostic capabilities may require up to 15 minutes to deliver results. We ask for your patience that you allow the process to finish before taking further action.
Alternative option
If you choose not to use the diagnostic tool, you can include a Reference String when submitting a support ticket. Additionally, you can enable the Access Logs feature to receive updates on RefString data directly in the Azure portal.
For more information on tracking references and access log parameters, see Monitor metrics and logs in Azure Front Door, which highlights specific fields in access logs that help identify various types of errors.
Next steps
- To learn more about navigating common issues, see Front Door Troubleshooting Issues.
- For answers to common questions, see Azure Front Door FAQ.
