Display rollup progress or totals in Azure Boards
Azure DevOps Services | Azure DevOps Server 2022 | Azure DevOps Server 2020
This article provides an overview of rollup functionality in Azure DevOps, explaining how rollup sums values of select fields for all child work items of a parent. Rollup is commonly used for estimated or completed work, effort, size, or story points. However, rollup of Effort, Story Points, or Size fields across product and portfolio backlogs isn't supported. This article also guides you through the steps to implement rollup functionality in various contexts such as product and portfolio backlogs, sprint Planning pane, sprint backlogs, and taskboards.
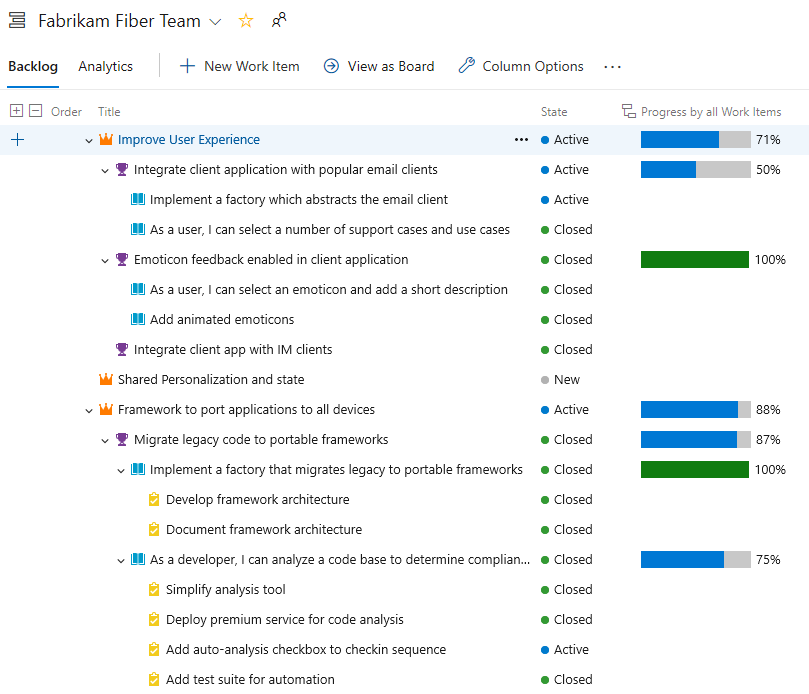
In the following example, Progress by Work Items displays progress bars for parent work items based on the percentage of closed descendant items. For Epics, descendant items include all child Features and their child or grandchild work items. For Features, descendant items include all child User Stories and their child work items.
Important
- Rollup data supports progress bars, counts of work items, and sums of numeric fields within a project. Child items linked to a different project aren't included in the parent rollup calculations.
- Links to test cases or test artifacts aren't included in rollup calculations, as these items are linked using test-specific link types.
Note
You can view rollup progress in the new version of Delivery Plans, now available in public preview for Azure Boards. This feature is integrated into Azure Boards and is no longer an extension. To enable it, see Manage or enable features and turn on New Delivery Plans Experience. For more information, see Review team Delivery Plans.
Prerequisites
- Permissions: Be a member of the Project Collection Valid Users Group to view delivery plans and rollup progress.
- Access levels: Have one of the following access levels assigned to you:
- Basic: Provides full access to all Azure Boards features, including viewing and modifying work items.
- Stakeholder: Allows viewing and modifying work items but with limited features.
- Use parent-child links: Ensure that your work items are linked using parent-child relationships to support rollup.
- Add required fields: Make sure that the fields you want to roll up are present in the work item types.
- Enable the Analytics service on your on-premises Azure DevOps Server. For more information, see Install/uninstall or enable/disable the Analytics service.
- Use parent-child links: Ensure that your work items are linked using parent-child relationships to support rollup.
- Add required fields: Make sure that the fields you want to roll up are present in the work item types.
Rollup and hierarchical work items
The default set of backlog work items that supports natural hierarchical grouping varies based on the process chosen for your project. The easiest way to create a hierarchy is by mapping work items or adding them to a parent item on a board. For more information, see Organize your backlog, map child work items to parents and Board features and epics.
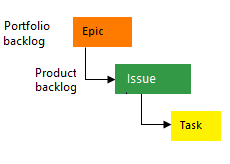
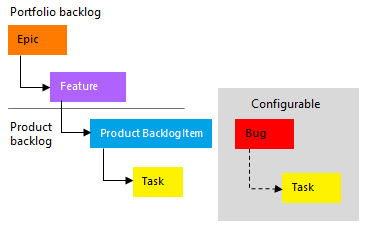
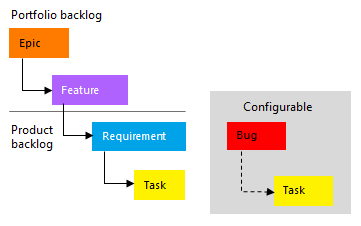
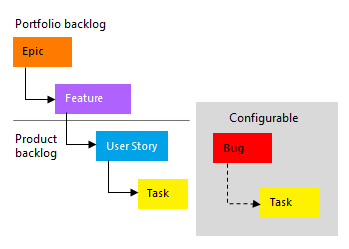
The following image shows the Agile process backlog work item hierarchy. Each team can configure how they manage bugs—either at the same level as User Stories or Tasks—by adjusting the Working with bugs setting.
Open a product or portfolio backlog
Each user can customize their column options, and these settings persist across sessions for each backlog.
- Open a product or portfolio backlog. Optionally, enable Show parents in your view options. Even if child items aren't listed, rollup for them displays.
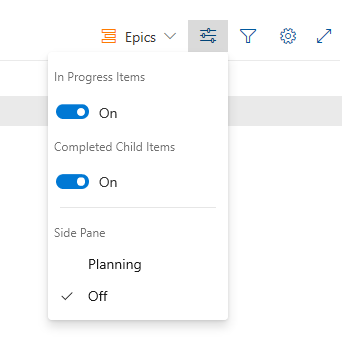
Open a portfolio backlog and select In Progress Items and Completed Child Items. This allows you to compare the State value of items with the rollup value.
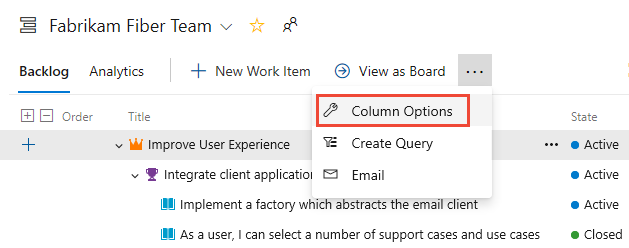
Select Column options, or select the
 actions icon and then select Column options.
Tip
The Column options you select apply to the chosen backlog level and will persist across your sessions until you change them.
Add a rollup column
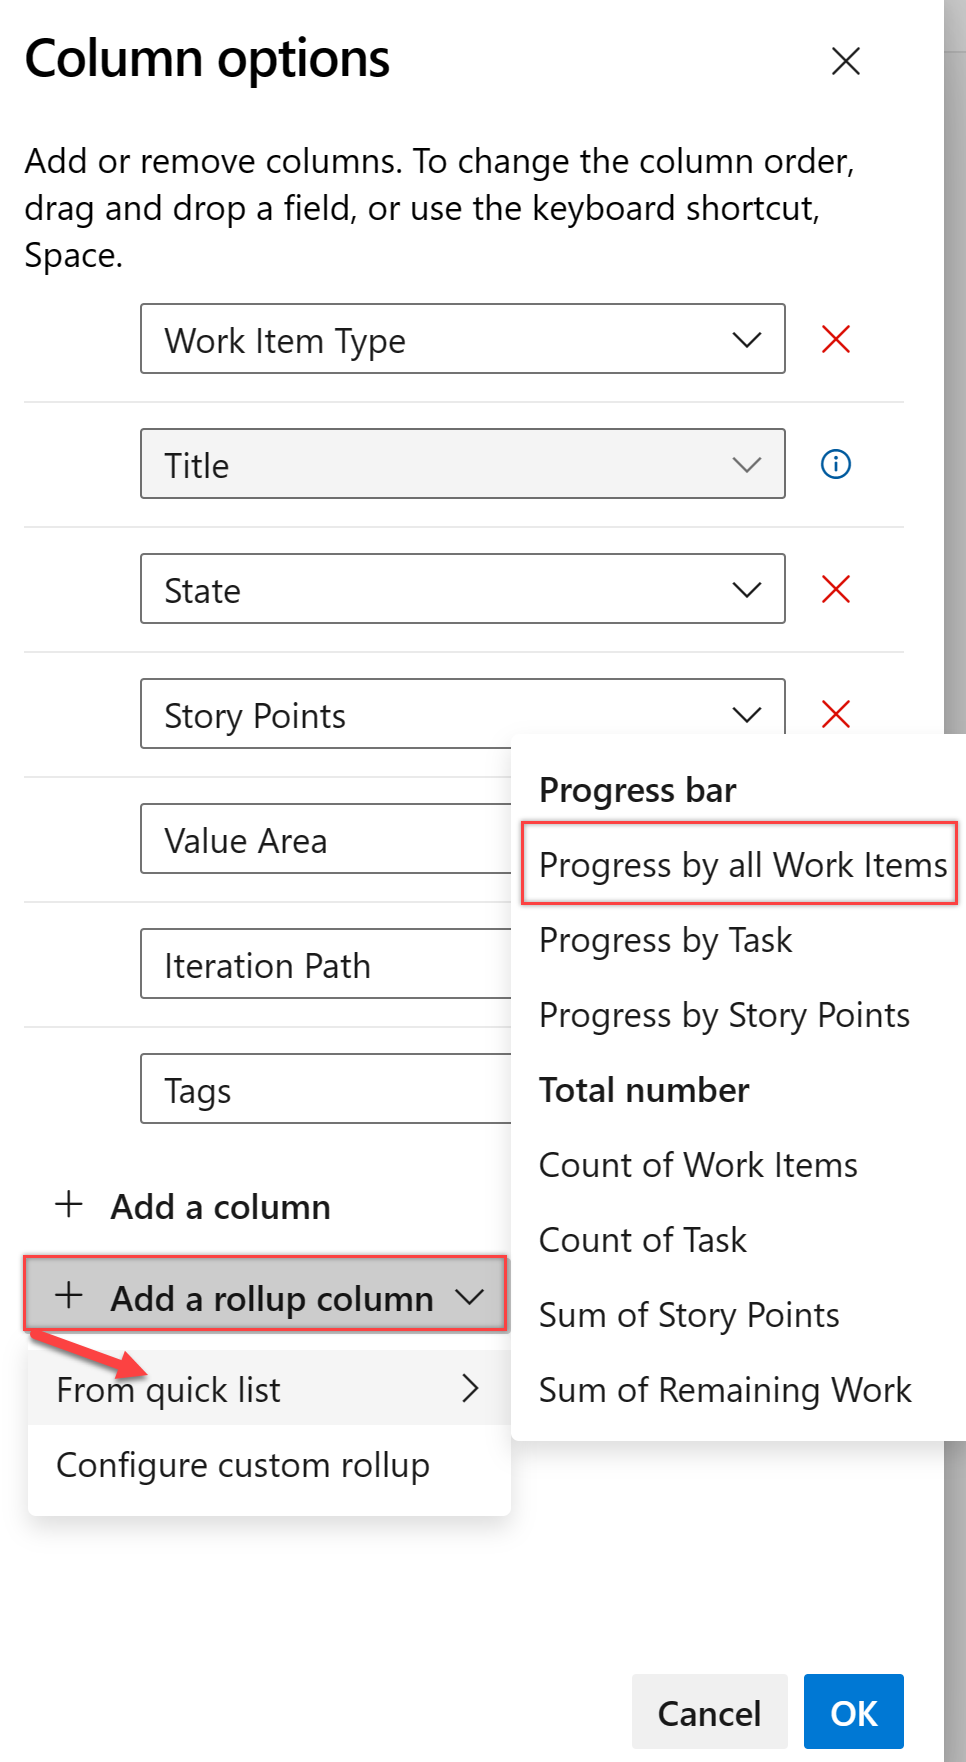
From your backlog, select Column Options > Add a rollup column > From quick list, and then choose from the menu provided.
Note
The menu options vary based on the process chosen for your project, the selected backlog level, and whether the Show parents view option is enabled.
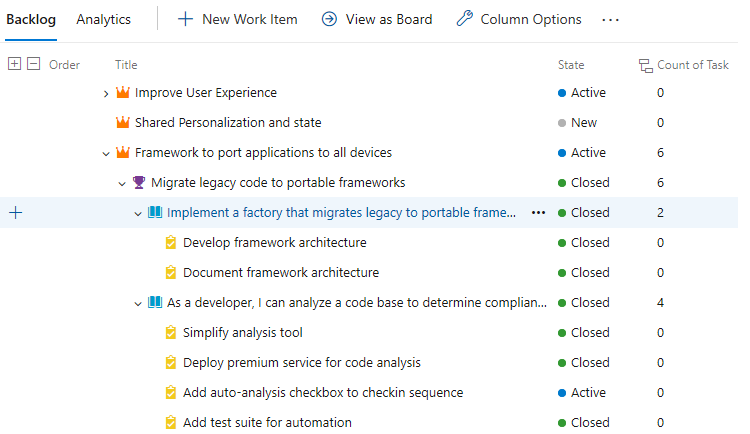
For example, the following image shows that the Count of Tasks for the parent user stories is 2 and 4, respectively. The Count of Tasks for the parent Feature and Epic is 6.
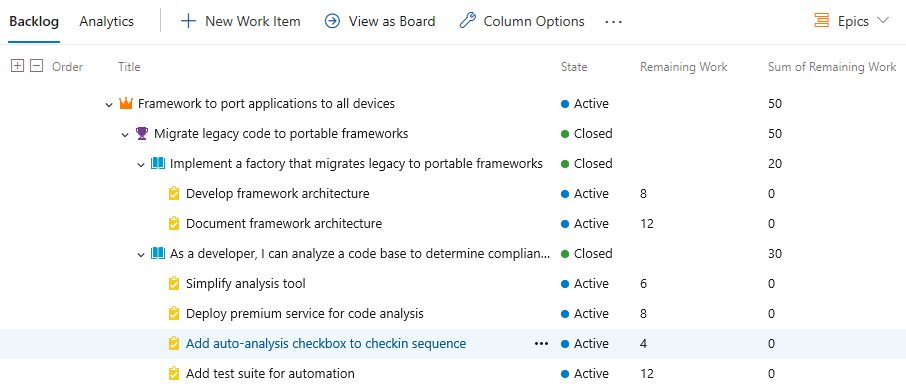
Remaining Work of Tasks shows the sum of Remaining Work of tasks linked to the parent item.
Tip
When a task is closed, the Remaining Work field automatically sets to zero.
Get rollup data
Use the following methods to get rollup data:
- Create flat list queries:
- Create a flat list query to include the fields you want to roll up.
- Export the query results to Excel for further analysis.
- Use extensions:
- Install extensions from the Azure DevOps Marketplace that support rollup functionality.
- Example: Roll-up Board extension.
- Use the Analytics Service:
- Use the Analytics Service to create custom reports and dashboards that include rollup data.
- Example: Create a Power BI report that displays rollup values for your work items.
Use product and portfolio backlogs
Got to your product or portfolio backlog.
Ensure that the backlog view includes the fields you want to roll up.
The rollup values display in the backlog view.
Use the sprint planning pane
Open the sprint planning pane.
Add the fields you want to roll up to the view.
The rollup values display for the parent work items.
Use a sprint backlog and taskboard
Go to your sprint backlog or taskboards.
Ensure that the view includes the fields you want to roll up.
The rollup values display for the parent work items.
Analytics, latency, and error states
Rollup data gets calculated from the Analytics service. When dealing with a large amount of data, you might experience some latency in displaying rollup. Hover over the ![]() rollup icon to determine the state of the data.
rollup icon to determine the state of the data.
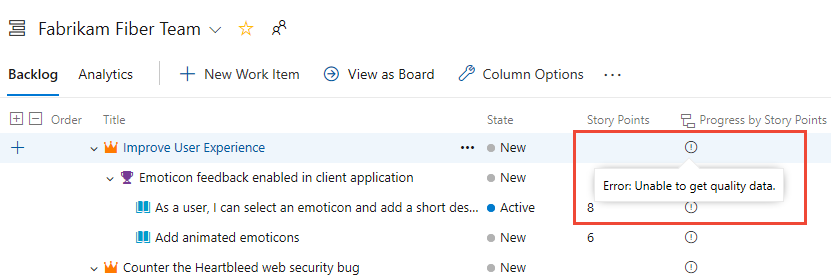
If an error occurs in retrieving rollup data, you see an ![]() info icon and empty rows. Errors indicate when the Analytics data was last updated, meaning the Analytics services are still processing changes that might affect rollup calculations. Once the Analytics data is up to date, the rollup columns refresh with the latest data.
info icon and empty rows. Errors indicate when the Analytics data was last updated, meaning the Analytics services are still processing changes that might affect rollup calculations. Once the Analytics data is up to date, the rollup columns refresh with the latest data.
For more information about the service, see What is Analytics?.
Change the column order or remove a rollup column
To change the order of the fields, drag and drop the field to your desired position within the set of selected fields. To remove a field, select the ![]() .
.
Rollup of custom work item types or custom fields
If you add a custom work item type or field to a backlog level, you can view rollup data based on those options. For example, the Customer Request type is added to the Requirements category, and the following image shows a Count of Customer Requests.

From the Column options dialog, select Add a rollup column > Configure custom rollup.
Choose the options you want from the Custom Rollup column dialog.
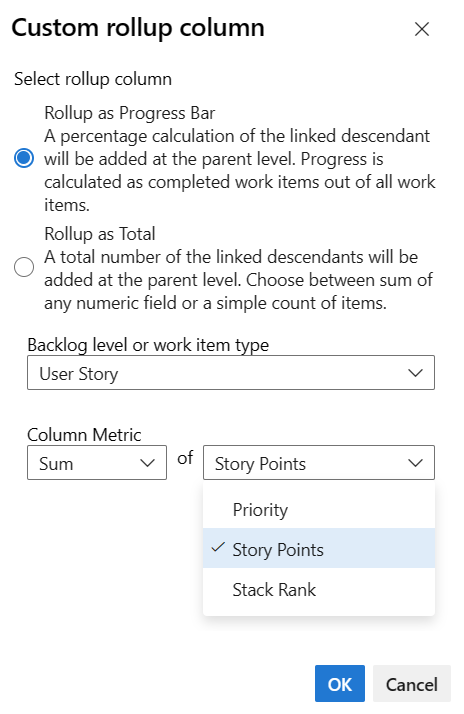
Select OK > OK to complete your operations.
Tip
After adding custom fields or custom work item types, refresh the backlog page to see your changes.
Use keyboard shortcuts to change the column order, column width, or sort options
Change the column order, column size, or sort options using the following actions:
- Change column order: Select the field and drag it to a new location.
- Resize a column: Select the column divider to the right of the field and drag it to adjust the size.
