Tutorial: Configure Azure DDoS Protection metric alerts through portal
In this tutorial, you learn how to:
- Configure metrics alerts through Azure Monitor.
DDoS Protection metrics alerts are an important step in alerting your team through Azure portal, email, SMS message, push, or voice notification when an attack is detected.
Prerequisites
- An Azure account with an active subscription. Create an account for free.
- DDoS Network Protection must be enabled on a virtual network or DDoS IP Protection must be enabled on a public IP address.
- DDoS Protection monitors public IP addresses assigned to resources within a virtual network. If you don't have any resources with public IP addresses in the virtual network, you must first create a resource with a public IP address.
Configure metric alerts through portal
You can select any of the available Azure DDoS Protection metrics to alert you when there’s an active mitigation during an attack, using the Azure Monitor alert configuration.
Sign in to the Azure portal.
In the search box at the top of the portal, enter Alerts. Select Alerts in the search results.
Select + Create on the navigation bar, then select Alert rule.
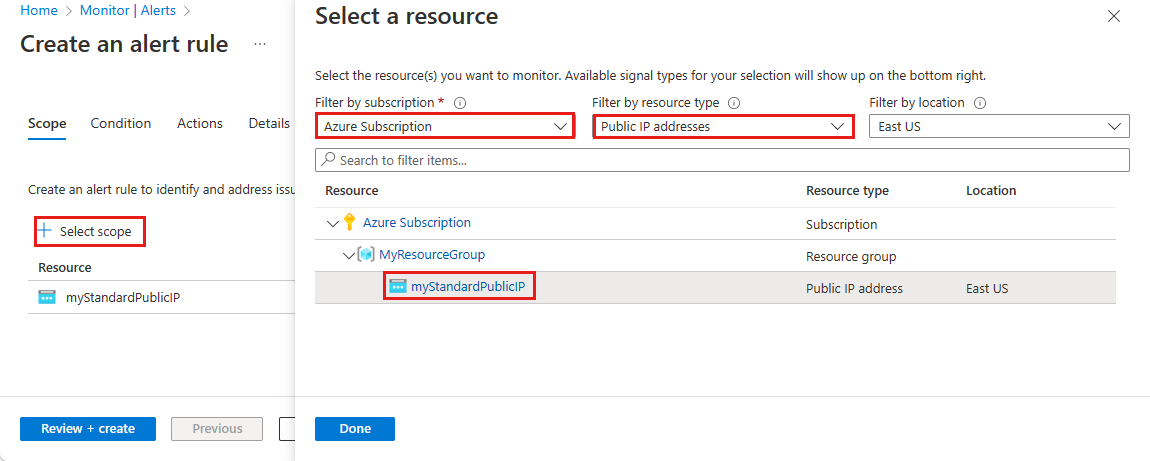
On the Create an alert rule page, select + Select scope, then select the following information in the Select a resource page.
Setting Value Filter by subscription Select the Subscription that contains the public IP address you want to log. Filter by resource type Select Public IP Addresses. Resource Select the specific Public IP address you want to log metrics for. Select Done, then select Next: Condition.
On the Condition page, select + Add Condition, then in the Search by signal name search box, search, and select Under DDoS attack or not.
In the Create an alert rule page, select the following information.
Setting Value Threshold Leave as the default Static. Aggregation type Leave as default Maximum. Operator Select Greater than or equal to. Unit Leave as default Count. Threshold value Enter 1. For the Under DDoS attack or not metric, 0 means you're not under attack while 1 means you are under attack. Check every Choose how often the alert rule will check if the condition is met. Leave as default 1 minute. Lookback period This is the lookback period, or the time period to look back at each time the data is checked. For example, every 1 minute you’ll be looking at the past 5 minutes. Leave as default 5 minutes. Select Next: Actions then select + Create action group.
Create action group
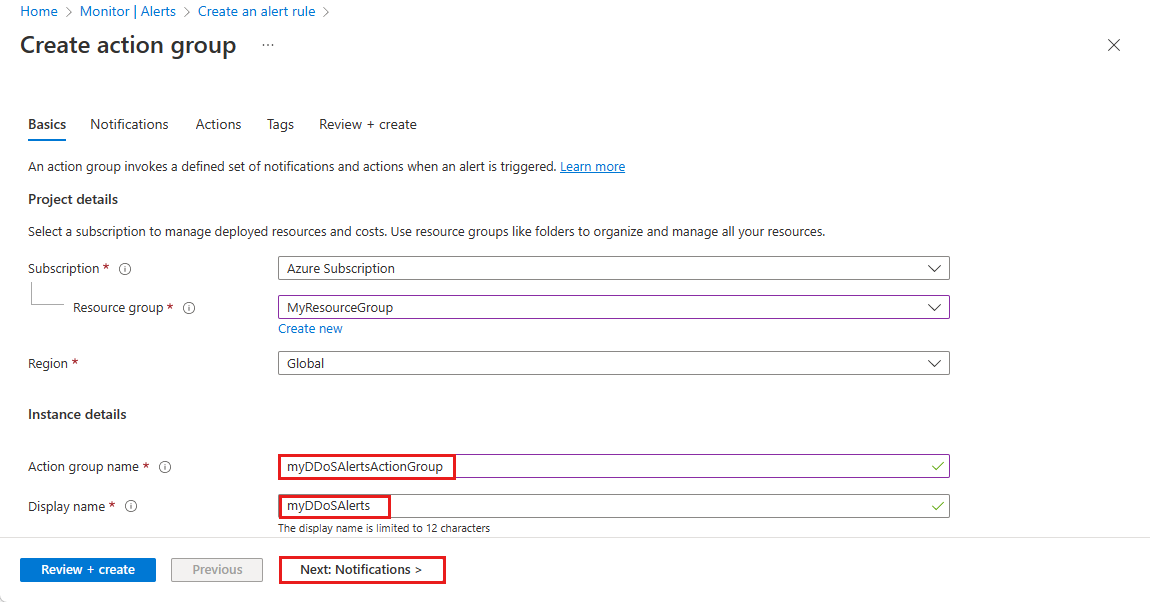
In the Create action group page, enter the following information, then select Next: Notifications.
Setting Value Subscription Select your Azure subscription that contains the public IP address you want to log. Resource Group Select your Resource group. Region Choose these locations for the broadest set of Azure products and long-term capacity growth. Action Group Provide an action group name that is unique within the resource group. For this example, enter myDDoSAlertsActionGroup. Display name This display name will be shown as the action group name in email and SMS notifications. For this example, enter myDDoSAlerts. On the Notifications tab, under Notification type, select the notification type you wish to use. For this example, we select Email/SMS message/Push/Voice. In the Name tab, enter myUnderAttackEmailAlert.
On the Email/SMS message/Push/Voice page, select the Email check box, then enter the required email. Select OK.
Select Review + create and then select Create.
Note
Review the Action groups documentation for more information on creating action groups.
Continue configuring alerts through portal
Select Next: Details.
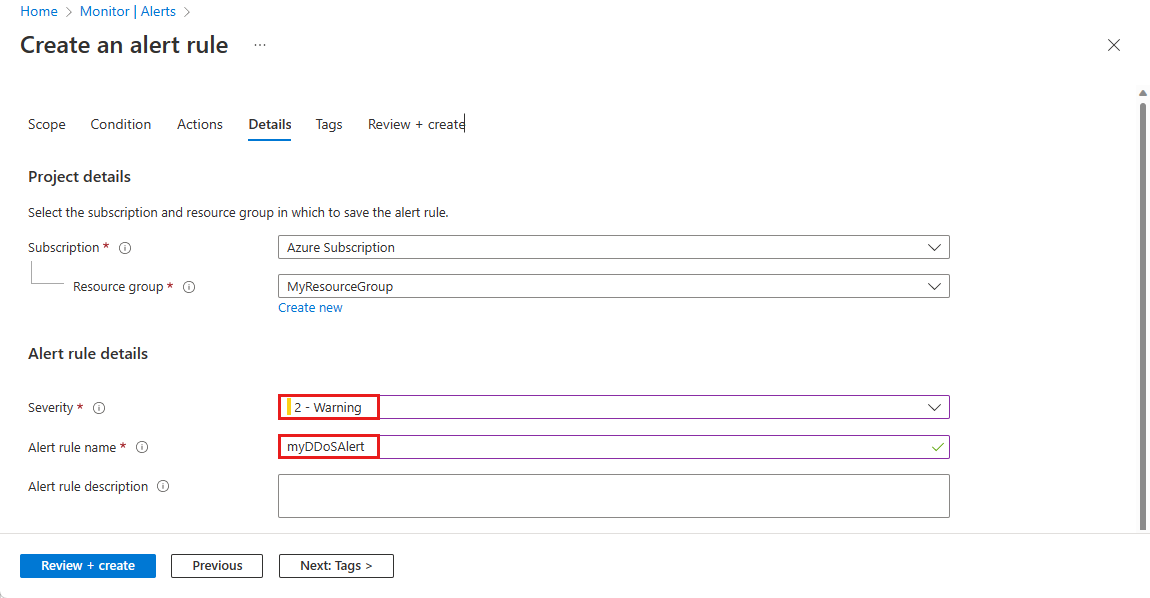
On the Details tab, under Alert rule details, enter the following information.
Setting Value Severity Select 2 - Warning. Alert rule name Enter myDDoSAlert. Select Review + create and then select Create after validation passes.
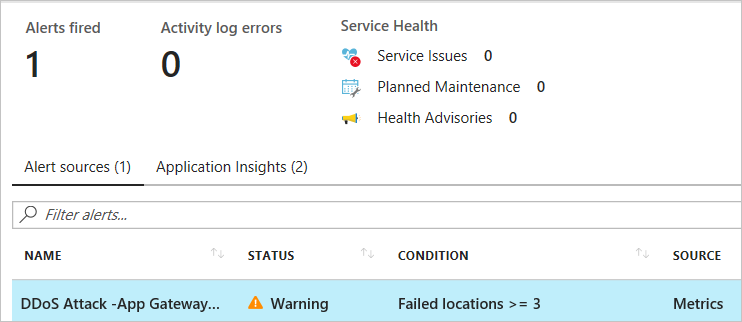
Within a few minutes of attack detection, you should receive an email from Azure Monitor metrics that looks similar to the following picture:
You can also learn more about configuring webhooks and logic apps for creating alerts.
Clean up resources
You can keep your resources for the next tutorial. If no longer needed, delete the alerts.
In the search box at the top of the portal, enter Alerts. Select Alerts in the search results.
Select Alert rules.
In the Alert rules page, select your subscription.
Select the alerts created in this tutorial, then select Delete.
Next steps
In this tutorial you learned how to configure metric alerts through Azure portal.
To configure diagnostic logging, continue to the next tutorial.


