Configure customer-managed keys for DBFS using the Azure portal
Note
This feature is available only in the Premium plan.
You can use the Azure portal to configure your own encryption key to encrypt the workspace storage account. This article describes how to configure your own key from Azure Key Vault vaults. For instructions on using a key from Azure Key Vault Managed HSM, see Configure HSM customer-managed keys for DBFS using the Azure portal.
For more information about customer-managed keys for DBFS, see Customer-managed keys for DBFS root.
Create a key in Azure Key Vault
This section describes how to create a key in your Azure Key Vault. You must use a Key Vault that is in the same Microsoft Entra ID tenant as your workspace.
If you already have an existing Key Vault in the same region, you can skip the first step in this procedure. However, be aware that when you use the Azure portal to assign a customer-managed key for DBFS root encryption, the system enables the Soft Delete and Do Not Purge properties by default for your Key Vault. For more information about these properties, see Azure Key Vault soft-delete overview.
Create a Key Vault following the instructions in Quickstart: Set and retrieve a key from Azure Key Vault using the Azure portal.
The Azure Databricks workspace and the Key Vault must be in the same region and the same Microsoft Entra ID tenant, but they can be in different subscriptions.
Create a key in the Key Vault, continuing to follow the instructions in the Quickstart.
DBFS root storage supports RSA and RSA-HSM keys of sizes 2048, 3072 and 4096. For more information about keys, see About Key Vault keys.
Once your key is created, copy and paste the Key Identifier into a text editor. You will need it when you configure your key for Azure Databricks.
Encrypt the workspace storage account using your key
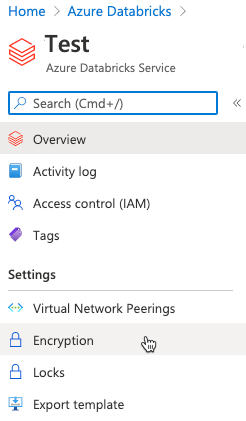
Go to your Azure Databricks service resource in the Azure portal.
In the left menu, under Settings, select Encryption.

Select Use your own key, enter your key’s Key Identifier, and select the Subscription that contains the key. If no key version is provided, the latest version of your key is used. For related information, see the Azure documentation article on key versions.
Click Save to save your key configuration.
Note
Only users with the Key Vault Contributor role or higher for the Key Vault can save.
When the encryption is enabled, the system enables Soft-Delete and Purge Protection on the Key Vault, creates a managed identity on the DBFS root, and adds an access policy for this identity in the Key Vault.
Regenerate (rotate) keys
When you regenerate a key, you must return to the Encryption page in your Azure Databricks service resource, update the Key Identifier field with your new key identifier, and click Save. This applies to new versions of the same key as well as new keys.
Important
If you delete the key that is used for encryption, the data in the DBFS root cannot be accessed. You can use the Azure Key Vault APIs to recover deleted keys.