Manage public access to your Azure Data Explorer cluster
This article describes how to allow, limit, or prevent public access to your Azure Data Explorer cluster.
Manage public access
To allow, limit, or prevent public access to your cluster, follow these steps:
In the Azure portal, go to your cluster.
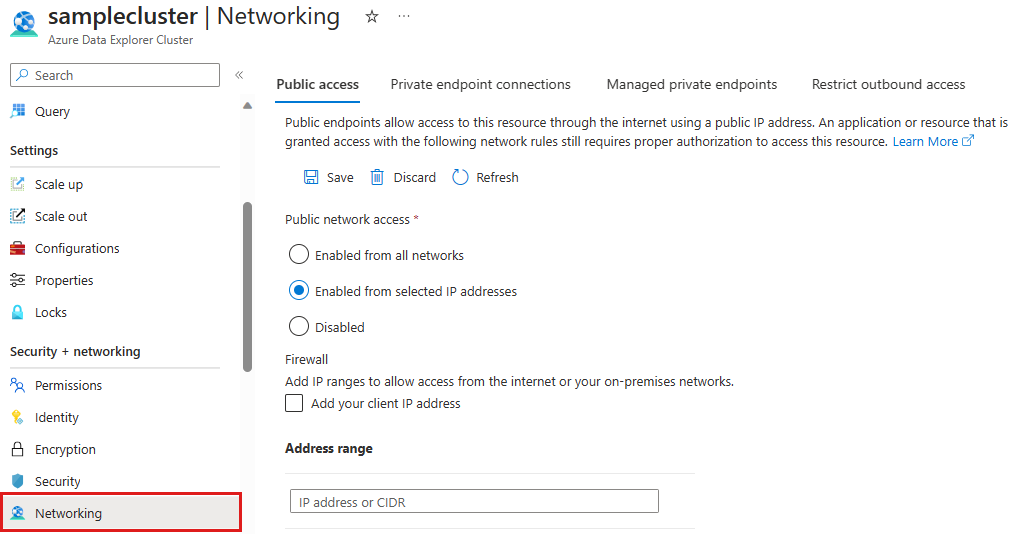
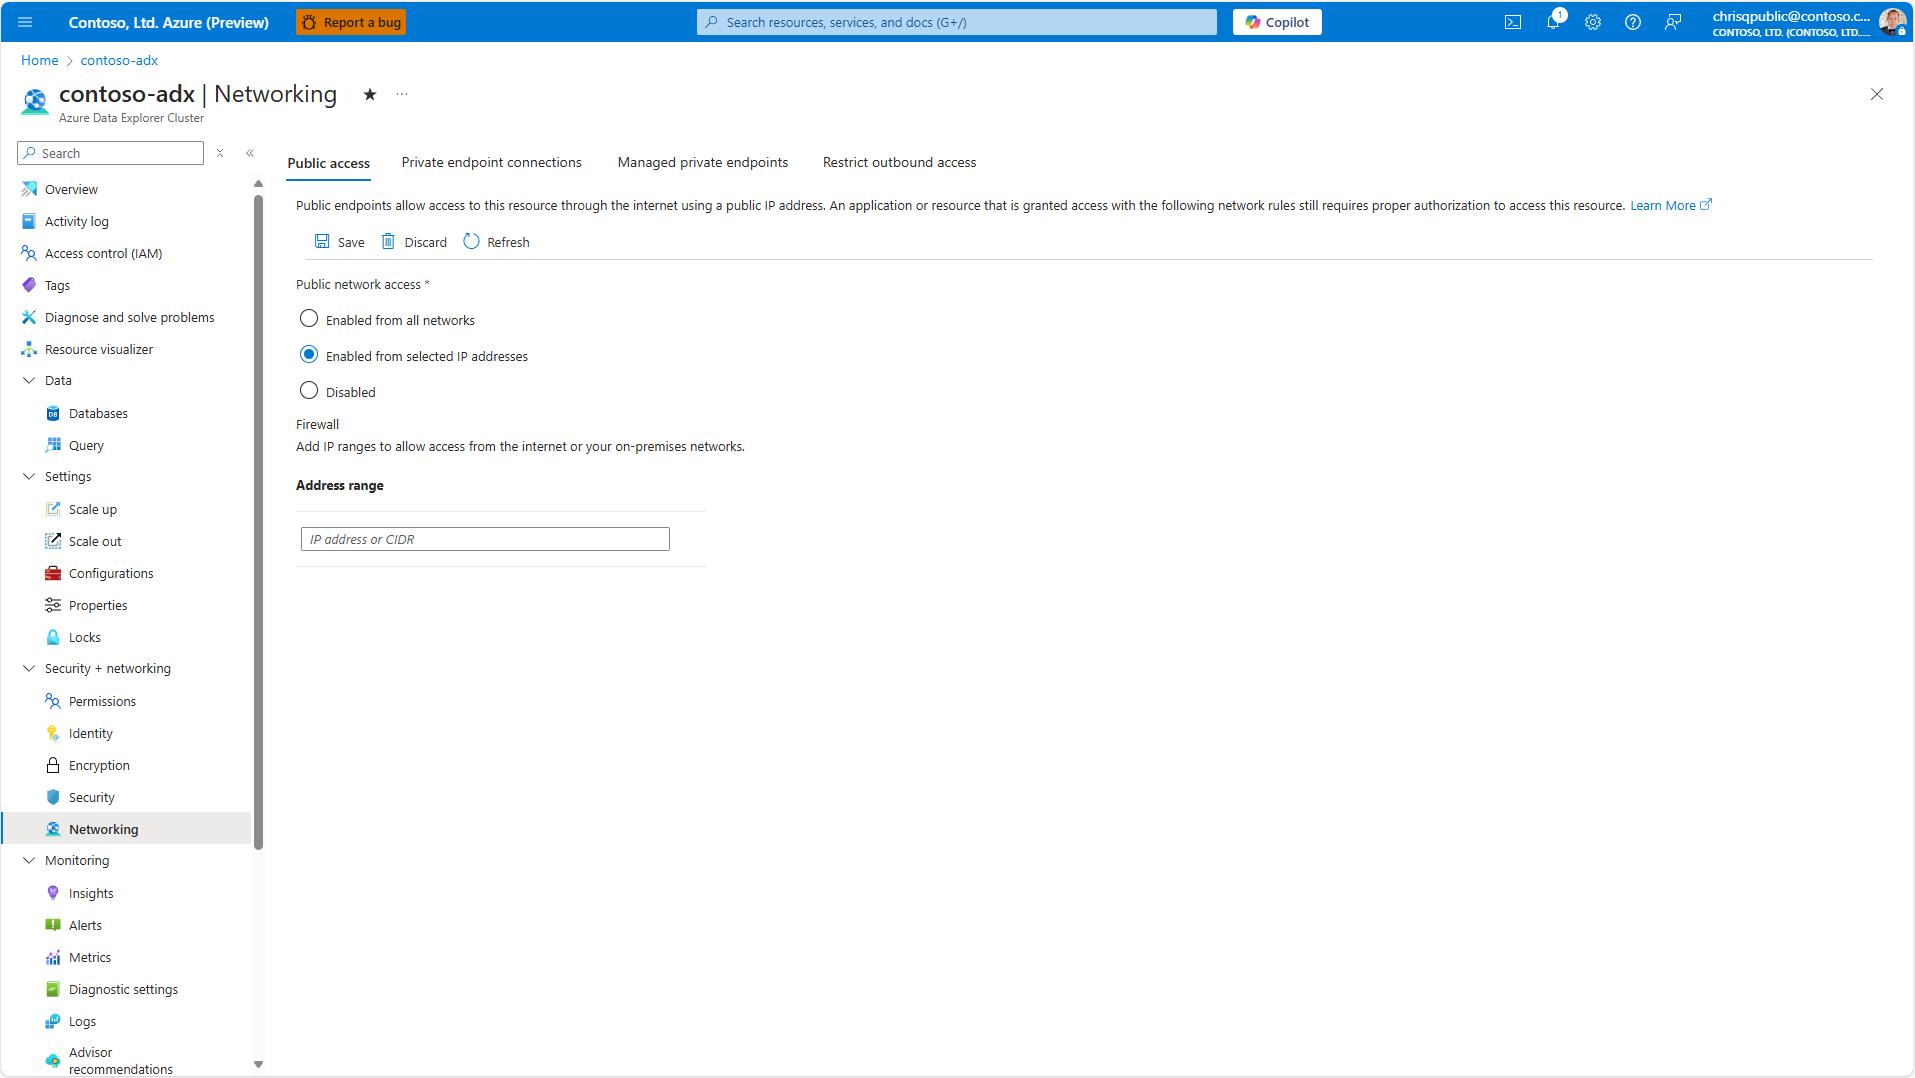
From the left-hand menu, under Security + Networking, select Networking. If you select the Enabled from selected IP addresses option, you must specify the IP address or CIDR using the IPv4 address format.
Within the Public network access area, select one of the following three options:
Enabled from all networks: This option allows access from public networks.
Enabled from selected IP addresses: This option allows you to define a firewall allowlist of IP addresses, Classless Inter-Domain Routing (CIDR) notation, or service tags that can connect to the public endpoint of your cluster. In CIDR notation, the IP address is followed by a slash and a number that represents the subnet mask. For more information, see Specify selected IP addresses.
Disabled: This option prevents access to the cluster from public networks and instead requires connection through a private endpoint.
Select Save.
Specify selected IP addresses
The Enabled from selected IP addresses option provides flexibility in managing network access to your cluster by offering multiple ways to define the IP addresses that can connect. You can specify individual IP addresses, use CIDR notation to define a range of IP addresses, or utilize service tags, which represent a group of IP address prefixes from specific Azure services. The following examples show how each can be specified.
Examples
The following examples show how to specify IP addresses, CIDR notations, and service tags.
Individual IP addresses
The following example specifies a single IP address in the format xxx.xxx.xxx.xxx.
192.168.1.10
CIDR notation
The following example specifies a range of IP addresses from 192.168.1.0 to 192.168.1.255 using CIDR notation. The /24 indicates that the first 24 bits, or three octets, represent the network part of the address, while the last eight bits are used for the host addresses within the network from 0 to 255.
192.168.1.0/24
Service tags
The following example uses a service tag to allow access to the Azure Storage IP address range from the Azure Data Center in the West US region.
Storage.WestUS
For a full list of service tags, see Available service tags.
Configure selected IP addresses
You can configure the selected IP addresses either through the Azure portal or by modifying the ARM template. Choose the method that best aligns with your workflow, requirements, and network access management needs.
Caution
To configure service tags use the ARM template.
Go to your cluster in the Azure portal.
Under Security + networking > Networking > Public access, select Enabled from selected IP addresses.
Configure the IP addresses or CIDR ranges that you want to allow to connect to the cluster.
Select Save to submit the configuration.


