Set up continuous deployment
APPLIES TO: SDK v4
This article describes how to configure continuous deployment. You can enable continuous deployment to automatically deploy code changes from your source repository to Azure.
This article covers setting up continuous deployment for GitHub. For information on setting up continuous deployment with other source control systems, see continuous deployment to Azure App Service.
Note
The Bot Framework JavaScript, C#, and Python SDKs will continue to be supported, however, the Java SDK is being retired with final long-term support ending in November 2023.
Existing bots built with the Java SDK will continue to function.
For new bot building, consider using Microsoft Copilot Studio and read about choosing the right copilot solution.
For more information, see The future of bot building.
Prerequisites
- If you don't have an Azure subscription, create a free account before you begin.
- Before setting up continuous deployment, Deploy your bot to Azure at least once.
- A GitHub account and a repository to use for your bot.
Prepare your GitHub repository
Add your bot project to your GitHub repository.
Important
To enable automatic builds from the build provider, your repository root must contain specific files for your project.
| Runtime | Root directory files |
|---|---|
| ASP.NET Core | .sln or .csproj |
| Node.js | server.js, app.js, or package.json with a start script |
| Java | pom.xml |
| Python | app.py |
Set up continuous deployment with GitHub
- Go to the Azure portal.
- Open the App Service blade for your bot.
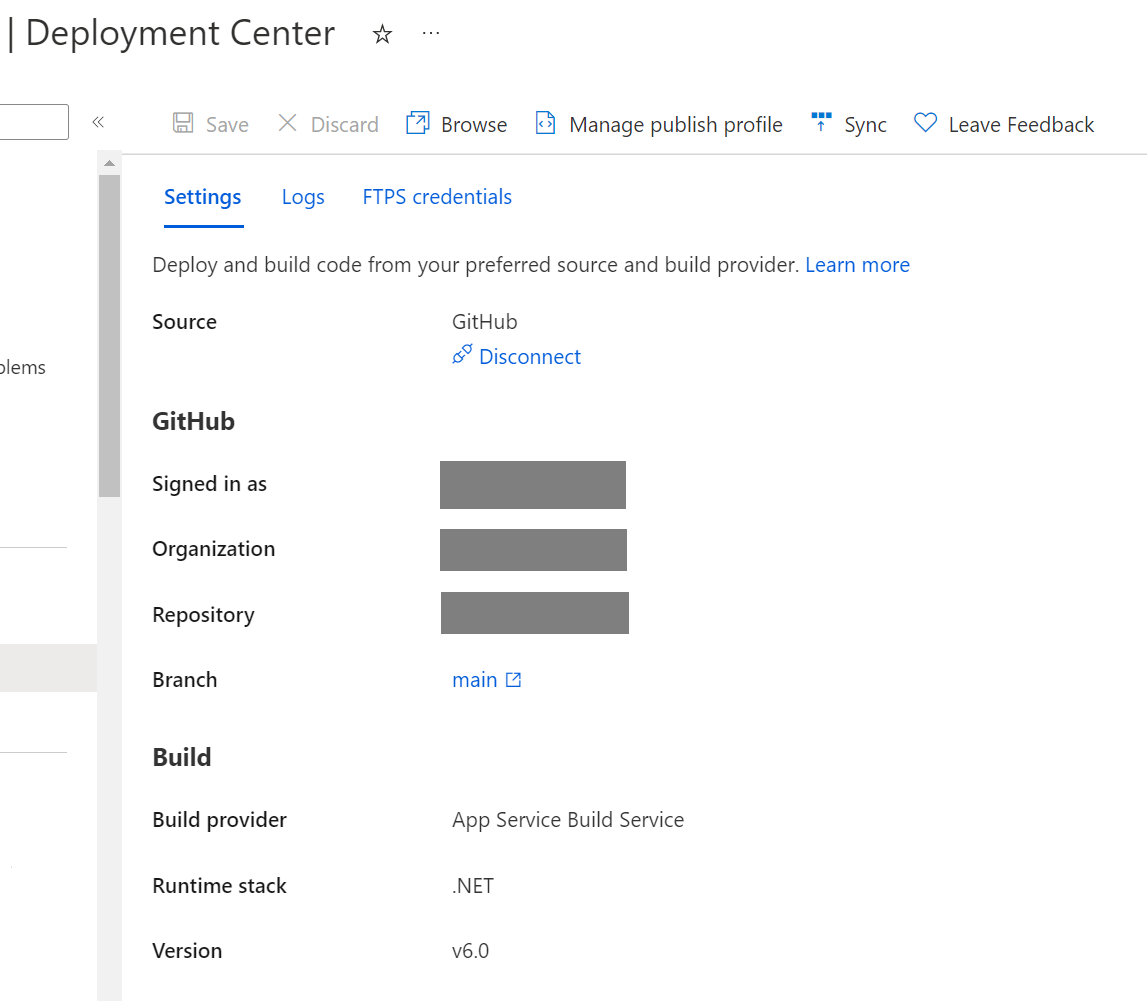
- Under Deployment, select Deployment Center to open the Deployment Center blade.
- Select the Settings tab.
For Source, select GitHub.
Change the build provider:
- Select Change provider.
- Select App Service Build Service, then OK.
If you haven't connected to GitHub from Azure before, select Authorize to authorize Azure App Service to access your GitHub account.
Check that the Signed in as field shows your correct GitHub account.
To sign into and authorize a different account, select Change account.
For Organization, Repository, and Branch, select the GitHub organization, repository, and branch that contains your bot project.
Select Save.
At this point, continuous deployment with GitHub is set up. New commits in the selected repository and branch now deploy continuously into your App Service app. You can track the commits and deployments on the Logs tab.

Disable continuous deployment
While your bot is configured for continuous deployment, you may not use the online code editor to make changes to your bot. If you want to use the online code editor, you can temporarily disable continuous deployment.
To disable continuous deployment:
- Go to the Azure portal.
- Open the App Service blade for your bot.
- Under Deployment, select Deployment Center to open the Deployment Center blade.
- Select the Settings tab.
- Select Disconnect to disable continuous deployment.
To re-enable continuous deployment, repeat the steps from Set up continuous deployment with GitHub.