Authorize requests to Azure Web PubSub resources with Managed identities for Azure resources
Azure Web PubSub Service supports Microsoft Entra ID for authorizing requests from Managed identities for Azure resources.
This article explains how to set up your resource and code to authorize requests to the resource using a managed identity.
Configure managed identities
The first step is to configure managed identities on your app or virtual machine.
- Configure managed identities for App Service and Azure Functions
- Configure managed identities on Azure virtual machines (VMs)
- Configure managed identities for Azure resources on a virtual machine scale set
Add a role assignment in the Azure portal
This section shows how to assign a Web PubSub Service Owner role to a service principal or managed identity for a Web PubSub resource.
For detailed steps, see Assign Azure roles using the Azure portal.
Note
A role can be assigned to any scope, including management group, subscription, resource group, or single resource. To learn more about scope, see Understand scope for Azure RBAC.
In the Azure portal, go to your Web PubSub resource.
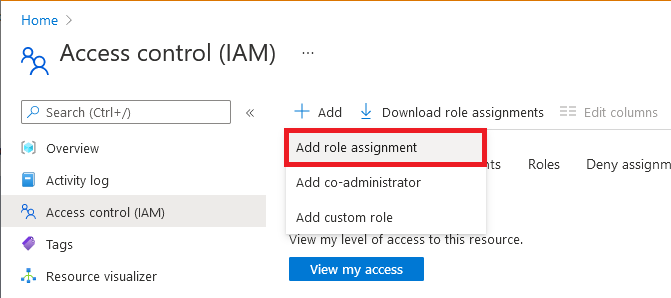
Select Access control (IAM) in the sidebar.
Select Add > Add role assignment.
On the Role tab, select Web PubSub Service Owner or other Web PubSub built-in roles depends on your scenario.
Role Description Use case Web PubSub Service Owner Full access to data-plane APIs, including read/write REST APIs and Auth APIs. Most commonly used for building a upstream server that handles negotiation requests and client events. Web PubSub Service Reader Readonly access to data-plane APIs. Use it when write a monitoring tool that calls readonly REST APIs. Select Next.
For Microsoft Entra application.
- In the
Assign accessto row, select User, group, or service principal. - In the
Membersrow, clickselect members, then choose the identity in the pop-up window.
- In the
For managed identity for Azure resources.
- In the
Assign accessto row, select Managed identity. - In the
Membersrow, clickselect members, then choose the application in the pop-up window.
- In the
Select Next.
Review your assignment, then click Review + assign to confirm the role assignment.
Important
Newly added role assignments might take up to 30 minutes to propagate.
To learn more about how to assign and manage Azure roles, see these articles:
- Assign Azure roles using the Azure portal
- Assign Azure roles using the REST API
- Assign Azure roles using Azure PowerShell
- Assign Azure roles using the Azure CLI
- Assign Azure roles using Azure Resource Manager templates
Code samples with Microsoft Entra authorization
Check out our samples that show how to use Microsoft Entra authorization in programming languages we officially support.