Artifacts in Azure Pipelines
TFS 2017 | TFS 2015
Note
We recommend upgrading from build artifacts (PublishBuildArtifacts@1 and DownloadBuildArtifacts@0) to pipeline artifacts (PublishPipelineArtifact@1 and DownloadPipelineArtifact@2) for faster performance.
Azure Artifacts is a service that enables teams to use feeds and upstream sources to manage their dependencies. You can use Azure Pipelines to publish and consume different types of artifacts as part of your CI/CD workflow.
How do I publish artifacts?
Artifacts can be published at any stage of your pipeline. You can use YAML or the classic Azure DevOps editor to publish your packages.
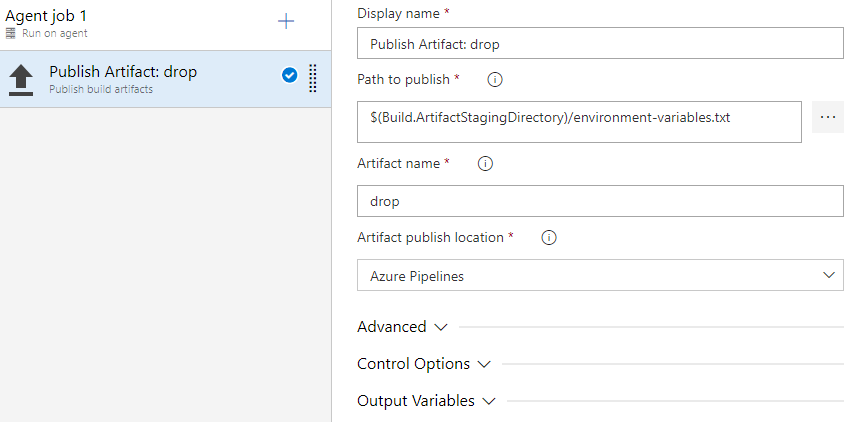
Publish a text file
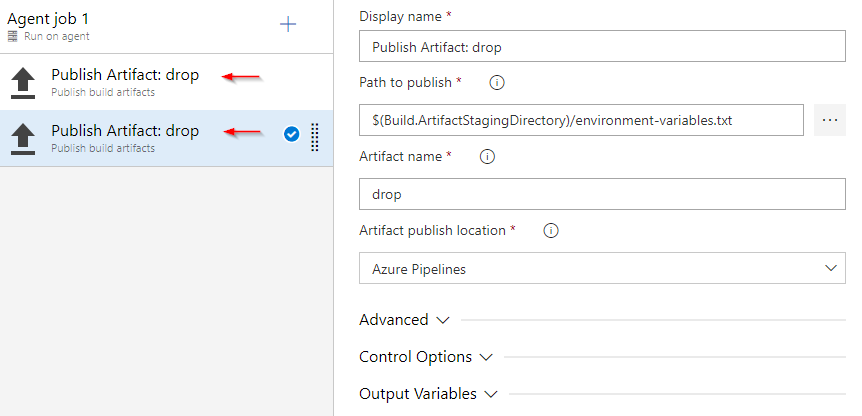
Publish two sets of artifacts
Example: Assemble C++ artifacts into one location and publish as an artifact
How do I consume artifacts?
You can consume your artifacts in different ways: you can use it in your release pipeline, pass it between your pipeline jobs, download it directly from your pipeline and even download it from feeds and upstream sources.
Consume artifacts in release pipelines
You can download artifacts produced by either a build pipeline (created in a classic editor) or a YAML pipeline (created through a YAML file) in a release pipeline and deploy them to the target of your choice.
Consume an artifact in the next job of your pipeline
You can consume an artifact produced by one job in a subsequent job of the pipeline, even when that job is in a different stage (YAML pipelines). This can be useful to test your artifact.
Download to debug
You can download an artifact directly from a pipeline for use in debugging.
Note
In case you are using a deployment task, you can then reference your build artifacts by using $(Agent.BuildDirectory) variable. See Agent variables for more information on how to use predefined variables.
Tips
PublishBuildArtifacts: using the publishLocation argument, you can store you artifact in Azure Pipelines (Container), or copy it to a file share (FilePath). The file share must be accessible from the agent running the pipeline.Use forward slashes in file path arguments so that they work for all agents. Backslashes don't work for macOS and Linux agents.
Build artifacts are stored on a Windows filesystem, which causes all UNIX permissions to be lost, including the execution bit. You might need to restore the correct UNIX permissions after downloading your artifacts from Azure Pipelines or TFS.
On Azure Pipelines and some versions of TFS, two different variables point to the staging directory:
Build.ArtifactStagingDirectoryandBuild.StagingDirectory. These are interchangeable.The directory referenced by
Build.ArtifactStagingDirectoryis cleaned up after each build.Deleting a build that published Artifacts to a file share will result in the deletion of all Artifacts in that UNC path.
You can get build artifacts using the Azure DevOps REST API.
Related tasks for publishing artifacts
Use these tasks to publish artifacts:
 Utility: Copy Files By copying files to
 $(Build.ArtifactStagingDirectory), you can publish multiple files of different types from different places specified by your matching patterns. Utility: Delete Files You can prune unnecessary files that you copied to the staging directory.
 Utility: Publish Build Artifacts
Explore, download, and deploy your artifacts
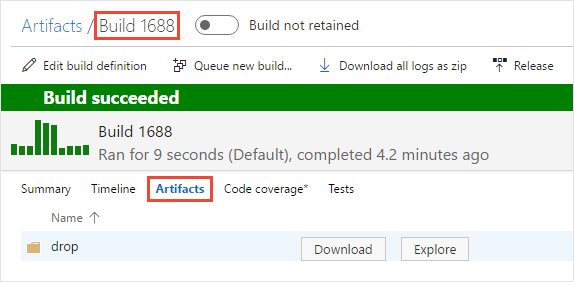
When the build is done, if you watched it run, select the name of the completed build and then select the Artifacts tab to see your artifact.

From here, you can explore or download the artifacts.
You can also use Azure Pipelines to deploy your app by using the artifacts that you've published. See Artifacts in Azure Pipelines releases.
Publish from TFS to a UNC file share
If you're using a private Windows agent, you can set the artifact publish location option (TFS 2018 RTM and older: artifact type) to publish your files to a UNC file share.
Note
Use a Windows build agent. This option doesn't work for macOS and Linux agents.
Choose file share to copy the artifact to a file share. Common reasons to do this:
The size of your drop is large and consumes too much time and bandwidth to copy.
You need to run some custom scripts or other tools against the artifact.
If you use a file share, specify the UNC file path to the folder. You can control how the folder is created for each build by using variables. For example: \\my\share\$(Build.DefinitionName)\$(Build.BuildNumber).
Publish artifacts from TFS 2015 RTM
If you're using TFS 2015 RTM, the steps in the preceding examples are not available. Instead, you copy and publish your artifacts by using a single task: Build: Publish Build Artifacts.


 Utility: Download Build Artifacts