Teams App Test Tool for Visual Studio
Teams App Test Tool (Test Tool) makes debugging bot-based apps effortless. You can chat with your bot and see its messages and Adaptive Cards as they appear in Microsoft Teams. You don’t need a Microsoft 365 developer account, tunneling, or Teams app and bot registration to use Test Tool.
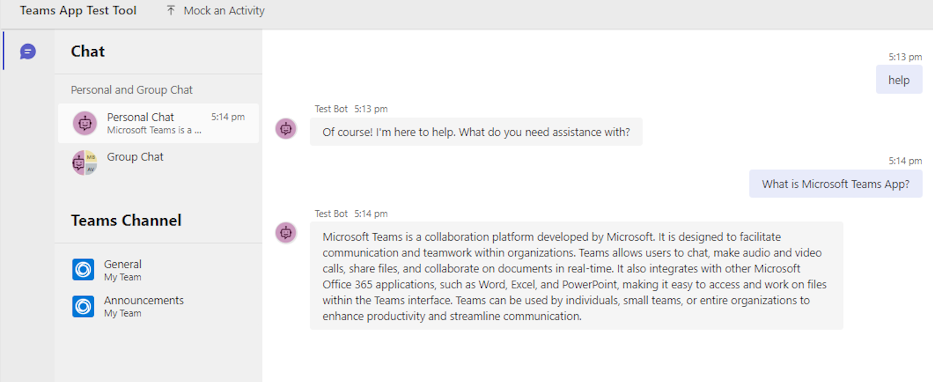
The following image shows a sample app displaying a response in Test Tool:
The following are the advantages of Test Tool:
Sandbox environment: The sandbox environment of Test Tool emulates the behavior, look, and user experience of Teams.
Tunneling: An external tunnel service isn't necessary as Test Tool runs on a local server that your bot can communicate with.
Reduce account dependencies: Microsoft 365 Developer tenant and the app uploading permissions aren't necessary to debug the bot.
Rapid inner-loop iterations: Optimizes the process of making changes to the app design and bot logic without having to redeploy the bot to the cloud.
Mock data and activities: Test Tool makes it easy to test complex scenarios such as, sending a welcome message when a new member joins the channel and using mock data and activity triggers.
Reliable: Test Tool is reliable as the bot's Adaptive Card utilizes the same rendering technology as in Teams.
Integration with existing Teams bot applications: Test Tool integrates effortlessly with existing Teams bot applications built with Bot Framework SDK.
Support for different scopes: Test Tool supports testing in personal, team, and group chat scopes.
Prerequisites
Ensure you install the following tools for building and deploying your bot in Test Tool:
| Install | For using... |
|---|---|
| Node.js | Back-end JavaScript runtime environment. |
| Visual Studio 2022 |
You can install the enterprise version in Visual Studio 2022, and install the ASP.NET and web development workloads. Use the version 17.9 or later. |
Test Tool experience in Visual Studio
Test Tool offers a faster debug experience for bot applications when compared to the Teams client. Test Tool provides support for all bot app features. In this scenario, we're using AI Chat Bot as an example. To debug your bot in Test Tool, follow these steps:
Open Visual Studio.
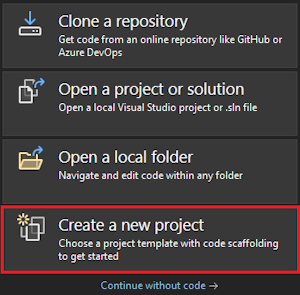
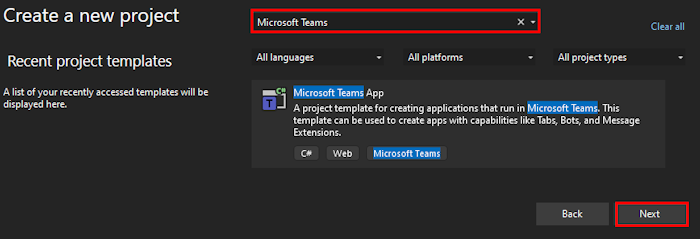
Select Create a new project.
In the search box, enter Microsoft Teams. From the search results, select Microsoft Teams App.
Select Next.
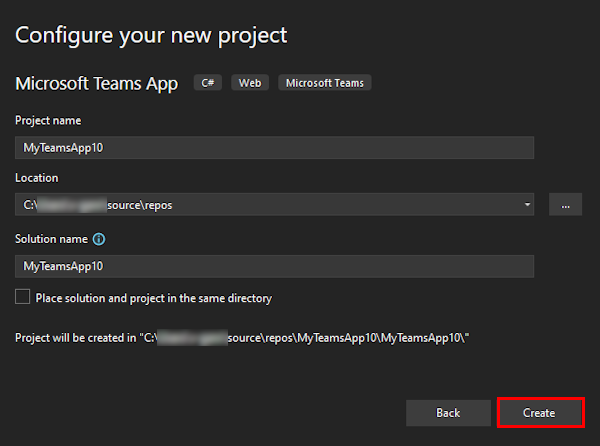
Enter Project name and select Create.
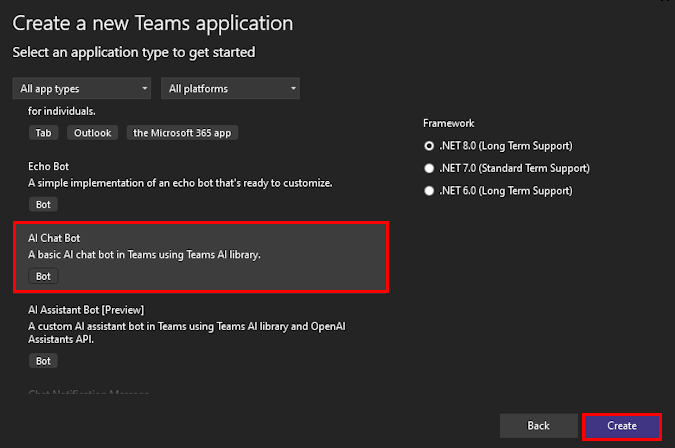
Select AI Chat Bot > Create.
Note
- OpenAI or Azure OpenAI are the prerequisite to debug AI Chat Bot app.
A GettingStarted window appears.
The
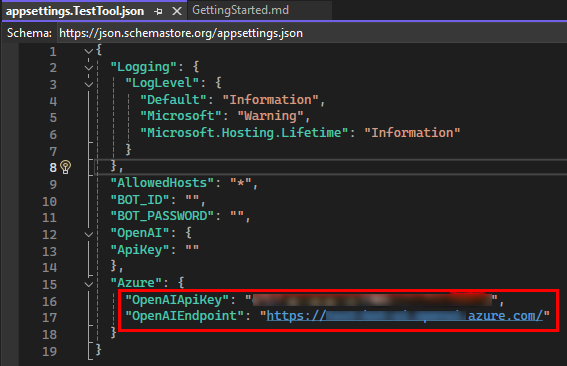
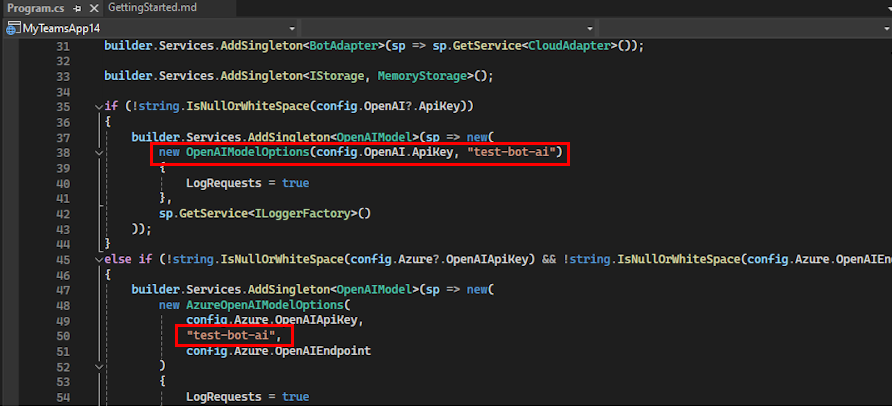
appsettings.TestTool.jsonfile helps to configure the Test Tool by updating few parameters. To updateappsettings.TestTool.jsonfile, follow either OpenAI or Azure OpenAI steps:Update OpenAI
ApiKeyin theappsettings.TestTool.jsonfile.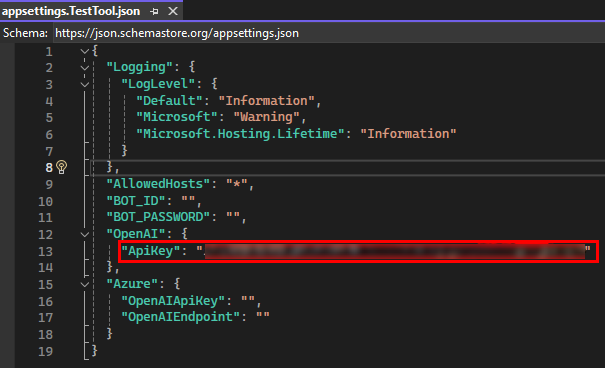
In the debug dropdown list, select Teams App Test Tool (browser).
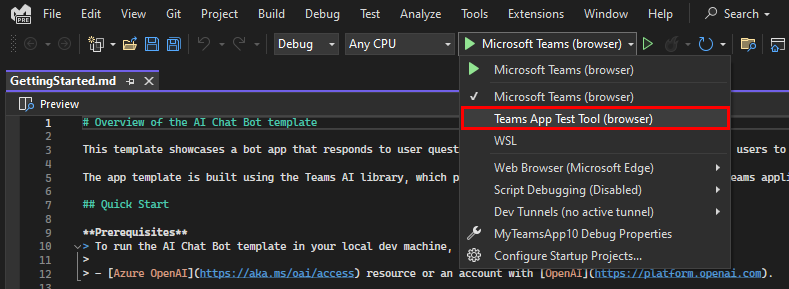
Test Tool opens the bot in a webpage.
Activity triggers
You can mock an activity in Test Tool using activity triggers. There are two types of activity triggers:
Predefined activity triggers
Test Tool provides predefined activity triggers to test the functionalities of your bot.
| Category | Activity | Handler |
|---|---|---|
| Trigger Installation Update Activity | Install bot Uninstall bot |
onInstallationUpdate onInstallationUpdateAdded onInstallationUpdate onInstallationUpdateRemove |
| Trigger Conversation Update Activity | Add user Add bot Add channel |
onMembersAddedonTeamsMembersAddedEvent onTeamsChannelRenamedEvent |
| Remove user Remove bot Remove channel Remove team |
onMembersRemoved onTeamsMembersRemovedEvent onMembersRemoved onTeamsMembersRemovedEvent onTeamsChannelDeletedEvent onTeamsTeamDeletedEvent |
|
| Rename channel Rename team |
onTeamsChannelRenamedEvent onTeamsTeamRenamedEvent |
Note
All types of activities aren't available in all scopes. For example, you can't add or remove a channel in a personal chat or a group chat.
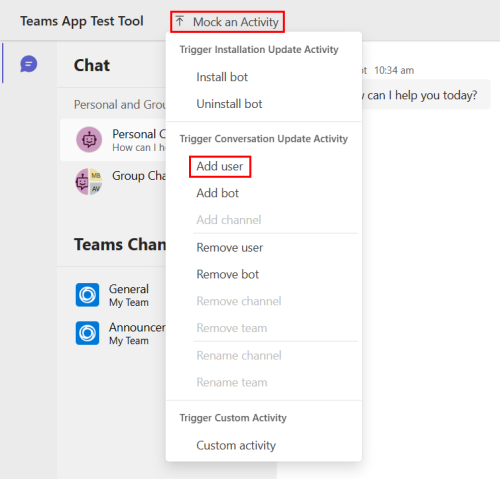
Predefined activity triggers are available in the Mock an Activity menu in Test Tool. In this scenario, we're using Add user activity trigger as an example. To mock an Add user activity, follow these steps:
In Visual Studio Code, go to Solution Explorer.
Select the Program.cs file.
In the Program.cs file, under
builder.Services.AddTransient<IBot>(sp =>add the following code:app.OnConversationUpdate("membersAdded", async (context, state, cancellationToken) => { await context.SendActivityAsync($"new member added", cancellationToken: cancellationToken); });The
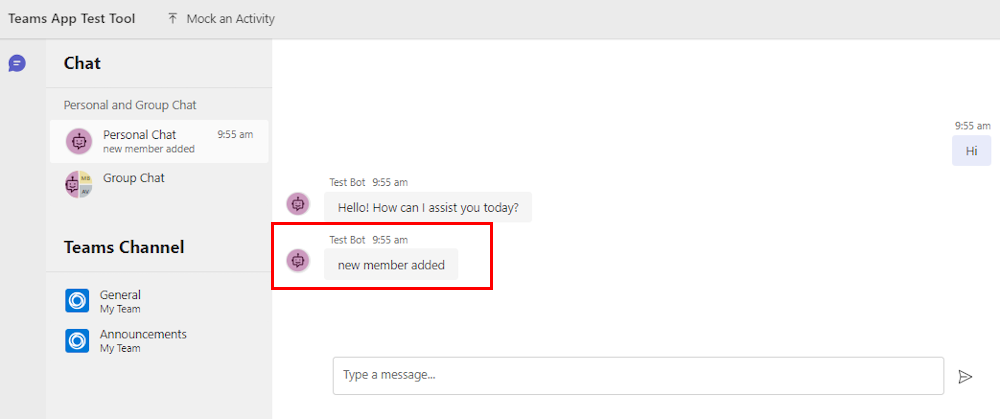
OnConversationUpdatehandler recognizes the members who join the conversation as described by the Add user activity.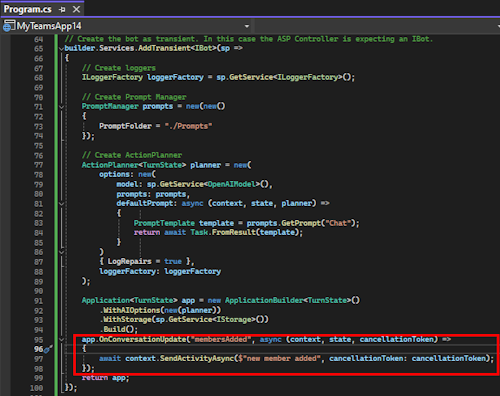
In the Test Tool, go to Mock an Activity and select Add user.
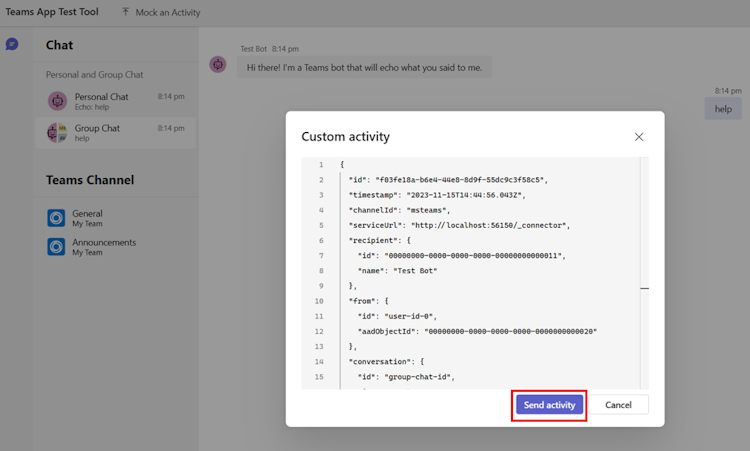
A pop-up dialog appears to preview the activity handler.
Select Send activity.
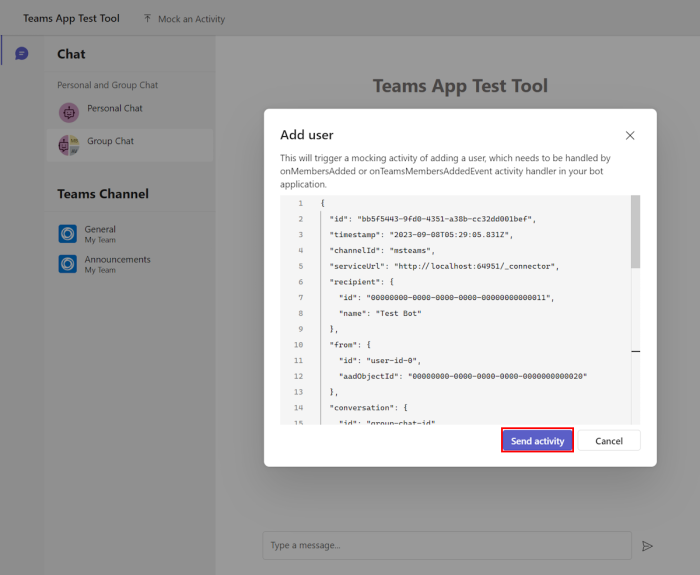
Bot sends a response.
Custom activity triggers
You can use Custom activity to customize activity trigger reactionsAdded, to fit the requirements of your bot app. Test Tool automatically populates the required properties of the activity. You can also modify the activity type and add more properties such as, MembersAdded, membersremoved, and reactionsremoved.
In Visual Studio Code, go to Solution Explorer.
Select the Program.cs file.
In the Program.cs file, under
builder.Services.AddTransient<IBot>(sp =>add the following code:app.OnMessageReactionsAdded(async (context, state, cancellationToken) => { await context.SendActivityAsync($"reaction added.", cancellationToken: cancellationToken); });The
OnMessageReactionsAddedhandler identifies the reaction to append by using theReplyToIdproperty of the earlier conversation.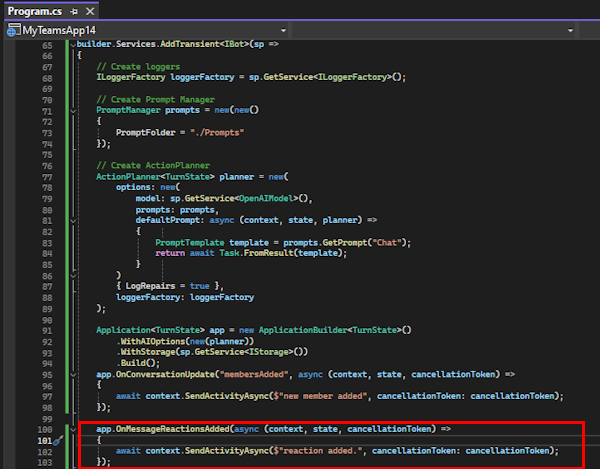
Go to the Test Tool webpage and select the latest response from Log Panel to copy
replyToId.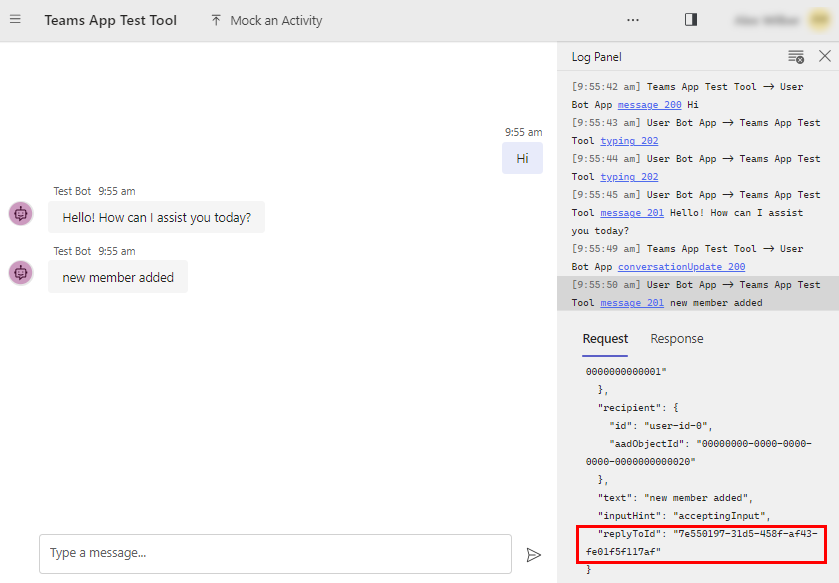
Select Mock an Activity > Custom activity.
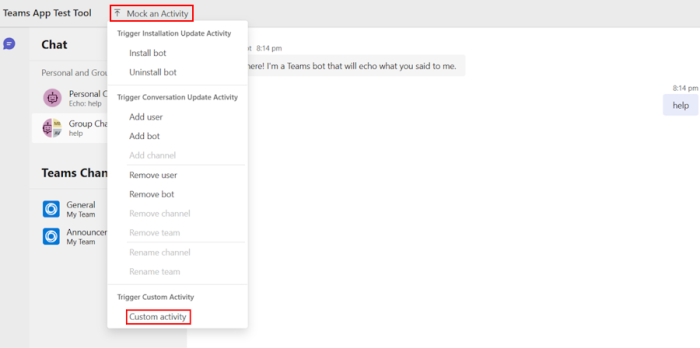
To customize the activity, add
messageReactionunder thetypeproperty.Replace with the latest
replyToId.{ "type": "messageReaction", "reactionsAdded": [ { "type": "like" } ], "replyToId": "d60fd1cb-3e8f-44ef-849c-404806ba1b47" }Select Send activity.
Bot sends an
onReactionsAddedhandler in response.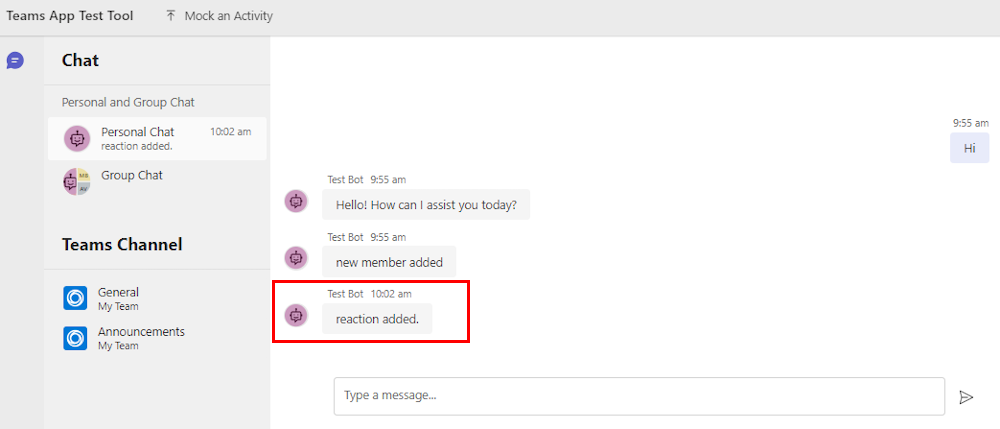
Limitations
Bot features enabled through app manifest aren't available, as Test Tool doesn't process it.
Test Tool doesn't support all types of cards except Adaptive Cards.
Test Tool doesn't support the following Adaptive Card features:
Test Tool doesn't support the following experiences:
- Mobile
- Meeting
See also
Platform Docs


