이 문서의 일부 Azure CLI 명령에서는 azure-cli-ml 또는 v1(Azure Machine Learning용 확장)을 사용합니다. v1 확장에 대한 지원은 2025년 9월 30일에 종료됩니다. 해당 날짜까지 v1 확장을 설치하고 사용할 수 있습니다.
2025년 9월 30일 이전에 ml 또는 v2 확장으로 전환하는 것이 좋습니다. v2 확장에 대한 자세한 내용은 Azure Machine Learning CLI 확장 및 Python SDK v2를 참조 하세요.
이 문서에서는 ONNX(Open Neural Network Exchange)를 사용하여 AutoML(Azure 자동화된 Machine Learning)에서 생성된 Computer Vision 모델을 예측하는 방법을 알아봅니다.
예측에 ONNX를 사용하려면 다음을 수행해야 합니다.
AutoML 학습 실행에서 ONNX 모델 파일을 다운로드합니다.
ONNX 모델의 입력 및 출력을 이해합니다.
입력 이미지에 필요한 형식이 되도록 데이터를 전처리합니다.
Python용 ONNX 런타임을 통해 추론을 수행합니다.
개체 감지 및 인스턴스 구분 작업에 대한 예측을 시각화합니다.
ONNX는 기계 학습 및 딥 러닝 모델을 위한 개방형 표준입니다. 인기 있는 AI 프레임워크에서 모델 가져오기 및 내보내기(상호 운용성)를 지원합니다. 자세한 내용은 ONNX GitHub 프로젝트를 살펴보세요.
ONNX 런타임은 플랫폼 간 추론을 지원하는 오픈 소스 프로젝트입니다. ONNX 런타임은 프로그래밍 언어(Python, C++, C#, C, Java 및 JavaScript 포함)에서 API를 제공합니다. 이러한 API를 사용하여 입력 이미지에 대한 추론을 수행할 수 있습니다. 모델을 ONNX 형식으로 내보낸 후에는 프로젝트에 필요한 프로그래밍 언어에서 이러한 API를 사용할 수 있습니다.
이 가이드에서는 ONNX 런타임용 Python API를 사용하여 인기 있는 비전 작업을 위한 이미지를 에측하는 방법을 알아봅니다. 이러한 ONNX 내보낸 모델을 언어 간에 사용할 수 있습니다.
onnxruntime 패키지를 설치합니다. 이 문서의 메서드는 버전 1.3.0~1.8.0에서 테스트되었습니다.
ONNX 모델 파일 다운로드
Azure Machine Learning 스튜디오 UI 또는 Azure Machine Learning Python SDK를 사용하여 AutoML 실행에서 ONNX 모델 파일을 다운로드할 수 있습니다. 실험 이름 및 부모 실행 ID를 가진 SDK를 통해 다운로드하는 것이 좋습니다.
Azure Machine Learning 스튜디오
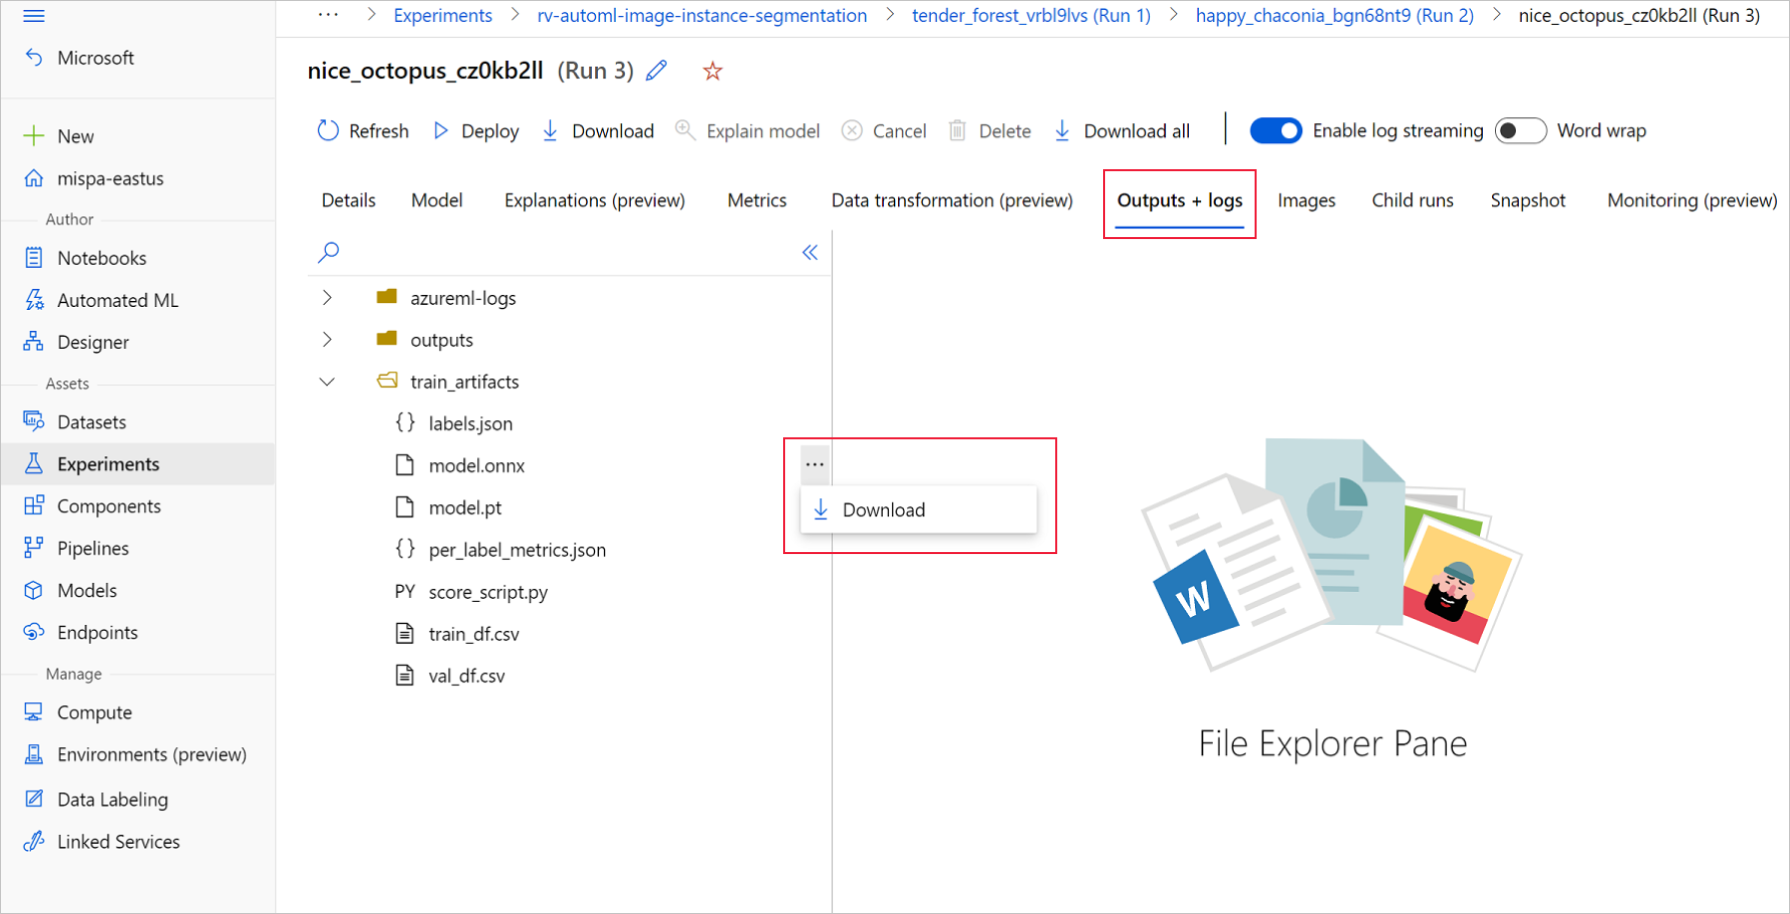
Azure Machine Learning 스튜디오에서 학습 Notebook에 생성된 실험에 대한 하이퍼링크를 사용하거나 자산 아래의 실험 탭을 사용하여 실험으로 이동합니다. 그런 다음, 최상의 자식 실행을 선택합니다.
최상의 자식 실행 내에서 출력+로그>train_artifacts로 이동합니다.
다운로드 단추를 사용하여 다음 파일을 수동으로 다운로드합니다.
labels.json: 학습 데이터 세트의 모든 클래스 또는 레이블을 포함하는 파일
model.onnx: ONNX 형식의 모델
다운로드한 모델 파일을 디렉터리에 저장합니다. 이 문서의 예제에서는 ./automl_models 디렉터리를 사용합니다.
Azure Machine Learning Python SDK
SDK를 사용하면 실험 이름 및 부모 실행 ID를 사용하여 가장 적합한 자식 실행(기본 메트릭 기준)을 선택할 수 있습니다. 그런 후, labels.json 및 model.onnx 파일을 다운로드할 수 있습니다.
다음 코드는 관련 기본 메트릭에 따라 최상의 자식 실행을 반환합니다.
from azureml.train.automl.run import AutoMLRun

# Select the best child run
run_id = '' # Specify the run ID
automl_image_run = AutoMLRun(experiment=experiment, run_id=run_id)
best_child_run = automl_image_run.get_best_child()
학습 데이터 세터의 모든 클래스 및 레이블을 포함하는 labels.json 파일을 다운로드합니다.
기본적으로 AutoML for Images는 분류를 위한 일괄 처리 채점을 지원합니다. 그러나 개체 감지 및 인스턴스 세분화 모델은 일괄 처리 유추를 지원하지 않습니다. 개체 감지 및 인스턴스 구분에 대한 일괄 처리 추론의 경우 다음 절차를 사용하여 필요한 일괄 처리 크기에 대한 ONNX 모델을 생성합니다. 특정 일괄 처리 크기에 대해 생성된 모델은 다른 일괄 처리 크기에 대해 작동하지 않습니다.
from azureml.core.script_run_config import ScriptRunConfig
from azureml.train.automl.run import AutoMLRun
from azureml.core.workspace import Workspace
from azureml.core import Experiment

# specify experiment name
experiment_name = ''
# specify workspace parameters
subscription_id = ''
resource_group = ''
workspace_name = ''
# load the workspace and compute target
ws = ''
compute_target = ''
experiment = Experiment(ws, name=experiment_name)

# specify the run id of the automl run
run_id = ''
automl_image_run = AutoMLRun(experiment=experiment, run_id=run_id)
best_child_run = automl_image_run.get_best_child()
다중 클래스 이미지 분류의 경우 최상의 자식 실행을 위해 생성된 ONNX 모델은 기본적으로 일괄 처리 채점을 지원합니다. 따라서 이 작업 유형에는 모델별 인수가 필요하지 않으며 레이블 및 ONNX 모델 파일 로드 섹션으로 건너뛸 수 있습니다.
다중 레이블 이미지 분류의 경우 최상의 자식 실행을 위해 생성된 ONNX 모델은 기본적으로 일괄 처리 채점을 지원합니다. 따라서 이 작업 유형에는 모델별 인수가 필요하지 않으며 레이블 및 ONNX 모델 파일 로드 섹션으로 건너뛸 수 있습니다.
arguments = ['--model_name', 'fasterrcnn_resnet34_fpn',  # enter the faster rcnn or retinanet model name
             '--batch_size', 8,  # enter the batch size of your choice
             '--height_onnx', 600,  # enter the height of input to ONNX model
             '--width_onnx', 800,  # enter the width of input to ONNX model
             '--experiment_name', experiment_name,
             '--subscription_id', subscription_id,
             '--resource_group', resource_group,
             '--workspace_name', workspace_name,
             '--run_id', run_id,
             '--task_type', 'image-object-detection',
             '--min_size', 600,  # minimum size of the image to be rescaled before feeding it to the backbone
             '--max_size', 1333,  # maximum size of the image to be rescaled before feeding it to the backbone
             '--box_score_thresh', 0.3,  # threshold to return proposals with a classification score > box_score_thresh
             '--box_nms_thresh', 0.5,  # NMS threshold for the prediction head
             '--box_detections_per_img', 100  # maximum number of detections per image, for all classes
             ]
arguments = ['--model_name', 'yolov5',  # enter the yolo model name
             '--batch_size', 8,  # enter the batch size of your choice
             '--height_onnx', 640,  # enter the height of input to ONNX model
             '--width_onnx', 640,  # enter the width of input to ONNX model
             '--experiment_name', experiment_name,
             '--subscription_id', subscription_id,
             '--resource_group', resource_group,
             '--workspace_name', workspace_name,
             '--run_id', run_id,
             '--task_type', 'image-object-detection',
             '--img_size', 640,  # image size for inference
             '--model_size', 'medium',  # size of the yolo model
             '--box_score_thresh', 0.1,  # threshold to return proposals with a classification score > box_score_thresh
             '--box_iou_thresh', 0.5  # IOU threshold used during inference in nms post processing
             ]
arguments = ['--model_name', 'maskrcnn_resnet50_fpn',  # enter the maskrcnn model name
             '--batch_size', 8,  # enter the batch size of your choice
             '--height_onnx', 600,  # enter the height of input to ONNX model
             '--width_onnx', 800,  # enter the width of input to ONNX model
             '--experiment_name', experiment_name,
             '--subscription_id', subscription_id,
             '--resource_group', resource_group,
             '--workspace_name', workspace_name,
             '--run_id', run_id,
             '--task_type', 'image-instance-segmentation',
             '--min_size', 600,  # minimum size of the image to be rescaled before feeding it to the backbone
             '--max_size', 1333,  # maximum size of the image to be rescaled before feeding it to the backbone
             '--box_score_thresh', 0.3,  # threshold to return proposals with a classification score > box_score_thresh
             '--box_nms_thresh', 0.5,  # NMS threshold for the prediction head
             '--box_detections_per_img', 100  # maximum number of detections per image, for all classes
             ]
현재 디렉터리에 ONNX_batch_model_generator_automl_for_images.py 파일을 다운로드하여 보관하고 스크립트를 제출합니다.
ScriptRunConfig를 사용하여 azureml-examples GitHub 리포지토리에서 사용할 수 있는 스크립트 ONNX_batch_model_generator_automl_for_images.py를 제출하여 특정 일괄 처리 크기의 ONNX 모델을 생성합니다. 다음 코드에서는 학습된 모델 환경을 사용하여 이 스크립트를 제출하여 ONNX 모델을 생성하고 출력 디렉터리에 저장합니다.
일괄 처리 모델이 생성되면 Outputs+logs>outputs에서 수동으로 다운로드하거나 다음 메서드를 사용합니다.
batch_size= 8  # use the batch size used to generate the model
onnx_model_path = 'automl_models/model.onnx'  # local path to save the model
remote_run.download_file(name='outputs/model_'+str(batch_size)+'.onnx', output_file_path=onnx_model_path)
모델 다운로드 단계 후에 ONNX 런타임 Python 패키지를 사용하여 model.onnx 파일로 추론을 수행합니다. 데모를 위해 이 문서에서는 이미지 데이터 세트 준비 방법을 통해 간단한 비전 작업을 위한 데이터 세트를 사용합니다.
ONNX 모델 추론을 시연하기 위해 해당 데이터 세트를 포함하는 모든 비전 작업에 대해 모델을 학습시켰습니다.
레이블 및 ONNX 모델 파일 로드
다음 코드 조각은 클래스 이름이 정렬되어 있는 labels.json을 로드합니다. 즉, ONNX 모델이 레이블 ID를 2로 예측하면 labels.json 파일에서 세 번째 인덱스에 지정된 레이블 이름에 해당한다는 것입니다.
import json
import onnxruntime

labels_file = "automl_models/labels.json"
with open(labels_file) as f:
    classes = json.load(f)
print(classes)
try:
    session = onnxruntime.InferenceSession(onnx_model_path)
    print("ONNX model loaded...")
except Exception as e:
    print("Error loading ONNX file: ",str(e))
ONNX 모델에 대한 예상 입력 및 출력 세부 정보 가져오기
모델이 있는 경우 모델별 세부 정보 및 작업별 세부 정보를 알고 있어야 합니다. 이러한 세부 정보로는 입력 수와 출력 수, 이미지 전처리를 위한 예상 입력 셰이프 또는 형식, 모델별 출력 또는 작업별 출력을 알 수 있는 출력 셰이프가 포함됩니다.
sess_input = session.get_inputs()
sess_output = session.get_outputs()
print(f"No. of inputs : {len(sess_input)}, No. of outputs : {len(sess_output)}")

for idx, input_ in enumerate(range(len(sess_input))):
    input_name = sess_input[input_].name
    input_shape = sess_input[input_].shape
    input_type = sess_input[input_].type
    print(f"{idx} Input name : { input_name }, Input shape : {input_shape}, \
    Input type  : {input_type}")

for idx, output in enumerate(range(len(sess_output))):
    output_name = sess_output[output].name
    output_shape = sess_output[output].shape
    output_type = sess_output[output].type
    print(f" {idx} Output name : {output_name}, Output shape : {output_shape}, \
    Output type  : {output_type}")
입력은 전처리된 이미지로, 배치 크기가 1이고 높이 및 너비가 224인 셰이프 (1, 3, 224, 224)를 갖습니다. 이러한 숫자는 학습 예제의 crop_size에 사용되는 값에 해당합니다.
출력 형식
출력은 모든 클래스/레이블에 대한 로짓 배열입니다.
출력 이름
출력 셰이프
출력 형식
설명
output1
(batch_size, num_classes)
ndarray(float)
모델은 로짓(sigmoid 제외)을 반환합니다. 예를 들어, 배치 크기가 1이고 클래스가 4개 있으면 (1, 4)를 반환합니다.
이 개체 감지 예제는 ONNX 모델 추론을 설명하기 위한 128개 이미지와 4개 클래스/레이블이 포함된 fridgeObjects 검색 데이터 세트를 학습시킨 모델을 사용합니다. 이 예제에서는 추론 단계를 보여 주기 위해 Faster R-CNN 모델을 학습시킵니다. 개체 감지 모델 학습에 대한 자세한 내용은 개체 감지 Notebook을 참조하세요.
입력 형식
입력은 전처리된 이미지입니다.
입력 이름
입력 셰이프
Input type
설명
Input
(batch_size, num_channels, height, width)
ndarray(float)
입력은 전처리된 이미지로, 배치 크기가 1이고 높이가 600, 너비가 800인 셰이프 (1, 3, 600, 800)를 갖습니다.
출력 형식
출력은 output_names 및 예측의 튜플입니다. 여기서 output_names 및 predictions는 각각 길이가 3*batch_size인 목록입니다. Faster R-CNN의 경우 출력 순서는 상자, 레이블 및 점수인 반면 RetinaNet의 경우 출력은 상자, 점수, 레이블입니다.
출력 이름
출력 셰이프
출력 형식
설명
output_names
(3*batch_size)
키 목록
일괄 처리 크기가 2인 경우 output_names은 ['boxes_0', 'labels_0', 'scores_0', 'boxes_1', 'labels_1', 'scores_1']입니다.
predictions
(3*batch_size)
ndarray(float) 목록
일괄 처리 크기가 2인 경우 predictions은 [(n1_boxes, 4), (n1_boxes), (n1_boxes), (n2_boxes, 4), (n2_boxes), (n2_boxes)]의 형태를 취합니다. 여기서 각 인덱스 값은 output_names의 동일한 인덱스에 해당합니다.
다음 표에서는 이미지 일괄 처리의 각 샘플에 대해 반환된 상자, 레이블 및 점수에 대해 설명합니다.
이름
도형
Type
설명
상자
(n_boxes, 4). 각 상자에는 x_min, y_min, x_max, y_max가 있습니다.
ndarray(float)
모델은 상단 왼쪽 및 하단 오른쪽 좌표와 함께 n개 상자를 반환합니다.
레이블
(n_boxes)
ndarray(float)
각 상자에 있는 개체의 레이블 또는 클래스 ID입니다.
점수
(n_boxes)
ndarray(float)
각 상자에 있는 개체의 신뢰도 점수입니다.
이 개체 감지 예제는 ONNX 모델 추론을 설명하기 위한 128개 이미지와 4개 클래스/레이블이 포함된 fridgeObjects 검색 데이터 세트를 학습시킨 모델을 사용합니다. 이 예제에서는 추론 단계를 보여 주기 위해 YOLO 모델을 학습시킵니다. 개체 감지 모델 학습에 대한 자세한 내용은 개체 감지 Notebook을 참조하세요.
입력 형식
입력은 전처리된 이미지로, 배치 크기가 1이고 높이 및 너비가 640인 셰이프 (1, 3, 640, 640)를 갖습니다. 이러한 숫자는 학습 예제에 사용되는 값에 해당합니다.
입력 이름
입력 셰이프
Input type
설명
Input
(batch_size, num_channels, height, width)
ndarray(float)
입력은 전처리된 이미지로, 일괄 처리 크기가 1이고 높이가 640, 너비가 640인 셰이프 (1, 3, 640, 640)를 갖습니다.
출력 형식
ONNX 모델 예측에는 여러 출력이 포함됩니다. 첫 번째 출력은 감지를 위해 최대가 아닌 억제를 수행하는 데 필요합니다. 쉽게 사용할 수 있는 자동화된 ML은 NMS 후처리 단계 후 출력 형식을 표시합니다. NMS 이후의 출력은 일괄 처리의 각 샘플에 대한 상자, 레이블 및 점수 목록입니다.
출력 이름
출력 셰이프
출력 형식
설명
출력
(batch_size)
ndarray(float) 목록
모델은 일괄 처리의 각 샘플에 대한 상자 감지를 반환합니다.
목록의 각 셀은 도형이 (n_boxes, 6)인 샘플의 상자 감지를 나타내며 각 상자에는 x_min, y_min, x_max, y_max, confidence_score, class_id가 있습니다.
이 인스턴스 구분 예제에서는 ONNX 모델 추론을 설명하기 위해 128개 이미지와 4개 클래스/레이블이 포함된 fridgeObjects 데이터 세트를 학습시킨 Mask R-CNN 모델을 사용합니다. 인스턴스 구분 모델의 학습에 대한 자세한 내용은 인스턴스 구분 Notebook을 참조하세요.
Important
인스턴스 조각화 작업에는 Mask R-CNN만 지원됩니다. 입력 및 출력 형식은 Mask R-CNN만을 기준으로 합니다.
입력 형식
입력은 전처리된 이미지입니다. Mask R-CNN에 대한 ONNX 모델을 내보내 다른 셰이프의 이미지를 사용할 수 있습니다. 성능 향상을 위해 학습 이미지 크기와 일치하는 고정된 크기로 크기를 조정하는 것이 좋습니다.
입력 이름
입력 셰이프
Input type
설명
Input
(batch_size, num_channels, height, width)
ndarray(float)
입력은 전처리된 이미지로, 배치 크기가 1이고 입력 이미지와 높이 및 너비가 유사한 셰이프 (1, 3, input_image_height, input_image_width)를 갖습니다.
출력 형식
출력은 output_names 및 예측의 튜플입니다. 여기서 output_names 및 predictions는 각각 길이가 4*batch_size인 목록입니다.
출력 이름
출력 셰이프
출력 형식
설명
output_names
(4*batch_size)
키 목록
일괄 처리 크기가 2인 경우 output_names은 ['boxes_0', 'labels_0', 'scores_0', 'masks_0', 'boxes_1', 'labels_1', 'scores_1', 'masks_1']입니다.
predictions
(4*batch_size)
ndarray(float) 목록
일괄 처리 크기가 2인 경우 predictions은 [(n1_boxes, 4), (n1_boxes), (n1_boxes), (n1_boxes, 1, height_onnx, width_onnx), (n2_boxes, 4), (n2_boxes), (n2_boxes), (n2_boxes, 1, height_onnx, width_onnx)]의 형태를 취합니다. 여기서 각 인덱스 값은 output_names의 동일한 인덱스에 해당합니다.
이름
도형
Type
설명
상자
(n_boxes, 4). 각 상자에는 x_min, y_min, x_max, y_max가 있습니다.
import glob
import numpy as np
from PIL import Image

def preprocess(image, resize_size, crop_size_onnx):
    """Perform pre-processing on raw input image

    :param image: raw input image
    :type image: PIL image
    :param resize_size: value to resize the image
    :type image: Int
    :param crop_size_onnx: expected height of an input image in onnx model
    :type crop_size_onnx: Int
    :return: pre-processed image in numpy format
    :rtype: ndarray 1xCxHxW
    """

    image = image.convert('RGB')
    # resize
    image = image.resize((resize_size, resize_size))
    #  center  crop
    left = (resize_size - crop_size_onnx)/2
    top = (resize_size - crop_size_onnx)/2
    right = (resize_size + crop_size_onnx)/2
    bottom = (resize_size + crop_size_onnx)/2
    image = image.crop((left, top, right, bottom))

    np_image = np.array(image)
    # HWC -> CHW
    np_image = np_image.transpose(2, 0, 1) # CxHxW
    # normalize the image
    mean_vec = np.array([0.485, 0.456, 0.406])
    std_vec = np.array([0.229, 0.224, 0.225])
    norm_img_data = np.zeros(np_image.shape).astype('float32')
    for i in range(np_image.shape[0]):
        norm_img_data[i,:,:] = (np_image[i,:,:]/255 - mean_vec[i])/std_vec[i]

    np_image = np.expand_dims(norm_img_data, axis=0) # 1xCxHxW
    return np_image

# following code loads only batch_size number of images for demonstrating ONNX inference
# make sure that the data directory has at least batch_size number of images

test_images_path = "automl_models_multi_cls/test_images_dir/*" # replace with path to images
# Select batch size needed
batch_size = 8
# you can modify resize_size based on your trained model
resize_size = 256
# height and width will be the same for classification
crop_size_onnx = height_onnx_crop_size

image_files = glob.glob(test_images_path)
img_processed_list = []
for i in range(batch_size):
    img = Image.open(image_files[i])
    img_processed_list.append(preprocess(img, resize_size, crop_size_onnx))

if len(img_processed_list) > 1:
    img_data = np.concatenate(img_processed_list)
elif len(img_processed_list) == 1:
    img_data = img_processed_list[0]
else:
    img_data = None

assert batch_size == img_data.shape[0]
PyTorch 사용
import glob
import torch
import numpy as np
from PIL import Image
from torchvision import transforms

def _make_3d_tensor(x) -> torch.Tensor:
    """This function is for images that have less channels.

    :param x: input tensor
    :type x: torch.Tensor
    :return: return a tensor with the correct number of channels
    :rtype: torch.Tensor
    """
    return x if x.shape[0] == 3 else x.expand((3, x.shape[1], x.shape[2]))

def preprocess(image, resize_size, crop_size_onnx):
    transform = transforms.Compose([
        transforms.Resize(resize_size),
        transforms.CenterCrop(crop_size_onnx),
        transforms.ToTensor(),
        transforms.Lambda(_make_3d_tensor),
        transforms.Normalize([0.485, 0.456, 0.406], [0.229, 0.224, 0.225])])

    img_data = transform(image)
    img_data = img_data.numpy()
    img_data = np.expand_dims(img_data, axis=0)
    return img_data

# following code loads only batch_size number of images for demonstrating ONNX inference
# make sure that the data directory has at least batch_size number of images

test_images_path = "automl_models_multi_cls/test_images_dir/*" # replace with path to images
# Select batch size needed
batch_size = 8
# you can modify resize_size based on your trained model
resize_size = 256
# height and width will be the same for classification
crop_size_onnx = height_onnx_crop_size

image_files = glob.glob(test_images_path)
img_processed_list = []
for i in range(batch_size):
    img = Image.open(image_files[i])
    img_processed_list.append(preprocess(img, resize_size, crop_size_onnx))

if len(img_processed_list) > 1:
    img_data = np.concatenate(img_processed_list)
elif len(img_processed_list) == 1:
    img_data = img_processed_list[0]
else:
    img_data = None

assert batch_size == img_data.shape[0]
ONNX 모델 추론을 위해 다음과 같은 전처리 단계를 수행합니다. 이러한 단계는 다중 클래스 이미지 분류에 대해서도 동일합니다.
이미지를 RGB로 변환합니다.
이미지 크기를 학습 중에 유효성 검사 데이터 세트의 변환에 사용된 값에 해당하는 valid_resize_size 및 valid_resize_size 값으로 조정합니다.
valid_resize_size의 기본값은 256입니다.
height_onnx_crop_size 및 width_onnx_crop_size 크기로 이미지 가운데를 자릅니다. 이것은 기본값이 224인 valid_crop_size에 해당합니다.
HxWxC를 CxHxW로 바꿉니다.
Float 형식으로 변환합니다.
ImageNet의 mean = [0.485, 0.456, 0.406] 및 std = [0.229, 0.224, 0.225]로 정규화합니다.
학습 중에 하이퍼 매개 변수valid_resize_size 및 valid_crop_size에 대해 다른 값을 선택하면 해당 값을 사용해야 합니다.
import glob
import numpy as np
from PIL import Image

def preprocess(image, resize_size, crop_size_onnx):
    """Perform pre-processing on raw input image

    :param image: raw input image
    :type image: PIL image
    :param resize_size: value to resize the image
    :type image: Int
    :param crop_size_onnx: expected height of an input image in onnx model
    :type crop_size_onnx: Int
    :return: pre-processed image in numpy format
    :rtype: ndarray 1xCxHxW
    """

    image = image.convert('RGB')
    # resize
    image = image.resize((resize_size, resize_size))
    # center  crop
    left = (resize_size - crop_size_onnx)/2
    top = (resize_size - crop_size_onnx)/2
    right = (resize_size + crop_size_onnx)/2
    bottom = (resize_size + crop_size_onnx)/2
    image = image.crop((left, top, right, bottom))

    np_image = np.array(image)
    # HWC -> CHW
    np_image = np_image.transpose(2, 0, 1) # CxHxW

    # normalize the image
    mean_vec = np.array([0.485, 0.456, 0.406])
    std_vec = np.array([0.229, 0.224, 0.225])
    norm_img_data = np.zeros(np_image.shape).astype('float32')
    for i in range(np_image.shape[0]):
        norm_img_data[i,:,:] = (np_image[i,:,:] / 255 - mean_vec[i]) / std_vec[i]
    np_image = np.expand_dims(norm_img_data, axis=0) # 1xCxHxW
    return np_image

# following code loads only batch_size number of images for demonstrating ONNX inference
# make sure that the data directory has at least batch_size number of images

test_images_path = "automl_models_multi_label/test_images_dir/*" # replace with path to images
# Select batch size needed
batch_size = 8
# you can modify resize_size based on your trained model
resize_size = 256
# height and width will be the same for classification
crop_size_onnx = height_onnx_crop_size

image_files = glob.glob(test_images_path)
img_processed_list = []
for i in range(batch_size):
    img = Image.open(image_files[i])
    img_processed_list.append(preprocess(img, resize_size, crop_size_onnx))

if len(img_processed_list) > 1:
    img_data = np.concatenate(img_processed_list)
elif len(img_processed_list) == 1:
    img_data = img_processed_list[0]
else:
    img_data = None

assert batch_size == img_data.shape[0]
PyTorch 사용
import glob
import torch
import numpy as np
from PIL import Image
from torchvision import transforms

def _make_3d_tensor(x) -> torch.Tensor:
    """This function is for images that have less channels.

    :param x: input tensor
    :type x: torch.Tensor
    :return: return a tensor with the correct number of channels
    :rtype: torch.Tensor
    """
    return x if x.shape[0] == 3 else x.expand((3, x.shape[1], x.shape[2]))

def preprocess(image, resize_size, crop_size_onnx):
    """Perform pre-processing on raw input image

    :param image: raw input image
    :type image: PIL image
    :param resize_size: value to resize the image
    :type image: Int
    :param crop_size_onnx: expected height of an input image in onnx model
    :type crop_size_onnx: Int
    :return: pre-processed image in numpy format
    :rtype: ndarray 1xCxHxW
    """
    transform = transforms.Compose([
        transforms.Resize(resize_size),
        transforms.CenterCrop(crop_size_onnx),
        transforms.ToTensor(),
        transforms.Lambda(_make_3d_tensor),
        transforms.Normalize([0.485, 0.456, 0.406], [0.229, 0.224, 0.225])])

    img_data = transform(image)
    img_data = img_data.numpy()
    img_data = np.expand_dims(img_data, axis=0)

    return img_data

# following code loads only batch_size number of images for demonstrating ONNX inference
# make sure that the data directory has at least batch_size number of images

test_images_path = "automl_models_multi_label/test_images_dir/*" # replace with path to images
# Select batch size needed
batch_size = 8
# you can modify resize_size based on your trained model
resize_size = 256
# height and width will be the same for classification
crop_size_onnx = height_onnx_crop_size

image_files = glob.glob(test_images_path)
img_processed_list = []
for i in range(batch_size):
    img = Image.open(image_files[i])
    img_processed_list.append(preprocess(img, resize_size, crop_size_onnx))

if len(img_processed_list) > 1:
    img_data = np.concatenate(img_processed_list)
elif len(img_processed_list) == 1:
    img_data = img_processed_list[0]
else:
    img_data = None

assert batch_size == img_data.shape[0]
Faster R-CNN 알고리즘을 사용하여 개체를 감지하려면 이미지 자르기를 제외하고 이미지 구분과 동일한 전처리 단계를 따릅니다. 높이 600 및 너비 800으로 이미지 크기를 조정할 수 있습니다. 다음 코드를 사용하여 예상되는 입력 높이 및 너비를 구할 수 있습니다.
import glob
import numpy as np
from PIL import Image

def preprocess(image, height_onnx, width_onnx):
    """Perform pre-processing on raw input image

    :param image: raw input image
    :type image: PIL image
    :param height_onnx: expected height of an input image in onnx model
    :type height_onnx: Int
    :param width_onnx: expected width of an input image in onnx model
    :type width_onnx: Int
    :return: pre-processed image in numpy format
    :rtype: ndarray 1xCxHxW
    """

    image = image.convert('RGB')
    image = image.resize((width_onnx, height_onnx))
    np_image = np.array(image)
    # HWC -> CHW
    np_image = np_image.transpose(2, 0, 1) # CxHxW
    # normalize the image
    mean_vec = np.array([0.485, 0.456, 0.406])
    std_vec = np.array([0.229, 0.224, 0.225])
    norm_img_data = np.zeros(np_image.shape).astype('float32')
    for i in range(np_image.shape[0]):
        norm_img_data[i,:,:] = (np_image[i,:,:] / 255 - mean_vec[i]) / std_vec[i]
    np_image = np.expand_dims(norm_img_data, axis=0) # 1xCxHxW
    return np_image

# following code loads only batch_size number of images for demonstrating ONNX inference
# make sure that the data directory has at least batch_size number of images

test_images_path = "automl_models_od/test_images_dir/*" # replace with path to images
image_files = glob.glob(test_images_path)
img_processed_list = []
for i in range(batch_size):
    img = Image.open(image_files[i])
    img_processed_list.append(preprocess(img, height_onnx, width_onnx))

if len(img_processed_list) > 1:
    img_data = np.concatenate(img_processed_list)
elif len(img_processed_list) == 1:
    img_data = img_processed_list[0]
else:
    img_data = None

assert batch_size == img_data.shape[0]
YOLO 알고리즘을 사용하여 개체를 감지하려면 이미지 자르기를 제외하고 이미지 분류와 동일한 전처리 단계를 따릅니다. 다음 코드를 사용하여 높이 600 및 800으로 이미지 크기를 조정하고, 예상되는 입력 높이 및 너비를 구할 수 있습니다.
import glob
import numpy as np
from yolo_onnx_preprocessing_utils import preprocess

# use height and width based on the generated model
test_images_path = "automl_models_od_yolo/test_images_dir/*" # replace with path to images
image_files = glob.glob(test_images_path)
img_processed_list = []
pad_list = []
for i in range(batch_size):
    img_processed, pad = preprocess(image_files[i])
    img_processed_list.append(img_processed)
    pad_list.append(pad)

if len(img_processed_list) > 1:
    img_data = np.concatenate(img_processed_list)
elif len(img_processed_list) == 1:
    img_data = img_processed_list[0]
else:
    img_data = None

assert batch_size == img_data.shape[0]
ImageNet의 mean = [0.485, 0.456, 0.406] 및 std = [0.229, 0.224, 0.225]로 정규화합니다.
resize_height 및 resize_width의 경우 Mask R-CNN의 min_size 및 max_size하이퍼 매개 변수에 따라, 학습 중에 사용한 값을 사용할 수도 있습니다.
import glob
import numpy as np
from PIL import Image

def preprocess(image, resize_height, resize_width):
    """Perform pre-processing on raw input image

    :param image: raw input image
    :type image: PIL image
    :param resize_height: resize height of an input image
    :type resize_height: Int
    :param resize_width: resize width of an input image
    :type resize_width: Int
    :return: pre-processed image in numpy format
    :rtype: ndarray of shape 1xCxHxW
    """

    image = image.convert('RGB')
    image = image.resize((resize_width, resize_height))
    np_image = np.array(image)
    # HWC -> CHW
    np_image = np_image.transpose(2, 0, 1)  # CxHxW
    # normalize the image
    mean_vec = np.array([0.485, 0.456, 0.406])
    std_vec = np.array([0.229, 0.224, 0.225])
    norm_img_data = np.zeros(np_image.shape).astype('float32')
    for i in range(np_image.shape[0]):
        norm_img_data[i,:,:] = (np_image[i,:,:]/255 - mean_vec[i])/std_vec[i]
    np_image = np.expand_dims(norm_img_data, axis=0)  # 1xCxHxW
    return np_image

# following code loads only batch_size number of images for demonstrating ONNX inference
# make sure that the data directory has at least batch_size number of images
# use height and width based on the trained model
# use height and width based on the generated model
test_images_path = "automl_models_is/test_images_dir/*" # replace with path to images
image_files = glob.glob(test_images_path)
img_processed_list = []
for i in range(batch_size):
    img = Image.open(image_files[i])
    img_processed_list.append(preprocess(img, height_onnx, width_onnx))

if len(img_processed_list) > 1:
    img_data = np.concatenate(img_processed_list)
elif len(img_processed_list) == 1:
    img_data = img_processed_list[0]
else:
    img_data = None

assert batch_size == img_data.shape[0]
 Python SDK azureml v1