자습서: OPC UA 서버에서 Azure Data Lake Storage Gen 2로 데이터 보내기
빠른 시작에서는 Azure IoT Operations에서 Event Hubs로 데이터를 보낸 다음 EventStreams를 통해 Microsoft Fabric으로 데이터를 보내는 데이터 흐름을 만들었습니다.
그러나 Event Hubs를 사용하지 않고 스토리지 엔드포인트에 직접 데이터를 보낼 수도 있습니다. 이 방법을 사용하려면 데이터를 나타내는 Delta Lake 스키마를 만들고, Azure IoT Operations에 스키마를 업로드한 다음, OPC UA 서버에서 데이터를 읽고 스토리지 엔드포인트에 쓰는 데이터 흐름을 만들어야 합니다.
이 자습서는 빠른 시작 설정을 기반으로 하며 Azure Data Lake Storage Gen 2에 데이터를 분기하는 방법을 보여 줍니다. 이 방법을 사용하면 데이터를 확장 가능하고 안전한 데이터 레이크에 직접 저장할 수 있으며, 이를 통해 추가 분석 및 처리에 사용할 수 있습니다.
필수 조건
OPC UA 서버에서 Azure IoT Operations MQTT Broker로 데이터를 가져오는 빠른 시작의 두 번째 단계를 완료합니다. Event Hubs에서 데이터를 볼 수 있는지 확인합니다.
Data Lake Storage 기능을 사용하여 스토리지 계정 만들기
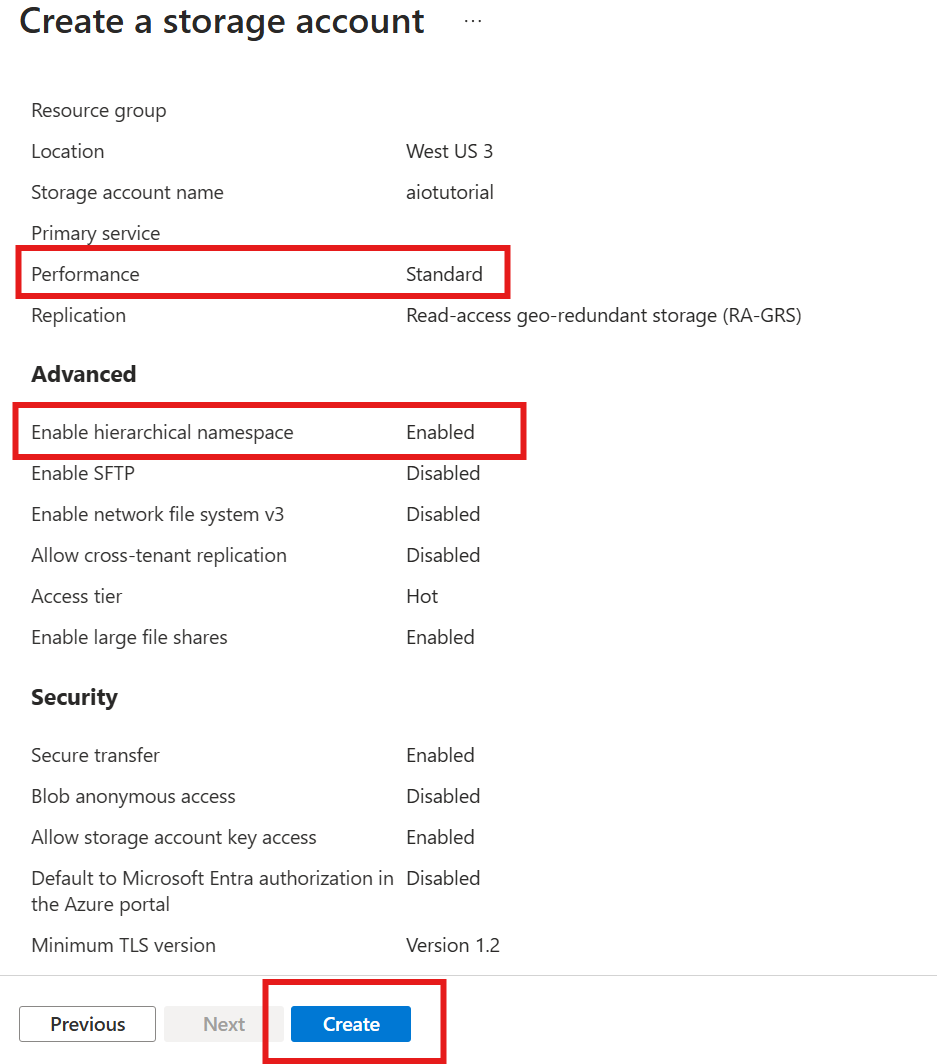
먼저 Data Lake Storage Gen 2 기능을 사용하여 스토리지 계정을 만드는 단계를 수행합니다.
- 다음 단계에서 필요하므로 스토리지 계정에 대해 기억하기는 하지만 고유한 이름을 선택합니다.
- 최상의 결과를 얻으려면 Azure IoT 작업이 실행 중인 Kubernetes 클러스터와 가까운 위치를 사용합니다.
- 생성 프로세스 중에 계층 구조 네임스페이 스 설정을 사용하도록 설정합니다. 이 설정은 Azure IoT Operations가 스토리지 계정에 쓰는 데 필요합니다.
- 다른 설정은 기본값으로 그대로 둘 수 있습니다.
검토 단계에서 설정을 확인하고 만들기를 선택하여 스토리지 계정을 만듭니다.
Azure IoT Operations의 확장 이름 가져오기
Azure Portal에서 빠른 시작에서 만든 Azure IoT Operations 인스턴스를 찾습니다.
개요 블레이드에서 Arc 확장 섹션을 찾고 확장 이름을 확인합니다.
azure-iot-operations-xxxxx 형식입니다.
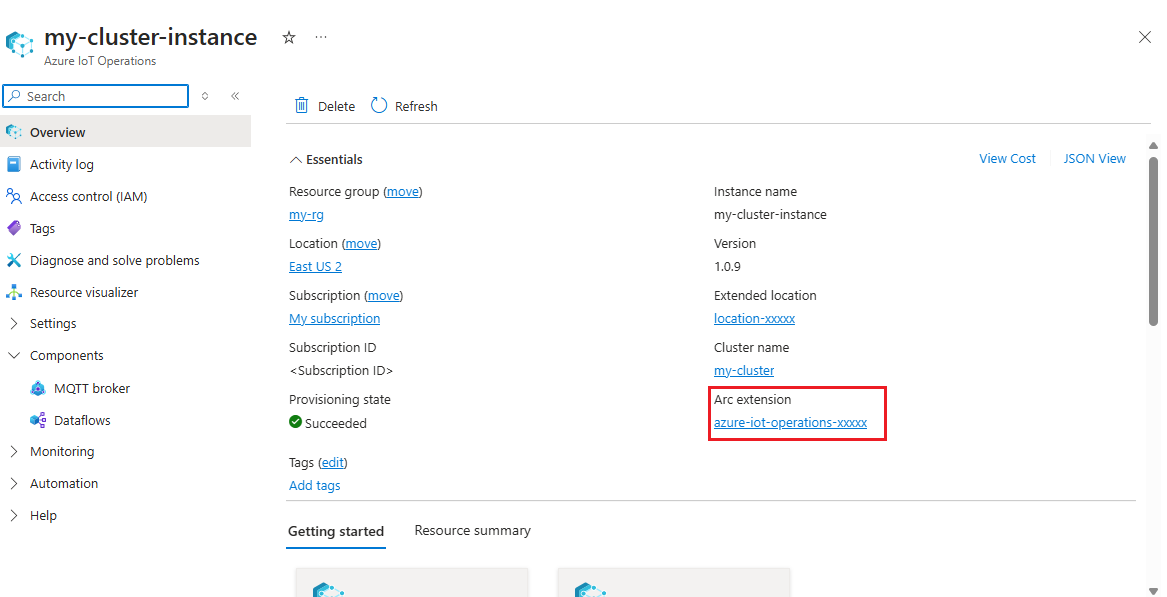
이 확장 이름은 스토리지 계정에 권한을 할당하기 위해 다음 단계에서 사용됩니다.
Azure IoT Operations에 스토리지 계정에 쓸 수 있는 권한 할당
먼저 스토리지 계정에서 액세스 제어(IAM) 블레이드로 이동하여 + 역할 할당 추가를 선택합니다. 역할 할당 추가 블레이드에서 Storage Blob 데이터 기여자 역할을 검색하고 선택합니다.
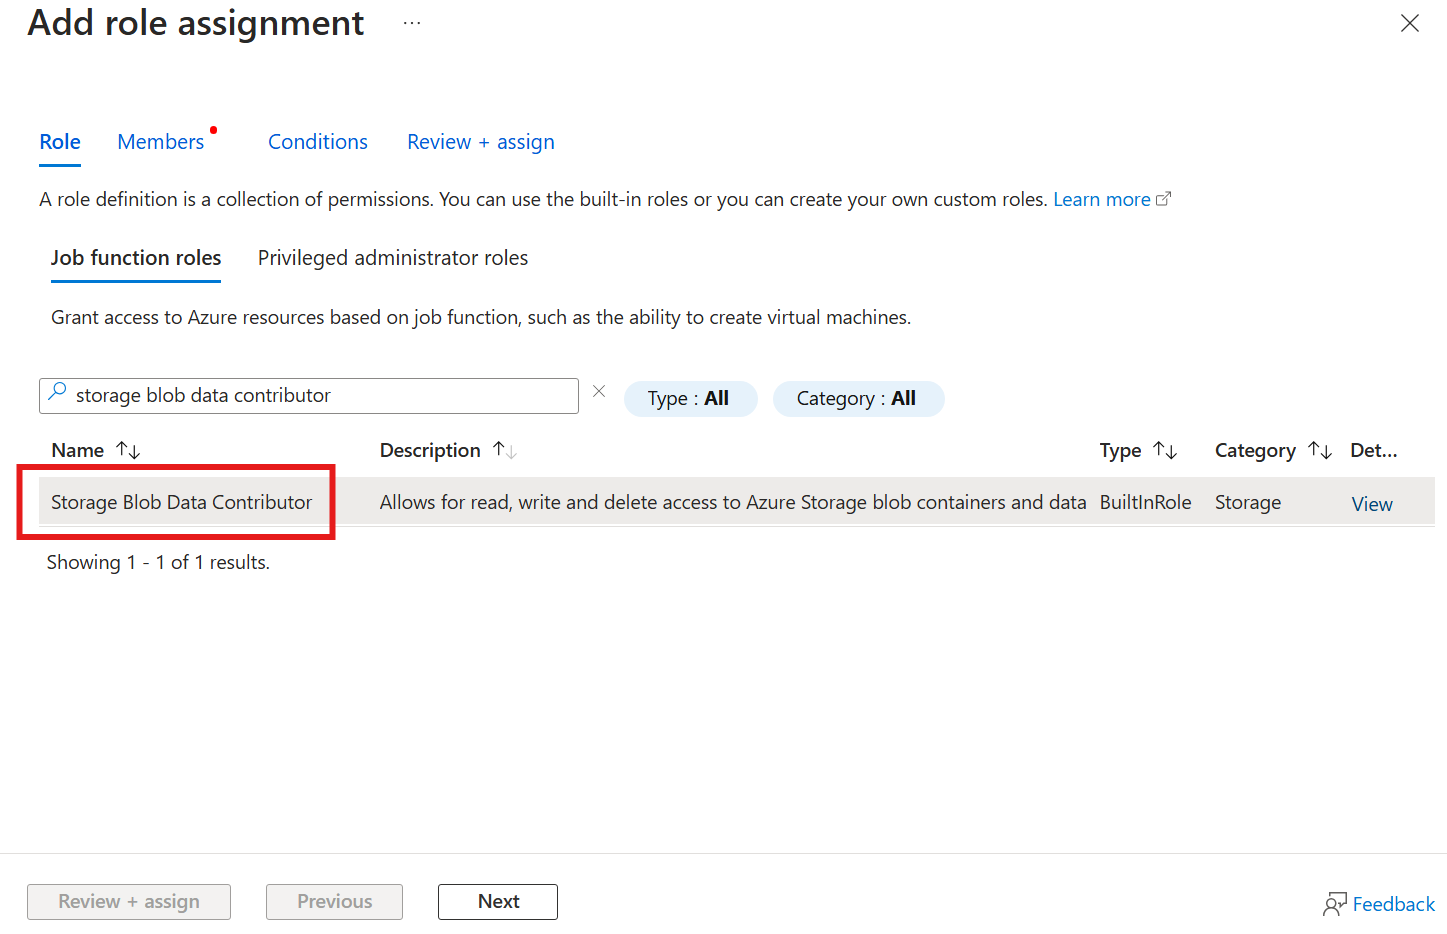
그런 다음, [다음]을 선택하여 멤버 섹션으로 이동하세요.
다음으로 멤버 선택을 선택하고 선택 상자에서 명명된 azure-iot-operations-xxxxx Azure IoT Operations Arc 확장의 관리 ID를 검색하여 선택합니다.
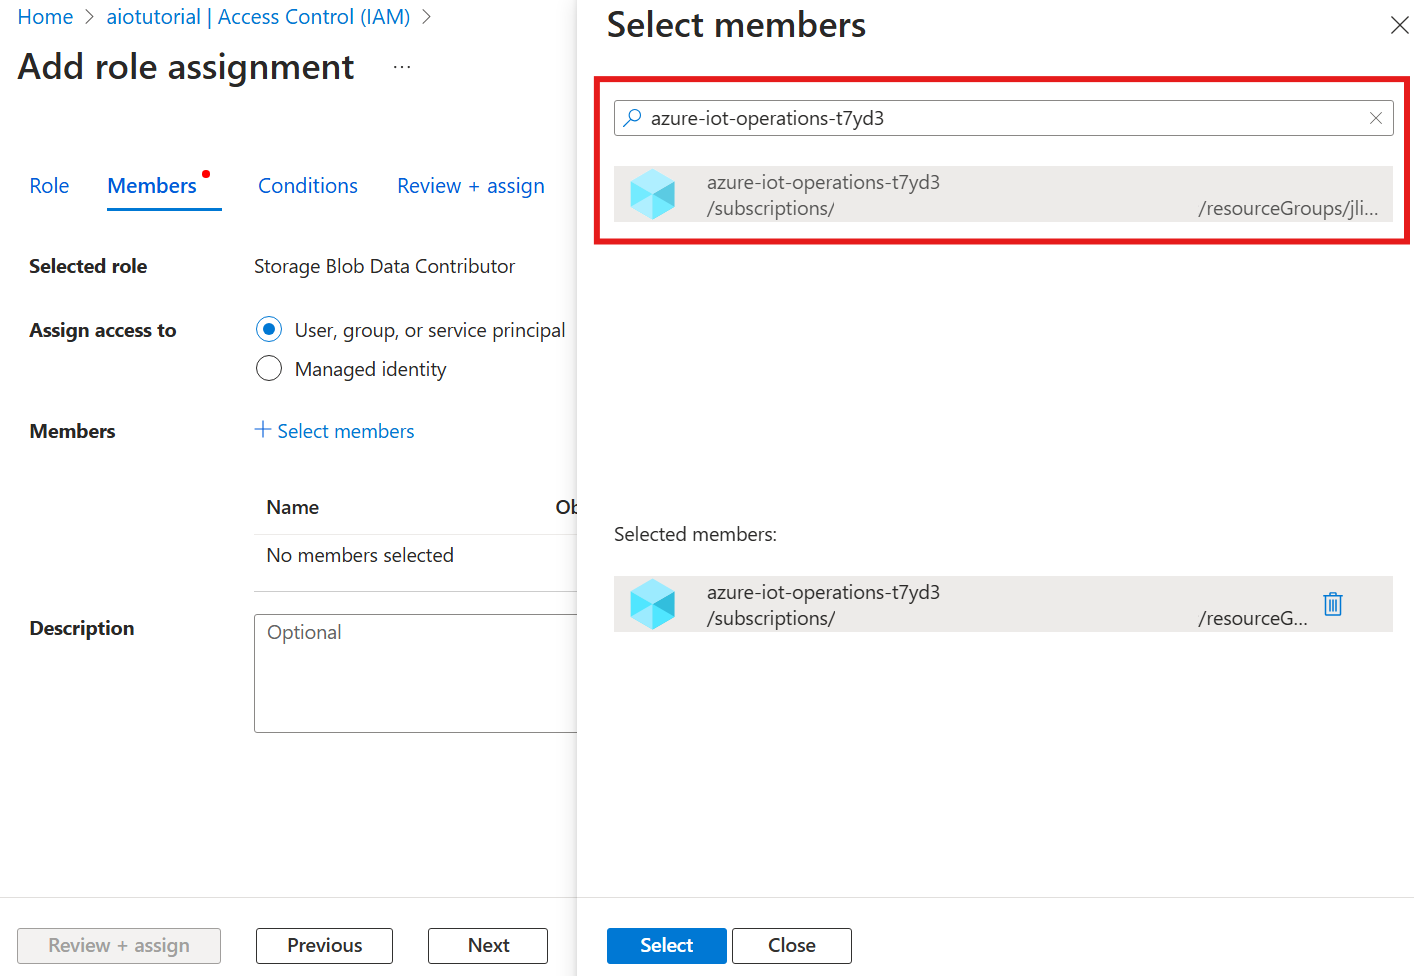
검토 + 할당을 사용하여 과제를 완료합니다.
스토리지 계정에 컨테이너 만들기
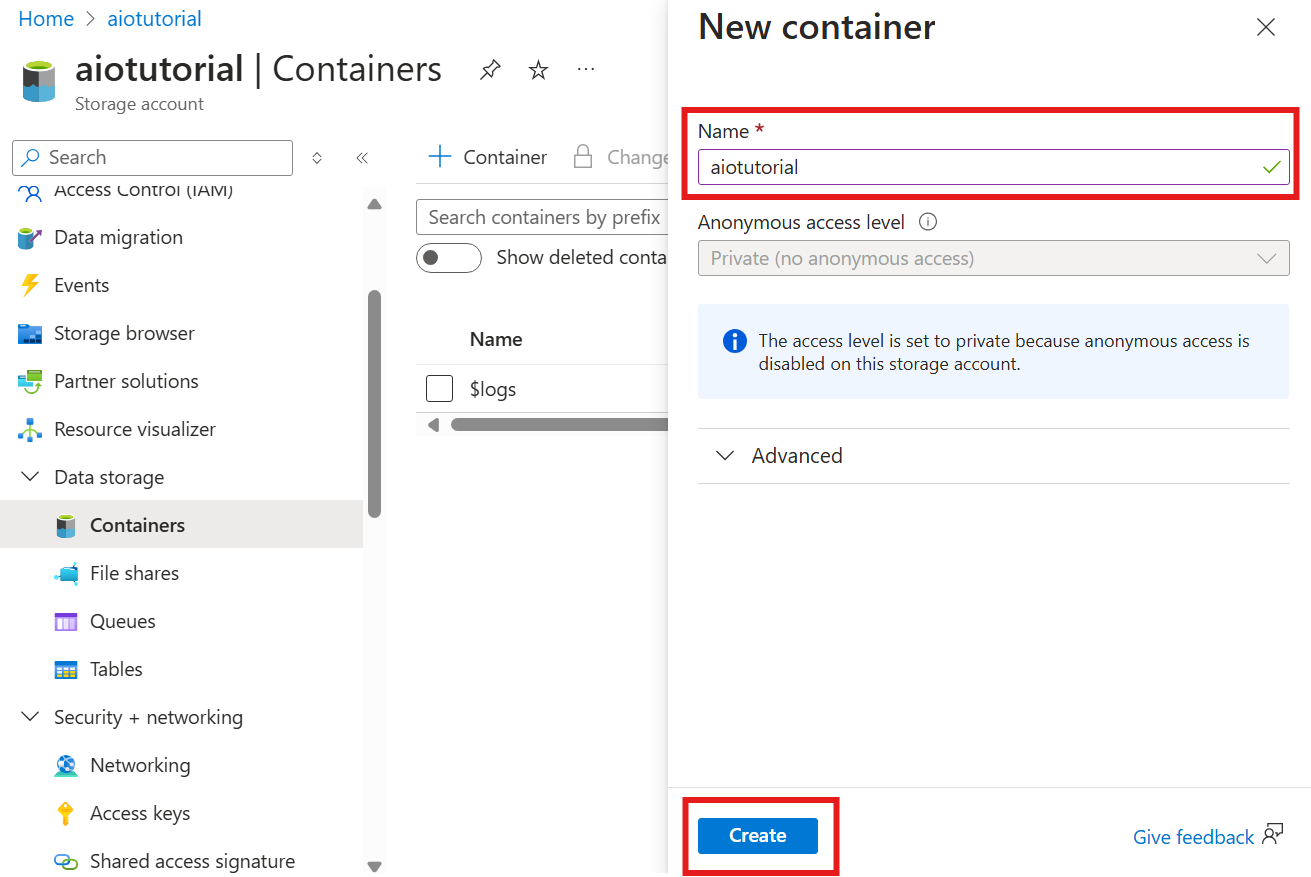
스토리지 계정에서 컨테이너 블레이드로 이동하여 + 컨테이너를 선택합니다. 이 자습서에서는 컨테이너 aiotutorial이름을 지정합니다.
만들기를 선택하여 컨테이너를 만듭니다.
스키마 레지스트리 이름 및 네임스페이스 가져오기
Azure IoT Operations에 스키마를 업로드하려면 스키마 레지스트리 이름 및 네임스페이스를 알고 있어야 합니다. Azure CLI를 사용하여 이 정보를 가져올 수 있습니다.
다음 명령을 실행하여 스키마 레지스트리 이름 및 네임스페이스를 가져옵니다. 자리 표시자는 해당 값으로 바꿉니다.
az iot ops schema registry list -g <RESOURCE_GROUP> --query "[0].{name: name, namespace: properties.namespace}" -o tsv
출력은 다음과 같습니다.
<REGISTRY_NAME> <SCHEMA_NAMESPACE>
다음 단계에 대한 값을 저장합니다.
Azure IoT 작업에 스키마 업로드
빠른 시작에서 오븐 자산에서 가져온 데이터는 다음과 같습니다.
{
  "Temperature": {
    "SourceTimestamp": "2024-11-15T21:40:28.5062427Z",
    "Value": 6416
  },
  "FillWeight": {
    "SourceTimestamp": "2024-11-15T21:40:28.5063811Z",
    "Value": 6416
  },
  "EnergyUse": {
    "SourceTimestamp": "2024-11-15T21:40:28.506383Z",
    "Value": 6416
  }
}
Delta Lake에 필요한 스키마 형식은 Delta Lake 스키마 serialization 형식을 따르는 JSON 개체입니다. 스키마는 각 필드의 형식 및 속성을 포함하여 데이터의 구조를 정의해야 합니다. 스키마 형식에 대한 자세한 내용은 Delta Lake 스키마 serialization 형식 설명서를 참조 하세요.
팁
샘플 데이터 파일에서 스키마를 생성하려면 스키마 Gen 도우미를 사용합니다.
이 자습서의 경우 데이터에 대한 스키마는 다음과 같습니다.
{
  "$schema": "Delta/1.0",
  "type": "object",
  "properties": {
    "type": "struct",
    "fields": [
      {
        "name": "Temperature",
        "type": {
          "type": "struct",
          "fields": [
            {
              "name": "SourceTimestamp",
              "type": "timestamp",
              "nullable": false,
              "metadata": {}
            },
            {
              "name": "Value",
              "type": "integer",
              "nullable": false,
              "metadata": {}
            }
          ]
        },
        "nullable": false,
        "metadata": {}
      },
      {
        "name": "FillWeight",
        "type": {
          "type": "struct",
          "fields": [
            {
              "name": "SourceTimestamp",
              "type": "timestamp",
              "nullable": false,
              "metadata": {}
            },
            {
              "name": "Value",
              "type": "integer",
              "nullable": false,
              "metadata": {}
            }
          ]
        },
        "nullable": false,
        "metadata": {}
      },
      {
        "name": "EnergyUse",
        "type": {
          "type": "struct",
          "fields": [
            {
              "name": "SourceTimestamp",
              "type": "timestamp",
              "nullable": false,
              "metadata": {}
            },
            {
              "name": "Value",
              "type": "integer",
              "nullable": false,
              "metadata": {}
            }
          ]
        },
        "nullable": false,
        "metadata": {}
      }
    ]
  }
}
라는 opcua-schema.json파일로 저장합니다.
그런 다음, Azure CLI를 사용하여 Azure IoT Operations에 스키마를 업로드합니다. 자리 표시자는 해당 값으로 바꿉니다.
az iot ops schema create -n opcua-schema -g <RESOURCE_GROUP> --registry <REGISTRY_NAME> --format delta --type message --version-content opcua-schema.json --ver 1
그러면 버전1이 있는 Azure IoT Operations 레지스트리에 이름이 지정된 opcua-schema 스키마가 만들어집니다.
스키마가 업로드되었는지 확인하려면 Azure CLI를 사용하여 스키마 버전을 나열합니다.
az iot ops schema version list -g <RESOURCE_GROUP> --schema opcua-schema --registry <REGISTRY_NAME>
데이터 흐름 엔드포인트 만들기
데이터 흐름 엔드포인트는 데이터가 전송되는 대상입니다. 이 경우 데이터는 Azure Data Lake Storage Gen 2로 전송됩니다. 인증 방법은 스토리지 계정에 쓸 수 있는 올바른 권한을 갖도록 설정한 시스템 할당 관리 ID입니다.
Bicep을 사용하여 데이터 흐름 엔드포인트를 만듭니다. 자리 표시자는 해당 값으로 바꿉니다.
// Replace with your values
param aioInstanceName string = '<AIO_INSTANCE_NAME>'
param customLocationName string = '<CUSTOM_LOCATION_NAME>'

// Tutorial specific values
param endpointName string = 'adls-gen2-endpoint'
param host string = 'https://<ACCOUNT>.blob.core.windows.net'

resource aioInstance 'Microsoft.IoTOperations/instances@2024-11-01' existing = {
  name: aioInstanceName
}

resource customLocation 'Microsoft.ExtendedLocation/customLocations@2021-08-31-preview' existing = {
  name: customLocationName
}

resource adlsGen2Endpoint 'Microsoft.IoTOperations/instances/dataflowEndpoints@2024-11-01' = {
  parent: aioInstance
  name: endpointName
  extendedLocation: {
    name: customLocation.id
    type: 'CustomLocation'
  }
  properties: {
    endpointType: 'DataLakeStorage'
    dataLakeStorageSettings: {
      host: host
      authentication: {
        method: 'SystemAssignedManagedIdentity'
        systemAssignedManagedIdentitySettings: {}
      }
    }
  }
}
Azure CLI를 사용하여 파일을 다른 이름으로 adls-gen2-endpoint.bicep 저장하고 배포합니다.
az deployment group create -g <RESOURCE_GROUP> --template-file adls-gen2-endpoint.bicep
데이터 흐름 만들기
Azure Data Lake Storage Gen 2로 데이터를 보내려면 OPC UA 서버에서 데이터를 읽고 스토리지 계정에 쓰는 데이터 흐름을 만들어야 합니다. 이 경우 변환이 필요하지 않으므로 데이터가 있는 그대로 기록됩니다.
Bicep을 사용하여 데이터 흐름을 만듭니다. 자리 표시자는 해당 값으로 바꿉니다.
// Replace with your values
param aioInstanceName string = '<AIO_INSTANCE_NAME>'
param customLocationName string = '<CUSTOM_LOCATION_NAME>'
param schemaNamespace string = '<SCHEMA_NAMESPACE>'

// Tutorial specific values
param schema string = 'opcua-schema'
param schemaVersion string = '1'
param dataflowName string = 'tutorial-adls-gen2'
param assetName string = 'oven'
param endpointName string = 'adls-gen2-endpoint'
param containerName string = 'aiotutorial'
param serialFormat string = 'Delta'

resource aioInstance 'Microsoft.IoTOperations/instances@2024-11-01' existing = {
  name: aioInstanceName
}

resource customLocation 'Microsoft.ExtendedLocation/customLocations@2021-08-31-preview' existing = {
  name: customLocationName
}

// Pointer to the default data flow profile
resource defaultDataflowProfile 'Microsoft.IoTOperations/instances/dataflowProfiles@2024-11-01' existing = {
  parent: aioInstance
  name: 'default'
}

resource adlsEndpoint 'Microsoft.IoTOperations/instances/dataflowEndpoints@2024-11-01' existing = {
  parent: aioInstance
  name: endpointName
}

resource defaultDataflowEndpoint 'Microsoft.IoTOperations/instances/dataflowEndpoints@2024-11-01' existing = {
  parent: aioInstance
  name: 'default'
}

resource asset 'Microsoft.DeviceRegistry/assets@2024-11-01' existing = {
  name: assetName
}

resource dataflow 'Microsoft.IoTOperations/instances/dataflowProfiles/dataflows@2024-11-01' = {
  // Reference to the parent data flow profile, the default profile in this case
  // Same usage as profileRef in Kubernetes YAML
  parent: defaultDataflowProfile
  name: dataflowName
  extendedLocation: {
    name: customLocation.id
    type: 'CustomLocation'
  }
  properties: {
    mode: 'Enabled'
    operations: [
      {
        operationType: 'Source'
        sourceSettings: {
          endpointRef: defaultDataflowEndpoint.name
          assetRef: asset.name
          dataSources: ['azure-iot-operations/data/${assetName}']
        }
      }
      // Transformation optional
      {
        operationType: 'BuiltInTransformation'
        builtInTransformationSettings: {
          serializationFormat: serialFormat
          schemaRef: 'aio-sr://${schemaNamespace}/${schema}:${schemaVersion}'
          map: [
            {
              type: 'PassThrough'
              inputs: [
                '*'
              ]
              output: '*'
            }
         ]
        }
      }
      {
        operationType: 'Destination'
        destinationSettings: {
          endpointRef: adlsEndpoint.name
          dataDestination: containerName
        }
      }
    ]
  }
}
Azure CLI를 사용하여 파일을 다른 이름으로 adls-gen2-dataflow.bicep 저장하고 배포합니다.
az deployment group create -g <RESOURCE_GROUP> --template-file adls-gen2-dataflow.bicep
Azure Data Lake Storage Gen 2에서 데이터 확인
스토리지 계정에서 컨테이너 블레이드로 이동하여 만든 컨테이너 aiotutorial 를 선택합니다. 이름이 지정된 aiotutorial 폴더가 표시되고 그 안에 OPC UA 서버의 데이터가 포함된 Parquet 파일이 표시됩니다. 파일 이름은 형식 part-00001-44686130-347f-4c2c-81c8-eb891601ef98-c000.snappy.parquet입니다.
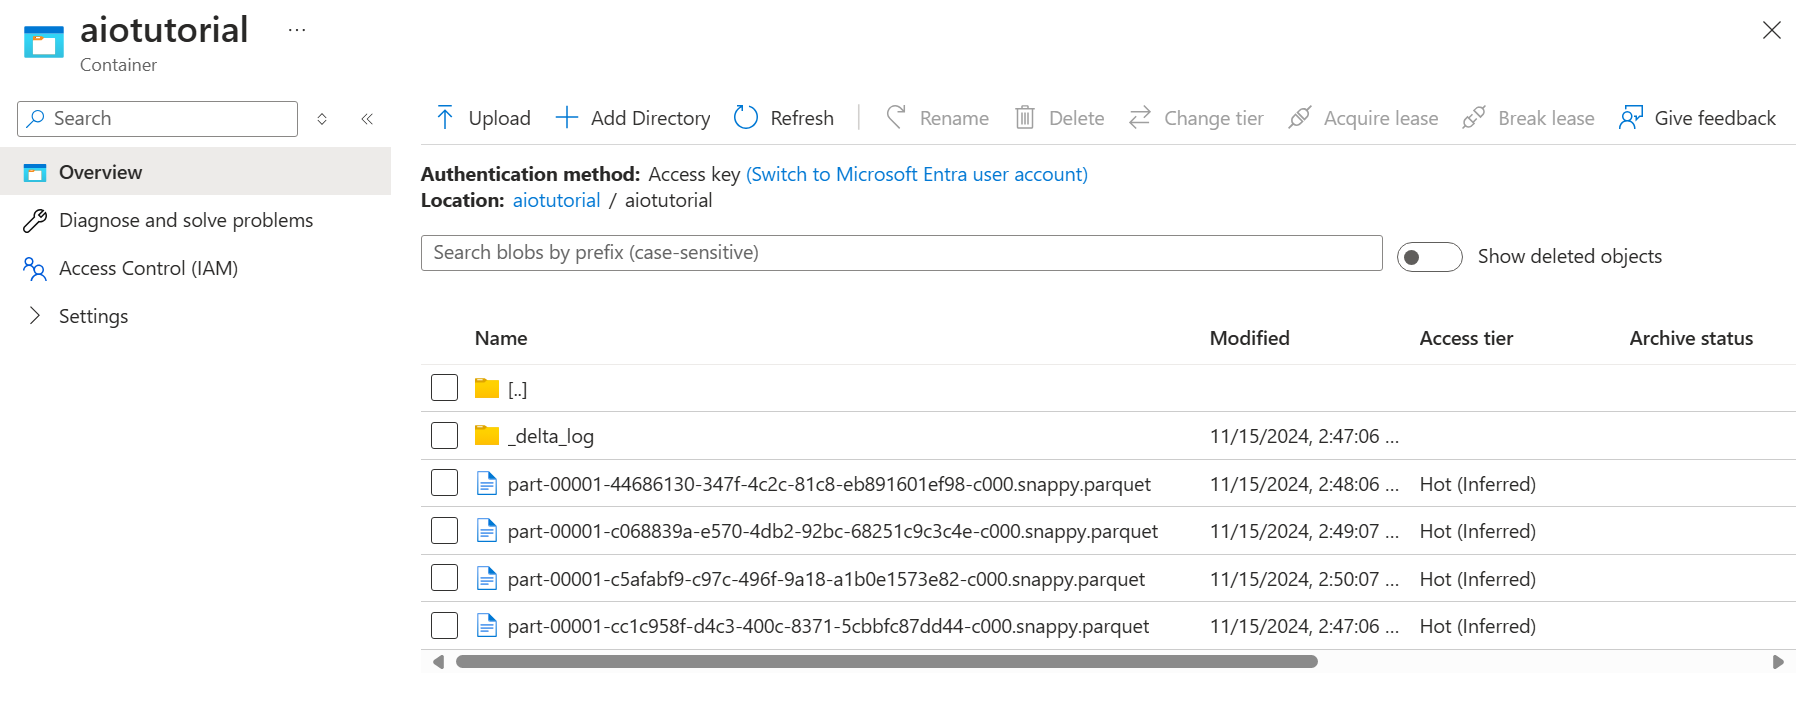
파일의 내용을 보려면 각 파일을 선택하고 편집을 선택합니다.
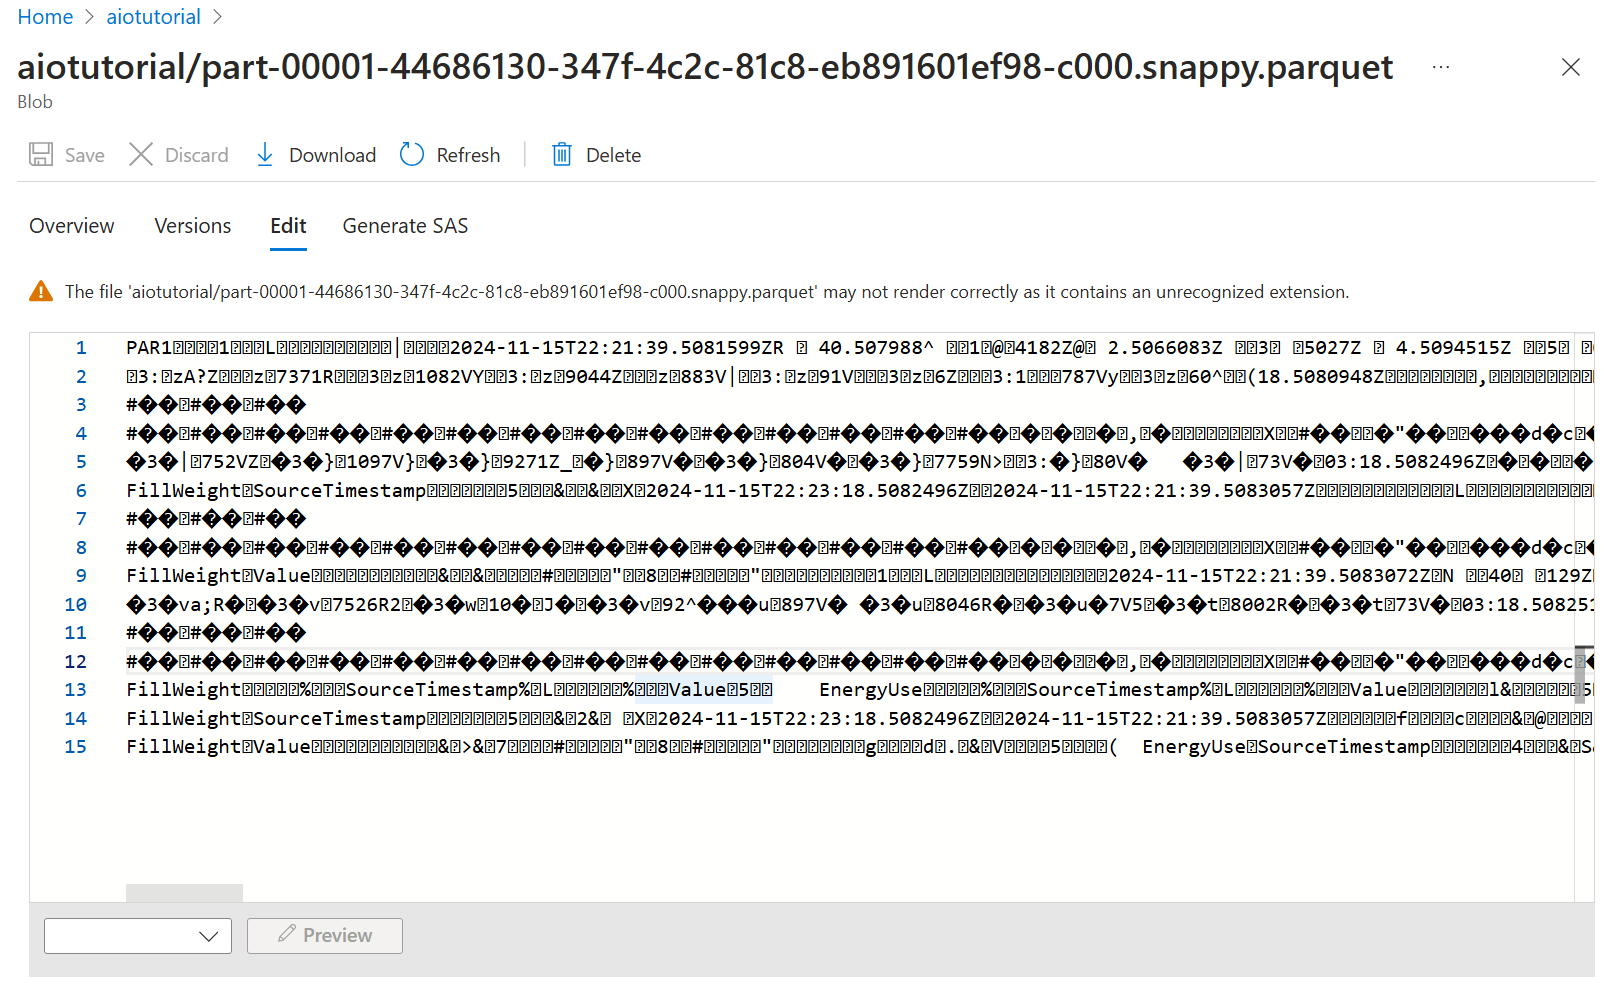
콘텐츠가 Azure Portal에서 제대로 렌더링되지 않지만 파일을 다운로드하여 Parquet Viewer와 같은 도구에서 열 수 있습니다.