Azure Pipelines를 사용하여 Azure 앱 서비스에 사용자 지정 컨테이너 배포
Azure DevOps Services | Azure DevOps Server 2022 - Azure DevOps Server 2019
Azure Pipelines를 사용하여 Linux의 Azure 앱 Service Web App 컨테이너에 웹앱을 빌드, 테스트 및 자동으로 배포할 수 있습니다. 이 문서에서는 YAML 또는 클래식 파이프라인을 사용하여 다음을 수행하도록 하는 방법을 알아봅니다.
- Azure Container Registry에 Docker 이미지 빌드 및 게시
- Azure 웹앱 만들기
- Azure 앱 Service에 컨테이너 배포
- 배포 슬롯에 배포
필수 조건
- 활성 구독이 있는 Azure 계정. 체험 계정을 만듭니다.
- GitHub 계정. 아직 GitHub 계정이 없는 경우 무료 GitHub 계정을 만듭니다.
- Azure DevOps 조직 아직 조직이 없는 경우 조직을 만듭니다.
- Azure Container Registry. 아직 없는 경우 Azure 컨테이너 레지스트리 를 만듭니다.
코드 가져오기
GitHub에서 다음 샘플 앱을 포크합니다.
https://github.com/spring-guides/gs-spring-boot-docker.git
Azure Container Registry에 Docker 이미지 빌드 및 게시
이 섹션을 성공적으로 완료하려면 Azure Container Registry가 있어야 합니다. 자세한 내용은 필수 조건 섹션을 참조하세요.
Azure DevOps 조직에 로그인하고, 프로젝트로 이동합니다.
파이프라인을 선택한 다음 새 파이프라인을 선택합니다.
소스 코드의 위치를 묻는 메시지가 표시되면 GitHub를 선택한 다음, 리포지토리를 선택합니다.
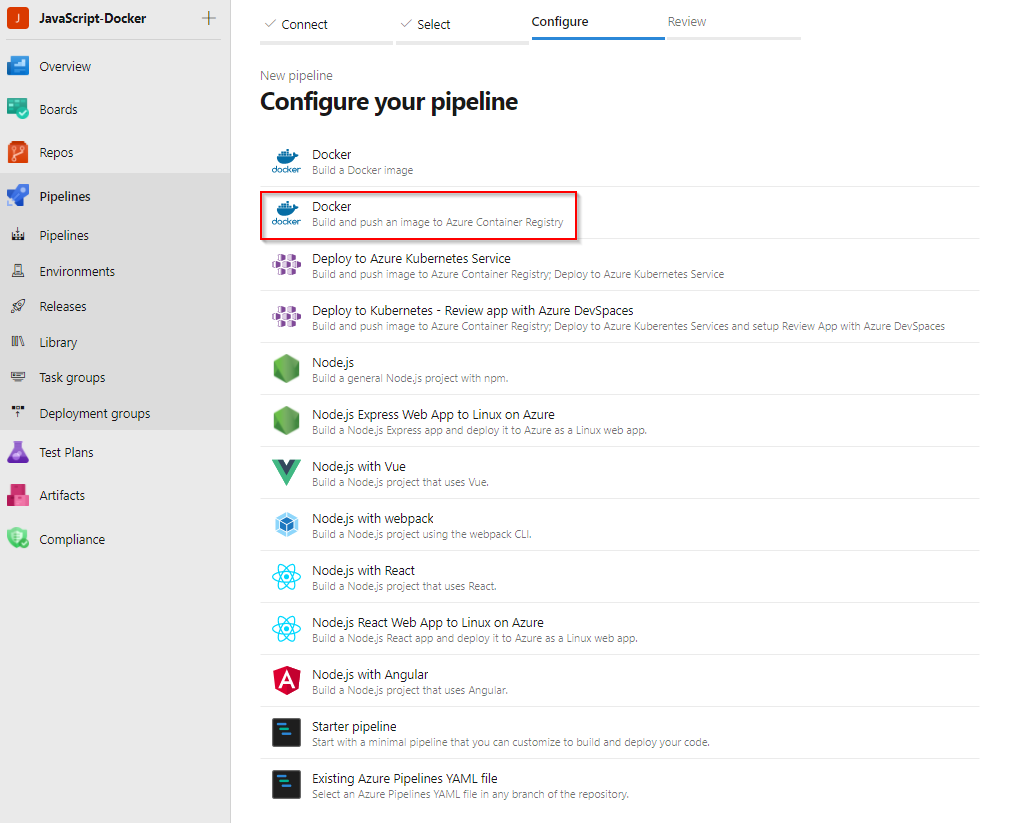
Docker를 선택합니다. 이미지를 빌드하고 Azure Container Registry 파이프라인 템플릿에 푸시합니다.
Azure 구독을 선택한 다음 계속을 선택합니다.
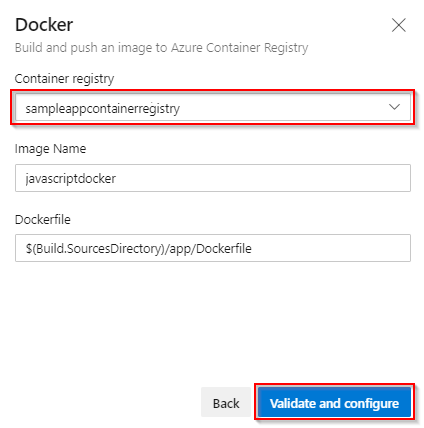
드롭다운 메뉴에서 컨테이너 레지스트리를 선택한 다음 유효성 검사 및 구성을 선택합니다.
파이프라인 YAML 템플릿을 검토한 다음 저장을 선택하고 실행 하여 Docker 이미지를 빌드하고 Azure Container Registry에 게시합니다.
trigger:
- main

resources:
- repo: self

variables:
    # Container registry service connection established during pipeline creation
    dockerRegistryServiceConnection: '{{ containerRegistryConnection.Id }}'
    imageRepository: 'javascriptdocker'
    containerRegistry: 'sampleappcontainerregistry.azurecr.io'
    dockerfilePath: '$(Build.SourcesDirectory)/app/Dockerfile'
    tag: '$(Build.BuildId)'

    # Agent VM image name
    vmImageName: 'ubuntu-latest'

stages:
- stage: Build
    displayName: Build and push stage
    jobs:
    - job: Build
    displayName: Build
    pool:
        vmImage: $(vmImageName)
    steps:
    - task: Docker@2
        displayName: Build and push an image to container registry
        inputs:
        command: buildAndPush
        repository: $(imageRepository)
        dockerfile: $(dockerfilePath)
        containerRegistry: $(dockerRegistryServiceConnection)
        tags: |
            $(tag)
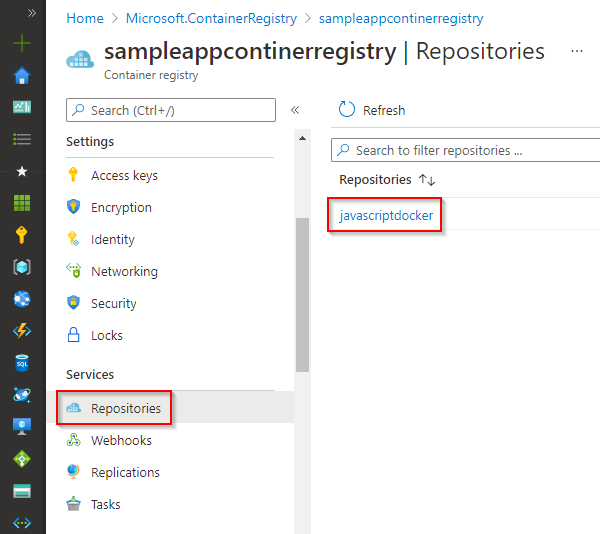
파이프라인 실행이 완료된 후 게시된 Docker 이미지를 보려면 Azure Portal에서 컨테이너 레지스트리로 이동한 다음, 리포지토리를 선택합니다.
컨테이너 레지스트리에서 이미지를 배포하려면 관리자 사용자 계정을 사용하도록 설정해야 합니다. Azure Portal에서 컨테이너 레지스트리로 이동하고 액세스 키를 선택합니다. 그런 다음, 관리자 사용자를 사용하도록 설정하기 위한 토글 단추를 선택합니다.
웹앱 만들기
Azure Portal로 이동합니다.
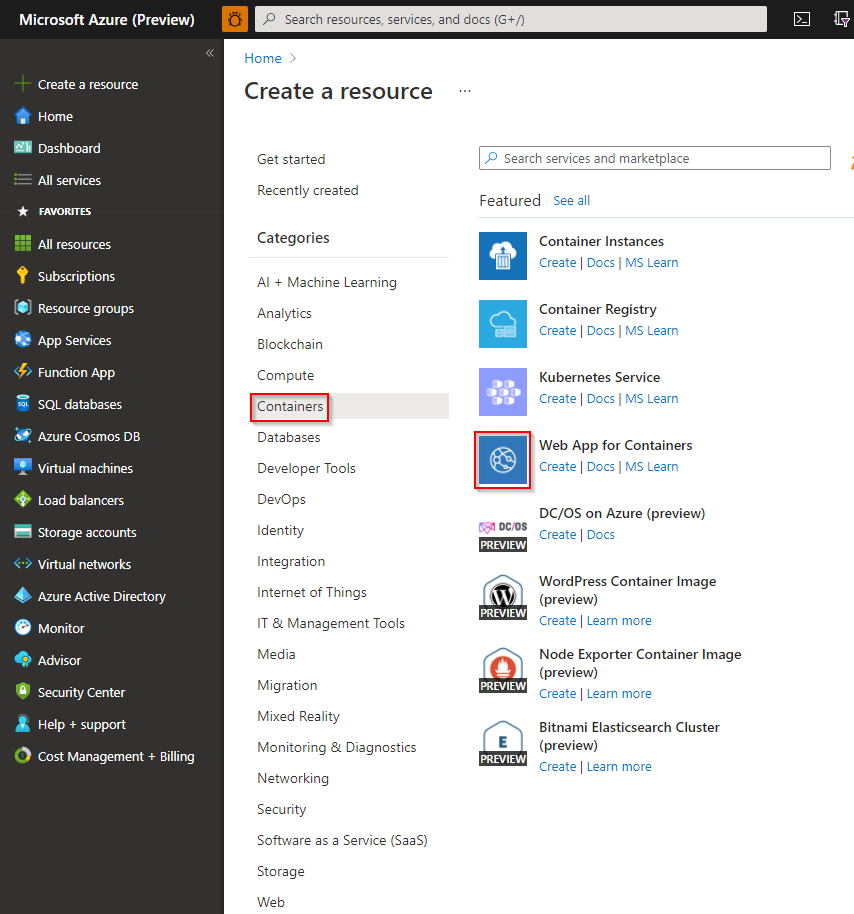
리소스>컨테이너 만들기를 선택한 다음, Web App for Containers를 선택합니다.
새 웹앱의 이름을 입력하고 새 리소스 그룹을 만듭니다. 운영 체제에 대해 Linux를 선택합니다.
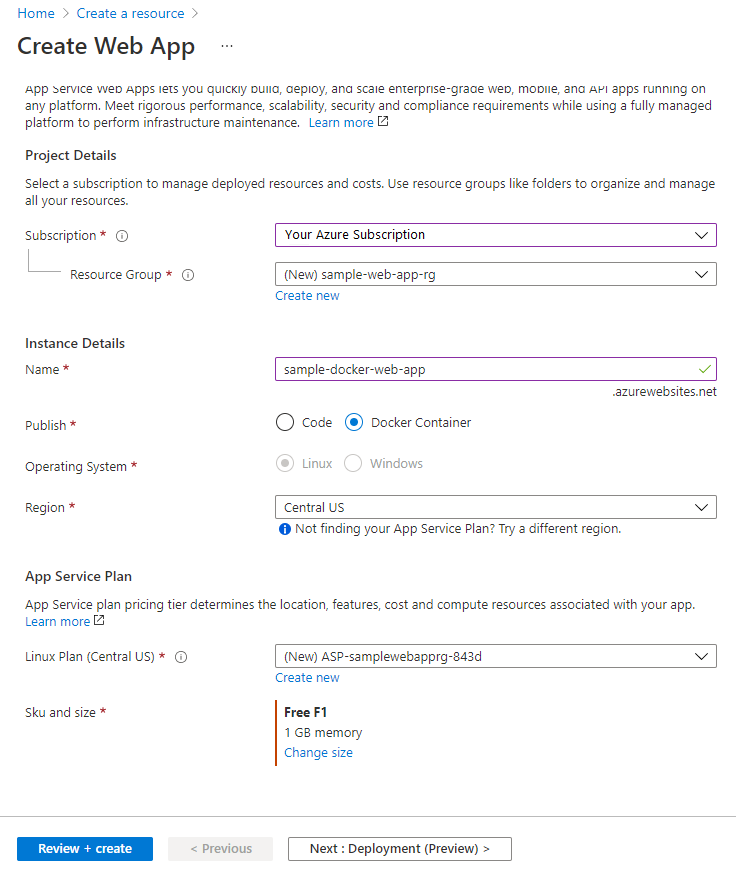
가격 책정 계획 섹션에서 F1 무료 플랜을 선택합니다.
검토 및 만들기를 선택합니다. 구성을 검토하고 완료되면 만들기를 선택합니다.
Web App for Containers에 배포
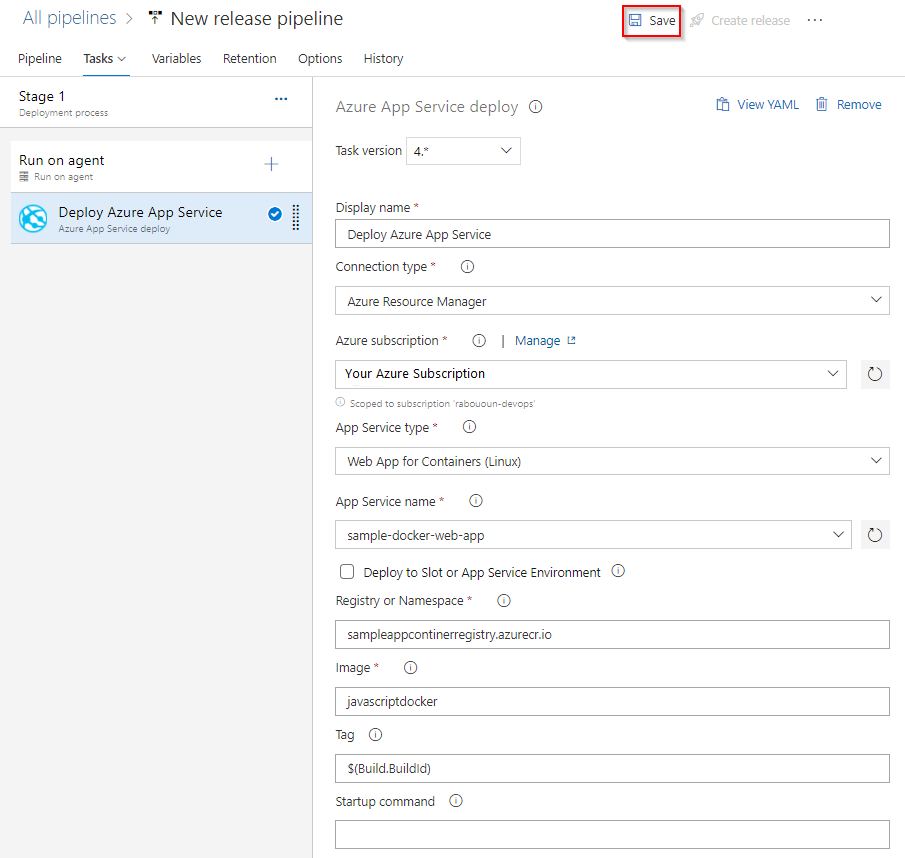
이 YAML에서는 Docker 이미지를 빌드하고 컨테이너 레지스트리에 푸시한 다음, Azure Web App for Containers에 배포합니다. 빌드 단계에서는 Docker@2 작업을 사용하여 Docker 이미지를 빌드하고 Azure Container Registry에 푸시합니다. AzureWebAppContainer@1 작업은 이미지를 Web App for Containers에 배포합니다.
trigger:
- main

resources:
- repo: self

variables:
  ## Add this under variables section in the pipeline
  azureSubscription: <Name of the Azure subscription>
  appName: <Name of the Web App>
  containerRegistry: <Name of the Azure container registry>
  dockerRegistryServiceConnection: '4fa4efbc-59af-4c0b-8637-1d5bf7f268fc'
  imageRepository: <Name of image repository>
  dockerfilePath: '$(Build.SourcesDirectory)/Dockerfile'
  tag: '$(Build.BuildId)'

  vmImageName: 'ubuntu-latest'

stages:
- stage: Build
  displayName: Build and push stage
  jobs:
  - job: Build
    displayName: Build
    pool:
      vmImage: $(vmImageName)
    steps:
    - task: Docker@2
      displayName: Build and push an image to container registry
      inputs:
        command: buildAndPush
        repository: $(imageRepository)
        dockerfile: $(dockerfilePath)
        containerRegistry: $(dockerRegistryServiceConnection)
        tags: |
          $(tag)


    ## Add the below snippet at the end of your pipeline
    - task: AzureWebAppContainer@1
      displayName: 'Azure Web App on Container Deploy'
      inputs:
        azureSubscription: $(azureSubscription)
        appName: $(appName)
        containers: $(containerRegistry)/$(imageRepository):$(tag)
배포 슬롯에 배포
여러 슬롯이 있도록 Azure Web App 컨테이너를 구성할 수 있습니다. 슬롯을 사용하면 고객이 사용할 수 있도록 하기 전에 앱을 안전하게 배포하고 테스트할 수 있습니다. 자세한 내용은 스테이징 환경 만들기를 참조하세요.
다음 YAML 코드 조각은 스테이징 슬롯에 배포한 다음 프로덕션 슬롯으로 교환하는 방법을 보여줍니다.
- task: AzureWebAppContainer@1
  inputs:
    azureSubscription: '<Azure service connection>'
    appName: '<Name of the web app>'
    containers: $(containerRegistry)/$(imageRepository):$(tag)
    deployToSlotOrASE: true
    resourceGroupName: '<Name of the resource group>'
    slotName: staging

- task: AzureAppServiceManage@0
  inputs:
    azureSubscription: '<Azure service connection>'
    WebAppName: '<name of web app>'
    ResourceGroupName: '<name of resource group>'
    SourceSlot: staging
    SwapWithProduction: true
FAQ
Q: Docker 레지스트리 자격 증명을 찾으려면 어떻게 해야 하나요?
A: Azure Portal로 이동한 다음 컨테이너용 웹앱을 선택합니다. 구성>애플리케이션 설정을 선택한 다음 클릭하여 값을 표시합니다.
