빠른 시작: Azure AI Content Understanding REST API
Azure AI Content Understanding REST API(2024-12-01-preview)의 최신 미리 보기 버전 사용을 시작합니다.
Azure AI Content Understanding은 모든 형식의 파일(문서, 이미지, 비디오 및 오디오)을 분석하고 사용자 정의 필드 형식으로 구조화된 출력을 추출하는 새로운 생성 AI 기반 Azure AI 서비스 입니다.
REST API를 호출하여 Content Understanding 서비스를 워크플로 및 애플리케이션에 쉽게 통합합니다.
이 빠른 시작에서는 Content Understanding REST API를 사용하여 사용자 지정 분석기를 만들고 입력에서 콘텐츠 및 필드를 추출하는 방법을 안내합니다.
필수 조건
시작하려면 활성 Azure 구독이 필요합니다. Azure 계정이 없는 경우 무료 구독을 만들 수 있습니다.
Azure 구독이 있으면 Azure Portal에서 Azure AI Services 리소스를 만듭니다. 이 다중 서비스 리소스를 사용하면 단일 자격 증명 집합을 사용하여 여러 Azure AI 서비스에 액세스할 수 있습니다.
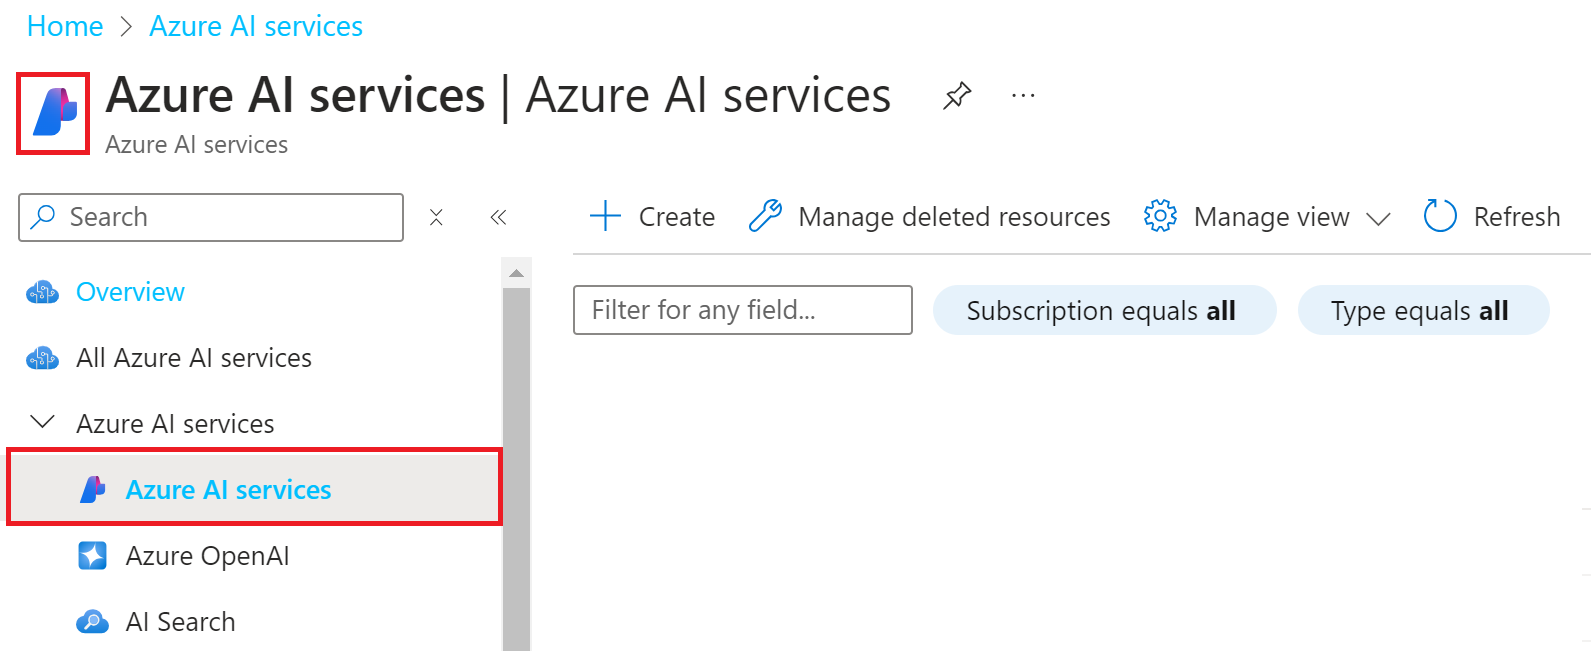
이 리소스는 포털의 Azure AI 서비스에 → Azure AI 서비스 아래에 나열됩니다.
Important
Azure는 Azure AI 서비스라는 두 개 이상의 리소스 유형을 제공합니다. 다음 이미지와 같이 Azure AI 서비스에 → Azure AI 서비스 아래에 나열된 항목을 선택해야 합니다. 자세한 내용은 Azure AI Services 리소스 만들기를 참조 하세요.

이 빠른 시작에서는 cURL 명령줄 도구를 사용합니다. 설치되지 않은 경우 개발 환경에 대한 버전을 다운로드할 수 있습니다.
사용자 지정 분석기 만들기
사용자 지정 분석기를 만들려면 추출하려는 구조적 데이터를 설명하는 필드 스키마를 정의해야 합니다. 다음 예제에서는 청구서 문서에서 기본 정보를 추출하기 위한 스키마를 정의합니다.
먼저 다음 콘텐츠를 사용하여 이름이 지정된 request_body.json JSON 파일을 만듭니다.
{
  "description": "Sample invoice analyzer",
  "scenario": "document",
  "config": {
    "returnDetails": true
  },
  "fieldSchema": {
    "fields": {
      "VendorName": {
        "type": "string",
        "method": "extract",
        "description": "Vendor issuing the invoice"
      },
      "Items": {
        "type": "array",
        "method": "extract",
        "items": {
          "type": "object",
          "properties": {
            "Description": {
              "type": "string",
              "method": "extract",
              "description": "Description of the item"
            },
            "Amount": {
              "type": "number",
              "method": "extract",
              "description": "Amount of the item"
            }
          }
        }
      }
    }
  }
}
다음 cURL 명령을 실행하기 전에 HTTP 요청을 다음과 같이 변경합니다.
-
{key}Azure Portal Azure AI Services 인스턴스의 엔드포인트 및 키 값으로 바꿉{endpoint}니다. -
{analyzerId}새 분석기의 이름으로 바꾸고 만듭니다(예:myInvoice.).
PUT 요청
curl -i -X PUT "{endpoint}/contentunderstanding/analyzers/{analyzerId}?api-version=2024-12-01-preview" \
  -H "Ocp-Apim-Subscription-Key: {key}" \
  -H "Content-Type: application/json" \
  -d @request_body.json
PUT 응답
201(Created) 응답에는 이 비동기 만들기 작업의 상태를 추적하는 데 사용할 수 있는 URL이 포함된 헤더가 포함됩니다 Operation-Location .
201 Created
Operation-Location: {endpoint}/contentunderstanding/analyzers/{analyzerId}/operations/{operationId}?api-version=2024-12-01-preview
완료되면 URL에서 HTTP GET을 수행하면 반환됩니다 "status": "succeeded".
curl -i -X GET "{endpoint}/contentunderstanding/analyzers/{analyzerId}/operations/{operationId}?api-version=2024-12-01-preview" \
  -H "Ocp-Apim-Subscription-Key: {key}"
파일 분석
만든 사용자 지정 분석기를 사용하여 파일을 분석하여 스키마에 정의된 필드를 추출할 수 있습니다.
cURL 명령을 실행하기 전에 HTTP 요청을 다음과 같이 변경합니다.
-
{key}Azure Portal Azure AI Services 인스턴스의 엔드포인트 및 키 값으로 바꿉{endpoint}니다. - 앞에서 만든 사용자 지정 분석기의 이름으로 바꿉
{analyzerId}습니다. - SAS(공유 액세스 서명) 또는 샘플 URL을 사용하여 Azure Storage Blob에 대한 경로와 같이 분석할 파일의 공개적으로 액세스할 수 있는 URL
https://github.com/Azure-Samples/cognitive-services-REST-api-samples/raw/master/curl/form-recognizer/rest-api/invoice.pdf로 바꿉{fileUrl}니다.
POST 요청
curl -i -X POST "{endpoint}/contentunderstanding/analyzers/{analyzerId}:analyze?api-version=2024-12-01-preview" \
  -H "Ocp-Apim-Subscription-Key: {key}" \
  -H "Content-Type: application/json" \
  -d "{\"url\":\"{fileUrl}\"}"
POST 응답
202(Accepted) 응답에는 이 비동기 분석 작업의 상태를 추적하는 데 사용할 수 있는 URL이 포함된 헤더가 포함됩니다 Operation-Location .
202 Accepted
Operation-Location: {endpoint}/contentunderstanding/analyzers/{analyzerId}/results/{resultId}?api-version=2024-12-01-preview
분석 결과 가져오기
resultId 이전 POST 응답에서 Operation-Location 반환된 헤더를 사용하고 분석 결과를 검색합니다.
-
{key}Azure Portal Azure AI Services 인스턴스의 엔드포인트 및 키 값으로 바꿉{endpoint}니다. - 앞에서 만든 사용자 지정 분석기의 이름으로 바꿉
{analyzerId}습니다. - 요청에서 반환된
resultId항목으로 바꿉다.{resultId}POST
GET 요청
curl -i -X GET "{endpoint}/contentunderstanding/analyzers/{analyzerId}/results/{resultId}?api-version=2024-12-01-preview" \
  -H "Ocp-Apim-Subscription-Key: {key}"
GET 응답
200(OK) JSON 응답에는 작업의 상태를 나타내는 필드가 포함됩니다 status . 작업이 완료되지 않은 경우 status의 값은 running 또는 notStarted입니다. 이러한 경우 수동으로 또는 스크립트를 통해 API를 다시 호출해야 합니다. 호출 사이에 1초 이상의 간격을 기다립니다.
샘플 응답
{
  "id": "bcf8c7c7-03ab-4204-b22c-2b34203ef5db",
  "status": "Succeeded",
  "result": {
    "analyzerId": "sample_invoice_analyzer",
    "apiVersion": "2024-12-01-preview",
    "createdAt": "2024-11-13T07:15:46Z",
    "warnings": [],
    "contents": [
      {
        "markdown": "CONTOSO LTD.\n\n\n# INVOICE\n\nContoso Headquarters...",
        "fields": {
          "VendorName": {
            "type": "string",
            "valueString": "CONTOSO LTD.",
            "spans": [ { "offset": 0, "length": 12 } ],
            "confidence": 0.941,
            "source": "D(1,0.5729,0.6582,2.3353,0.6582,2.3353,0.8957,0.5729,0.8957)"
          },
          "Items": {
            "type": "array",
            "valueArray": [
              {
                "type": "object",
                "valueObject": {
                  "Description": {
                    "type": "string",
                    "valueString": "Consulting Services",
                    "spans": [ { "offset": 909, "length": 19 } ],
                    "confidence": 0.971,
                    "source": "D(1,2.3264,5.673,3.6413,5.673,3.6413,5.8402,2.3264,5.8402)"
                  },
                  "Amount": {
                    "type": "number",
                    "valueNumber": 60,
                    "spans": [ { "offset": 995, "length": 6 } ],
                    "confidence": 0.989,
                    "source": "D(1,7.4507,5.6684,7.9245,5.6684,7.9245,5.8323,7.4507,5.8323)"
                  }
                }
              }, ...
            ]
          }
        },
        "kind": "document",
        "startPageNumber": 1,
        "endPageNumber": 1,
        "unit": "inch",
        "pages": [
          {
            "pageNumber": 1,
            "angle": -0.0039,
            "width": 8.5,
            "height": 11,
            "spans": [ { "offset": 0, "length": 1650 } ],
            "words": [
              {
                "content": "CONTOSO",
                "span": { "offset": 0, "length": 7 },
                "confidence": 0.997,
                "source": "D(1,0.5739,0.6582,1.7446,0.6595,1.7434,0.8952,0.5729,0.8915)"
              }, ...
            ],
            "lines": [
              {
                "content": "CONTOSO LTD.",
                "source": "D(1,0.5734,0.6563,2.335,0.6601,2.3345,0.8933,0.5729,0.8895)",
                "span": { "offset": 0, "length": 12 }
              }, ...
            ]
          }
        ],
        "paragraphs": [
          {
            "content": "CONTOSO LTD.",
            "source": "D(1,0.5734,0.6563,2.335,0.6601,2.3345,0.8933,0.5729,0.8895)",
            "span": { "offset": 0, "length": 12 }
          }, ...
        ],
        "sections": [
          {
            "span": { "offset": 0, "length": 1649 },
            "elements": [ "/sections/1", "/sections/2" ]
          },
          {
            "span": { "offset": 0, "length": 12 },
            "elements": [ "/paragraphs/0" ]
          }, ...
        ],
        "tables": [
          {
            "rowCount": 2,
            "columnCount": 6,
            "cells": [
              {
                "kind": "columnHeader",
                "rowIndex": 0,
                "columnIndex": 0,
                "rowSpan": 1,
                "columnSpan": 1,
                "content": "SALESPERSON",
                "source": "D(1,0.5389,4.5514,1.7505,4.5514,1.7505,4.8364,0.5389,4.8364)",
                "span": { "offset": 512, "length": 11 },
                "elements": [ "/paragraphs/19" ]
              }, ...
            ],
            "source": "D(1,0.4885,4.5543,8.0163,4.5539,8.015,5.1207,0.4879,5.1209)",
            "span": { "offset": 495, "length": 228 }
          }, ...
        ]
      }
    ]
  }
}