Provision Teams using Power Apps and Graph API
Introduction
Microsoft Teams is a collaboration app built for hybrid work, so you and your team stay informed, organized, and connected. With remote work taking the front seat, Teams have received immense acceptance in every organization and have in fact become the backbone of collaboration over a short period of time. Automation of Team and Channel Creation within Microsoft Teams hence becomes a topic of interest.
In this article, we will see how we can build a Power App using which we can create a Microsoft Teams leveraging Graph API
Implementation
We will be creating a Canvas App that accepts the input parameters needed for provisioning Teams. On click of the create button, we will call a Power Automate Flow to which we will pass the parameters and invoke the Graph API to create the Teams for us.
To save the details of the created Teams, we will be saving the data used for the Team creation into a SharePoint list as a way of logging.
Register Azure Application
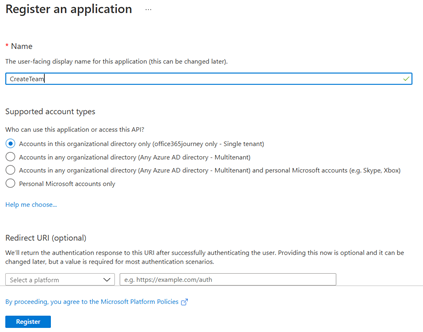
One of the first things that we need to do to use Graph API is to create an Azure App Registration. Let’s head over to the Azure Portal to create the App Registration. We can access it from Azure Active Directory > App registrations blade > click the new registration button. Specify the app name and click on register.
Next step is to create the client secret which can be done from the Certificates and secrets blade. Click on New client secret to generate a new one by adding the description and the expiry window.
Click on add which will generate the secret and show it in the window. Ensure that we save it somewhere safe as it will be hashed the moment we navigate away from the page.
Now we need to specify the permissions that needs to be granted to the app from the API Permissions blade. Since we are going to work on team creation, as per the official documentation, the permissions needed are:
Delegated Permission |
Team.Create |
Application Permission |
Team.Create, Teamwork.Migrate.All |
Microsoft Graph permission names follow a simple pattern: resource.operation.constraint. For example, here Team.Create grants the permission to do the operation of creation on the resource Team.
Delegated Permissions are used when there is a signed in user context in our implementation. Since in our case, the application runs as background service in response to when a user requests for team creation, we don’t need to specifically call for a signed in user context. However, to allow this, the administrator will have to consent the requested permission (Team.Create) as it will run unattended and with full privileges once the application goes live.
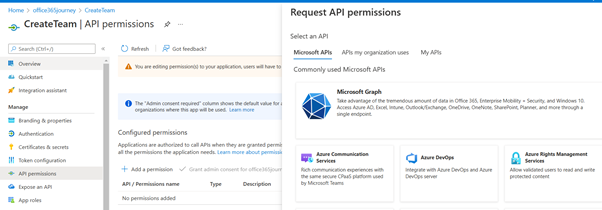
So, lets head over to the API Permissions and click on Add a permission which will slide open the panel where we can select the API – Microsoft Graph which we will be using in our app.
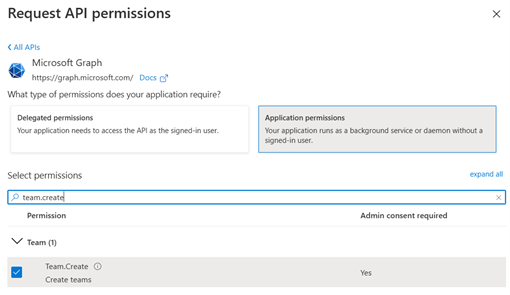
Let’s select Application Permissions and select the Permission – Team.Create.
The administrator will have to grant access to the newly added application permission by clicking on “Grant Admin Consent for <Tenant>”
After providing the admin consent for the permission, a tick mark will appear in the status
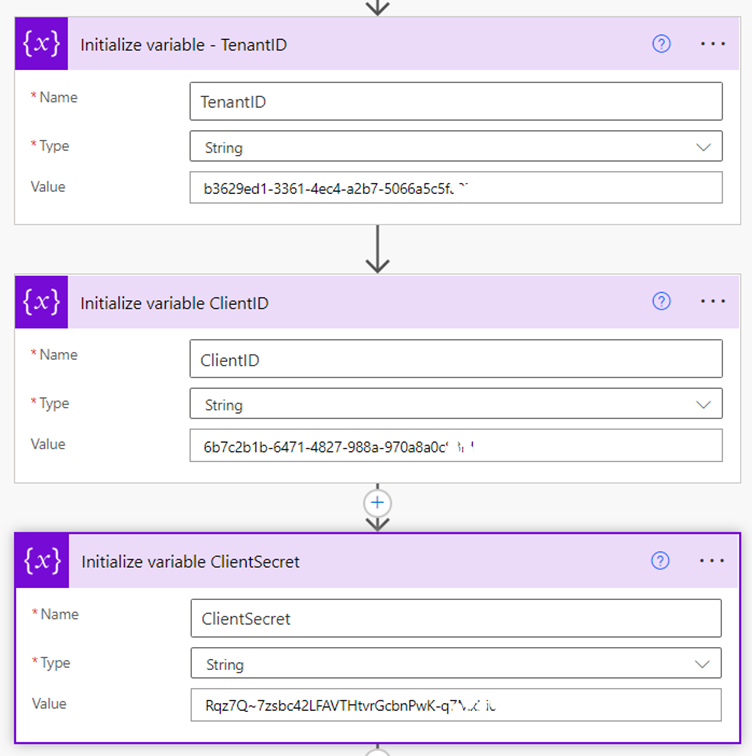
Thus, the configurations are completed in the portal, and we can note down 2 more value from the Overview blade: Tenant ID and Application ID along with the client secret as we will be using it in the Power Automate.
Build the Power Automate Flow
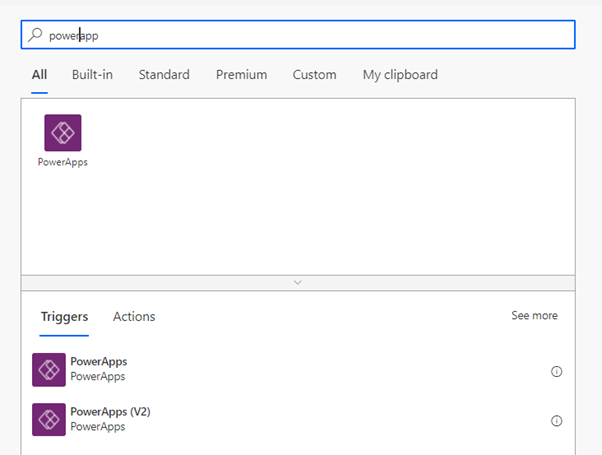
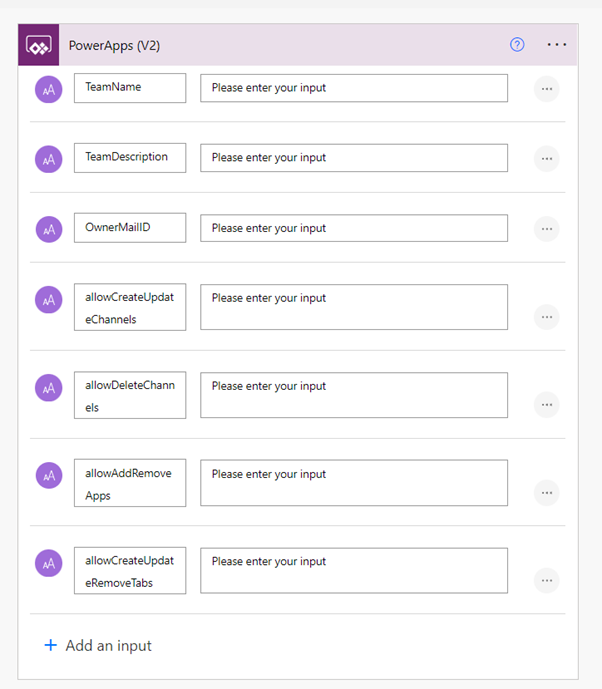
We will be accepting the input parameters needed for Teams Creation using Graph API from the Power App. So as to do this, lets create an instant flow and add the Power Apps V2 connector which has improved Input parameter management options that the first version of the connector.
We will add the below input parameter variables to the trigger.
We will add the variables to store the Tenant ID, Client ID and Client Secret.
A recommend best practice would be to store the secret in Azure Key Vault and read it from there which has been described in this article.
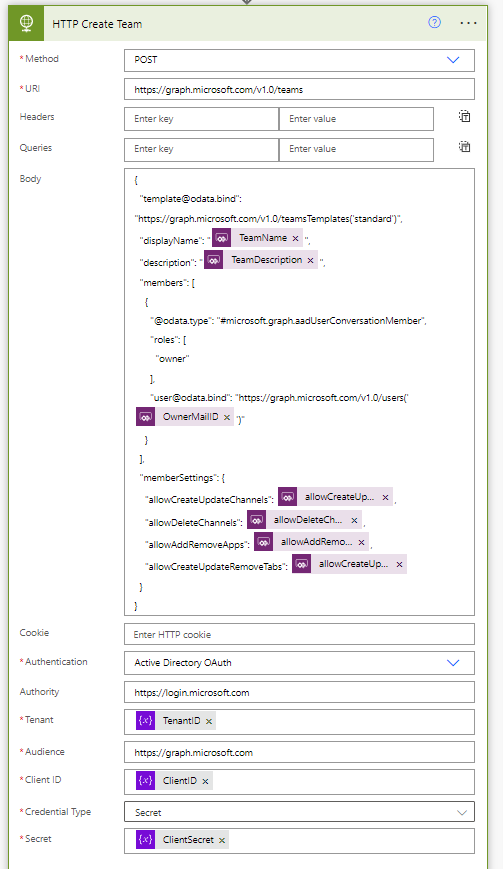
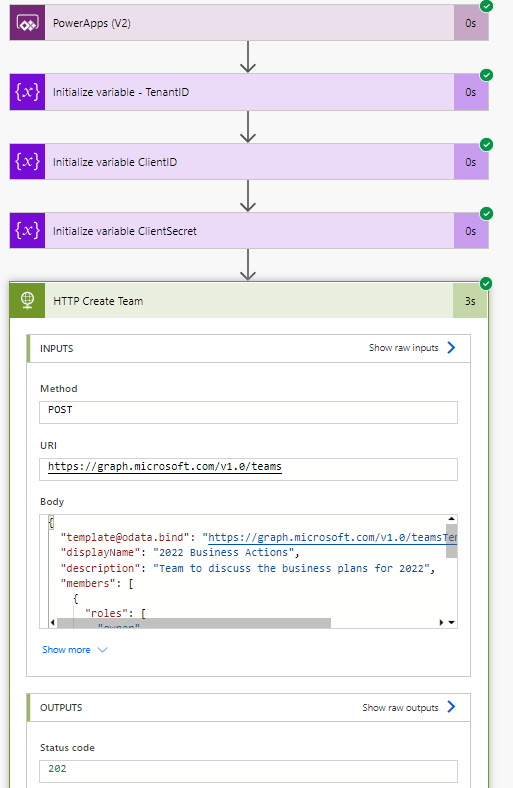
Finally lets add the Team Creation step using the HTTP Action where we sent a POST request to the URL : https://graph.microsoft.com/v1.0/teams and pass the body with team creation parameters as well as the Client Secret and ID:
{
  "template@odata.bind": "https://graph.microsoft.com/v1.0/teamsTemplates('standard')",
  "displayName": "@{triggerBody()['text']}",
  "description": "@{triggerBody()['text_1']}",
  "members": [
    {
      "@@odata.type": "#microsoft.graph.aadUserConversationMember",
      "roles": [
        "owner"
      ],
      "user@odata.bind": "https://graph.microsoft.com/v1.0/users('@{triggerBody()['text_2']}')"
    }
  ],
  "memberSettings": {
    "allowCreateUpdateChannels": @{triggerBody()['text_3']},
    "allowDeleteChannels":@{triggerBody()['text_4']} ,
    "allowAddRemoveApps":@{triggerBody()['text_5']} ,
    "allowCreateUpdateRemoveTabs" :@{triggerBody()['text_6']}
  }
}
Build the Power App
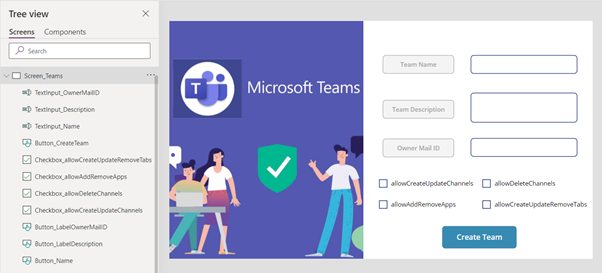
Now, lets build the Canvas app and add Text Input and Checkboxes to accept parameter values from Users. At a minimal level, we will be adding the below parameters as fields in the app:
- Team Name
- Team Description
- Owner Mail ID
- allowCreateUpdateChannels
- allowDeleteChannels
- allowAddRemoveApps
- allowCreateUpdateRemoveTabs
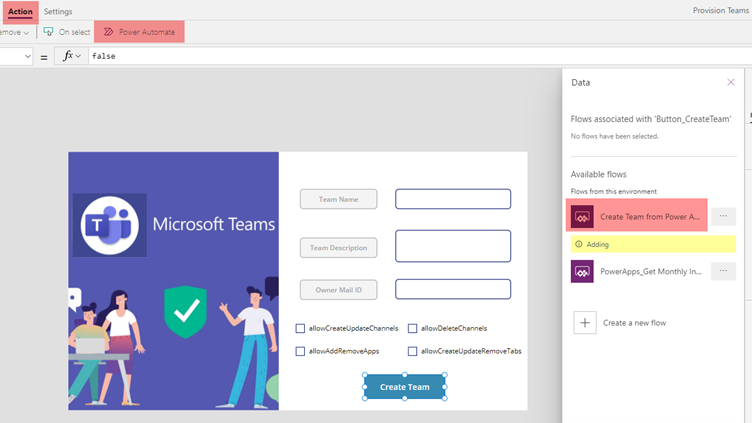
We will then be calling the recently created Power Automate Flow and passing the parameters to it.
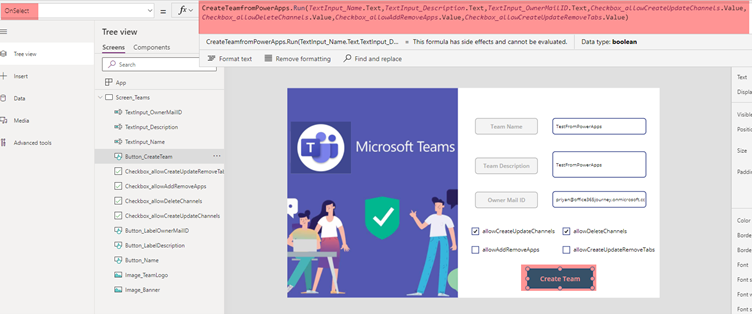
Lets add all the parameters we have defined in the flow while calling it from Power App using the expression :
CreateTeamfromPowerApps.Run(TextInput_Name.Text,TextInput_Description.Text,TextInput_OwnerMailID.Text,Checkbox_allowCreateUpdateChannels.Value,Checkbox_allowDeleteChannels.Value,Checkbox_allowAddRemoveApps.Value,Checkbox_allowCreateUpdateRemoveTabs.Value)
Test the App
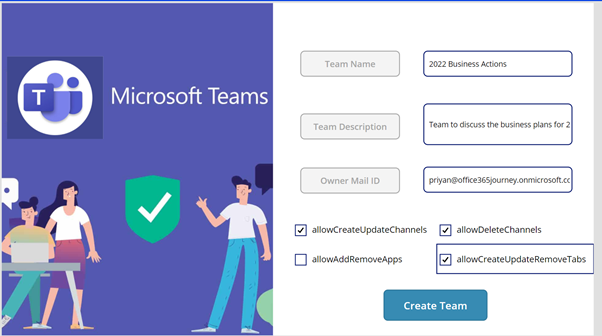
Now let’s test the team creation app by previewing it and add the team creation parameters
Clicking on Create Team will call the flow and invoke the Graph API to create a Team
We can see that the flow has run successfully and has also created the team.
Summary
Thus, we saw how we can create a Team Provisioning Power App that calls Power Automate and leverages Graph API to create a Team. In the coming article, we will see how we can call Graph API directly from Power App without an intermediary Power Automate using Customer Power App Connectors.
