Universal Windows App: Building an app using Windows Template Studio
Introduction
This Wiki explains how to build a Universal Windows App using Windows Template Studio with Visual Studio 2017.
What is Universal Windows application?
The Universal Windows Platform (UWP) is the app platform for Windows 10. You can develop apps for UWP with just one API set, one app package, and one store to reach all Windows 10 devices – PC, tablet, phone, Xbox, HoloLens, Surface Hub and more.
What is Windows Template Studio?
Windows Template Studio is a Visual Studio 2017 Extension that accelerates the creation of new Universal Windows Platform (UWP) apps using a wizard-based experience.
The resulting UWP project is well-formed, readable code that incorporates the latest Windows 10 features while implementing proven patterns and best practices.
Requirements
- You must be online the first time you use the wizard to generate an app or no templates will be loaded.
- Only compatible with Windows 10. You cannot use this if running VS 2107 on an older Operating System
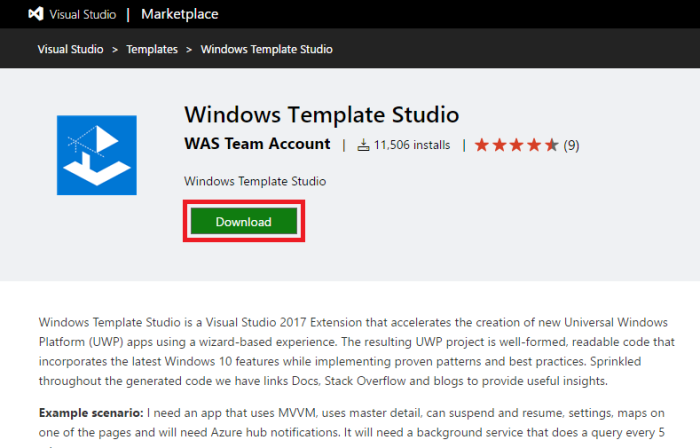
Download Windows Template Studio
For downloading Windows Template Studio, follow the following steps:
- Access to this Visual Studio Gallery link: https://marketplace.visualstudio.com/items?itemName=WASTeamAccount.WindowsTemplateStudio
- Click to Download
- Once the VSIX file is downloaded, install.
Create Universal Windows application project with Windows Template Studio
Step1: Select Windows Template Studio project
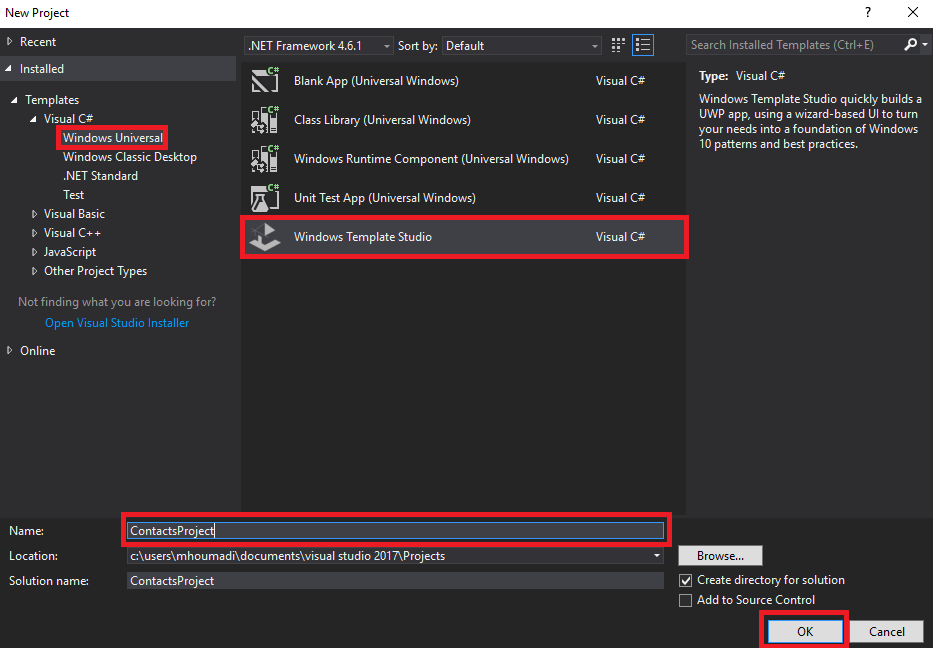
- Open Visual Studio 2017.
- Select Windows Universal project in Visual C# Templates.
- Select Windows Template Studio project, name the project ContactsProject and click OK
Step 2: Windows Template Studio Wizard
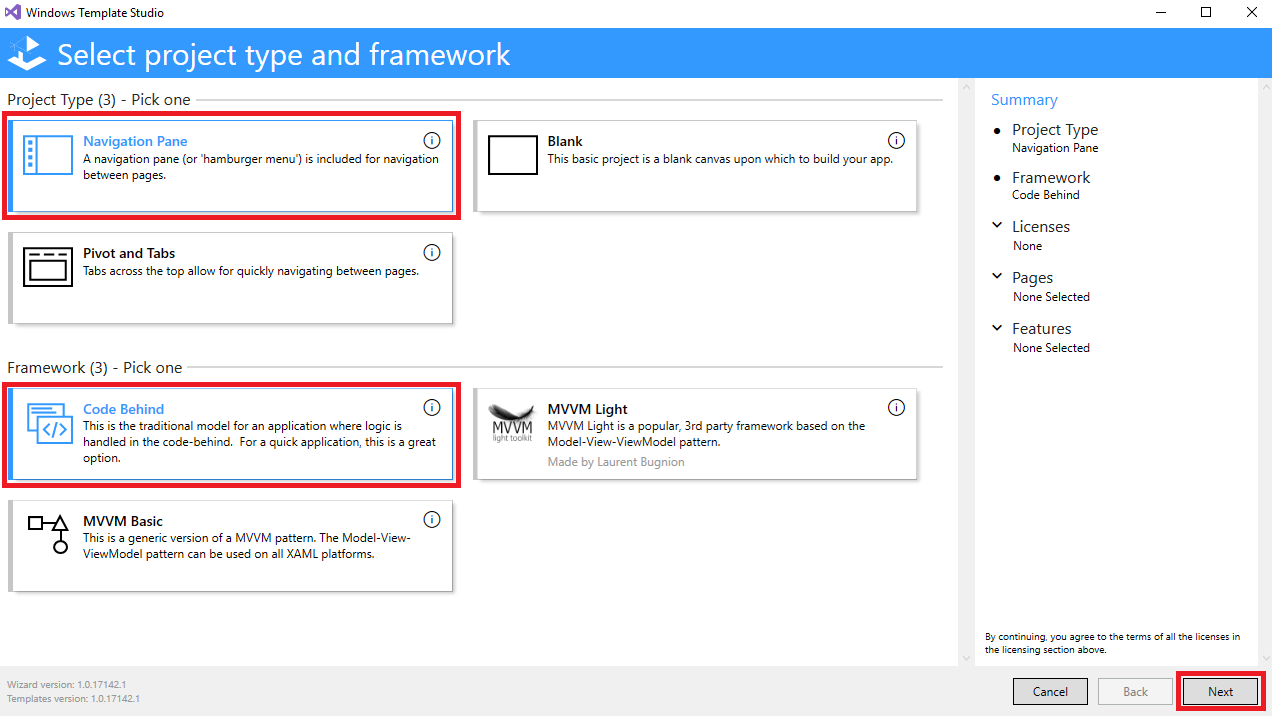
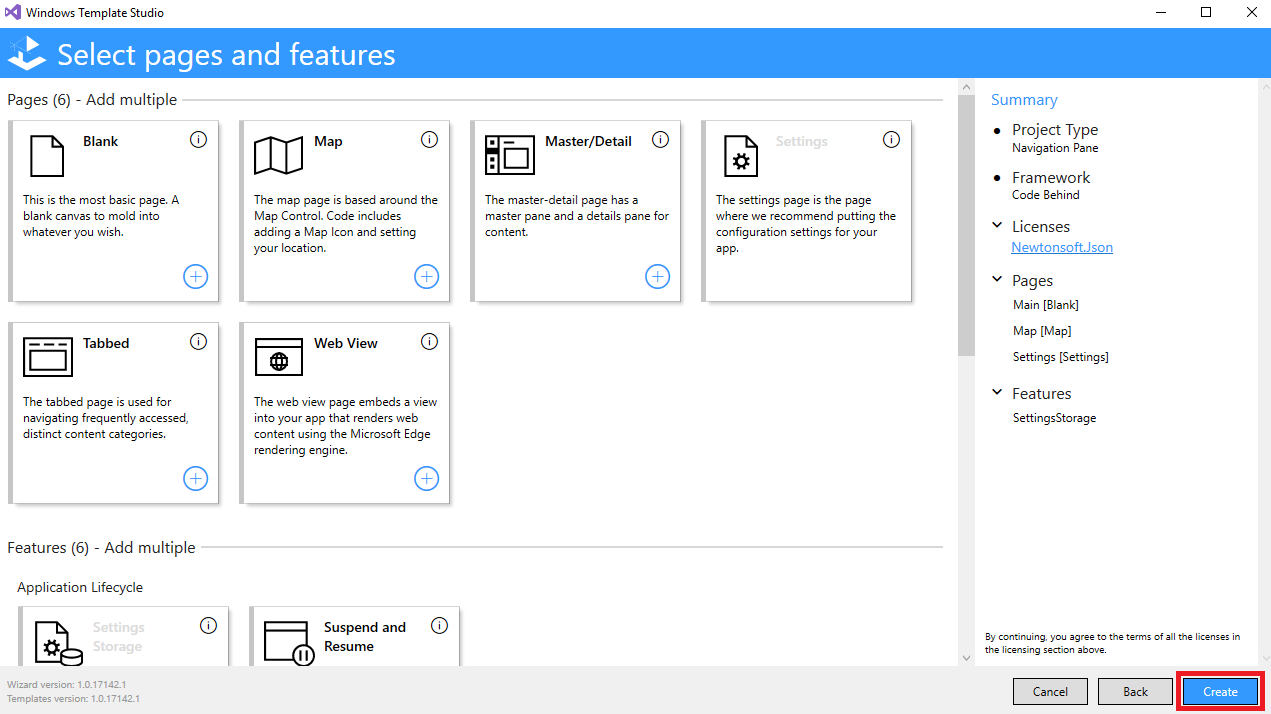
Windows Template Studio approaches UWP app creation using the following four attribute sets through the Wizard: Project type, App framework, App pages and Windows 10 features.
Once you select the attributes you want your new UWP app is generated.
In this step, we will create the Universal Windows project template using the Windows Template Studio Wizard.
- Select Project Type: Navigation Pane
- Select Framework: Code behind
- Click Next
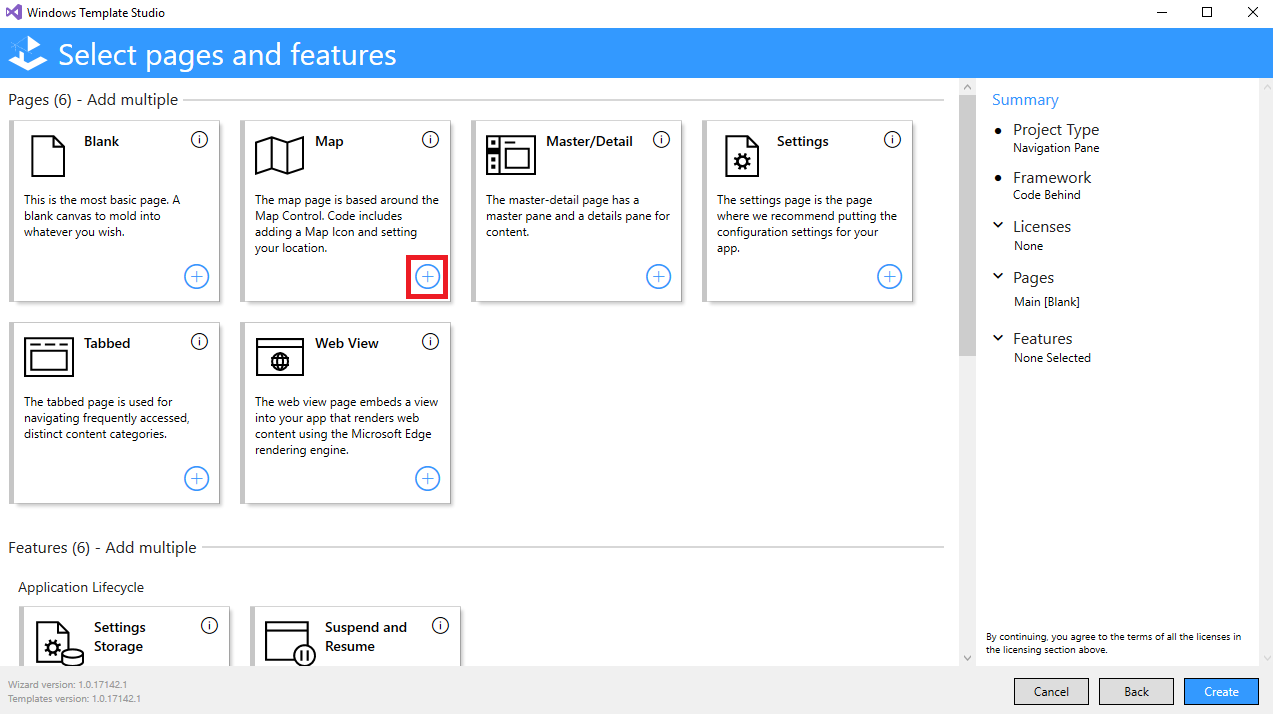
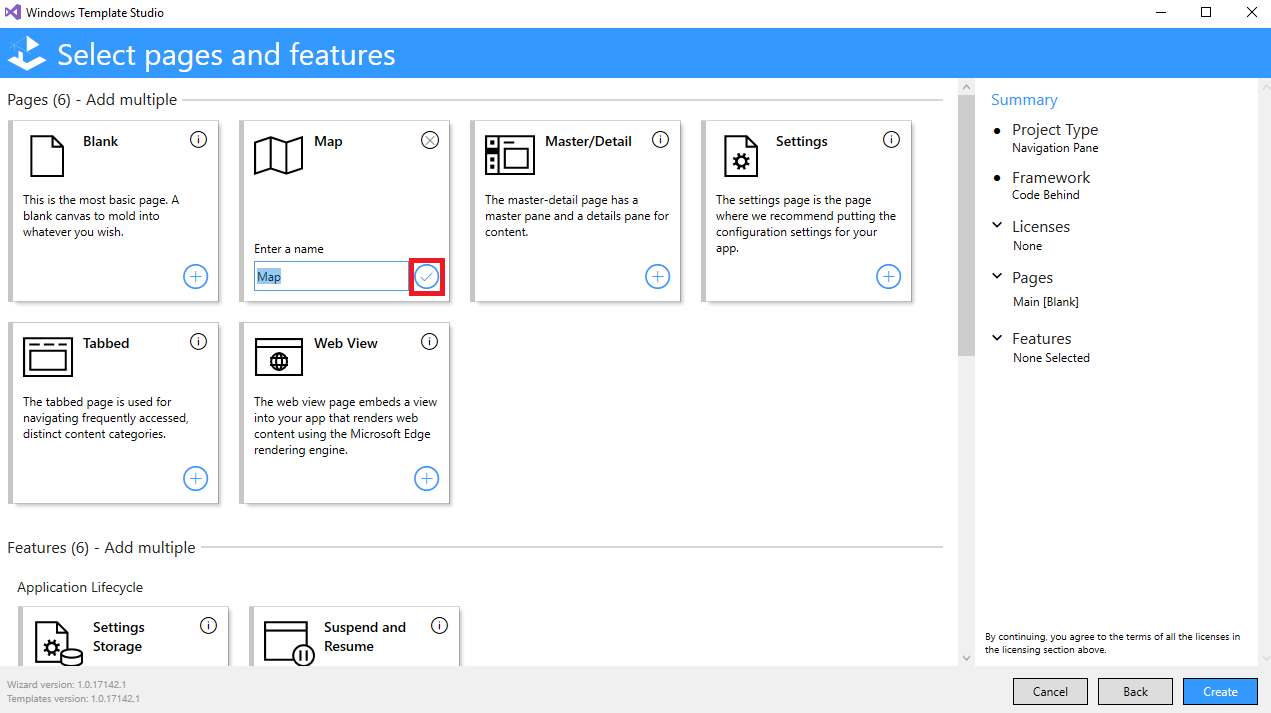
- Add a Map page
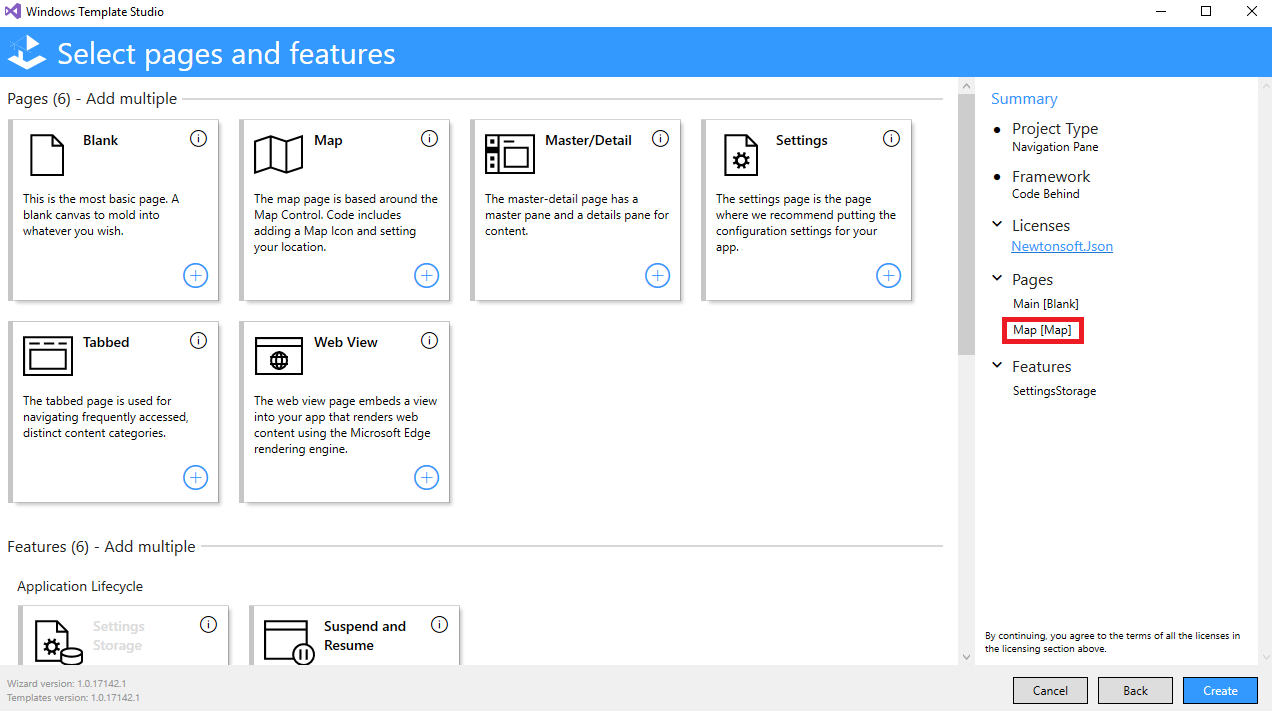
- Validate the creation of the Map page.
- Once the validation is done, the Map page will appear to the Summary region.
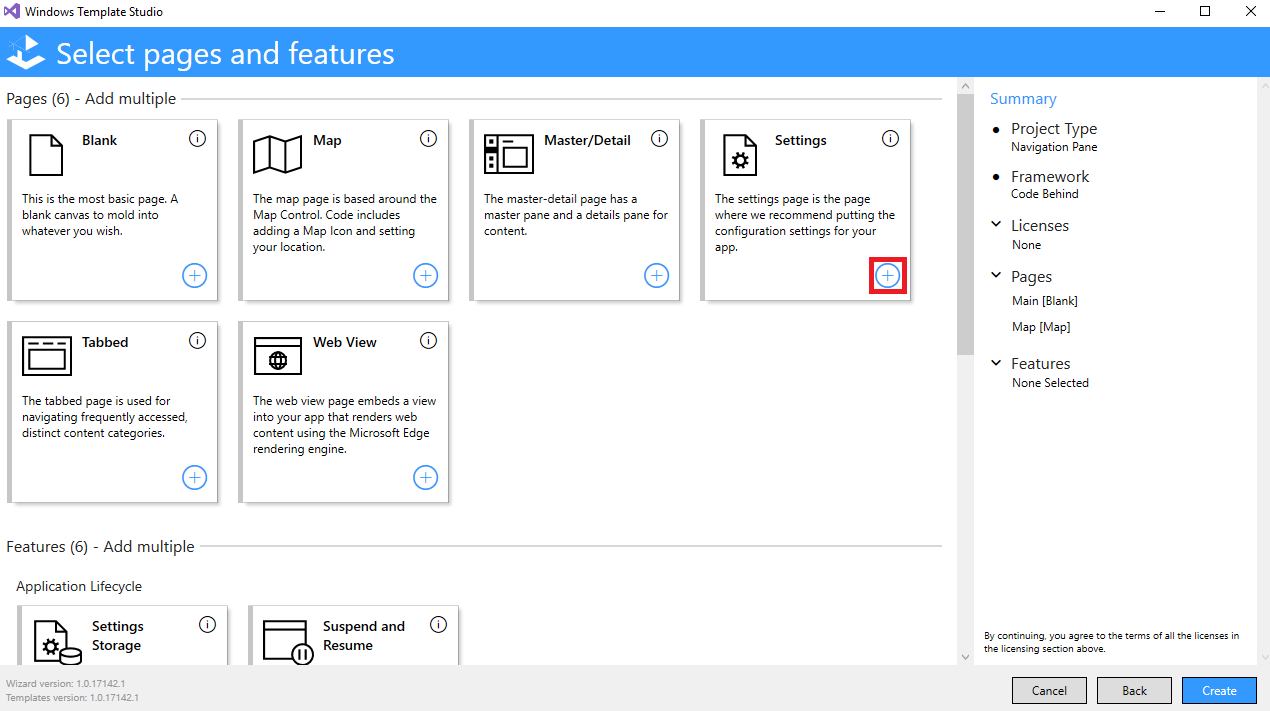
- Add a Settings page
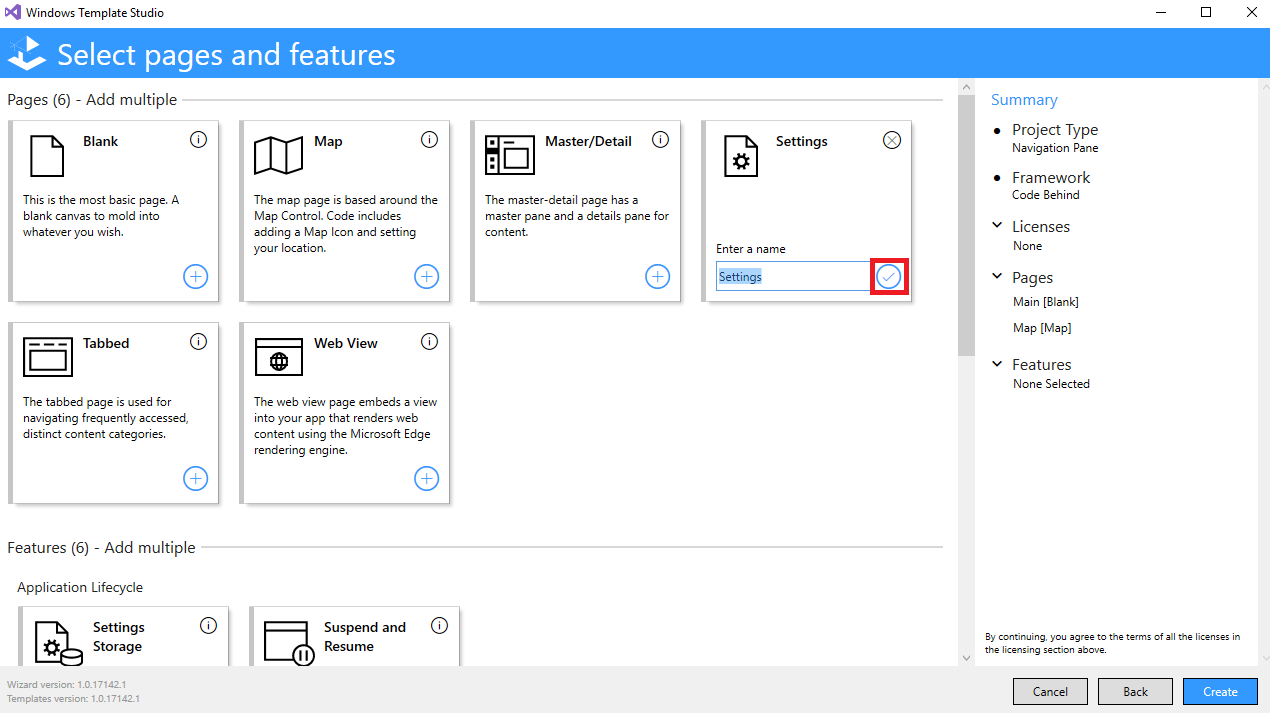
- Validate the creation of the Settings page.
- Click Create
The project is now created
Getting a Bing Maps Key (if you don’t have one yet)
In this project, we will use the Bing Maps to display the address of the contact. To do so, we will need to use the Bing Maps APIs.
To use the Bing Maps APIS, you must have a Bing Maps Key.
For getting a Bing Maps Key, follow the steps in this link: Getting a Bing Maps Key
Install Faker.Net (Portable Edition)
Faker.Net (Portable Edition) is used to easily generate fake data: names, addresses, phone numbers, etc.
To install Faker.NET (Portable Edition), run the following command in the Package Manager Console
Install-Package Faker.Net.Portable -Version 2.5.0
Create the Models
· In the folder Models, add new class and name it Contact.
· Insert the following code to the class Contact:
public class  Contact
 {
     public string  Name { get; set; }

     public string  FirstName { get; set; }

     public double  Latitude { get; set; }

     public double  Longitude { get; set; }
 }
Main Page
In this section, we are going to develop the MainPage. The MainPage will display all contacts.
Populate Datas
In this part, we will create hundred contacts using Faker.Net (Portable Edition) for the application.
Open the MainPage.xaml.cs and insert the following code:
/// <summary>
/// Get all contacts list
/// </summary>
/// <returns></returns>
private List<Contact> Contacts()
{
    List<Contact> LstContact = new  List<Contact>();

    for (int i = 0; i < 100; i++)
    {
        Contact contact = new  Contact()
        {
            Name = Faker.Name.Last(),
            FirstName = Faker.Name.First(),
            Latitude = Faker.Address.Latitude(),
            Longitude = Faker.Address.Longitude()
        };

        LstContact.Add(contact);
    }

    return LstContact;
}
Create the User Interface
In this section, we will create the user interface of the MainPage.
· Open MainPage.xaml
**
**
· Declare the namespace Models to use the Contact class: xmlns:models="using:ContactsProject.Models"
· Below <Grid Grid.Row="1" Background="{ThemeResource SystemControlPageBackgroundChromeLowBrush}">, insert the following code:
<GridView Margin="20"
          x:Name="GVContacts"
          IsItemClickEnabled="True"
          SelectionMode="None"
          ItemClick="GVContacts_ItemClick">
    <GridView.ItemTemplate>
        <DataTemplate x:DataType="models:Contact">
            <StackPanel Height="150"
                        Width="150"
                        Background="#236B8E">
                <TextBlock Text="{x:Bind FirstName}"
                           Foreground="White"
                           Style="{StaticResource SubtitleTextBlockStyle}"
                           Margin="10" />
                <TextBlock Text="{x:Bind Name}"
                           Foreground="White"
                           Style="{StaticResource SubtitleTextBlockStyle}"
                           Margin="10" />
            </StackPanel>
        </DataTemplate>
    </GridView.ItemTemplate>
</GridView>
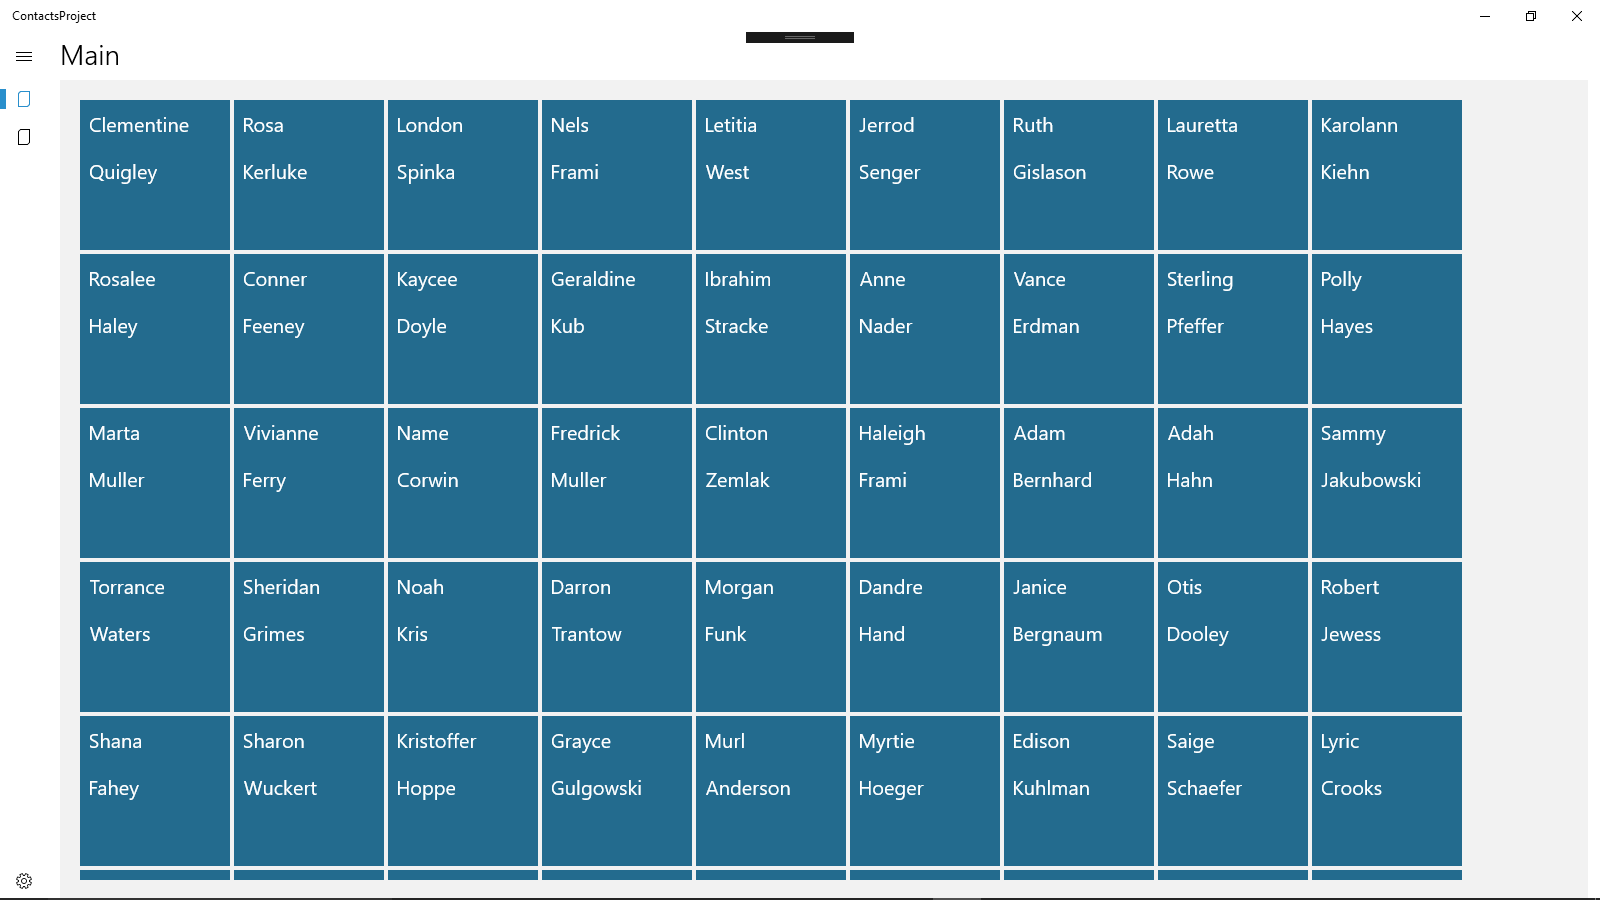
This code allows to display Contacts in the GridView GVContacts
Code behind
In this part, we will insert the code behind of the MainPage.
When we open the MainPage.xaml.cs, we notice that the extension Windows Template Studio inserted a PropertyChangedEventHandler PropertyChanged (see the code below):
public event  PropertyChangedEventHandler PropertyChanged;

 private void  Set<T>(ref  T storage, T value, [CallerMemberName]string propertyName = null)
 {
     if (Equals(storage, value))
     {
         return;
     }

     storage = value;
     OnPropertyChanged(propertyName);
 }

 private void  OnPropertyChanged(string propertyName) => PropertyChanged?.Invoke(this, new  PropertyChangedEventArgs(propertyName));
Now let’s handle the code behind of the MainPage.
In the bottom of the Contacts() method insert this code :
protected override  void OnNavigatedTo(NavigationEventArgs e)
{
    base.OnNavigatedTo(e);

    GVContacts.ItemsSource = Contacts();
}


private void  GVContacts_ItemClick(object sender, ItemClickEventArgs e)
{
    Contact contact = (Contact)e.ClickedItem;
    this.Frame.Navigate(typeof(MapPage), contact);
}
The GVContacts_ItemClick retrieves the selected contact and navigate to the user to the Map page
Once the application is launched, it should be like that:
Map Page
By default, the Map Page contains the necessary code to display a location in the MapControl.
In this part, we will update the MapPage.xaml.cs in order to display the location of the selected contact in the MainPage.
- Change the defaultZoomLevel:
private const double defaultZoomLevel = 0;
The defaultZoomLevel is 0 because Faker.Net generates random locations values. And sometimes the location is in the middle of the indian ocean. That is why I used this value.
Therefore, if the location is in a better place, select defaultZoomLevel=17.
- Create a new Contact instance before the MainPage() constructor:
Contact contact = new Contact();
- Insert this code in the OnNavigatedTo method, before the await InitializeAsync() :
This code allows to get the selected contact in the MainPage.
if (e.Parameter is Contact)
{
    contact = (Contact)e.Parameter;
}
· In the InitializeAsync() Task, change the code inside the if (mapControl != null), by this :
mapControl.MapServiceToken = "My Bing Maps Key";
                if (contact!=null)
                {
                    BasicGeoposition snPosition = new  BasicGeoposition() { Latitude = contact.Latitude, Longitude = contact.Longitude };
                    Geopoint geopoint = new  Geopoint(snPosition);
                    AddMapIcon(geopoint, contact.Name);
                }
                else
                {
                    AddMapIcon(Center, "Map_YourLocation".GetLocalized());
                                    }
The MapServiceToken contains your Bing Maps Key.
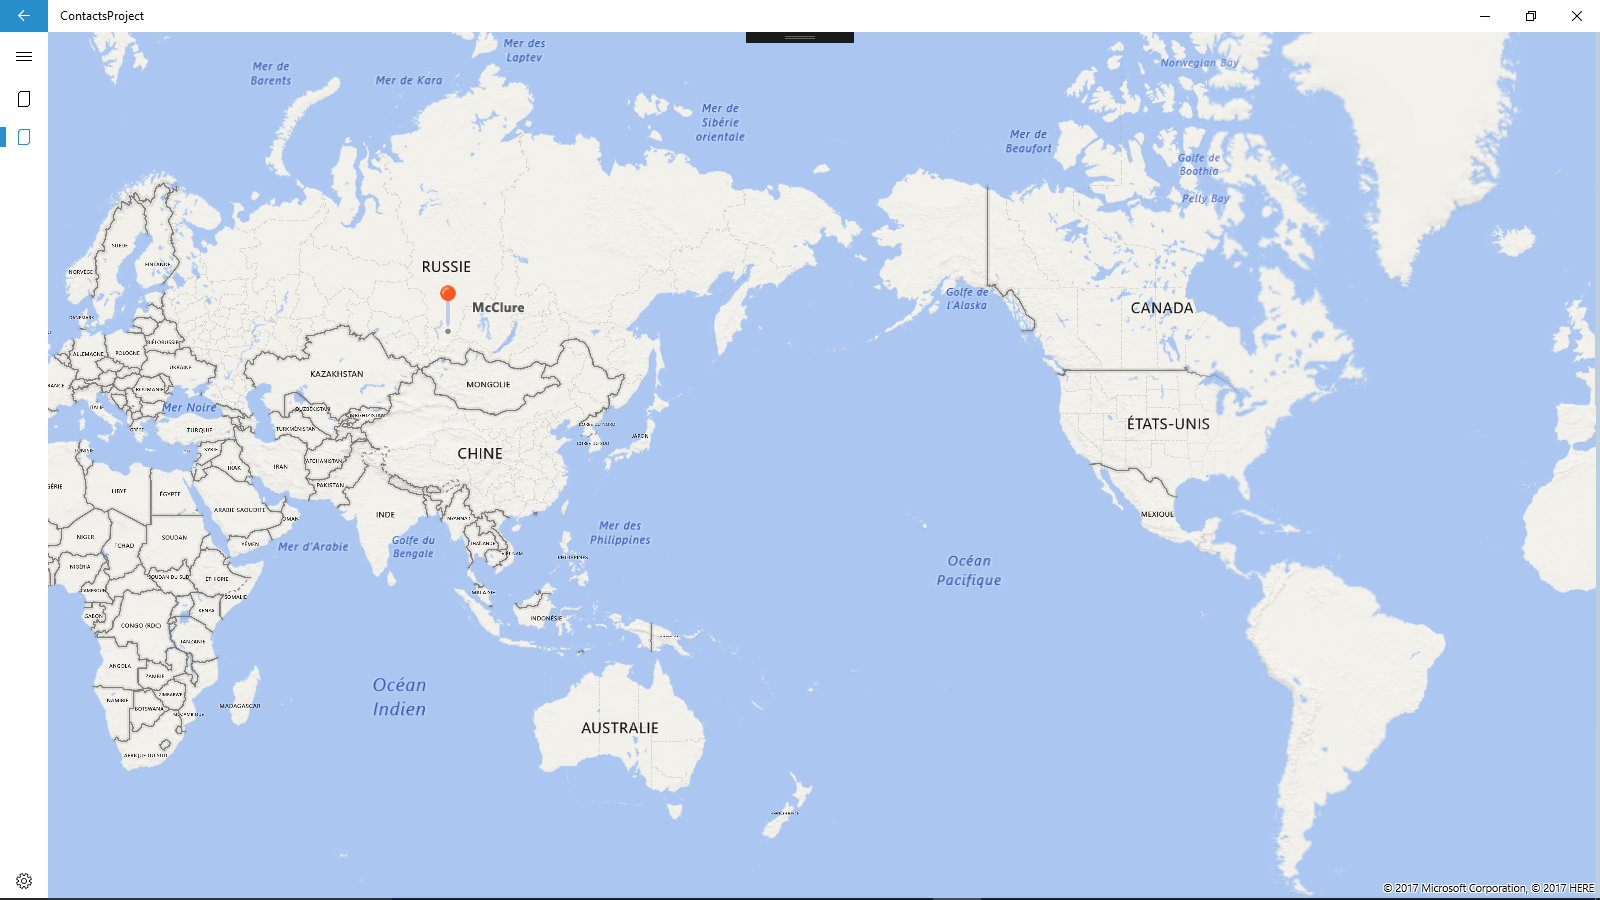
This code allows to display the Map Icon of the selected contact in the MapControl as follow:
Settings Page
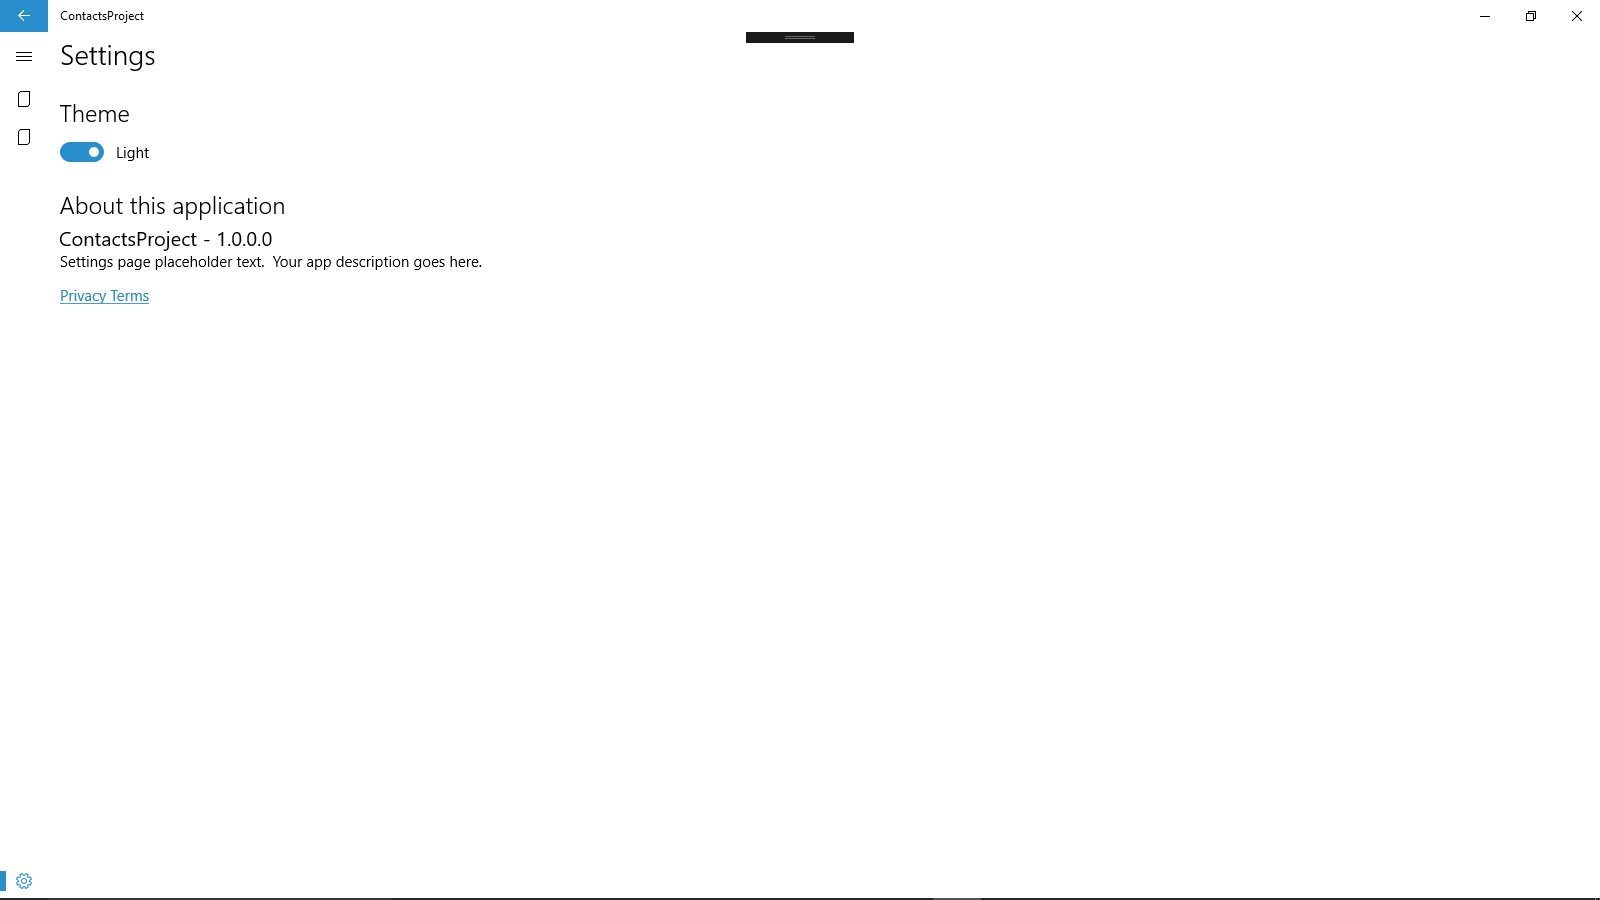
The default Settings Page of the Windows Template Studio contains:
- The theme of the application: Light and Dark
- Informations of the application.
- Privacy terms of the application.
Conclusion
In this article, we saw how it’s very simple to build a Universal Windows app using the extension Windows Template Studio.
Download
You can download all project in this link : https://gallery.technet.microsoft.com/Building-an-app-using-62151a53
