Create Simple Web API with ASP.NET MVC
Introduction
This article explains about web API and how to create simple web API in asp.NET MVC in easy way.
Definition
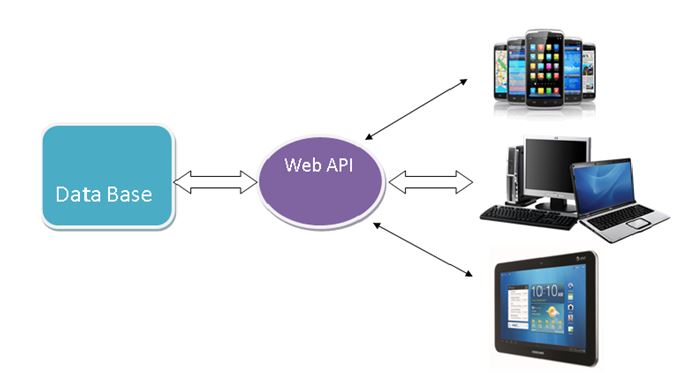
Web API is an application programming interface (API). API is used to communicating or interacts with software components each other. ASP.NET Web API is framework that makes it easy to build HTTP Service that reaches a broad range of clients, including browsers and mobile devices. Using ASP.NET web API can communicating by different devices from same database.
Diagram
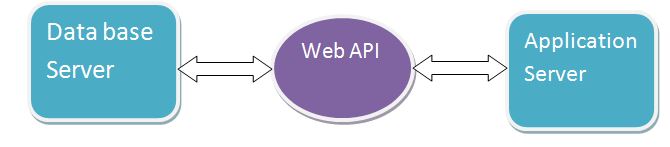
Use Web API
It is used to access service data in web application as well as many mobile apps and other external devices.<
It is used to create RESTful web service. REST stands for Representational State Transfer, which is an architectural style for networked hypermedia applications.
It is primarily used to build Web services that are lightweight, maintainable and scalable and support limited bandwidth.
It is user to create simple HTTP web service. It is support XML, JSON and other data format.
Steps for Creating Web API
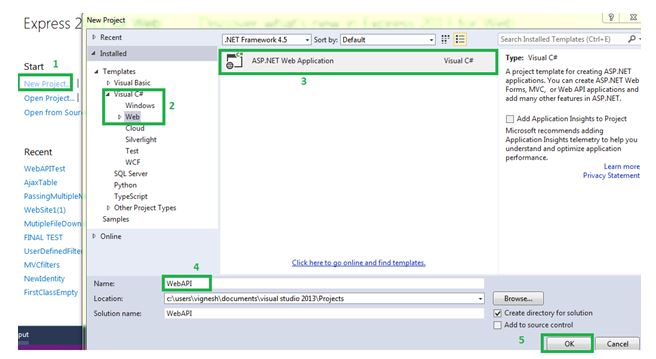
Step 1
Open visual studio and open new project. Select Visual C# and select web finally select ASP.NET Web Application. After selecting all give Project name and click ok.
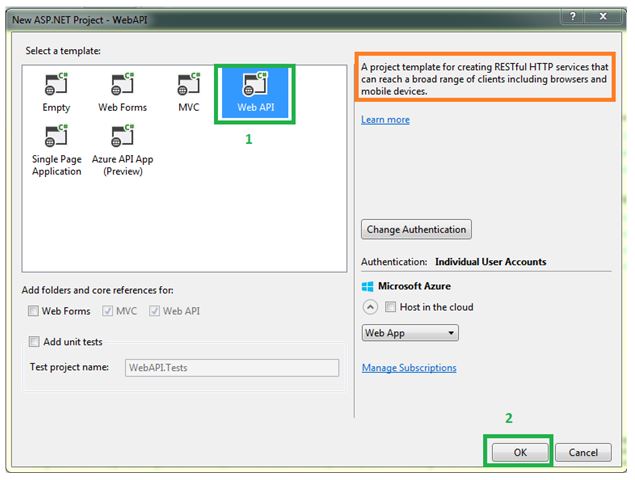
Step 2
Select Web API in template window. After select Web API we can see some message in right side in template window use of Web API. Now click ok button.
Step 3
Our project will be open after click ok button and we can see the solution explore right side. We can see all important files and folders like MVC. If we select empty application will be open with empty but did not select empty application.
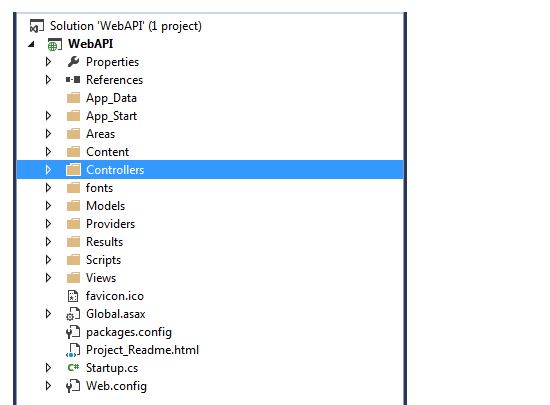
Step 4
Now go to controller and expand the controller. Now we can find see "ValuesController.cs", it is the main for Web API. This controller created by default. If we need new or different name we can create following way.
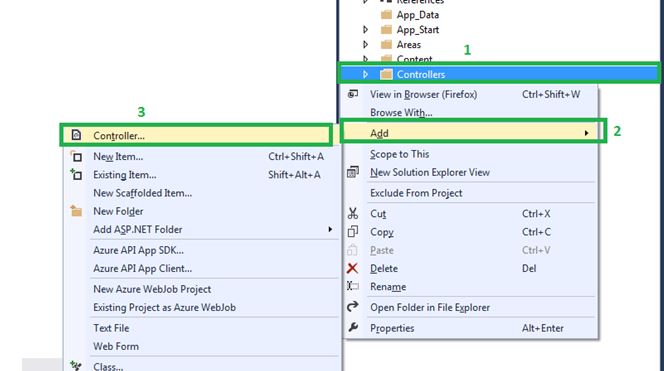
Select and right click controller then go to Add then select controller looks like below screen short.
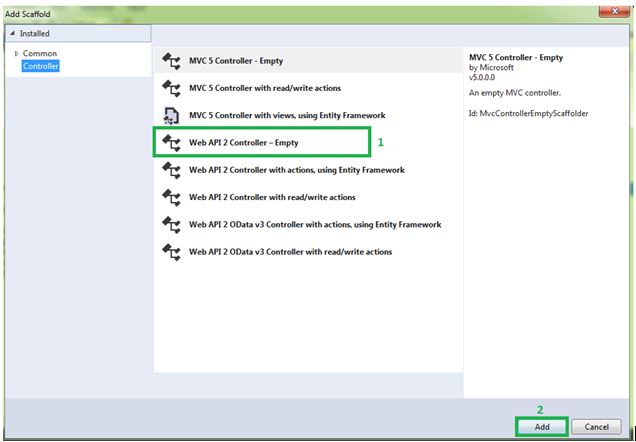
After selecting control then select “Web API 2 Controller - Empty” and click Add button from Add Scaffold window.
After adding “Web API 2 Controller - Empty” we see looks like below screen shorts.
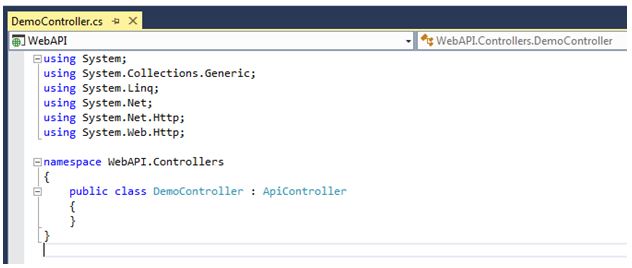
In Web API Controller inherited by “ApiController” abstract class. It is very important and base for Web API. Name space for this class is "System.Web.Http".
Step 5
Now create a simple method in controller then build the application run finally. In web API we us method name as “Get ()” because real meaning is getting the data using method. We can use any other method name. We write below code in Demo controller.
using System.Net;
using System.Net.Http;
using System.Web.Http;

namespace WebAPI.Controllers
{
    public class  DemoController : ApiController
    {

        public string  Get()
        {
            return "Welcome To Web API";
        }

        public List<string> Get(int Id)
        {
            return new  List<string> {"Data1","Data2"};
        }
    }
}
URL Format to run Web API
We need to run Web API "api/Controller_Name" URL format. For example in MVC we define URL format using "RouteConfig" class and "RegisterRoutes" static methods same as for Web API we are using "WebApiConfig" and "Register" static method. Go to "Global.aspx" file we can see in detail.
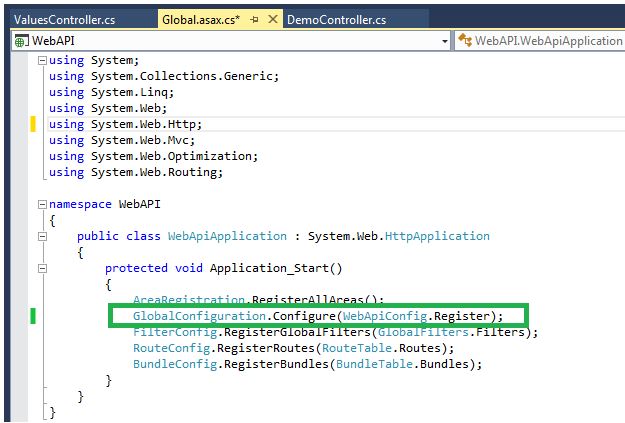
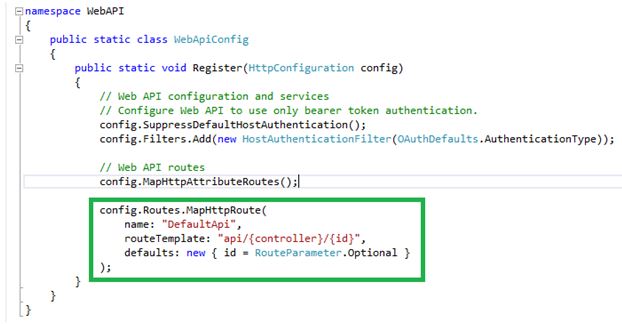
We define the Web API URL format using "GlobalConfiguration" and "Configure" static method. We are passing "Register" method from "WebApiConfig" class as argument into "Configure" method. If go to "WebApiConfig" class we can see Web API routes looks like below screen short.
Step 6
Now build our project and run above mention URL format. Our Controller name "Demo" so we run "http://localhost:53027/api/Demo" format. Web API return a result as a XML or JSON format. Our output looks like below.
If run http://localhost:53027/api/Demo it will call “Get ()” because no parameter so output looks like below.

If run http://localhost:53027/api/Demo/1 it will call “Get (int id)” because with parameter so output looks like below. Outputs return as XML format.

Conclusion
This article helps to new learners, students and fresher. I hope this article very clear and easily understandable. The next article explains about how to use web API in web forms in MVC.