SharePoint 2016 : A Deep Dive into SharePoint Add-in Environment Configuration and SharePoint Hosted Add-in Creation and Upgrade
Introduction
Share Point Add-ins (previously known as Share Point Apps) was introduced with Share Point 2013. They come in three different flavors:
- Share Point Hosted App
- Provider Hosted App
- Auto Hosted App (deprecated)
One of the benefit of SharePoint add-ins is that they run in their own isolated domain unlike the farm solutions that shares the process thread resulting in performance risks. In this article we will be diving into the below details :
- SharePoint Environment Configuration
- Setting up Visual Studio Template for Add-ins
- Create a SharePoint Hosted Add-in List and List Items
- Deploy the Solution to SharePoint
- Deploy a new Custom List form as an Add-in
SharePoint Environment Configuration
As the first step lets configure the SharePoint environment for the creation of SharePoint Add-ins.
Configure Domain
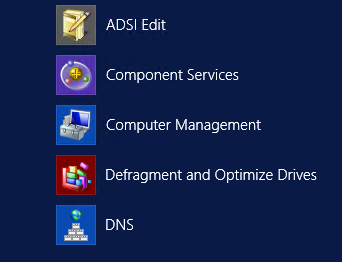
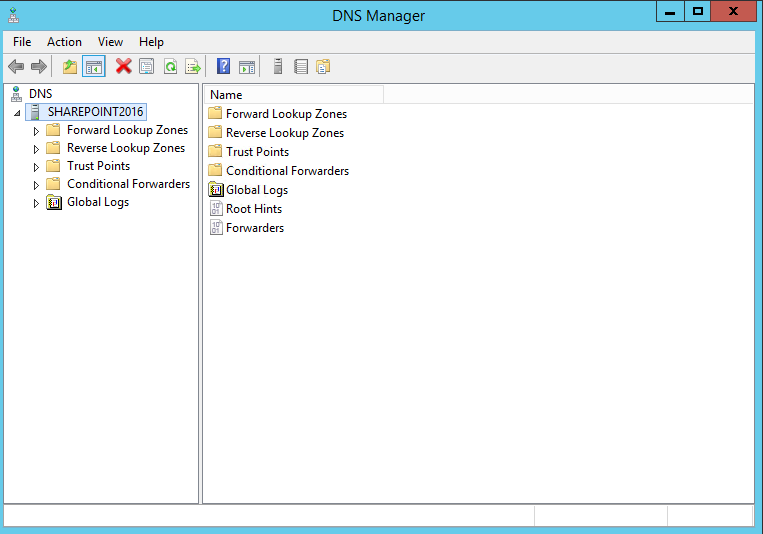
So one of the prerequisite of SharePoint add-ins is that a domain has to be configured in the DNS. We can add the domain by going to the DNS configuration tool.
As part of security, while creating the Domain for the app, it should not be a sub domain of an existing domain. Say, if we have a domain of the name SharePoint2016.com, instead of creating Apps.SharePoint2016.com we should be creating a domain of the format SharePoint2016Apps.com.
When an add-in is provisioned, it creates a unique domain name like 23131123asas.SharePoint2016Apps.com, where 23131123asas is the unique identifier for the app. In order for the DNS domain to support these kinds of unique names we will also have to set up a wildcard Canonical Name (CNAME). The process of setting up the domain can be summed up as:
- Create Forward look up zone
- Add CNAME
- Create Subscription settings service application
- Configure App URL in Central Admin
Create Forward look up zone
As the first step, let’s create a forward look up zone. In order to do this one has to be a domain administrator.
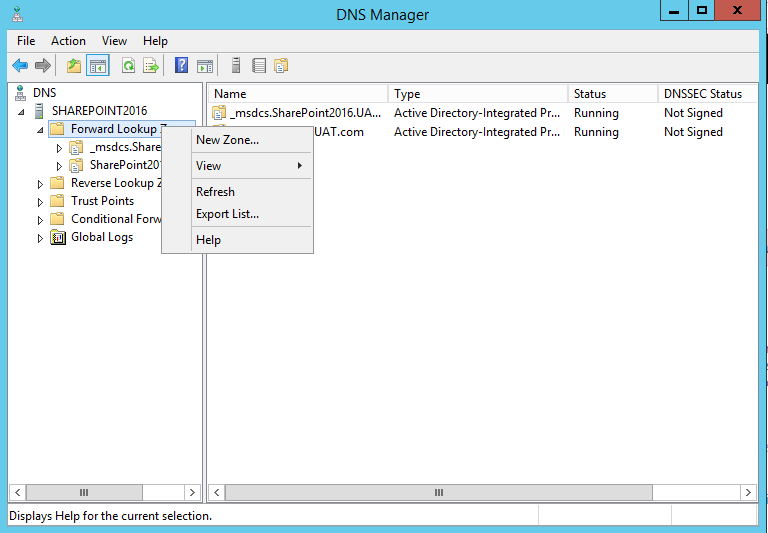
From the DNS Manager right click ‘Forward Look up Zones’ and click on ‘New Zone’.
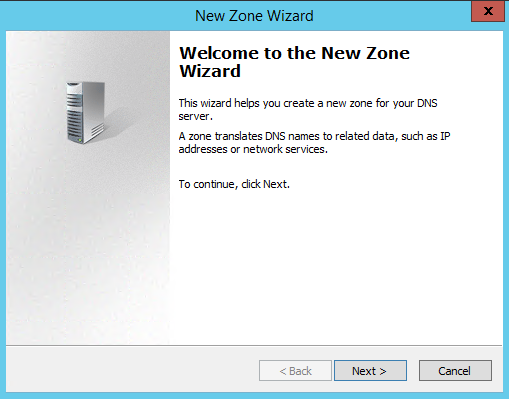
This will start the New Zone Wizard. Click on Next.
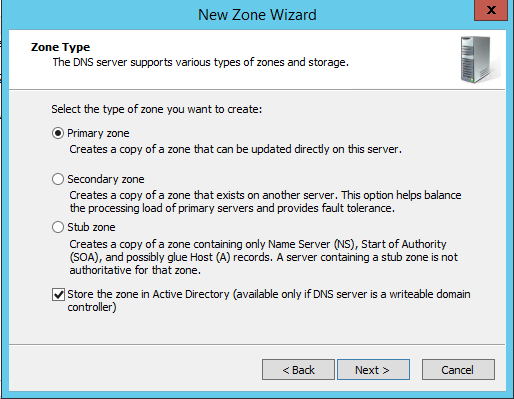
Select the zone type as ‘Primary’ and click on next.
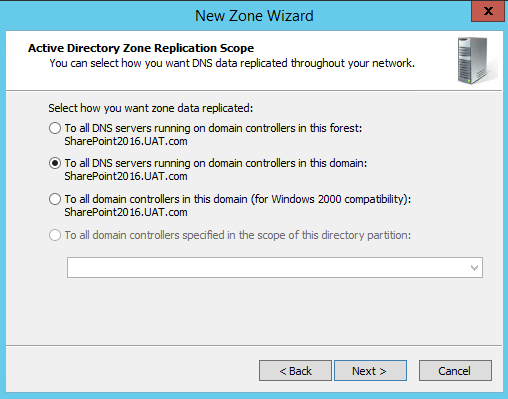
In the Active Directory Zone Replication Scope page, select the appropriate replication method. By default it is set as : ‘To all DNS servers running on domain controllers in this domain’.
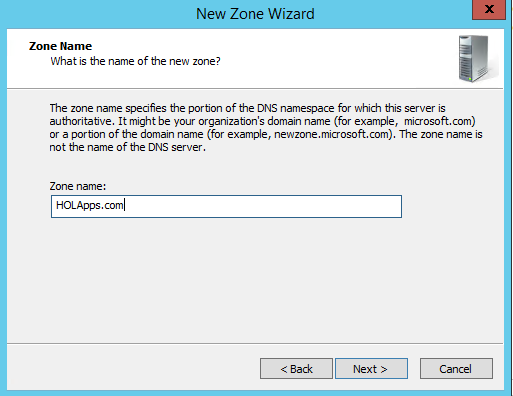
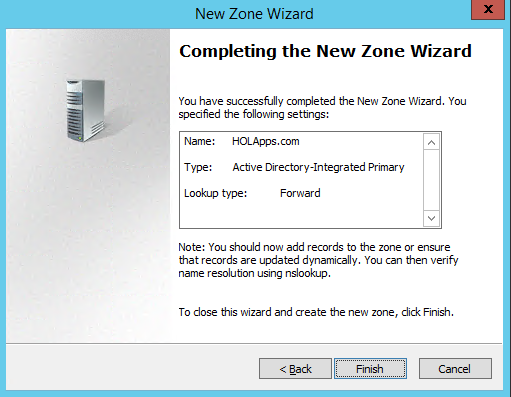
This is the main stage where we get to specify the App Domain Name. Specify the name and click on next.
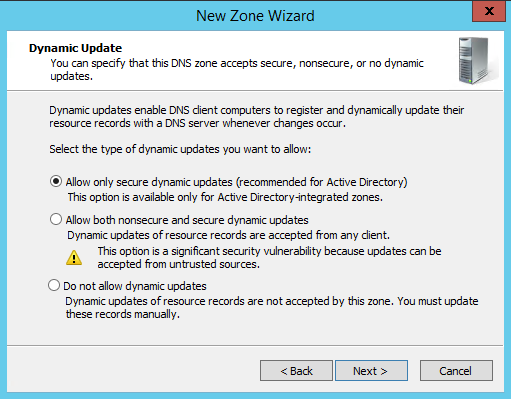
Select the required dynamic update option. For Active Directory integrated zones select ‘Allow only secure dynamic updates’.
Thus we have completed creation of the forward look up zone.
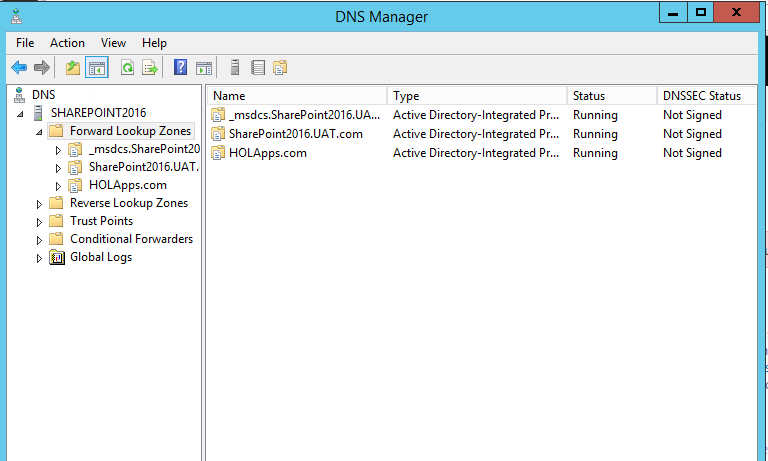
The new zone has come up in the available list of forward look up zones.
Add CNAME
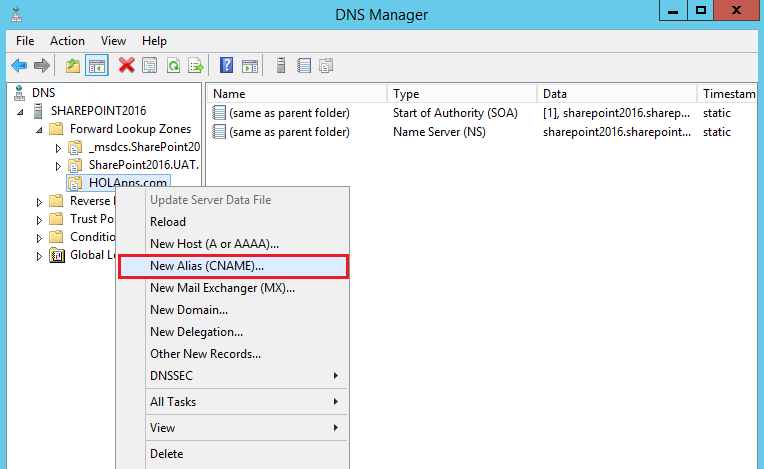
Now we can add a wild card CNAME for the newly created domain. Right click the newly created zone and select ‘New Alias(CNAME)’.
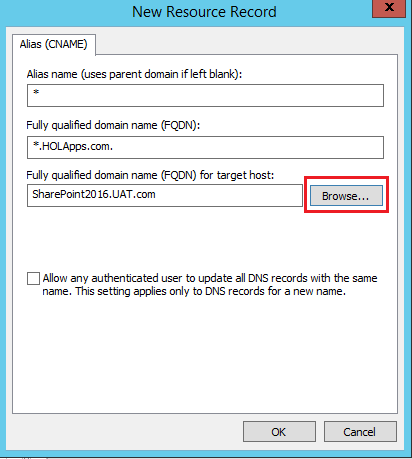
Specify ‘*’ as the wild card Alias and this will automatically add ‘*.NewlyCreatedDomainName’ as the fully qualified domain name. Now we have to specify the FQDN for the target host. Select Browse and go to the Forward Lookup Zone and double click it. Double click the domain that hosts the SharePoint sites .From there, select the record that “same as parent folder” and click OK.
This will work okay in case of a single server environment. However in case of a multi-server farm, ensure that you point to the DNS Record of the web server.
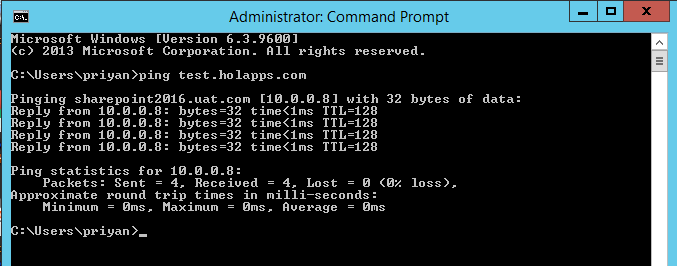
This completes the setting up of DNS entry. In order to ensure that the newly created domain name is working, we can try pinging it. If it returns an IP with successful delivery of data packets we can be sure that the wild card for the domain name was set up successfully.
Create App Management Service Application and Subscription Settings Service Application.
Once we have set up the DNS entry, we have to set up the subscription settings service applications and the app management service application. App Management Service Application can be created from the Central Admin UI which is pretty straight forward.
App Management Service Application
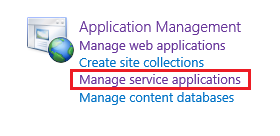
In order to create the app management service application, select Manage Service Applications from Application Management.
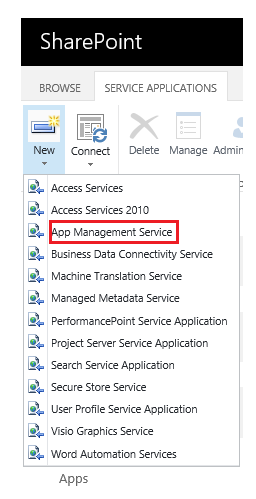
Select App Management Service
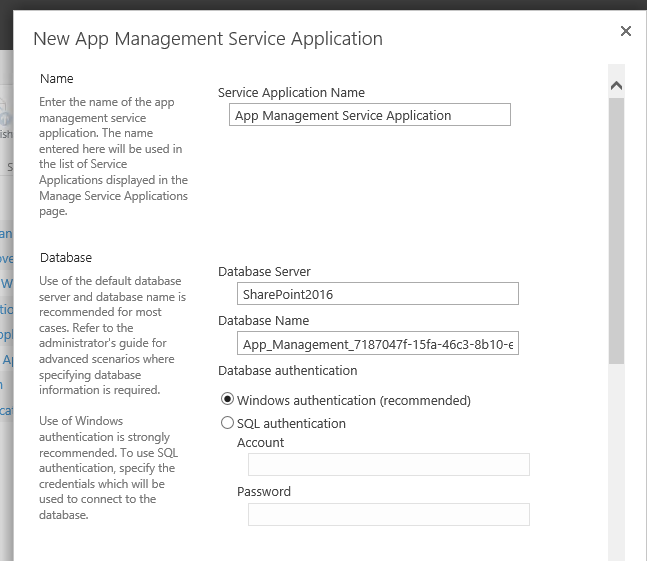
It will open up the window where we can specify the Service application name and database name.
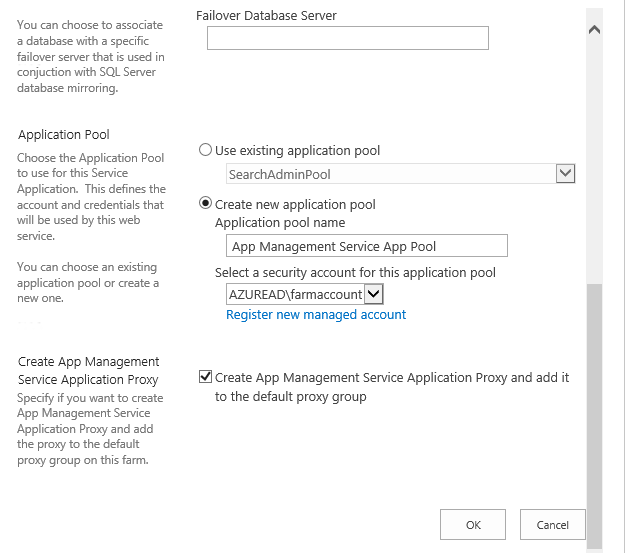
Specify the app pool name and service account that will be used for the service application and click on OK.
This will start provisioning the App Management Service Application.
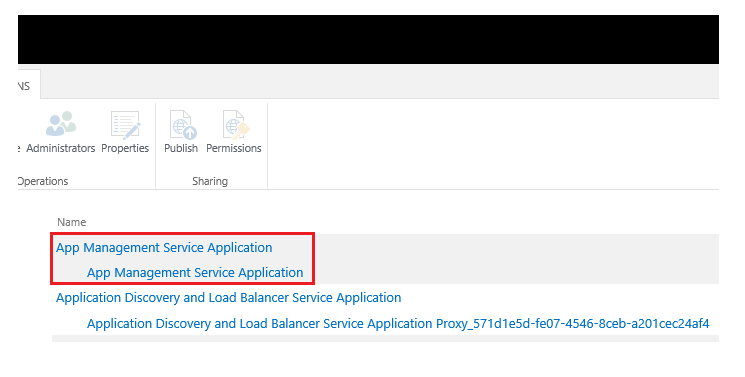
After some time you can see the service application created and listed out.
Subscription Settings Service Application
However in order to create Subscription settings Service application we have to PowerShell. Even in SharePoint 2016, a UI alternative is not available. You can use the below PowerShell script to create the Subscription settings service application.
$account = Get-SPManagedAccount "SharePointHOL\Priyan_ManagedAcc"

$appPool = New-SPServiceApplicationPool -Name 'Subscription App Pool' -Account $account

$SubscriptionSvcApp = New-SPSubscriptionSettingsServiceApplication -ApplicationPool $appPool -Name 'Subscription Settings Service Application' -DatabaseName 'SubscriptionSettings_ServiceDB'

$SubscriptionSvcproxy = New-SPSubscriptionSettingsServiceApplicationProxy -ServiceApplication $SubscriptionSvcApp
Thus the subscription settings service application has been created.
Configure App URL
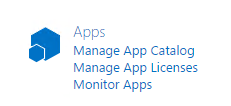
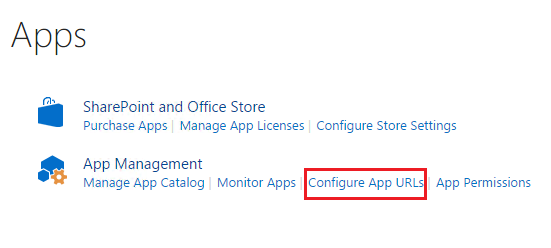
Now let’s configure the app URL. In order to do that go to the Apps section in the Central Administration.
Click on Configure App URLs
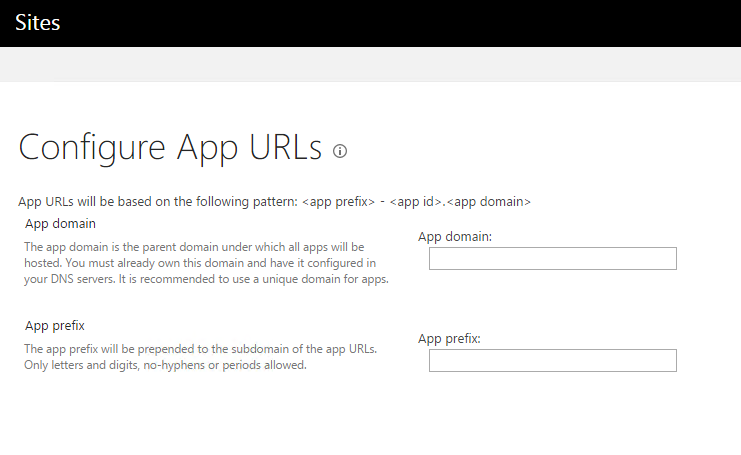
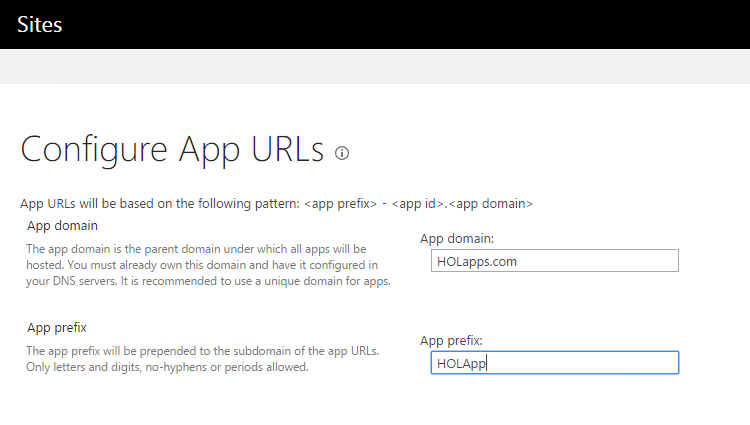
This will open up the page where we can add the app domain and app prefix.
HOLApps.com was the app domain that was created. Specify the app prefix which will come up prepended in the app URL in the browser.
In case you face the below error while saving the page, it is an indication that the Subscription settings service application has some configuration issue. Try restarting it.
Thus we have seen how to configure the environment in SharePoint Server 2016 to get started with add-in development.
Configure Visual Studio for SharePoint Add-in Development
Once we have installed SharePoint 2016, we have to make sure that Visual Studio has the required templates available to start development against SharePoint Server 2016.
Missing SharePoint Add-in Templates
Development for SharePoint 2016 can be kick started with Visual Studio 2015. Spin up Visual Studio and try to create a new project.
As you can see, the SharePoint project templates are not available for starting Server Side development or Add-in (previously App) Projects. Default installation of Visual Studio 2015 does not install SharePoint 2016 templates. In order to set up SharePoint 2016 templates, we have to ensure that we have the latest version of Office Developer Tools Preview, installed for Visual Studio.
Install Office Developer Tools Preview 2 for Visual Studio
Office Developer Tools Preview 2 for Visual Studio contains the new templates that support SharePoint 2016 add-in development. It also contains the new templates for creating server-side project templates, like Visual Web part. You can find the installer here.
Click on "Download" and select the installer bundle. Select the language specific installer file.
Click on "Install".
This will install the Office Developer Tools Preview 2 with the Office Templates and SharePoint 2016 Templates for Visual Studio.
Wait for the installer to complete the installation.
Now, let’s spin up the Visual Studio once again, and see if the SharePoint 2016 templates are available in the available project templates.
As you can see, the SharePoint 2016 templates have become available in the list of Visual Studio project templates. It has retained the SharePoint 2010 and SharePoint2013 templates as well.
Once the Visual Studio templates for SharePoint 2016 are made available, let’s get started with SharePoint hosted add-in creation.
Create SharePoint Hosted Add-in
We will try to deploy a SharePoint List along with items as a SharePoint Hosted Add-in. In order to create the SharePoint hosted add-in, we have to select the ‘SharePoint Add-in’ from the available templates. Specify the project name and click on OK.
Specify the name of the site that will be used for debugging and deployment. Specify the type of SharePoint add-in that we are going to create. In this case: SharePoint hosted. Click on Next.
Specify the version of SharePoint that will be used for deployment which is SharePoint 2016 in our case.
Click on Finish. This will start the creation of project structure.
Once provisioned, the project structure looks like the below.
We can deploy custom project items which are listed below, using SharePoint Hosted App in to SharePoint 2016.
Deploy SharePoint List and Items as Add-in
We will try to deploy a list as the SharePoint hosted add-in with some custom list items in it. Click on Add and select ‘New Item’.
Select ‘List’ and specify the name of the list.
Specify the template based on which the list should be created. In my case I am going with Custom List template.
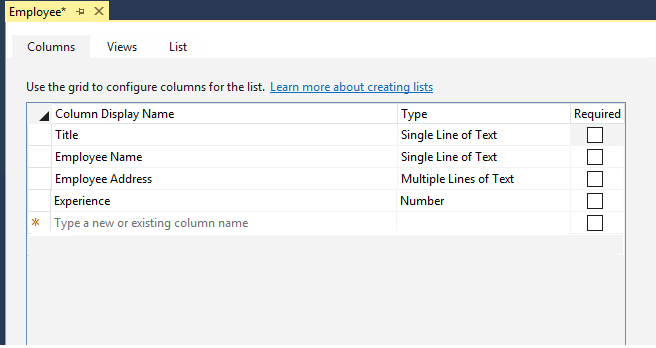
Add the columns that you want to be part of the list by specifying the list column names.
Once the list is added it will come up in the project structure as shown below.
The ‘Employee’ list also has an instance object which contains the information that can be added to the list by default.
You can add the information that needs to be pre-populated as list items in the list, using CAML in the elements.xml file of the list instance.
<Data>
      <Rows>
        <Row>
          <Field Name="Employee Name">Rajesh</Field>
          <Field Name="Employee Address">Kochi,India</Field>
          <Field Name="Experience">4</Field>
        </Row>
        <Row>
          <Field Name="Employee Name">Jinesh</Field>
          <Field Name="Employee Address">Bangalore,India</Field>
         <Field Name="Experience">12</Field>
        </Row>
      </Rows>
</Data>
Now, we have to update the app manifest file and set the start page to the list, that we are going to deploy. Unless ‘Start Page’ is set, on clicking the deployed app, it won’t navigate to the desired list. Specify the list object as ‘SolutionName/Lists/ListName’. Here, SolutionName and ListName are the respective names that can be found in the solution structure.
For continuous deployment, we can also increment the Version number in the app manifest file.
Publish and Test the Solution
Now, let’s deploy the SharePoint Hosted Add-in.
It will start the addition of the add-ins to SharePoint which will take some time. Once completed, we will get ‘Successfully installed SharePoint Add-in’ message in the console.
Going to the Site contents we can see the newly deployed SharePoint Hosted Add-in.
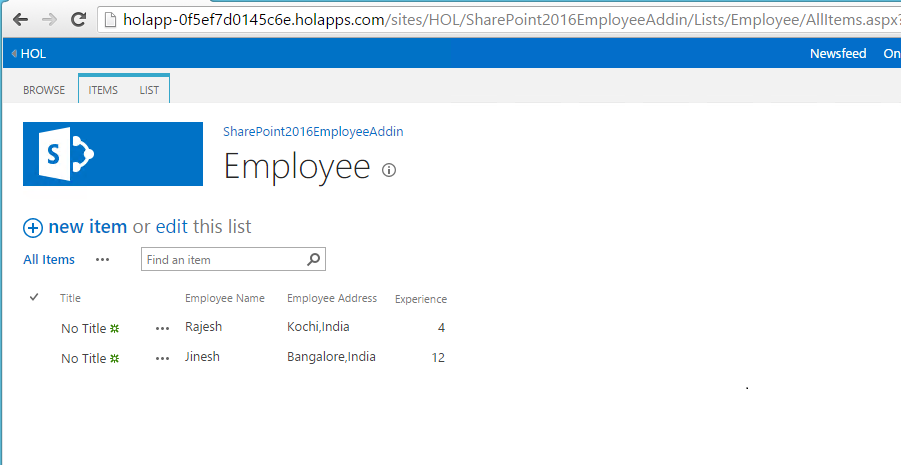
Clicking on it will navigate to the list and we can see the default list contents.
Thus, we have seen how to deploy the components as a SharePoint Hosted Add-in in SharePoint Server 2016. In the upcoming article, we will cover about Provider Hosted add-ins.
SharePoint Hosted Add-in Upgrade
However Share Point hosted Apps come with a design issue. Redeployment of Share Point hosted app causes the data to be lost .Say I have a list named Employee which is deployed as a Share Point Hosted App. Now I populate the list with data and after some time if I redeploy the App all the data within the list will be lost. It is here Share Point App Upgrade comes into play.
Share Point App upgrade facilitates updating an already deployed app with the latest changes. So if the Employee List with Content Type and Site columns is deployed as a Share Point Hosted App and if I have to add an additional column to the list after a deployment we can achieve this without a second deployment.
Let’s see how we can achieve this.
In addition to the above columns I am planning to add an additional column, Previous Company, to the site columns and List. In order to do that let's open the existing app solution and add the new column to the site columns xml.
Add the new column to the content type, if necessary.
Add the column to the List as well.
http://csharpcorner.mindcrackerinc.netdna-cdn.com/article/upgrade-sharepoint-hosted-add-insapps-in-sharepoint-2013/Images/column%20to%20the%20List.jpg
Go to App Manifest.xml.
Increment the version each time a new upgrade happens.
Right click the project and Publish.
Click on Package the app.
It will open up the .app solution location. Copy the local file URL.
Now go to the site and Navigate to the App “Apps in testing”. If you don’t find this in Site Contents,it’s because the developer feature is not enabled. If so enable the developer feature as below:
Enable-SPFeature e374875e-06b6-11e0-b0fa-57f5dfd72085 –urlhttp://c4968397007:5000/
e374875e-06b6-11e0-b0fa-57f5dfd72085 is the id of the developer feature .
Now we can see Apps in Testing.
Click on Apps in Testing and let’s upgrade the app.
Click on Upgrade an app.
Input the local .app file url which was saved earlier.
Click on Upgrade.
http://csharpcorner.mindcrackerinc.netdna-cdn.com/article/upgrade-sharepoint-hosted-add-insapps-in-sharepoint-2013/Images/Upgrade.jpg
The upgrade process has started.
It will take some time to complete the upgrade process. Once the upgrade is completed the app will be updated with the incremented version number.
Let’s go to the list and see the new site column added.
Thus we have seen how to upgrade the app without redeploying.
Deploy new SharePoint Add-in Forms
Upgrade process retains the data within the list. One problem associated with app re-deployment is, each deployment installs a fresh app causing existing data loss. However any form changes (New Form/Edit Form) cannot be pushed into the existing app via upgrade process. Form changes will need a fresh deployment which is a limitation by design. Default New Form would look plain like below. If we want to add a new form to the list we can do that by adding a custom aspx page. Once deployed, if we want to make any changes later we will have to redeploy the add-in(Upgrade will not push new changes). Lets see how to deploy a new form to the list.
Let’s create a new custom form,
Add a new aspx page to the list.
Open the newly added page. It would be as below,
Remove*<WebPartPages:WebPartZonerunat="server"FrameType="TitleBarOnly"ID="full"Title="loc:full"/> *from Placeholder Main section and add Field label, Field description and Form field as per need. The Field Name is the internal name of the column. Control Mode specifies whether the form Mode is New/Edit/Display.
I will be placing the fields within a div inside a table to give a tabular look and feel.
<div>
    <SharePoint:FieldLabel runat="server" FieldName="EmployeeName" ControlMode="New" />
    <SharePoint:FieldDescription runat="server" FieldName="EmployeeName" ControlMode="New" />
    <SharePoint:FormField runat="server" FieldName="EmployeeName" ControlMode="New" />
</div>
The updated custom new form will look as below,
As you can see the ControlMode attribute is set to New. This is because it is a new form we are creating. For editing and displaying forms the control mode value will be Edit and Display respectively.
Now let’s attach the new form to the SharePoint list. Go to the schema.xml of the list figure out the content within the <Forms></Forms> tag which will be usually towards the end of the file.
Replace the NewForm tag with the below line.
<Form Type="NewForm" Url="NewEmployee.aspx" Path="NewEmployee.aspx" WebPartZoneID="Main"Template="NewEmployee.aspx" />
The updated schema looks like below:
If we are attaching custom edit and display forms change the corresponding Form Tags accordingly.
Now once the customization is done, let go to the custom page’s properties (Press F4) and change the deployment type to Element File.
Deploy the app and click on Trust It.
Click on new Item to create an item with the custom form.
Now you can see that the custom form has been successfully deployed along with the app. On clicking New it picks up the Custom Form and not the OOTB one,
Currently no CSS has been applied . If any CSS or JavaScript needs to be added to this custom form we can add it within the custom aspx mark up inside the PlaceHolderAdditionalPageHead section.
The CSS can be referred as:
**
**
<link rel="Stylesheet"type="text/css"href="../../Content/App.css"/>
The JS can be referred as:
**
**
<script type="text/javascript" src="../../Content/CustomJS.js"></script>
Thus we saw how to create a new custom New/ Edit/ Display form and attach it to the List within a SharePoint Hosted App.
Summary
SharePoint Hosted Add-ins are a great way to deploy solutions to SharePoint Online and On Premise. It helps in better planning during migrations and offer enhanced code isolation and security thereby offering more stability to the SharePoint Farm. In the upcoming article we will see in depth how to create and deploy the Provider Hosted Add-ins for SharePoint.
Reference
- Configure Environment For Add-Ins In SharePoint 2016
- Set Up Sharepoint Server 2016 Project Templates For Visual Studio 2015
- Creating SharePoint Hosted Add-ins In SharePoint Server 2016
- Add Custom New/ Edit/ Display Form To List Using SharePoint Hosted App
- Upgrade SharePoint Hosted Add-Ins(Apps)
