Nano Server: Deploying MySQL Database Server
1. Introduction
In this article, we will demonstrate deploying MySQL database server capabilities on a Windows Server 2016 Technical Preview 5 Nano Server and allowing Nano Server to host MySQL database for your application.
2. Deploying and Managing MySQL Server Requirements
Since deploying MySQL Server in Nano Server will requires some kind of administration management of MySQL databases hosted in Nano Server, we will have to meet the following requirements for installing MySQL Server in Nano Server and installing MySQL Workbench in Windows Server 2016 Technical Preview 5 management server.
2.1. Deploying MySQL Community Server on Nano Server Requirements
You will need the following to host MySQL databases on Nano Server:
2.2. Deploying MySQL Workbench Requirements
You will need the following to connect and manage MySQL databases on Nano Server remotely:
3. Getting Started with MySQL on Nano Server
In order to host any MySQL databases on Nano Server, we will require to create a standard Nano Server image and deploy the Nano Server in the environment. You can refer to the following articles on below:
- Microsoft TechNet - Getting Started with Nano Server
- Microsoft TechNet Wiki - Windows Nano Server: Virtualization with VMware vSphere by Ryen Tang
Since the Nano Server is being deployed into a VMware vSphere virtualization environment, we are using the PowerShell example as below:
# Import Nano Server Image Generator PowerShell module for Technical Preview 5
Import-Module `
-Global 'C:\NanoServer\NanoServerImageGenerator\NanoServerImageGenerator.psm1' ;
# Create New Basic Nano Server Technical Preview 5 with MySQL Server for
# VMware vSphere 6.0 deployment
New-NanoServerImage `
-DeploymentType Guest `
-Edition Standard `
-TargetPath C:\NanoServer\NanoMySQL\NanoMySQL.vhdx `
-BasePath C:\NanoServer\Base `
-DomainBlobPath C:\NanoServer\NanoMySQL.djoin `
-DriversPath C:\NanoServer\VMware-Drivers `
-EnableRemoteManagementPort `
-InterfaceNameOrIndex 1 `
-Ipv4Address 192.168.100.101 `
-Ipv4Dns 192.168.100.11 `
-Ipv4Gateway 192.168.100.1 `
-Ipv4SubnetMask 255.255.255.0 `
-MaxSize 4GB `
-MediaPath D:\ `
-AdministratorPassword ( `
ConvertTo-SecureString `
-String "Password123" `
-AsPlainText `
-Force
) ;
3.1. Deploying MySQL on Nano Server
Because Nano Server does not support installation using Microsoft Windows Installer (MSI), we will be using the MySQL compressed ZIP Archive method to deploy MySQL Server into Nano Server headless environment.
3.1.1. Downloading MySQL X64 on Management Server
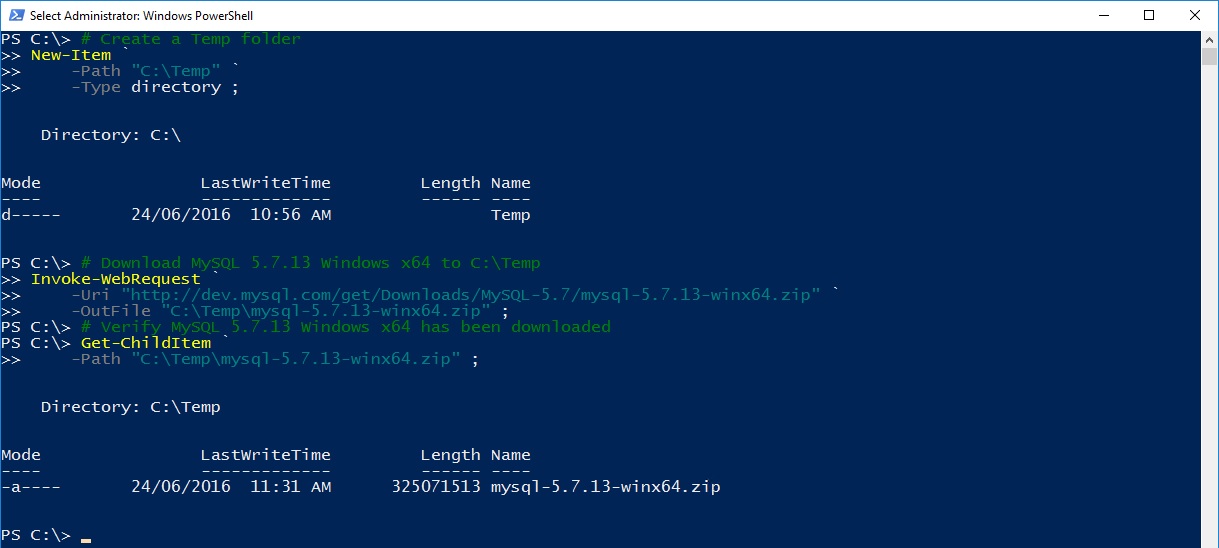
Firstly, we will have to create a temporary folder and download the required files to that location using the Management Server to work with.
# Create a Temp folder
New-Item `
-Path "C:\Temp" `
-Type directory ;
# Download MySQL 5.7.13 Windows x64 to C:\Temp
Invoke-WebRequest `
-Uri "http://dev.mysql.com/get/Downloads/MySQL-5.7/mysql-5.7.13-winx64.zip" `
-OutFile "C:\Temp\mysql-5.7.13-winx64.zip" ;
# Verify MySQL 5.7.13 Windows x64 has been downloaded
Get-ChildItem `
-Path "C:\Temp\mysql-5.7.13-winx64.zip" ;
3.1.2. Extract MySQL X64 compressed file content on Management Server
Once we have downloaded the MySQL compressed ZIP Archive, we will have to extract the compressed ZIP Archive content.
# Extract MySQL 5.7.13 Windows x64 Compressed Files
Add-Type -Assembly “System.IO.Compression.FileSystem” ;
[IO.Compression.ZipFile]::ExtractToDirectory("C:\Temp\mysql-5.7.13-winx64.zip", "C:\Temp\MySQL") ;
3.1.3. Copy MySQL X64 content to Nano Server remotely
Using the Windows Server 2016 Technical Preview 5 management server, we can use the Copy-Item PowerShell Cmdlet to copy the extracted MySQL content to the Nano Server UNC Path remotely. You will need to ensure that your remote Nano Server firewall is enabled to allow File and Printer Sharing.
# Copy the MySQL 5.7.13 Windows x64 content
# from extracted folder to Nano Server remotely
Copy-Item `
-Path "C:\Temp\MySQL\mysql-5.7.13-winx64\" `
-Destination "\192.168.100.101\C$\MySQL" `
-Recurse ;
3.1.4. Establish a PowerShell Remote Session with Nano Server remotely
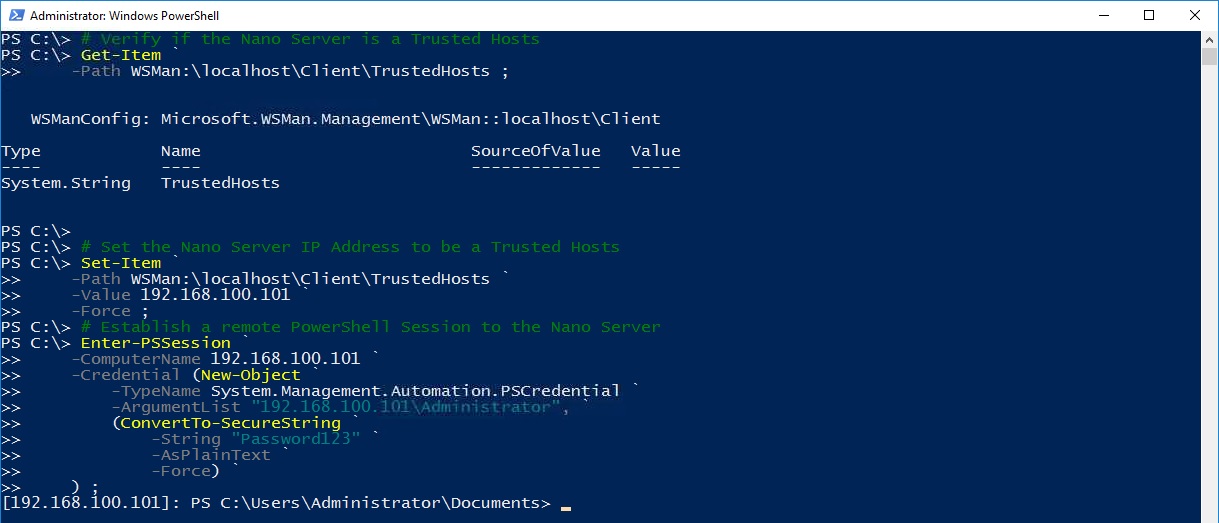
After we have transferred the extracted MySQL content to the Nano Server, we will have to start configuring the MySQL in the Nano Server remotely from the Management Server.
# Verify if the Nano Server is a Trusted Hosts
Get-Item `
-Path WSMan:\localhost\Client\TrustedHosts ;
# Set the Nano Server IP Address to be a Trusted Hosts
Set-Item `
-Path WSMan:\localhost\Client\TrustedHosts `
-Value 192.168.100.101 `
-Force ;
# Establish a remote PowerShell Session to the Nano Server
Enter-PSSession `
-ComputerName 192.168.100.101 `
-Credential (New-Object `
-TypeName System.Management.Automation.PSCredential `
-ArgumentList "192.168.100.101\Administrator", `
(ConvertTo-SecureString `
-String "Password123" `
-AsPlainText `
-Force) `
) ;
3.1.5. Configure MySQL Environmental Variable on Nano Server
Now that we have establish remote connectivity to the Nano Server using PowerShell remoting, we will configure the Nano Server Environmental Path variable to include the MySQL folder path that contains the MySQL Server content.
# Display the current Environmental Path
$Env:Path ;
# Set C:\MySQL\bin path into Environmental Path variable temporary
$Env:Path += ";C:\MySQL\bin” ;
# Permanently set C:\MySQL\bin path into Environmental Variable
SETX PATH $Env:Path /M
3.1.6. Verify MySQL is working on Nano Server
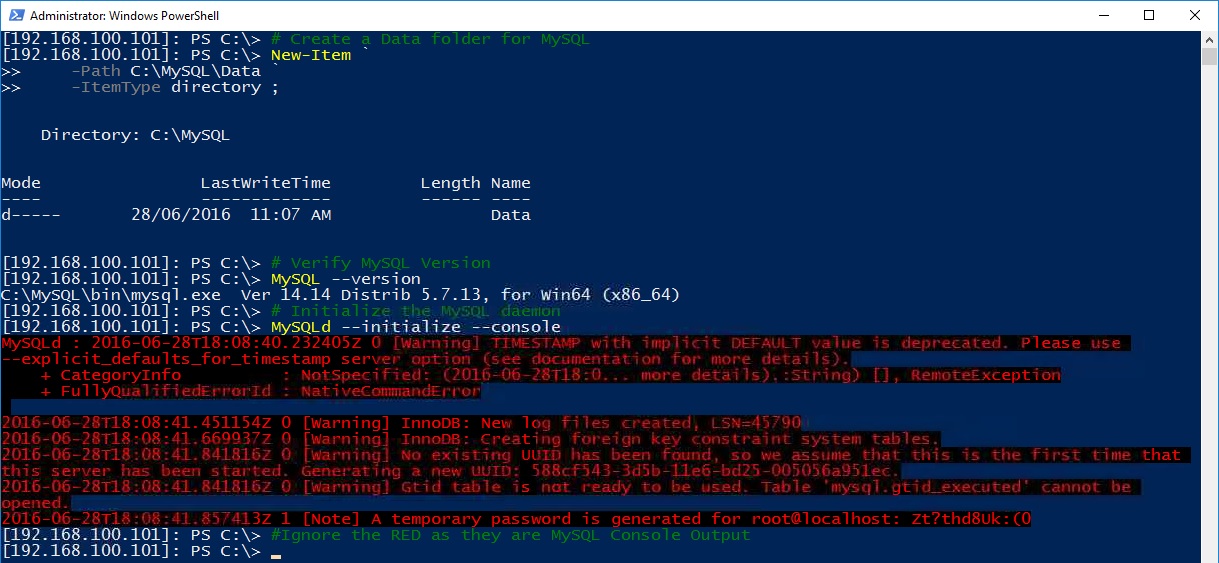
With the MySQL Server folder path configured on the Environmental Path variable, we can create a default Data folder to contain the databases and test the MySQL is working.
# Create a Data folder for MySQL
New-Item `
-Path C:\MySQL\Data `
-ItemType directory ;
# Verify MySQL Version
MySQL --version
# Initialize the MySQL daemon
MySQLd --initialize --console
3.1.7. Configure MySQL daemon initialization
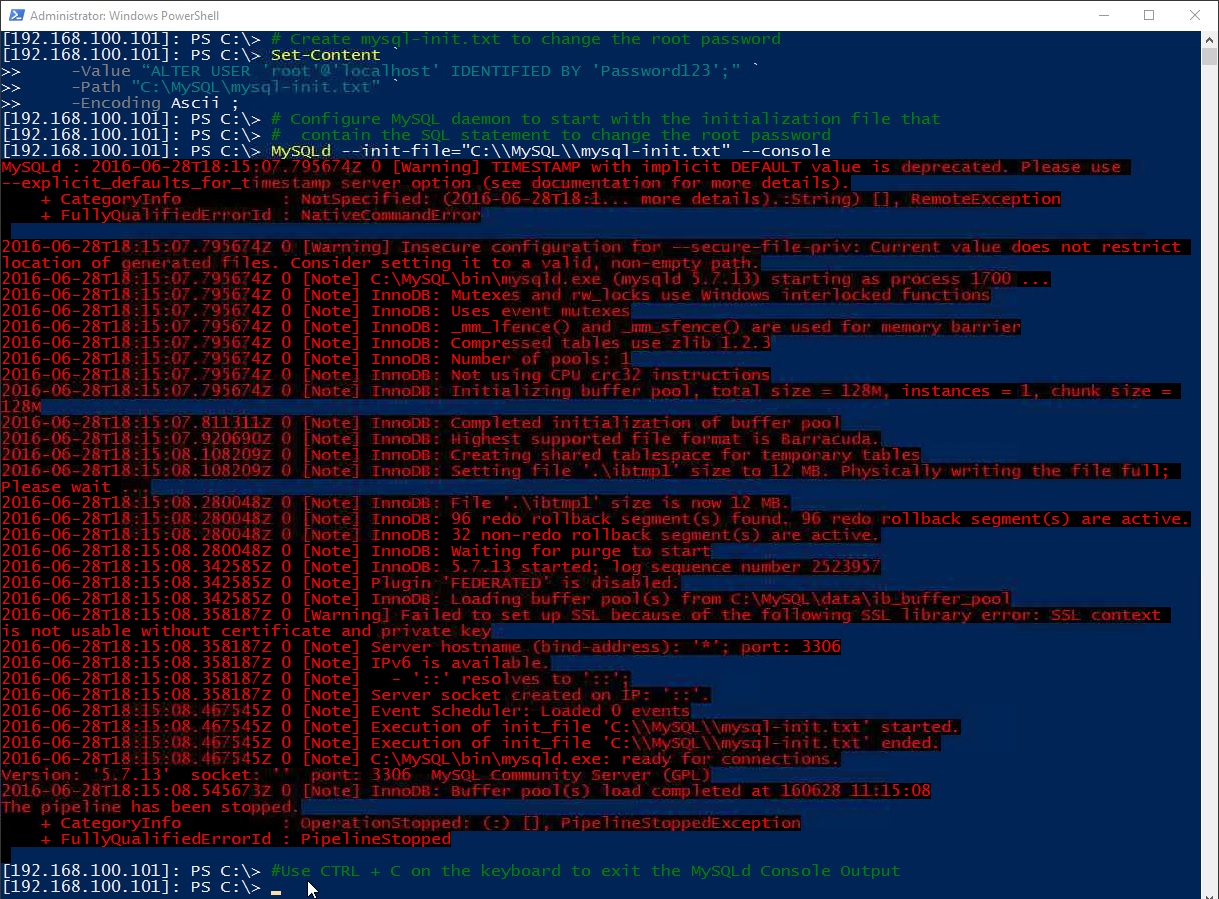
Once we have verified that the MySQL daemon can initialize without any major issues, we will create an initialization file to reset the root password and reinitialize the MySQL daemon with the appropriate configuration.
# Create mysql-init.txt to change the root password
Set-Content `
-Value “ALTER USER 'root'@'localhost' IDENTIFIED BY 'Password123';” `
-Path "C:\MySQL\mysql-init.txt" `
-Encoding Ascii ;
# Configure MySQL daemon to start with the initialization file that
# contain the SQL statement to change the root password
MySQLd --init-file="c:\mysql\mysql-init.txt" --console
3.1.8. Install MySQL daemon as a Service on Nano Server
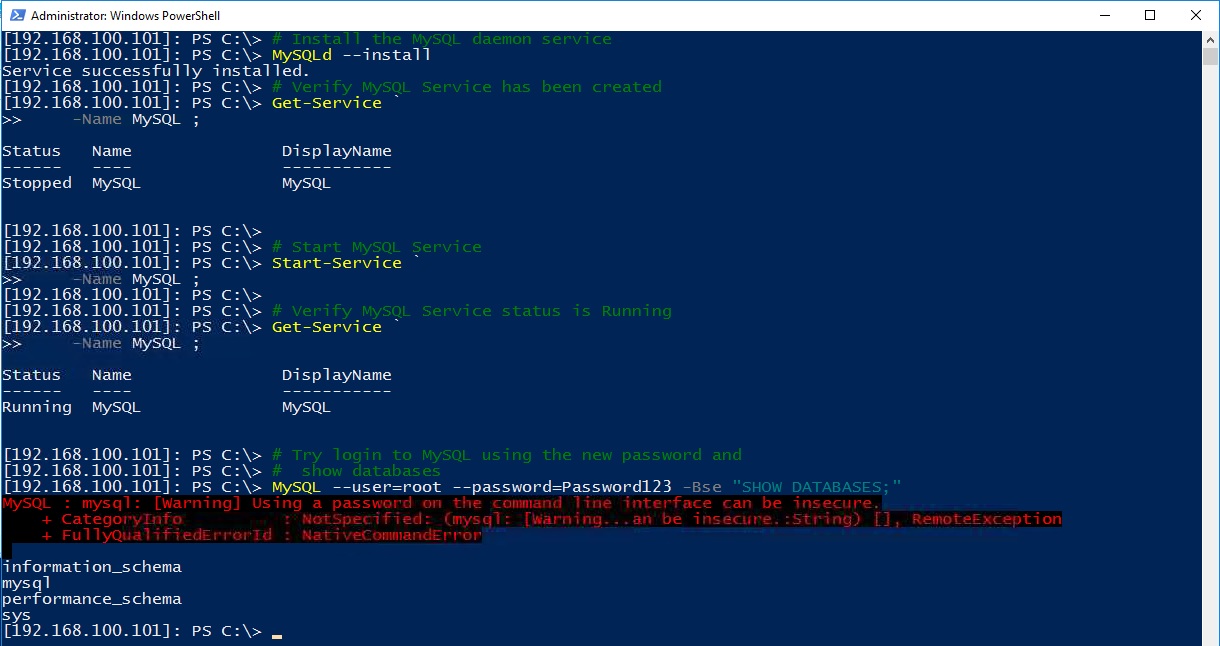
Now, we need to set up the MySQL daemon to run as a Service in Nano Server and to ensure MySQL daemon will constantly start up after a reboot.
# Install the MySQL daemon service
MySQLd --install
# Verify MySQL Service has been created
Get-Service `
-Name MySQL ;
# Start MySQL Service
Start-Service `
-Name MySQL ;
# Verify MySQL Service status is Running
Get-Service `
-Name MySQL ;
# Try login to MySQL using the new password and
# show databases
MySQL --user=root --password= -Bse "SHOW DATABASES;"
3.1.9. Configure Nano Server for MySQL Server remote connectivity
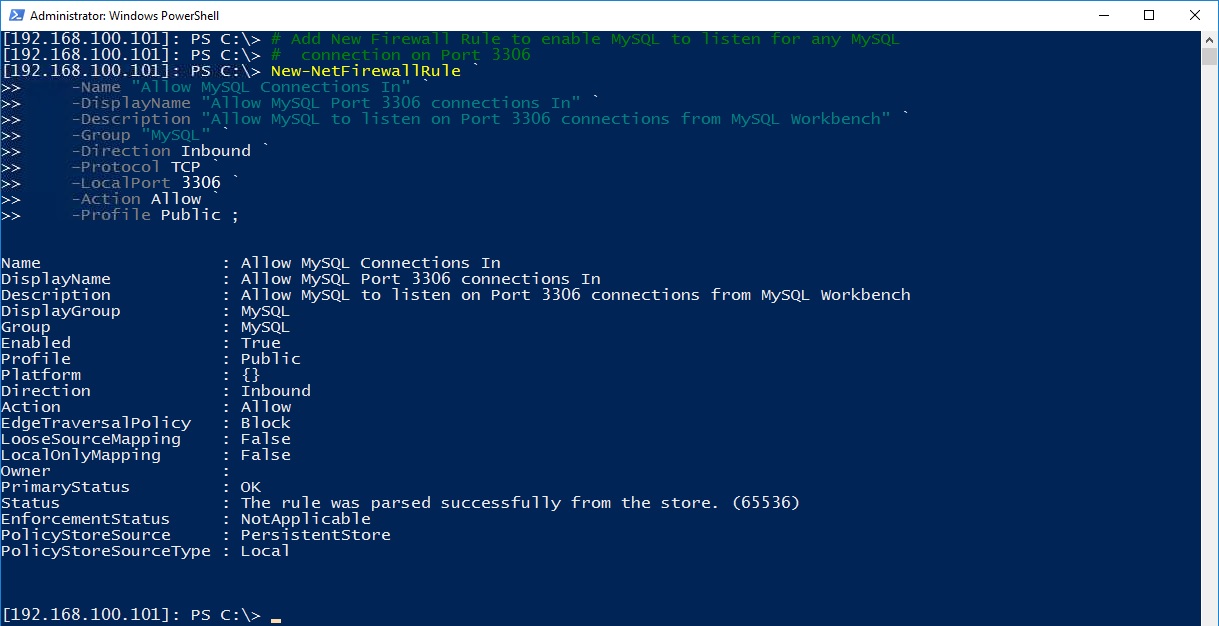
Depending on your infrastructure architecture, a dedicated Nano Server with MySQL Server hosting MySQL databases will only allow local applications to communicate internally to the databases and be managed locally. If you have a distributed infrastructure architecture, you will require to create a MySQL firewall rule to allow TCP Port 3306 (MySQL default port) communication from other infrastructure to use the MySQL Server.
In this section, we demonstrate how to create a MySQL firewall rule in Nano Server to allow the Nano Server to listen at TCP Port 3306.
# Add New Firewall Rule to enable MySQL to listen for any MySQL
# connection on Port 3306
New-NetFirewallRule `
-Name "Allow MySQL Connections In" `
-DisplayName "Allow MySQL Port 3306 connections In" `
-Description "Allow MySQL to listen on Port 3306 connections from MySQL Workbench" `
-Group "MySQL" `
-Direction Inbound `
-Protocol TCP `
-LocalPort 3306 `
-Action Allow `
-Profile Public ;
3.2. Getting Started with a new MySQL Database on Nano Server
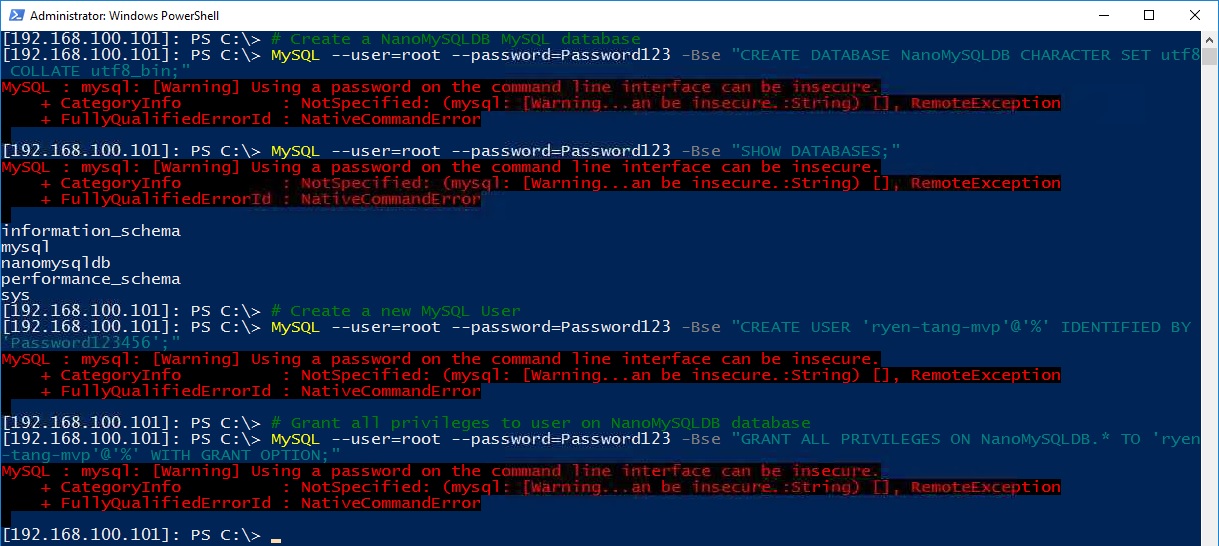
Finally, you can start creating MySQL databases for the MySQL Server in Windows Server 2016 Technical Preview 5 Nano Server. In this section, we created the NanoMySQLDB database and user as a demonstration using the native MySQL command trigger to the Nano Server remotely.
# Create a NanoMySQLDB MySQL database
MySQL --user=root --password= -Bse "CREATE DATABASE NanoMySQLDB CHARACTER SET utf8 COLLATE utf8_bin;"
# Create a new MySQL User
MySQL --user=root --password= -Bse "CREATE USER 'ryen-tang-mvp'@'%' IDENTIFIED BY PASSWORD 'Password123';"
# Grant all privileges to user on NanoMySQLDB database
MySQL --user=root --password= -Bse "GRANT ALL PRIVILEGES ON NanoMySQLDB.* TO 'ryen-tang-mvp'@'%' WITH GRANT OPTION;"
4. Getting Started with MySQL Workbench to manage MySQL databases remotely
Obviously, Database Administrators and others may like to simplify the MySQL administration, management and other operation tasks easily using MySQL Workbench instead of establishing PowerShell remoting to Nano Server to utilise the native MySQL commands. Because Nano Server is a headless operating system and do not support graphical user interface, we will need to deploy the MySQL Workbench on a Windows Server 2016 Technical Preview 5 management server that has a desktop graphical user interface. In this section, we will demonstrate how to easily deploy the MySQL Workbench on the Management Server and launch the MySQL Workbench to connect to the Nano Server using TCP Port 3306.
4.1. Download MySQL Workbench on a Management Server
Firstly, we will have to download the MySQL Workbench MSI to the Management Server.
# Download MySQL Workbench 6.3.7 Windows x64 to C:\Temp
Invoke-WebRequest `
-Uri "http://dev.mysql.com/get/Downloads/MySQLGUITools/mysql-workbench-community-6.3.7-winx64.msi" `
-OutFile "C:\Temp\mysql-workbench-community-6.3.7-winx64.msi" ;
# Verify MySQL Workbench 6.3.7 Windows x64 has been downloaded
Get-ChildItem `
-Path "C:\Temp\mysql-workbench-community-6.3.7-winx64.msi" ;
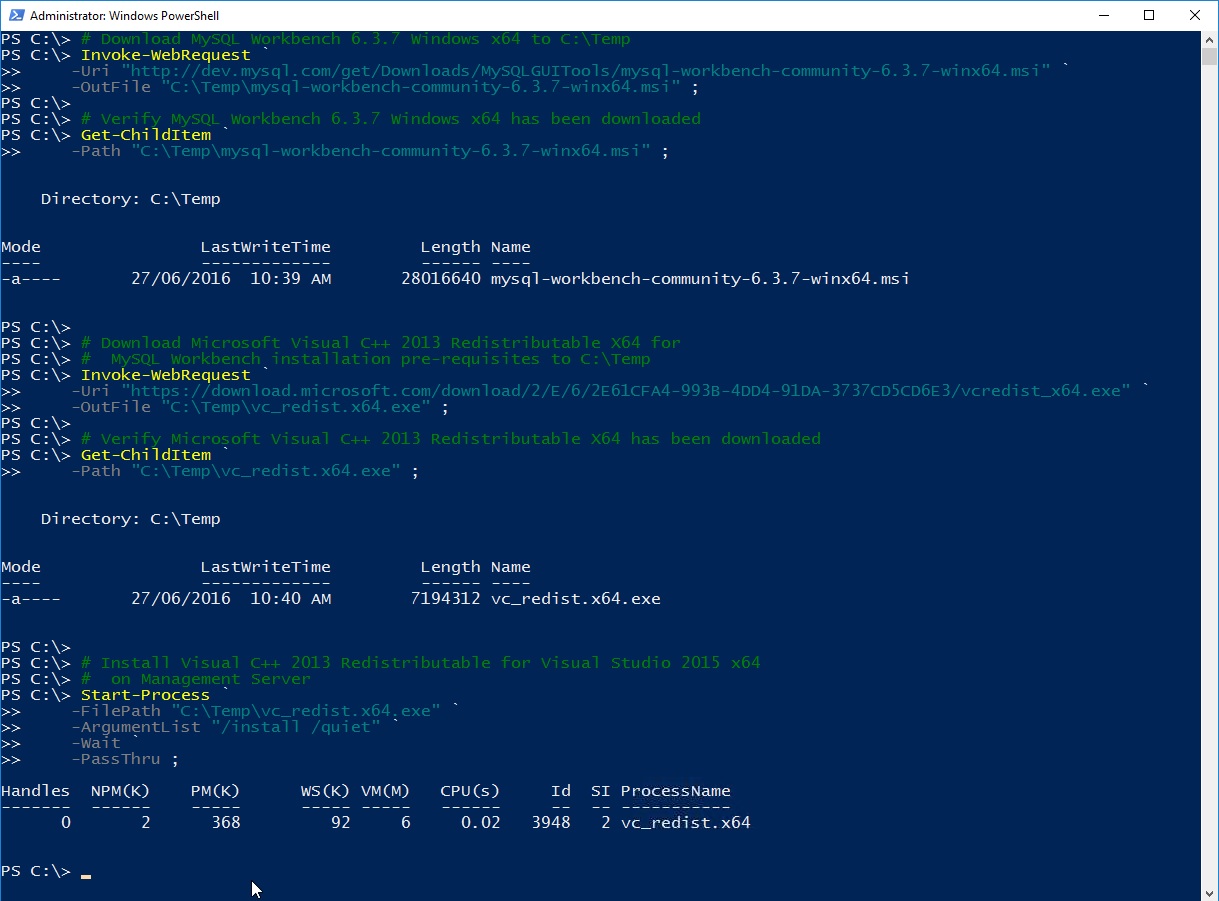
4.2. Download Visual C++ 2013 Redistributable on a Management Server
Secondly, we will have to download and install the Microsoft Visual C++ 2013 Redistributable package for the pre-requisite requirement to install MySQL Workbench on the Management Server.
# Download Microsoft Visual C++ 2013 Redistributable X64 for
# MySQL Workbench installation pre-requisites to C:\Temp
Invoke-WebRequest `
-Uri "https://download.microsoft.com/download/2/E/6/2E61CFA4-993B-4DD4-91DA-3737CD5CD6E3/vcredist_x64.exe" `
-OutFile "C:\Temp\vc_redist.x64.exe" ;
# Verify Microsoft Visual C++ 2013 Redistributable X64 has been downloaded
Get-ChildItem `
-Path "C:\Temp\vc_redist.x64.exe" ;
# Install Visual C++ 2013 Redistributable for Visual Studio 2015 x64
# on Management Server
Start-Process `
-FilePath "C:\Temp\vc_redist.x64.exe" `
-ArgumentList "/install /quiet" `
-Wait `
-PassThru ;
4.3. Install MySQL Workbench on Management Server
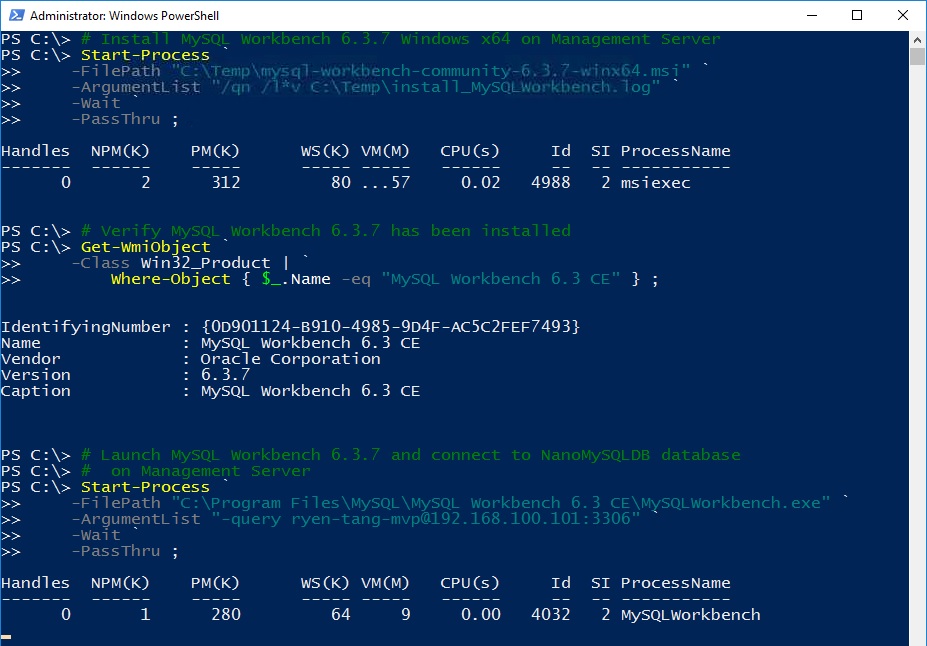
After we have downloaded the MySQL Workbench MSI and installed the Visual C++ Redistributable package to meet the Pre-Requisite requirement, we can start the installation of the MySQL Workbench and launch the MySQL Workbench to connect to the Nano Server remotely using the newly created User account that has privileges to connect from any where.
# Install MySQL Workbench 6.3.7 Windows x64 on Management Server
Start-Process `
-FilePath "C:\Temp\mysql-workbench-community-6.3.7-winx64.msi" `
-ArgumentList "/qn /l*v C:\Temp\install_MySQLWorkbench.log" `
-Wait `
-PassThru ;
# Verify MySQL Workbench 6.3.7 has been installed
Get-WmiObject `
-Class Win32_Product | `
Where-Object { $_.Name -eq "MySQL Workbench 6.3 CE" } ;
# Launch MySQL Workbench 6.3.7 and connect to NanoMySQLDB database
# on Management Server
Start-Process `
-FilePath "C:\Program Files\MySQL\MySQL Workbench 6.3 CE\MySQLWorkbench.exe" `
-ArgumentList "-query ryen-tang-mvp@192.168.100.101:3306" `
-Wait `
-PassThru ;
5. Conclusion
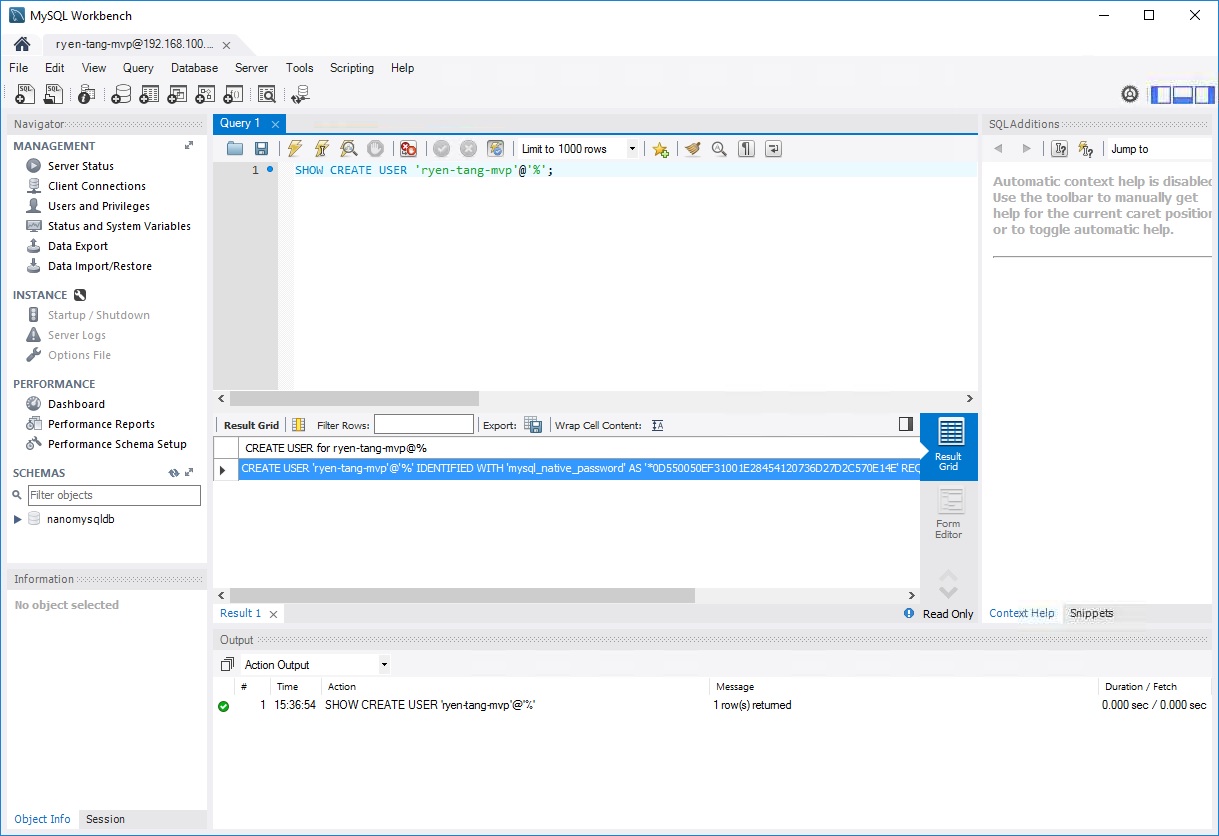
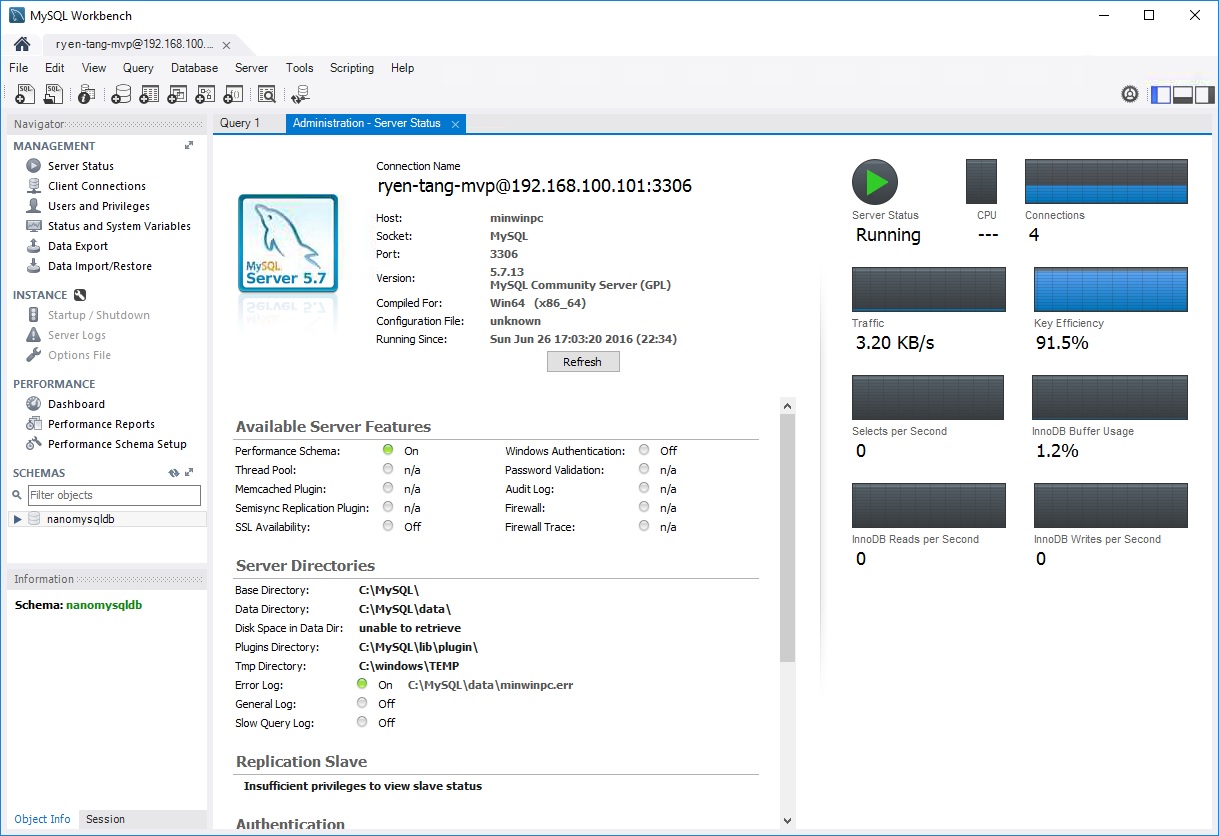
Finally, we have included two screenshots of MySQL Workbench from the Management Server connected to the MySQL Server running on Nano Server headless platform below and finishes off the deployment demonstration. It is definitely possible to deploy MySQL in Nano Server with Windows Server Technical Preview 5 and unleash many more possibilities to have Nano Server with databases for Nano Server hosting web applications.
Screenshot of MySQL Workbench querying MySQL Server hosted on Nano Server
Screenshot of MySQL Workbench displaying MySQL Server Status hosted on Nano Server
6. References
- MySQL 5.7 Reference Manual - Installing MySQL on Microsoft Windows Using a noinstall Zip Archive
- MySQL Workbench Manual - Installing on Windows
- MySQL Workbench Prerequisites
- Microsoft Download Center - Visual C++ Redistributable for Visual Studio 2013
- MySQL Server Blog - Windows Nano Server Technical Preview 5 and MySQL by Daniel Blanchard
- Microsoft TechNet Blog - MySQL on Nano Server by Reffat Issa
7. See Also
- Nano Server Survival Guide by Ryen Tang
- Microsoft Azure: Managing Nano Server with Server Management Tools by Ryen Tang
- Microsoft Azure: Deploying Windows Server 2016 Nano Server by Ryen Tang
- Windows Nano Server: Virtualization with VMware vSphere by Ryen Tang
- Nano Server: Getting Started with Image Builder by Ryen Tang
- Nano Server: Using New-NanoServerImage with Show-Command to deploy Nano Server by Ryen Tang
- Nano Server: Viewing Application, Security and System Event Logs using WMI by Ryen Tang
- Nano Server: Deploying an Internet Information Services (IIS) Web Server by Ryen Tang
- Nano Server: Deploying ASP.NET 5 site on Internet Information Services (IIS) Web Server by Ryen Tang
- Nano Server: Deploying PHP 7.0.6 on Internet Information Services (IIS) Web Server by Ryen Tang
- Nano Server: Deploying Python 3.x interpreter by Ryen Tang
- Nano Server: Getting Started in Container with Docker by Ryen Tang
