Nano Server: Deploying an Internet Information Services (IIS) Web Server
https://msdnshared.blob.core.windows.net/media/2016/05/0640_NinjaAwardTinyGold.pngGold Award Winner
1. Introduction
In this article, we will demonstrate deploying an Internet Information Services (IIS) role on a Windows Server 2016 Technical Preview 4 Nano Server. Taking the advantage of Nano Server being a dedicated web server with a small disk footprint that is born in the cloud for the cloud.
2. Preparation IIS for Nano Server Image
2.1. Joining Nano Server to Domain with Harvested BLOB
There is a few methods in joining a Nano Server to a Domain. This approach utilises DJoin to create the Nano Server computer object in the Domain Controller and output the harvested BLOB file for provisioning of a Nano Server using New-NanoServerImage Cmdlet.
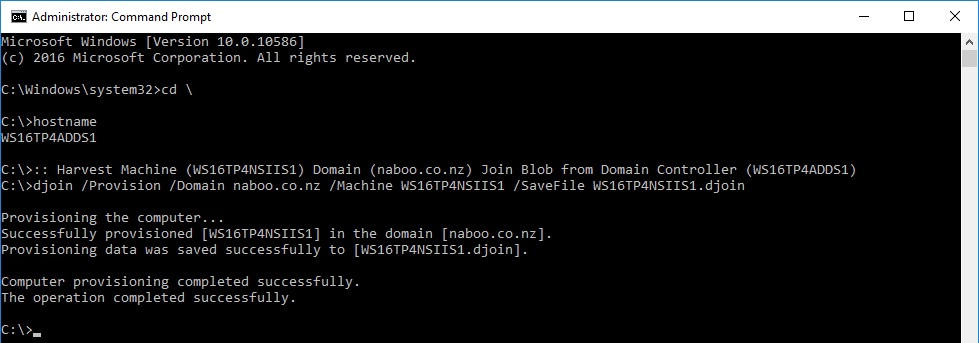
In this example, I have logged in to the Domain Controller and issued the command below;
# Harvest Machine (WS16TP4NSIIS1) Domain (naboo.co.nz) Join Blob from Domain Controller (WS16TP4ADDS1)
djoin /Provision /Domain naboo.co.nz /Machine WS16TP4NSIIS1 /SaveFile WS16TP4NSIIS1.djoin
Once the *.djoin is generated, copy the file to the machine where you will be using to generate a Nano Server image.
2.2. Getting Started with Nano Server (IIS and Domain Joined) Creation
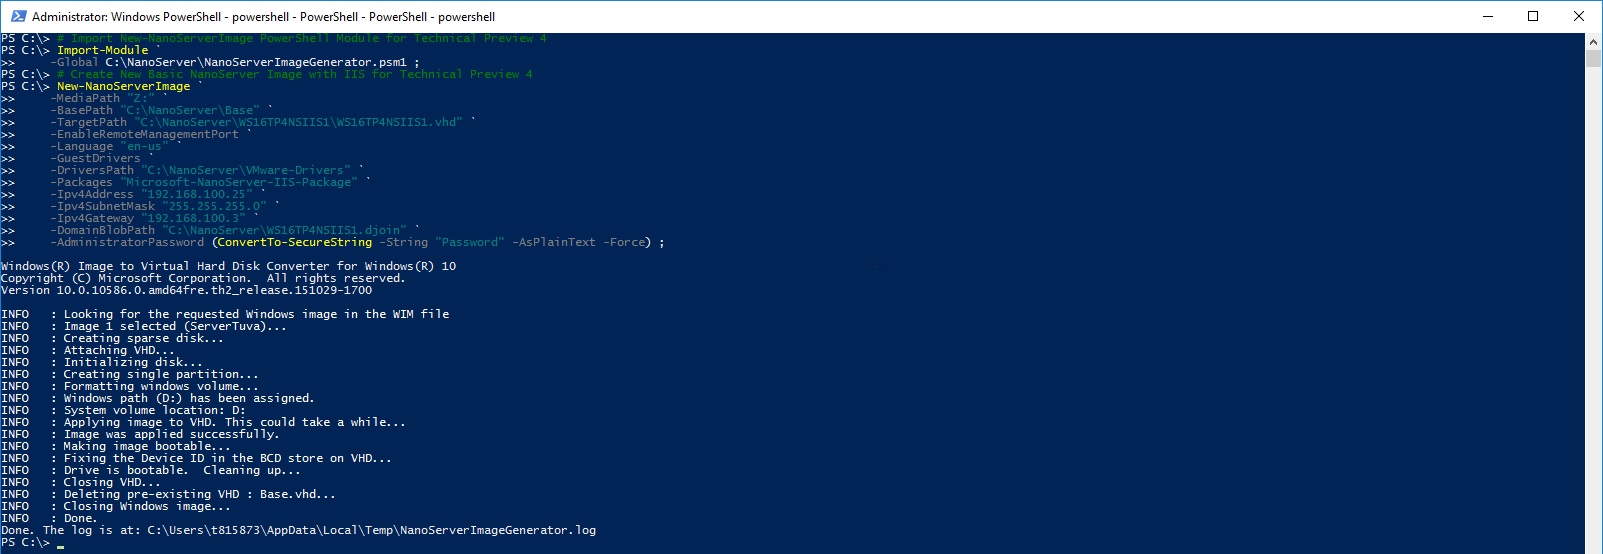
In this example, we will create a Nano Server with IIS package that is joined to the Domain for DNS URL resolution capability.
# Import New-NanoServerImage PowerShell Module for Technical Preview 4
Import-Module `
-Global C:\NanoServer\NanoServerImageGenerator.psm1 ;
# Create New Basic NanoServer Image with IIS for Technical Preview 4 with IIS Package
New-NanoServerImage `
-MediaPath "Z:" `
-BasePath "C:\NanoServer\Base" `
-TargetPath "C:\NanoServer\WS16TP4NSIIS1\WS16TP4NSIIS1.vhd" `
-EnableRemoteManagementPort `
-Language "en-us" `
-GuestDrivers `
-DriversPath "C:\NanoServer\VMware-Drivers" `
-Packages "Microsoft-NanoServer-IIS-Package" `
-Ipv4Address "192.168.100.25" `
-Ipv4SubnetMask "255.255.255.0" `
-Ipv4Gateway "192.168.100.3" `
-DomainBlobPath "C:\NanoServer\WS16TP4NSIIS1.djoin" `
-AdministratorPassword (ConvertTo-SecureString -String "Password" -AsPlainText -Force) ;
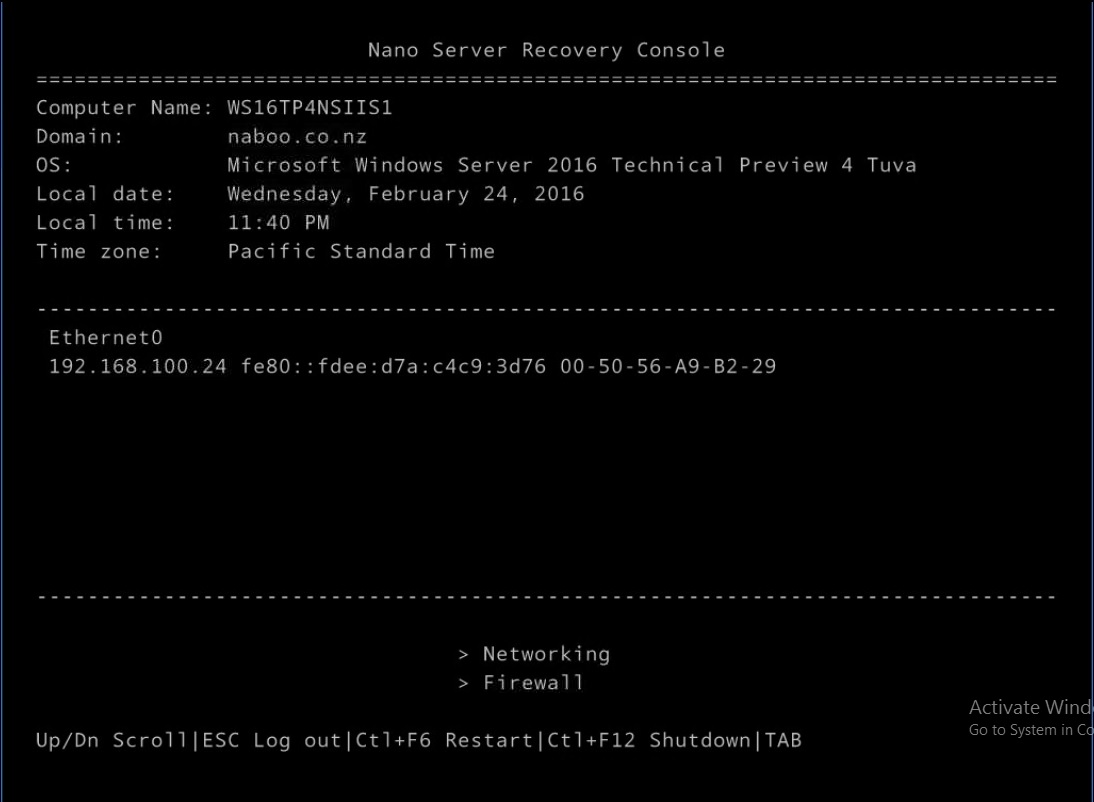
Verify and obtain the Nano Server IP Address from the Nano Server Recovery Console
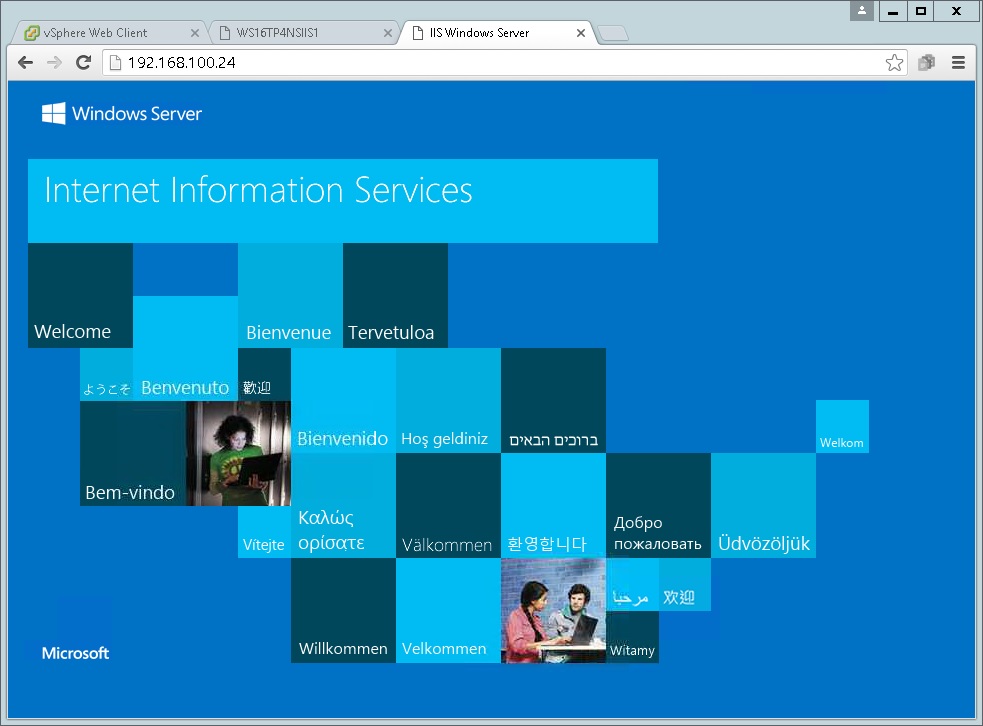
Verify the website is loading from another machine;
- Launch a Web Browser
- Input the IP Address of the Nano Server
- Verify that the IIS Default Website is loading
2.2.1. Manage Nano Server remotely using PowerShell Session
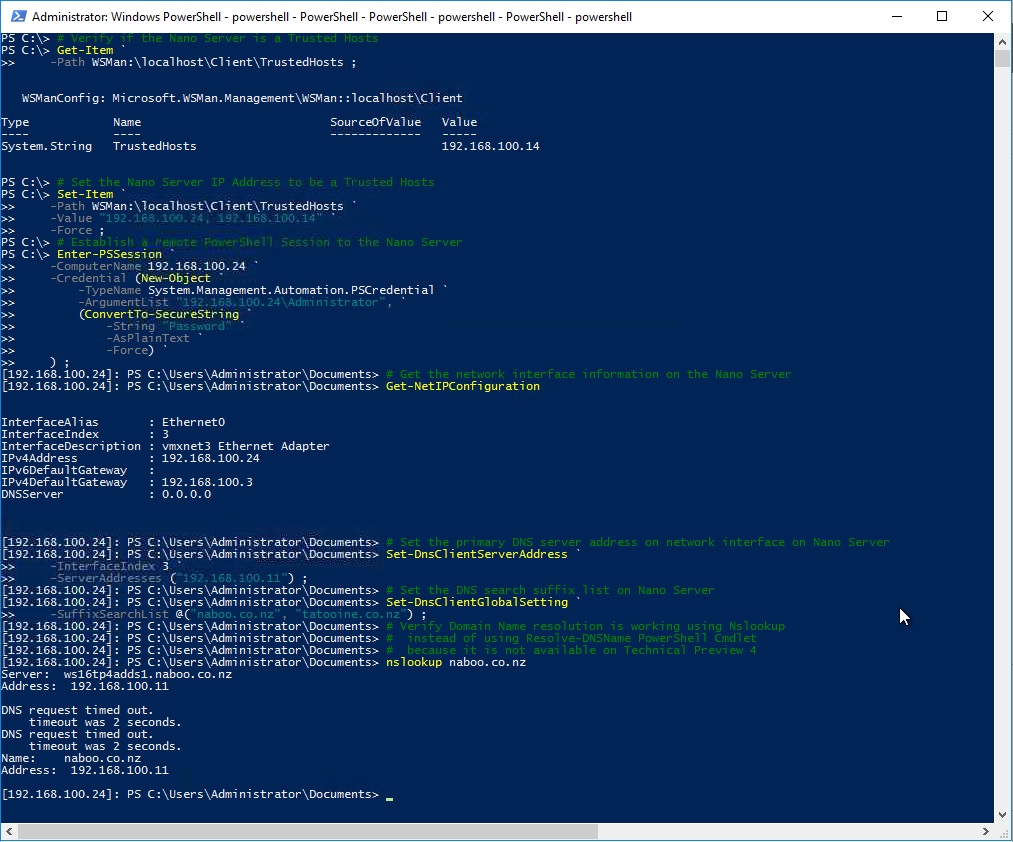
In this example, we will connect to Nano Server remotely using Enter-PSSession PowerShell Cmdlet to manage the Nano Server remotely and configure the Primary DNS Server Address and DNS Search Suffix List.
# Verify if the Nano Server is a Trusted Hosts
Get-Item `
-Path WSMan:\localhost\Client\TrustedHosts ;
# Set the Nano Server IP Address to be a Trusted Hosts
Set-Item `
-Path WSMan:\localhost\Client\TrustedHosts `
-Value "192.168.100.24" `
-Force ;
# Establish a remote PowerShell Session to the Nano Server
Enter-PSSession `
-ComputerName 192.168.100.24 `
-Credential (New-Object `
-TypeName System.Management.Automation.PSCredential `
-ArgumentList "192.168.100.24\Administrator", `
(ConvertTo-SecureString `
-String "Password" `
-AsPlainText `
-Force) `
) ;
2.2.2. Configure the Network Interface DNS Server Address and Search Suffix List
In this example, it demonstrate on how to configure the Network Interface DNS Server Address and Search Suffix List. Unfortunately, we cannot use Resolve-DNSName PowerShell Cmdlet and therefore utilise the NSLookup instead.
# Get the network interface information on the Nano Server
Get-NetIPConfiguration ;
# Set the primary DNS server address on network interface on Nano Server
Set-DnsClientServerAddress `
-InterfaceIndex 3 `
-ServerAddresses ("192.168.100.11") ;
# Set the DNS search suffix list on Nano Server
Set-DnsClientGlobalSetting `
-SuffixSearchList @("redmond.com", "contoso.com") ;
# Verify Domain Name resolution is working using Nslookup
# instead of using Resolve-DNSName PowerShell Cmdlet
# because it is not available on Technical Preview 4
nslookup redmond.com
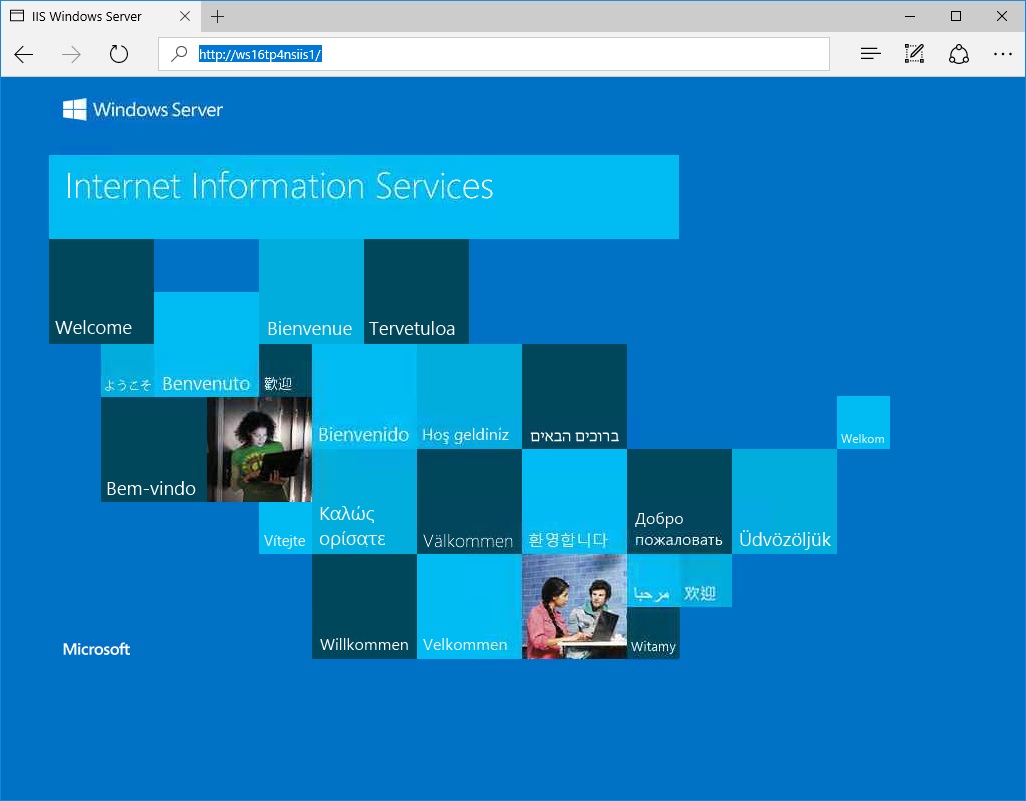
Once the Primary DNS Server Address and Search Suffix List has configured, you will need to ensure that the DNS Server has an A Record of the Nano Server Hostname. With the A Record of the Nano Server in the DNS Server, you will be able to verify the Default Website with the Hostname on Port 80.
Verify the website is loading from another machine;
- Launch a Web Browser
- Input the Hostname of the Nano Server
- Verify that the IIS Default Website is loading
3. Getting Started with a new Web Site on Nano Server
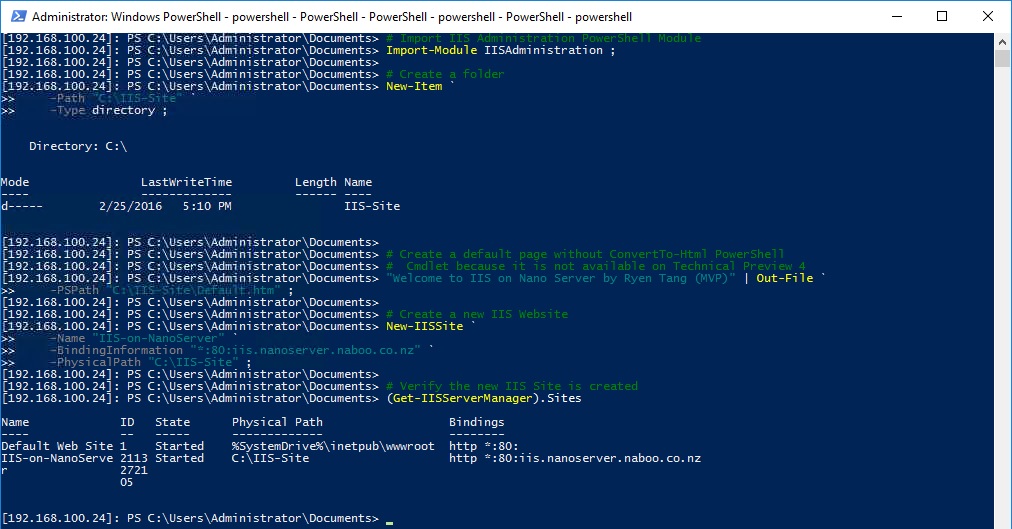
In this example, we will demonstrate how to create another Web Site on IIS in Nano Server using the new IISAdministration PowerShell module with a custom web binding information.
# Import IIS Administration PowerShell Module
Import-Module IISAdministration ;
# Create a folder
New-Item `
-Path "C:\IIS-Site" `
-Type directory ;
# Create a default page without ConvertTo-Html PowerShell
# Cmdlet because it is not available on Technical Preview 4
"Welcome to IIS on Nano Server by Ryen Tang (MVP)" | Out-File `
-PSPath "C:\IIS-Site\Default.htm" ;
# Create a new IIS Website
New-IISSite `
-Name "IIS-on-NanoServer" `
-BindingInformation "*:80:iis.nanoserver.redmond.com" `
-PhysicalPath "C:\IIS-Site" ;
# Verify the new IIS Site is created
(Get-IISServerManager).Sites ;
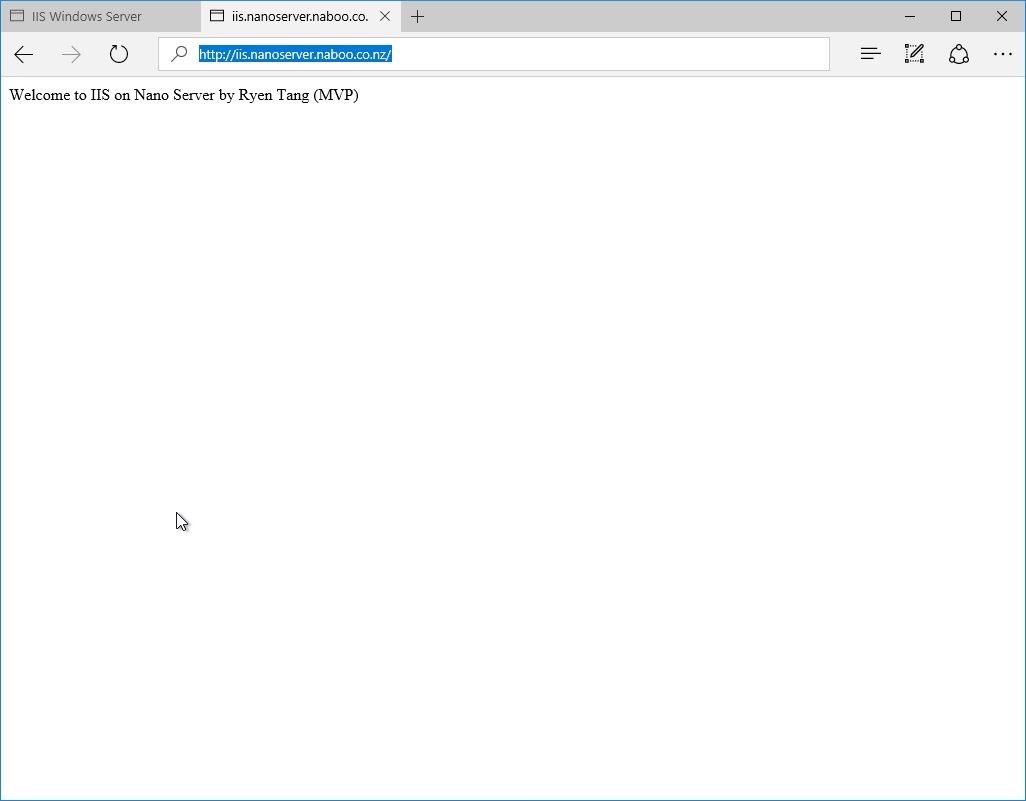
Create the custom web binding DNS A Record to resolve the custom web binding URL.
Verify the website is loading from another machine;
- Launch Web Browser
- Input the URL
- Verify the New Web Site with custom Web Binding is loading
4. References
- Microsoft TechNet - Getting Started with Nano Server
- Microsoft TechNet - IIS on Nano Server
- Microsoft TechNet - IISAdmin_Cmdlets
- Microsoft TechNet - New-IISSite
- Microsoft IIS.NET Blogs - Introducing IIS on Nano Server by David So
- Microsoft MSDN Channel9 - Demo Nano Server in a Container running IIS ASP.NET 5
5. See Also
- Nano Server Survival Guide by Ryen Tang
- Microsoft Azure: Managing Nano Server with Server Management Tools by Ryen Tang
- Microsoft Azure: Deploying Windows Server 2016 Nano Server by Ryen Tang
- Windows Nano Server: Virtualization with VMware vSphere by Ryen Tang
- Nano Server: Getting Started with Image Builder by Ryen Tang
- Nano Server: Using New-NanoServerImage with Show-Command to deploy Nano Server by Ryen Tang
- Nano Server: Viewing Application, Security and System Event Logs using WMI by Ryen Tang
- Nano Server: Deploying ASP.NET 5 site on Internet Information Services (IIS) Web Server by Ryen Tang
- Nano Server: Deploying PHP 7.0.6 on Internet Information Services (IIS) Web Server by Ryen Tang
- Nano Server: Deploying MySQL Database Server by Ryen Tang
- Nano Server: Deploying Python 3.x interpreter by Ryen Tang
- Nano Server: Getting Started in Container with Docker by Ryen Tang
