SharePoint Server 2016 RTM: offline installation
This wiki article explains steps for offline installation of SharePoint Server 2016 RTM on Windows Server 2012 R2.
Update: This article has been updated to reflect installation steps for SP Server 2016 RTM version.
Introduction
This wiki article explains steps for offline installation of SharePoint Server 2016 RTM on Windows Server 2012 R2. This will be divided into 3 sections:
- Install .NET framework 3.5 (The reference article http://blogs.technet.com/b/wbaer/archive/2015/05/12/what-s-new-in-sharepoint-server-2016-installation-and-deployment.aspx does not mention it directly, but pre-requisite will be unable to configure application server role and web server (IIS) role unless this is done. It indirectly mentions it though: You can enable the Web Server (IIS) role and the Application Server role in Server Manager. However if the server is not connected to the Internet, the http://support.microsoft.com/en-us/kb/2765260 article has an Offline method that explains how to use several Window PowerShell cmdlets to add and enable these roles.)
- Download and install prerequisites for SharePoint Server 2016 RTM
- Download and install SharePoint Server 2016 RTM
Steps for Installation
Section 1: Install .NET framework 3.5
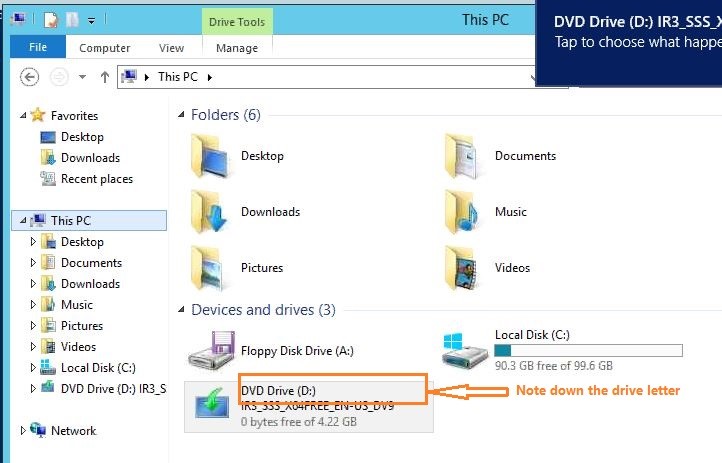
Login to the server with an account which have local administrative rights on the machine. Make sure that you have mounted ISO image of the Windows Server 2012 R2 and note down the drive path after mounting:
Open Server Manager. In Server Manager window, go to Manage -> Add Roles and features:
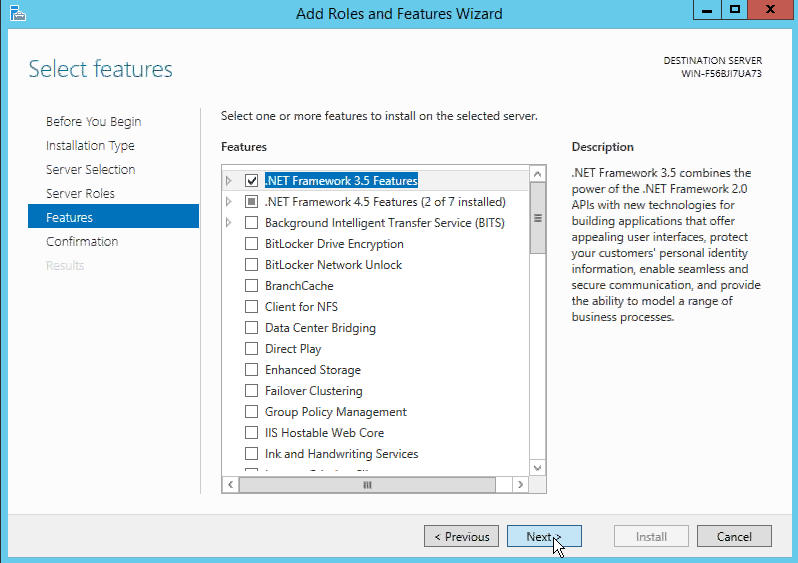
In Add Roles and Features wizard, click next until you come to Features section. In features section, click .Net framework 3.5, select it and then click next:
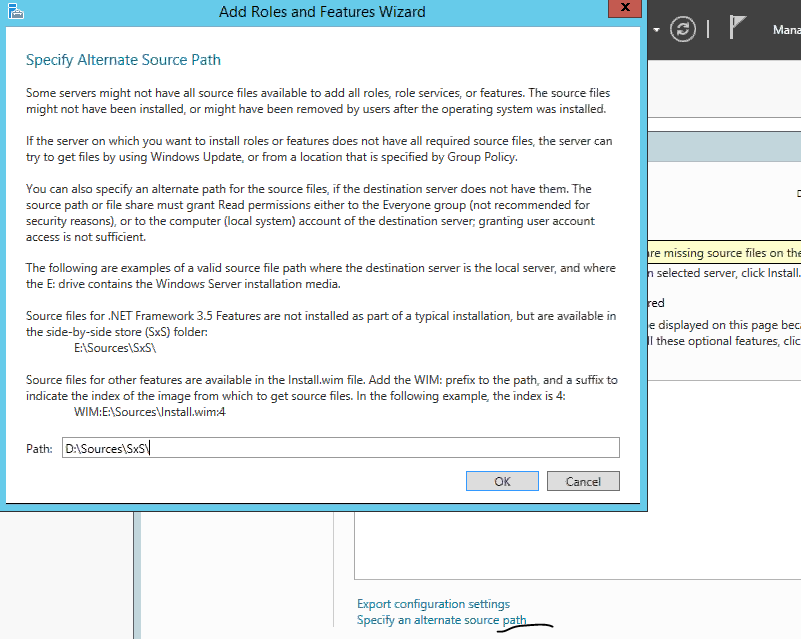
In the next window, click ‘specify an alternate source path’. In new windows opened, add \Sources\SxS\ to drive letter noted in step 1.a and enter inside the path field:
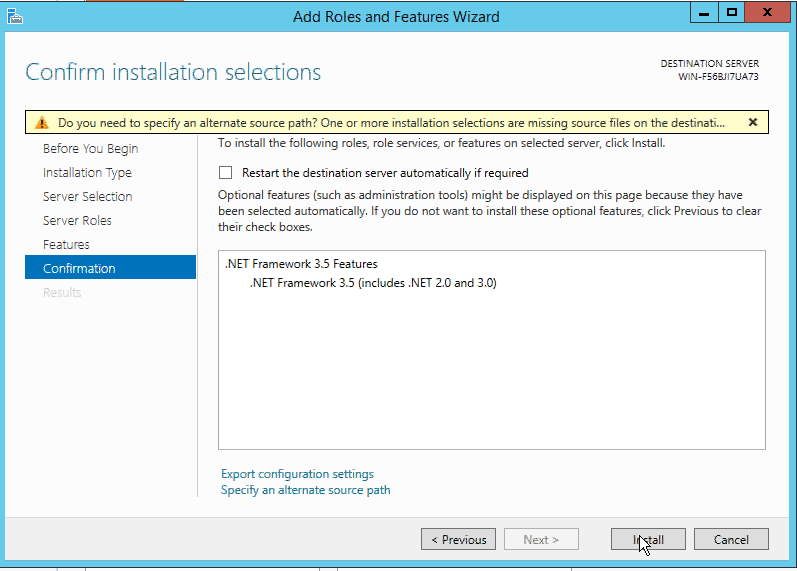
Click ok to come out of ‘specify alternate source path’ window and then click install in ‘Add Roles and Configuration Wizard’:
Once its installed, click finish and then close the wizard.
Section 2: Download and Install pre-requisites for SharePoint Server 2016 RTM
Download prerequisites binaries for SharePoint Server 2016 RTM as per script provided at https://gallery.technet.microsoft.com/PreRequisites-for-7f719ff3.
Save all the binaries files to a directory called C:\Installables\ If you have internet connection on the machine, you don't need to download files. SharePoint Prerequisites installer will download files from internet and install them.
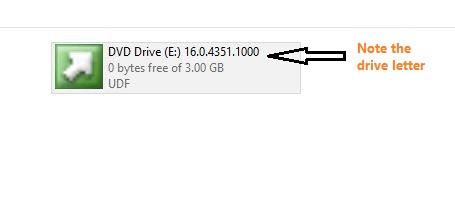
Download SharePoint Server 2016 RTM ISO image and save it to the server. Mount it and then note down the drive letter.
Opened a command window as an administrator. Navigate to drive to which ISO image was mounted. Paste following command (this is one single command, apology for line breaks) and then hit enter:
prerequisiteinstaller.exe /sqlncli:"C:\Installables\sqlncli.msi" /idfx11:"C:\Installables\MicrosoftIdentityExtensions-64.msi" /sync:"C:\Installables\Synchronization.msi" /appfabric:"C:\Installables\WindowsServerAppFabricSetup_x64.exe" /kb3092423:"C:\Installables\AppFabric-KB3092423-x64-ENU.exe" /msipcclient:"C:\Installables\setup_msipc_x64.exe" /wcfdataservices56:"C:\Installables\WcfDataServices.exe" /odbc:"C:\Installables\msodbcsql.msi" /msvcrt11:"C:\Installables\vc_redist.x64.exe" /msvcrt14:"C:\Installables\vcredist_x64.exe" /dotnetfx:"C:\Installables\NDP46-KB3045557-x86-x64-AllOS-ENU.exe"If you are using PowerShell, you can use below command:
#Directory path where SP 2016 RTM files are kept
$PreRequsInstallerPath= "E:"

#Directory path where SP 2016 Pre-requisites files are kept
$PreRequsFilesPath = "C:\Installables"

Start-Process "$PreRequsInstallerPath\PrerequisiteInstaller.exe" -Wait -ArgumentList "  `
              /SQLNCli:`"$PreRequsFilesPath\sqlncli.msi`" `
              /idfx11:`"$PreRequsFilesPath\MicrosoftIdentityExtensions-64.msi`" `
              /Sync:`"$PreRequsFilesPath\Synchronization.msi`"`
              /AppFabric:`"$PreRequsFilesPath\WindowsServerAppFabricSetup_x64.exe`" `
              /kb3092423:`"$PreRequsFilesPath\AppFabric-KB3092423-x64-ENU.exe`" `
              /MSIPCClient:`"$PreRequsFilesPath\setup_msipc_x64.exe`" `
              /wcfdataservices56:`"$PreRequsFilesPath\WcfDataServices.exe`" `
              /odbc:`"$PreRequsFilesPath\msodbcsql.msi`" `
              /msvcrt11:`"$PreRequsFilesPath\vc_redist.x64.exe`" `
              /msvcrt14:`"$PreRequsFilesPath\vcredist_x64.exe`" `
              /dotnetfx:`"$PreRequsFilesPath\NDP46-KB3045557-x86-x64-AllOS-ENU.exe`""
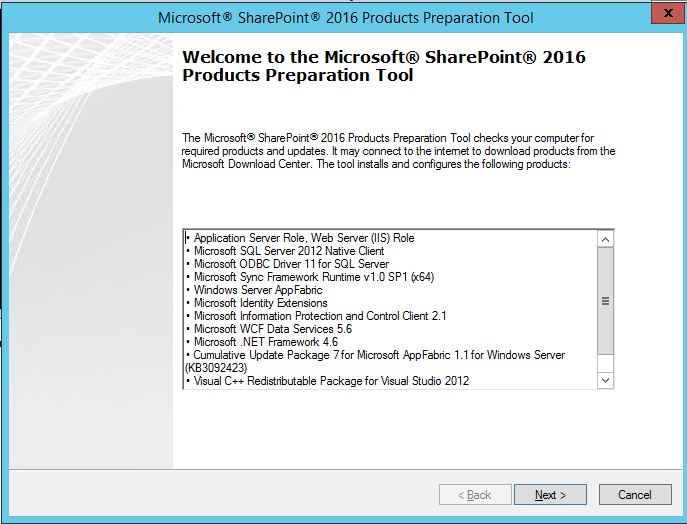
Once you hit enter, it will open prerequisite installer:
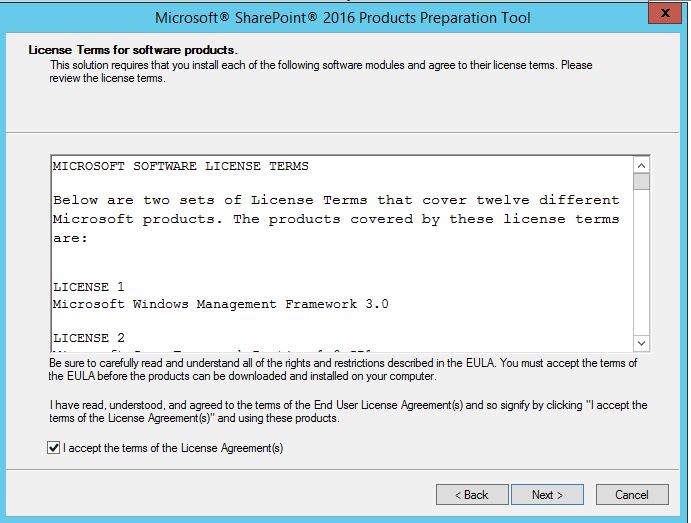
Click next. Accept the license terms and then click next again.
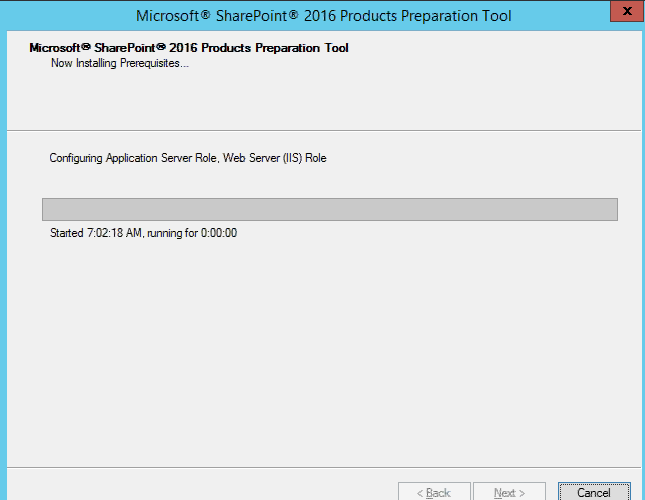
It will proceed to install binaries one by one. Once it’s done installing binaries, it will ask for reboot. Click finish and then it will restart server on its own. Once server comes up, login with same account again. Prerequisite installer will proceed from where it was left before reboot:
Once its completed successfully, it will ask for finish. Click finish in the window.
Section 3: Download and install SharePoint Server 2016 RTM.
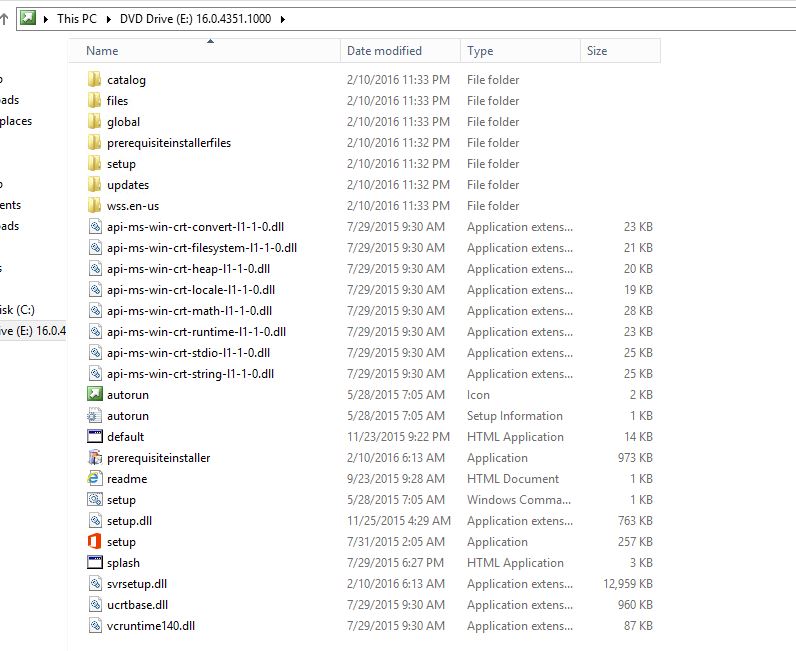
Open windows explorer. Navigate to drive where the SharePoint Server 2016 image was mounted. Double click to open setup file:
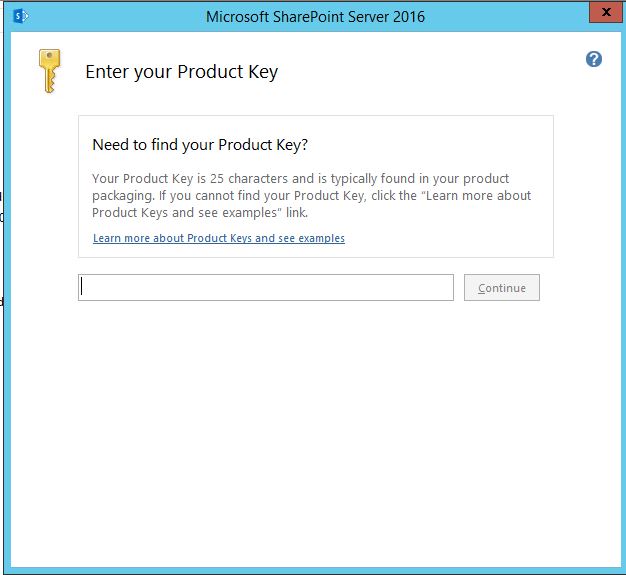
Enter product key when prompted (For trial image, key is available at download link itself) and then click continue:
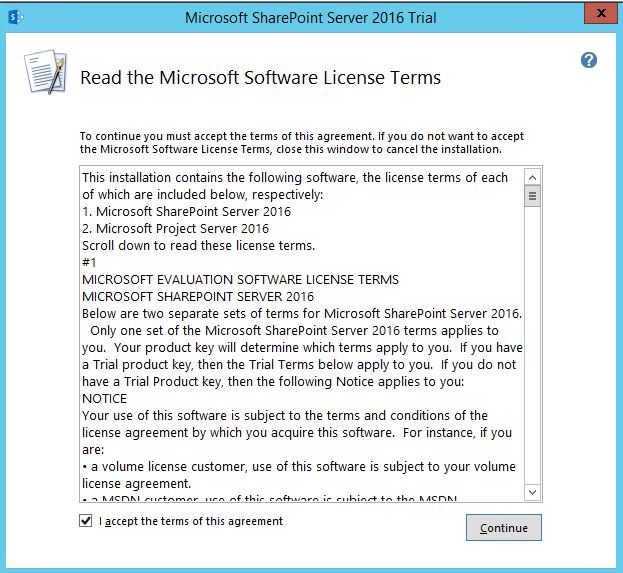
Accept the license terms and click continue:
In the next window, it will ask for file location to place files. It’s generally recommended to leave it as such. However you may want it to change to another drive. Once done, click InstallNow:
In last, uncheck ‘Run product configuration wizard Now’ option and then click finish to close all windows.
External Links
- Download SharePoint 2016 RTM Trial from here: https://www.microsoft.com/en-us/download/details.aspx?id=51493
- Bill Baer's blog on what's new in SharePoint Server 2016 Installation: http://blogs.technet.com/b/wbaer/archive/2015/05/12/what-s-new-in-sharepoint-server-2016-installation-and-deployment.aspx
