SharePoint Online : Using App Only Policy to create site collection in SharePoint Online
Introduction
You might come across situations where you are required to connect to SharePoint Online from an external application. Say for example you have a console application or a windows application that needs to perform some operations or access some resources on SharePoint Online. Under these scenarios a probable answer that comes to the mind is to make use of the SharePointOnlineCredentials class. You can use this class to authenticate to SharePoint Online from your host machine. The authentication process with CSOM in SharePoint Online has been greatly simplified in SharePoint 2013 with the introduction of the SharePointOnlineCredentials class. With the use of this class, we simply need to pass the email id for login into our SharePoint Online site and the password in the SecureString format.
The constructor for the same is like below.
public SharePointOnlineCredentials(
    string username,
    SecureString password
)
Sample code seems like below.
using (ClientContext tenantContext = new ClientContext("https://yoursite-admin.sharepoint.com/ ;  "))
{
          SecureString passWord = new  SecureString();
          foreach (char c in "yourpassword".ToCharArray())
                passWord.AppendChar(c);
          tenantContext.Credentials = newSharePointOnlineCredentials("admin@yoursite.onmicrosoft.com", passWord);

//Your code goes here
}
But, wait a minute. How about scenarios where you are not allowed to pass credentials?
The answer to this is to make use of the “App-Only” Policy.
What is App-Only Policy?
Before actually coming to the definition of the App-Only policy, let us briefly discuss a scenario that will help us in better understanding what we want to achieve using this App-Only Policy.
Say you have a requirement where you want the user to write something to a list but the user does not have the contribute permissions on the list. Let us say the user simply have a read access on the list. So how to handle such a scenario. You might think about RunWithElevatedPrivileges API over here but here it won’t work as we are talking about SharePoint Online. So, the question is how to accomplish this?
The answer is App Only Policy.
Now, in order to discuss what App Only Policy is, let us talk about the different App authorization policy types.
SharePoint provides three types of app authorization policy types.
- User-Only Policy
- User+App Policy
- App-Only Policy
User-Only Policy – In User-Only policy, SharePoint checks only the permission of the user.
User+App Policy – In User+App Policy, SharePoint checks the permission of both the user as well as the app principal. Authorization happens only if both user as well as the app has the permission to perform the desired action.
App-Only Policy – In the App-Only Policy, SharePoint checks the permissions of the app principal. Authorization checks succeed if the app has the desired permission to perform the action irrespective of the permission of the current user.
Having said that, it is clear that App-Only policy is very helpful in scenarios where we do not want to give users the permissions to access resources directly but do want them to do some actions which they cannot directly perform with the permission levels they have. In such scenarios we develop apps with App-Only policy.
Scenario
Let us now come back to the original intent of this article. We wanted to write a console application that will perform some operations on the SharePoint Online. Also we want to achieve this without passing the credentials and hence by making use of the App-Only policy.
Solution
We need to follow some basic steps in order to achieve this. Let us have a detailed discussion around the same.
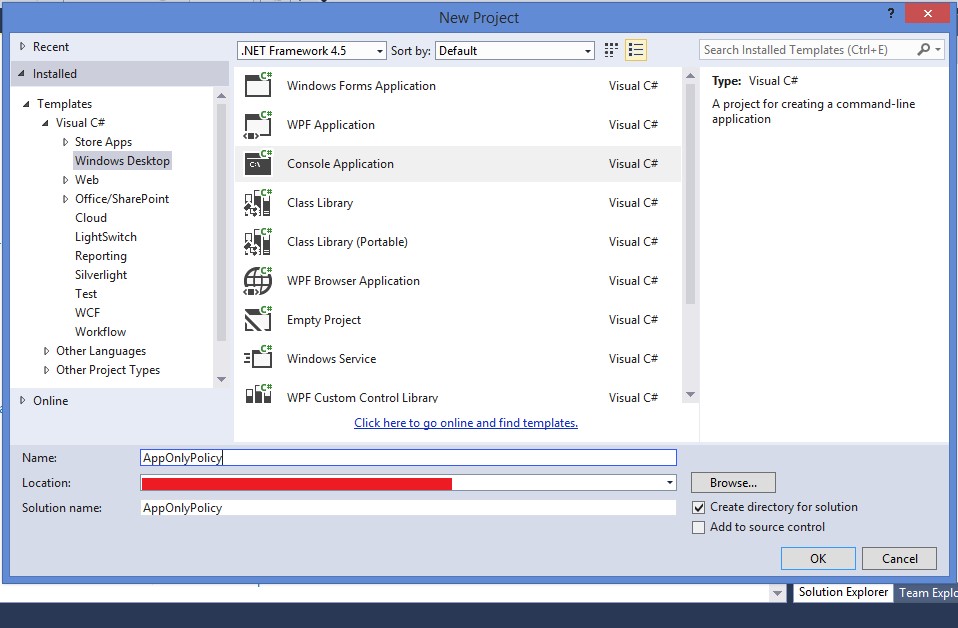
Create a Console Application
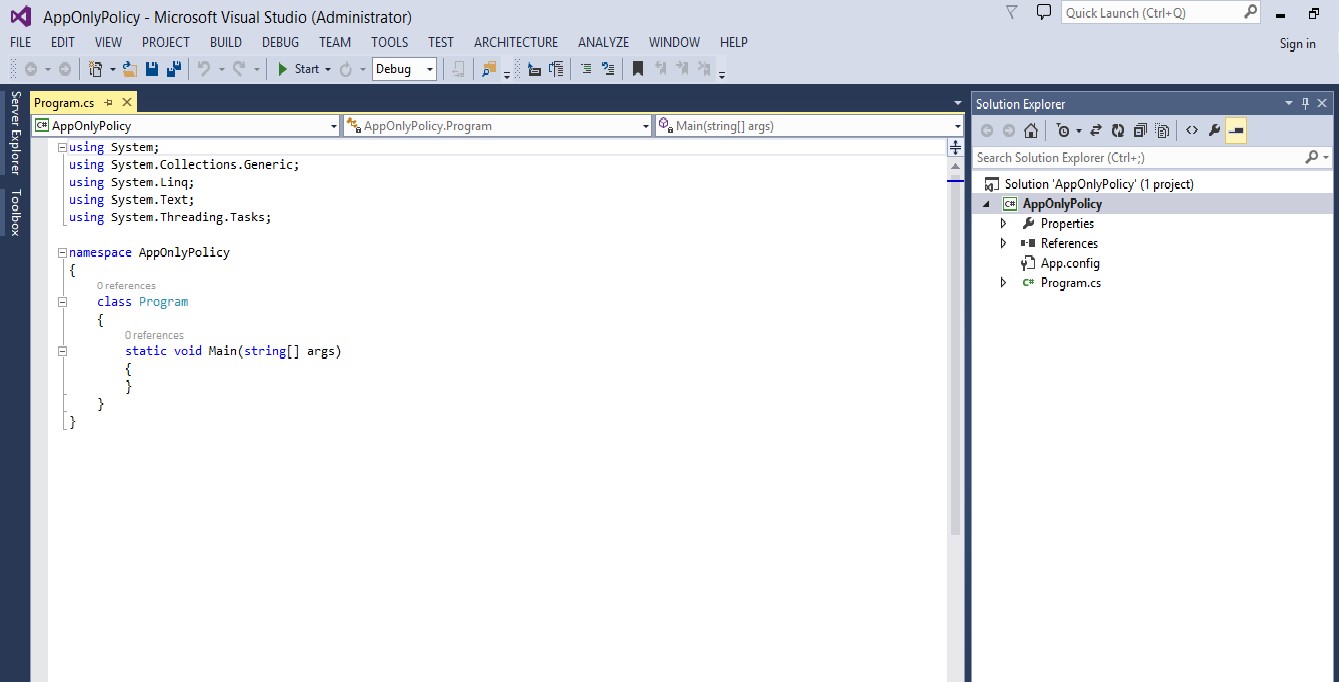
Create a console application in your Visual Studio 2012 /2013.
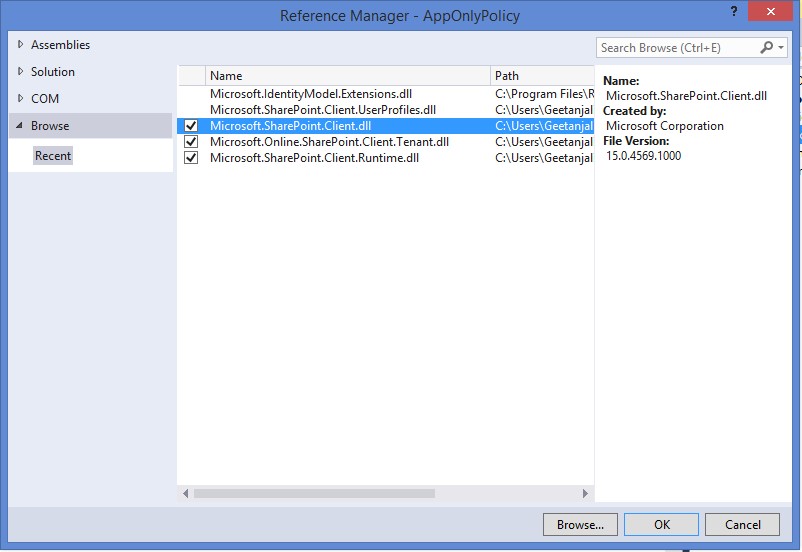
Add references to the following assemblies
- Microsoft.SharePoint.Client.dll
- Microsoft.SharePoint.Client.Runtime.dll
- Microsoft.Online.SharePoint.Client.Tenant.dll
Add TokenHelper Class
TokenHelper class has been created by Microsoft as a helper class to facilitate OAuth communication with SharePoint.
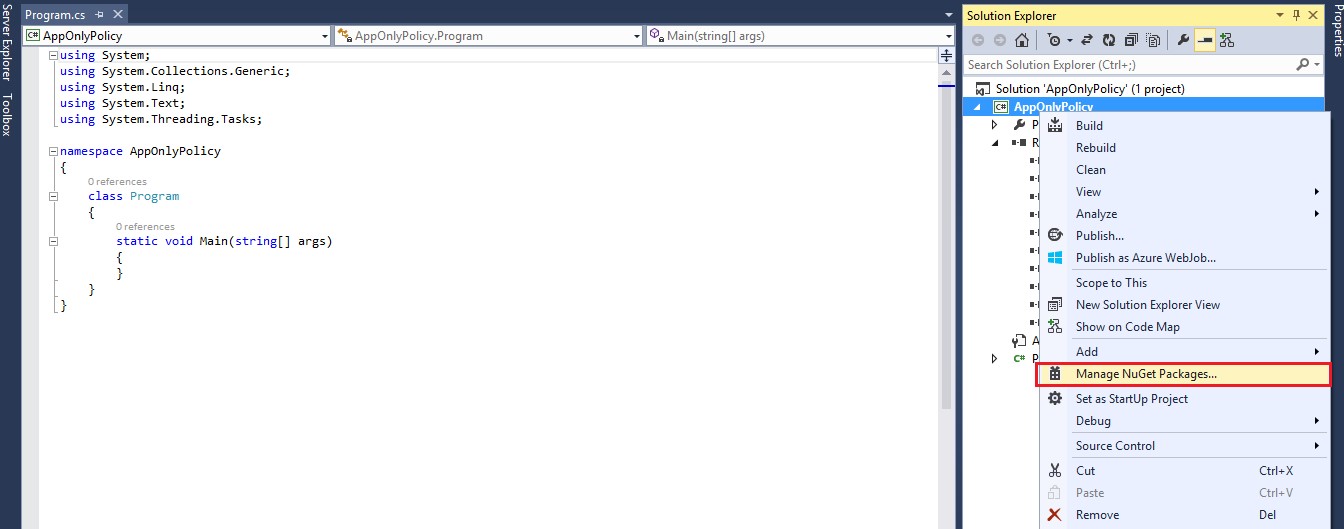
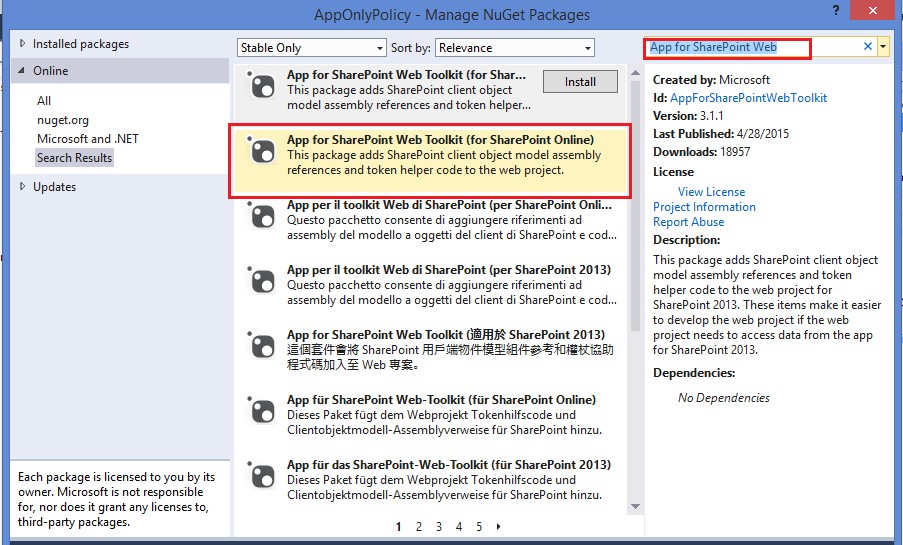
In order to add the TokenHelper class, let us make use of Nuget Package Manager. Right click on the project and select Manage NuGet Packages.
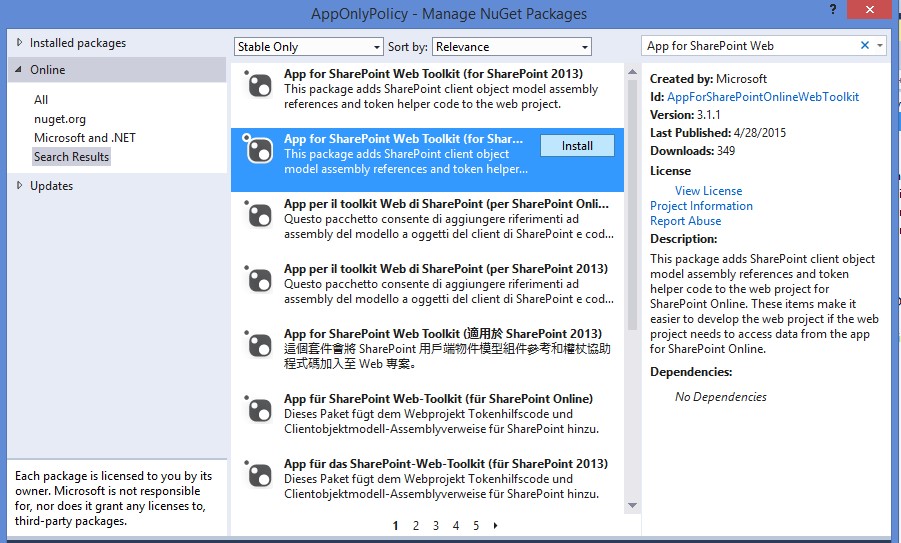
Search for App for SharePoint Web Toolkit.
Click on Install.
After the installation has taken place, you will observe the following changes in your solution. You will observe new assembly references added to the solution that includes
- Microsoft.IdentityModel.dll
- Microsoft.IdentityModel.Extensions.dll
- System.IdentityModel.dll
- System.ServiceModel.dll
- System.Web.dll
- System.Web.Extensions.dll
Besides this, you can also observe the addition of two classes
- SharePointContext.cs
- TokenHelper.cs
App Registration
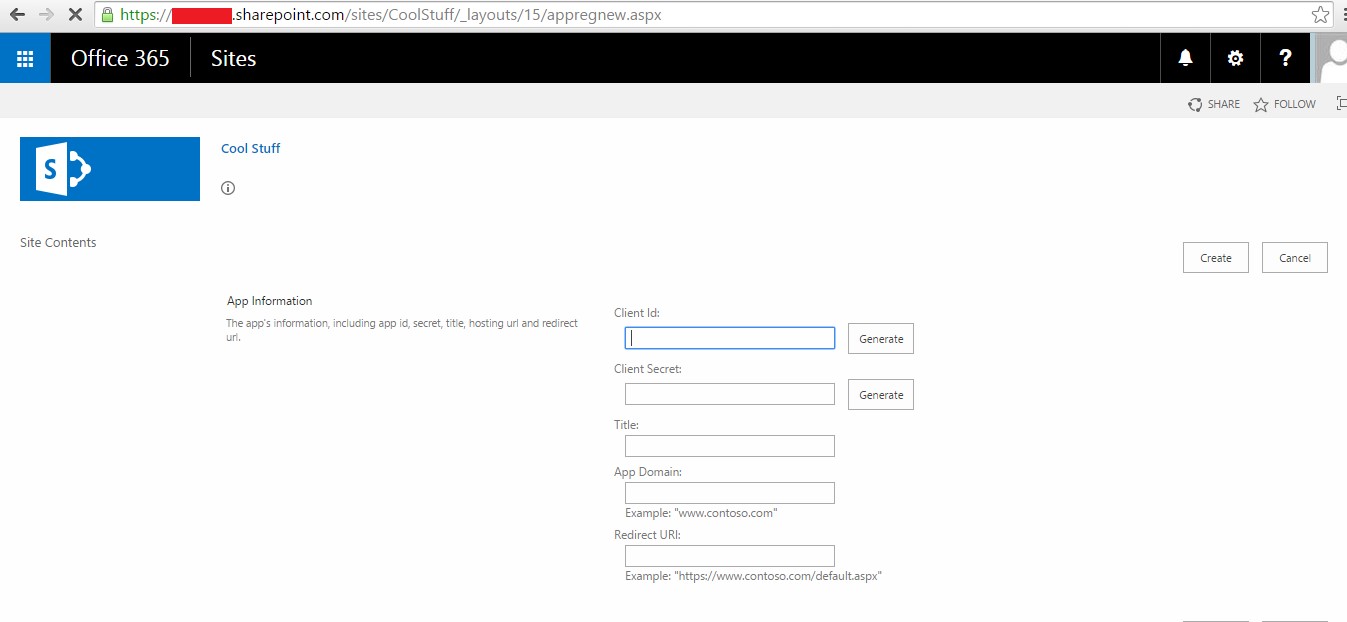
Firstly we need to register a new SharePoint App so that our console application can access the site collection in SharePoint Online by using App-Only Policy. For this we need to browse to the application page named appregnew.aspx. Let us open this page for our tenant.
Next you need to generate the Client Id and Client Secret as well as provide the values for all the fields shown on the page above.
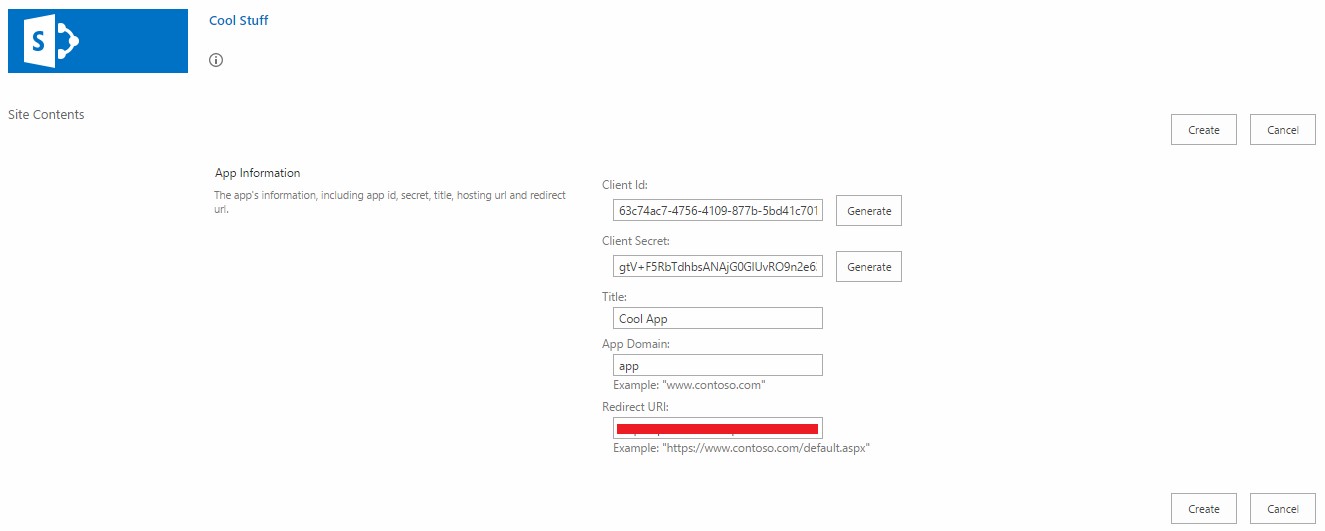
Click on Create and make a note of the Client Id and the Client Secret as these will be required.
Set Permission for the App
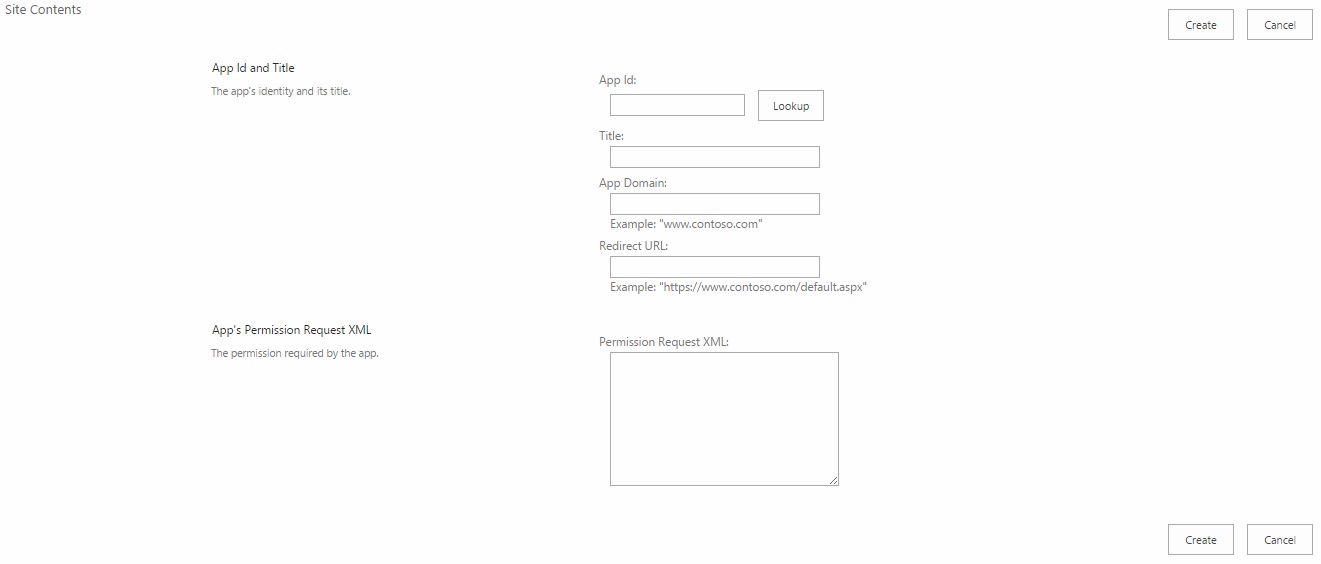
We need to browse to the appinv.aspx page of the site collection. This will authorize the console application to access the SharePoint resources.
Provide the Client Id that we copied in the previous step in the App Id box and click on Lookup. You will observe that the Title, App Domain and the Redirect URL fields will get auto populated.
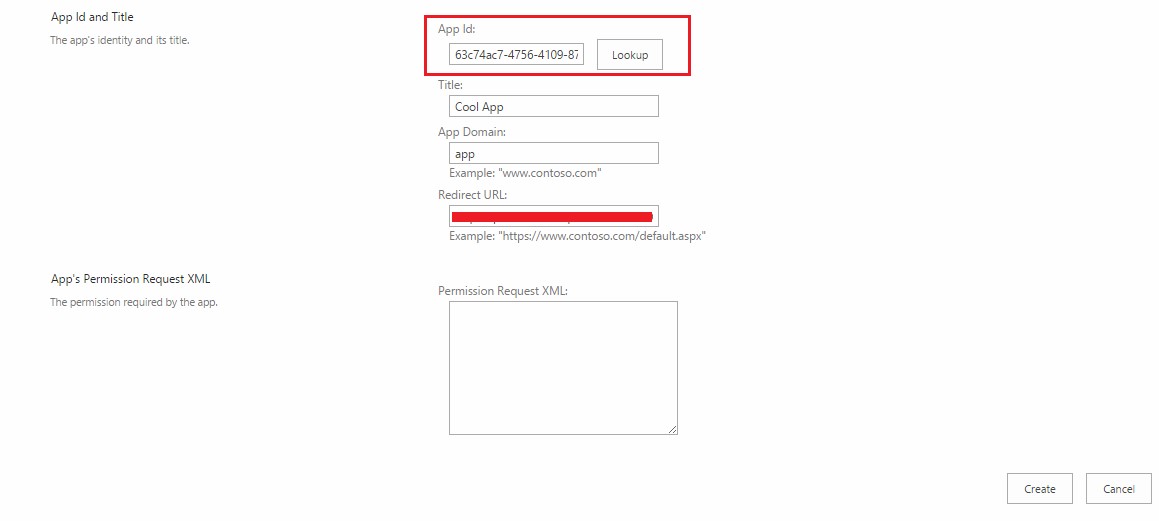
In the Permission Request XML provide the following piece of code and click on create.
<AppPermissionRequests AllowAppOnlyPolicy="true">
    <AppPermissionRequest Scope="http://sharepoint/content/tenant" Right="Manage" />
</AppPermissionRequests>
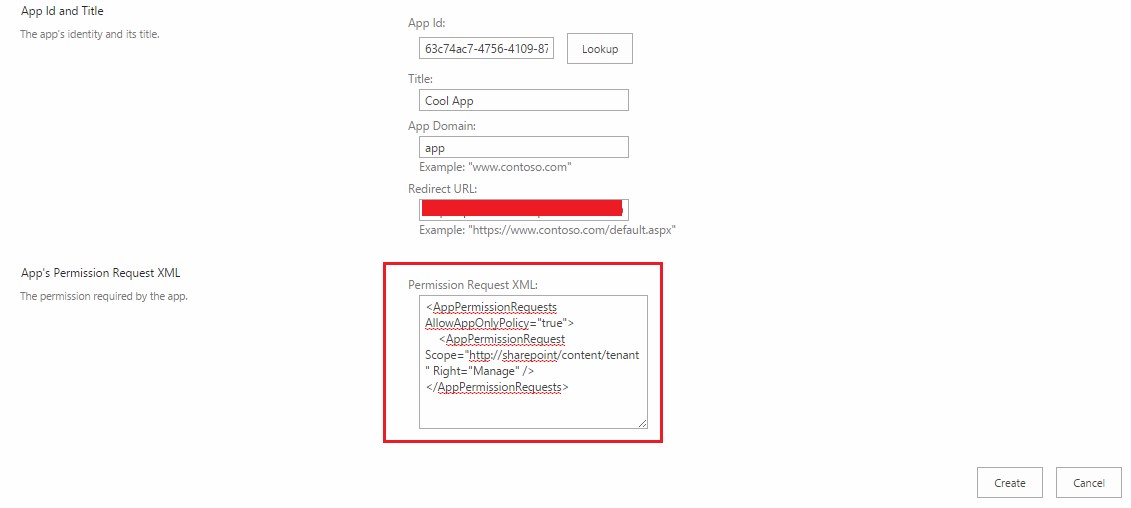
If you observe this XML then we are setting the AllowAppOnlyPolicy to true and the scope here is setting the permission request of the app. In the above case we are setting Manage permission for the tenant scope.
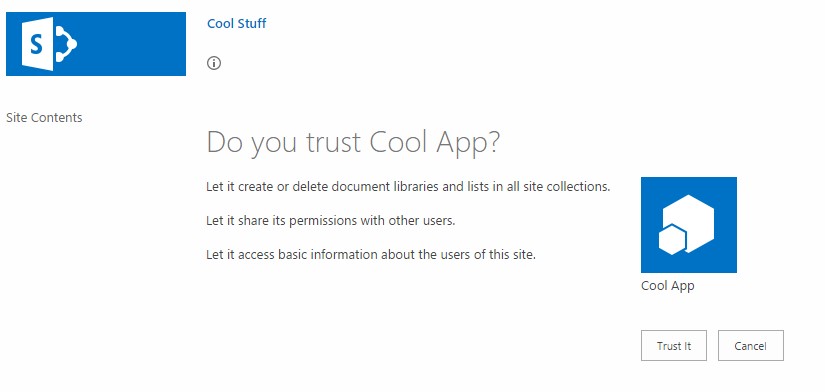
Next you are required to trust this app.
Fetch the Realm
We need to fetch the Realm next. In order to obtain the same we need to browse to the appprincipals.aspx page and copy the GUID after @ symbol.
Adding Logic
Now, we have all the plumbing in place and it is time to write some code.
First we need to browse to the App.config file in our console application.
Next we need to add the appSettings inside the configuration element and populate the ClientId, ClientSecret and Realm with the values previously obtained.
This is a very important step in order to allow OAuth authentication process which will be used by our TokenHelper class.
Now, let us write a very simple code to create a site collection in SharePoint Online.
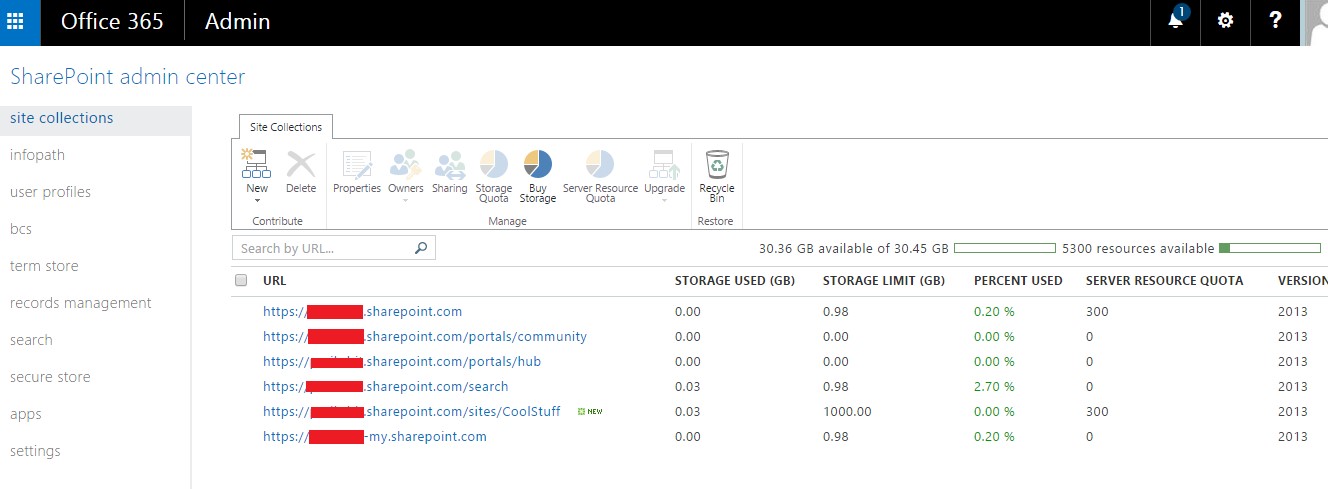
The below is the image that shows the site collections list before we ran our code.
using Microsoft.Online.SharePoint.TenantAdministration;
using System;
using System.Collections.Generic;
using System.Linq;
using System.Text;
using System.Threading.Tasks;

namespace AppOnlyPolicy
{
    class Program
    {
        static void  Main(string[] args)
        {

            var tenantAdminUri = new  Uri("https://yourtenant-admin.sharepoint.com/");

            var token = TokenHelper.GetAppOnlyAccessToken(TokenHelper.SharePointPrincipal, tenantAdminUri.Authority, null).AccessToken;

            using (var context = TokenHelper.GetClientContextWithAccessToken(tenantAdminUri.ToString(), token))
            {
                var tenant = new  Tenant(context);
                var properties = new  SiteCreationProperties()
                {
                    Url = "https://yourtenant.sharepoint.com/sites/OAuth",
                    Owner = "geetanjali@yourtenant.onmicrosoft.com",
                    Template = "STS#0",
                    StorageMaximumLevel = 1000,
                    UserCodeMaximumLevel = 100
                };

                tenant.CreateSite(properties);

                context.Load(tenant);
                context.ExecuteQuery();
            }
        }
    }
}
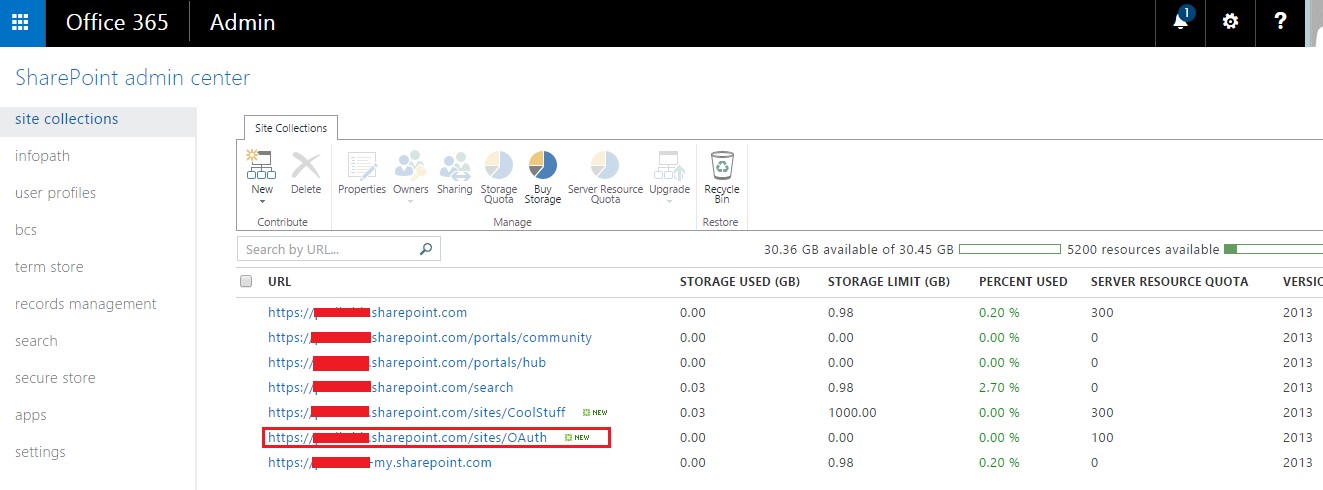
The image below shows our newly created site collection.
Conclusion
So in this way we were able to successfully create a site collection in SharePoint Online from a Console Application using App Only Policy and were not required to pass any credentials. When we use the App Only Policy, it doesn’t matter what access the user has on the specific resource in SharePoint and instead what matters is the permission that the app has on the resource.
References
- https://msdn.microsoft.com/en-us/library/office/fp179892.aspx
- http://blogs.msdn.com/b/kaevans/archive/2013/02/23/sharepoint-2013-app-only-policy-made-easy.aspx
- https://msdn.microsoft.com/en-us/library/microsoft.sharepoint.client.sharepointonlinecredentials.aspx
See Also
Gallery
You can download the entire solution from the Technet Gallery at https://gallery.technet.microsoft.com/Using-App-Only-Policy-to-b886c78a
