Troubleshooting of Auto Mapping Mailbox in Exchange Server 2010
This blog will focus on various troubleshooting information along with permissions needed to get assigned while granting full access permission for a mailbox against another mailbox. Some other methods for assigning full access permission rights in Exchange 2010 are also available. Here, the Mailbox Auto-Mapping feature regulating method in Exchange 2010/2013 will be discussed to grant some specific mailbox Full Access permissions for other mailbox. Exchange Server 2010 SP2 added an advance feature in which one can also disable auto-mapping. This process will be also covered in this blog.
How to Troubleshoot Mailbox Auto-Mapping Permissions?
Exchange Management Shell or Exchange Management Console can be used for granting user full access permissions against another mailbox. This can be done by changing access permissions. The Active Directory accounts of both mailboxes; one which is accessed and one which will be accessing will be reflected through some changes done on few AD attributes. The details can be checked to clarify that settings done are doing fine by checking msExchDelegateListLink and msExchDelegateListBL Active Directory attributes. You can check contents of these attributes through LDP.EXE through below mentioned steps:
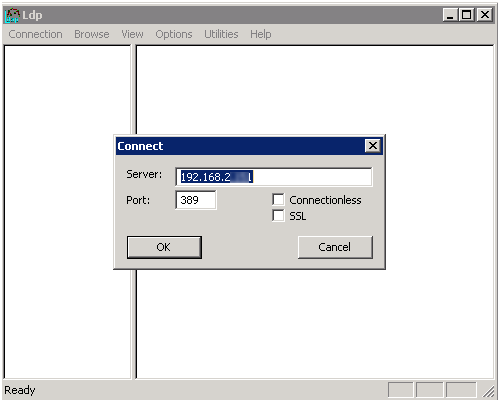
- Run LDP.EXE from the PowerShell and go to Connection option. From menu, click Connect.
- A Connect window will open, here configure the domain controller details and click OK. You will view the right-pane of LDP window with all the information as LDP, and domain controller are connected.
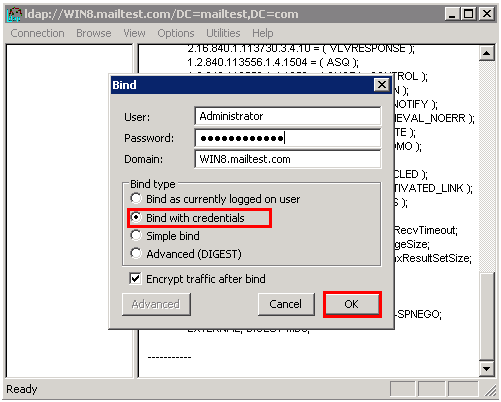
- Click Bind from Connection menu; here you can bind through required credentials. Here I am selecting Bind with credential option providing credentials for Administrator. Once done click OK.
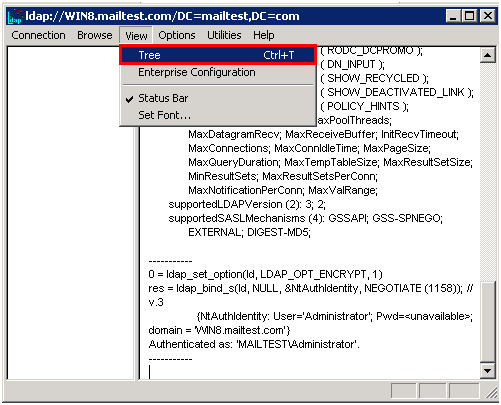
- Now get back to main LDP window. Select the View menu and click Tree option from the menu.
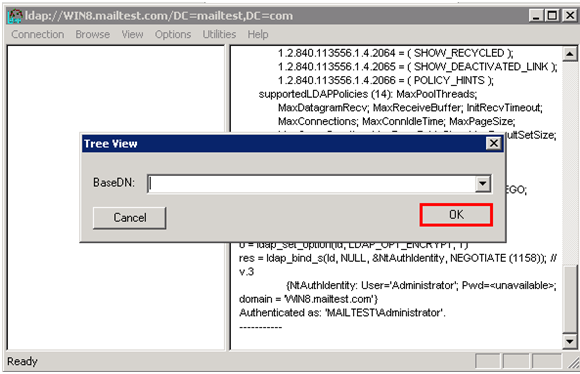
- Now Tree View window will be displayed. Here leave the BaseDN field blank and proceed to click OK.
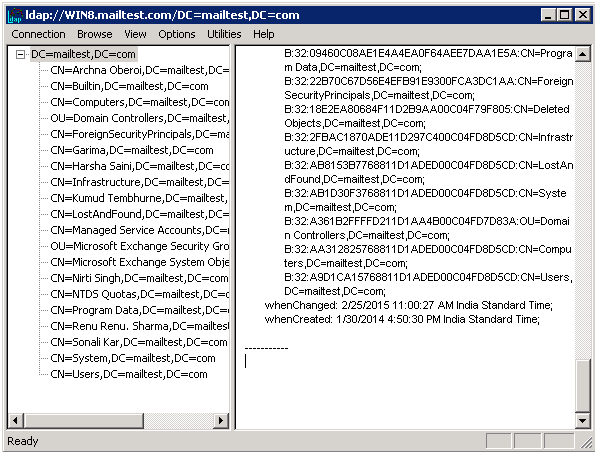
- Now, you will be able to view connection to domain information in the left-hand pane which can be again expanded.
The search for required attributes can be done either across the entire domain or particular Organizational Unit (OU) containing all user accounts. For searching entire domain, right-click domain name at the tops of the tree and select Search option.
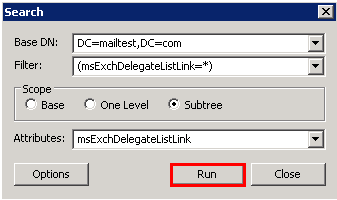
Search window should display domain in Base DN field. In the Filter field enter (msExchDelegateListLink=*), check Scope option as Subtree. In the Attributes section, enter msExchDelegateListLink. Once done with all these entries, click Run.
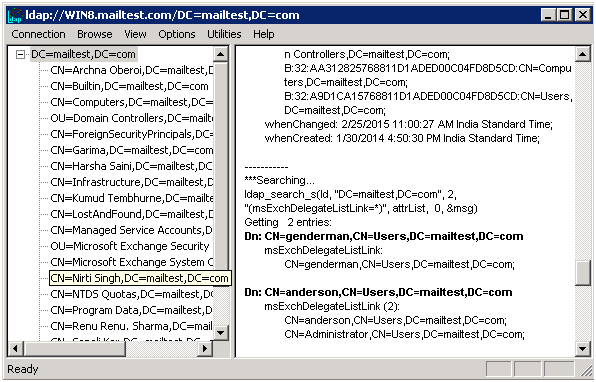
- LDP main window will display all searched results where you can see two objects match search criteria; genderman and anderson shared mailboxes. Their distinguished names are also displayed with a value set in the msExchDelegateListLink Active Directory attribute. Entries make it clear which mailboxes have been assigned permissions.
- Instead of searching msExchDelegateListLink attribute, you can also search for the msExchDelegateListBL attribute. For this, right-click domain name in LDP and choose the Search option.
- Set Filter field to (msExchDelegateListBL=*) and the Attributes field set to msExchDelegateListBL and click Run.
- Results can be viewed as backlinks for both Anderson and Genderman account objects for my account object.
How to Disable Auto Mapping Changes?
MS Exchange 2010 Service Pack 1 has this feature of auto-mapping which can be done automatically. This feature could not be disabled by users. MS Exchange 2010 Service Pack 2 was integrated with this new feature of disabling this feature. This disabling auto-mapping feature however cannot be used through Exchange Management Console and Exchange Management Shell is necessary to disable it.
A new Boolean parameter is also known as – AutoMapping is added to Add-MailboxPermission cmdlet which can be set to $true or $false.
The below-mentioned command is used for granting the mailbox full access permission to the shared mailbox.
Add-MailboxPermission –Identity genderman –User mailtest\mail –AccessRights FullAccess
Now in Exchange Server 2010 SP2, the same command can be run with this additional –Automapping parameter as $false to disable auto-mapping for this mailbox.
Add-MailboxPermission –Identity genderman –User mailtest\mail –AccessRights FullAccess –AutoMapping $false
Conclusion
This blog highlights the troubleshooting information about auto-mapping of mailboxes. Using the method described above, one can check that the auto-mapping mailboxes is done successfully or not. MS Exchange 2010 Service Pack 2 integrated a very efficient and useful feature with Add-MailboxPermission cmdlet for disabling auto-mapping which was unavailable in SP1. This blog covers how to use this disabling feature.
