Configuring Azure Virtual Machine Extensions in Visual Studio
Extensions are software components that you can install on your Azure virtual machines to help you manage and secure them. For more information, see VM Agent and Extensions.
How to use virtual machine extensions
To access virtual machine extension configurations in Visual Studio
1. In Solution Explorer in Visual Studio, choose Configure on the virtual machine’s context menu.
The virtual machine Configuration page appears.
2. In the Installed Extensions section of the virtual machine Configuration page, choose an extension from the drop-down list and then choose the Add button.
- Select the extension and then choose the Configure button. The Configure Extension dialog appears.
- Enter public extension configuration strings in the Public Configuration box and private extension configuration strings in the Private Configuration box, and then choose the OK button.
Configuration page notes
On the virtual machine’s Configuration page, the Remove button for extensions only removes the configuration from the grid only if it was just added in the Visual Studio UI and not yet saved. It does not uninstall the extension. However, if you’ve already saved an extension and want to uninstall it, you can do so by using the new version of the Azure Management Portal, such as in this example.
Also, when the Enable checkbox is selected, the extension is enabled. If the checkbox is cleared, then the extension is disabled. (That is, the extension is still installed but not doing anything.)
Virtual machine extension configuration examples
Here are some specific examples of how you can configure Azure virtual machine extensions.
Puppet private configuration
The configuration string for a private Puppet extension is:
Private configuration string |
{ "Puppet_Master_Server":"puppetmaster3.cloudapp.net" } |
Here’s how it looks when you enter it into the Configure Extension dialog box.
Chef public and private configurations
Here are the public and private configuration strings for Chef.
Public configuration string |
Private configuration string |
{ "validation_key":"-----BEGIN RSA PRIVATE KEY-----<YOUR_PRIVATE_KEY> -----END RSA PRIVATE KEY-----" } |
{ "client_rb":"log_level :info log_location STDOUT chef_server_url \"https://api.opscode.com/organizations/clogeny-dev\" validation_client_name \"clogeny-dev-validator\" client_key \"c:/chef/client.pem\" validation_key \"c:/chef/validation.pem\" node_name \"chef-azure-extn\", \"runlist\":\"recipe[getting-started]\"" } |
Here’s how it looks when you enter them into the Configure Extension dialog box.
Custom script public configuration
Here’s the configuration string for a public custom script.
Custom script extension configuration |
{ "commandToExecute":"powershell.exe -ExecutionPolicy Unrestricted -File mytest1.ps1 c:\\ramu1", "fileUris": ["<your_file_URL>"] } |
Here’s how it looks when you enter it into the Configure Extension dialog box.
Diagnostics VM extension public and private configuration
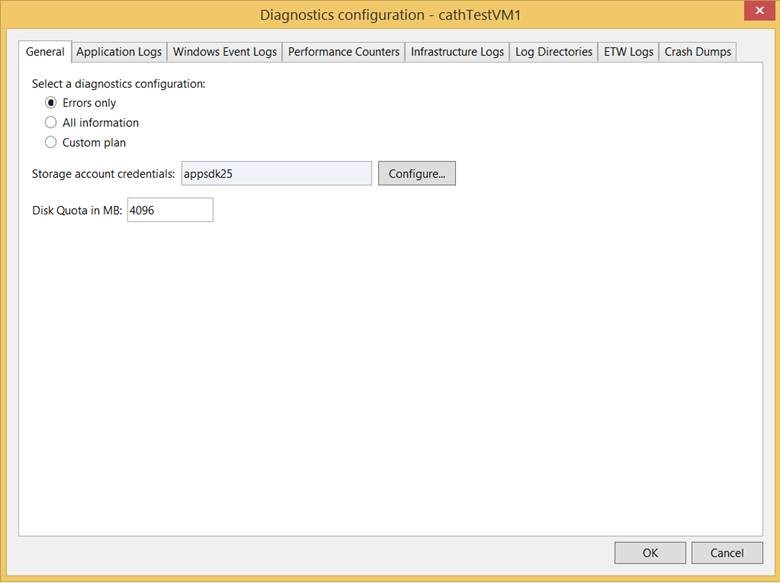
Clicking the Configure button for the Microsoft Monitoring Agent Diagnostics extension shows the Diagnostics configuration dialog box. See Configuring Diagnostics for Azure Virtual Machines for more information.
More information on virtual machine extension configurations
For more information on specific virtual machine extensions, see the following resources.
Configuration extension |
Legal terms |
Security extension |
Legal terms |
[Last updated: 10/31/14]


