Developing and Deploying a Service Fabric Voting App to Azure
While preparing for a partner meeting on Service Fabric, I went through two labs, Part I by the Service Fabric team and Part II by my colleague Max Knor, and created a working Voting app on Windows. If you are interested to learn how to develop a Service Fabric app, I highly recommend that you go through the labs. If just want to see how the app works and review the code, you can find the completed project at Github.
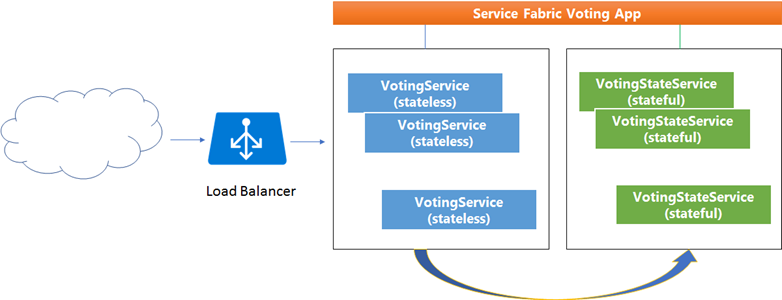
This simple app shows how a stateless service and a stateful service, two separate microservices, work together to accomplish the goal of tallying voting counts by candidate name. The stateless service provides a user interface (single page app) for data entry, and communicates with the stateful service through a remote client service proxy. The stateful service keeps track of voting counts by storing data in the Service Fabric built-in data collection, ReliableDictionary. Each stateful service comes with one Primary replica for read and write requests, and multiple active Secondary replicas for read only requests, to achieve high availability. No database or cache is used in the example.
The diagram below illustrates the high-level architecture of the Service Fabric Voting app. For more detail on Service Fabric, check out the online documentation or download the live pdf file (about 800 pages).
The lab documents provide detail on how to debug, test and upgrade the app and how to publish it to the local Service Fabric cluster in Visual Studio. In the post I will focus on deploying the app to Azure.
Step 1 – Create a Service Fabric cluster on Azure
You can use the Azure portal or PowerShell scripts. If you want to secure the Service Fabric, you’ll need to create Azure Key Vault. If you don’t have commercially available certificates, you can create and use self-signed certificates. See the detail here.
Step 2 – Publish the app to the Service Fabric cluster
You can use Visual Studio to publish the app directly to Azure. Alternatively, you can create a package for the app, and then use PowerShell scripts to publish it to Azure.
In Visual Studio, open Cloud.xml in PublishProfies in the app project. Replace <ClusterConnectionParameters ConnectionEndpoint="" /> with something similar to the following. Replace the ServerCertThumbprint value and FindValue with the thumbprint value you obtained at Step #1. Save the changes and go back to the Publish screen, you should be ready to publish the app to the cloud. If you have configured Azure AD for the cluster on Azure, use the ClusterConnectionParameters for Azure AD and make similar changes.
<ClusterConnectionParameters ConnectionEndpoint="mycluster.westus.cloudapp.azure.com:19000"
X509Credential="true"
ServerCertThumbprint="0123456789012345678901234567890123456789"
FindType="FindByThumbprint"
FindValue="9876543210987654321098765432109876543210"
StoreLocation="CurrentUser"
StoreName="My" />
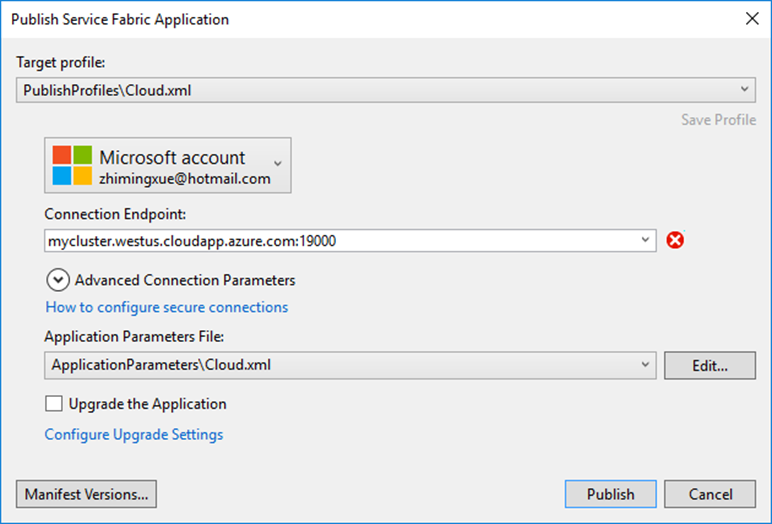
In case you run into an error as shown here, ensure the value in Connection Endpoint is valid.
Step 3 – Launch Service Fabric Explorer
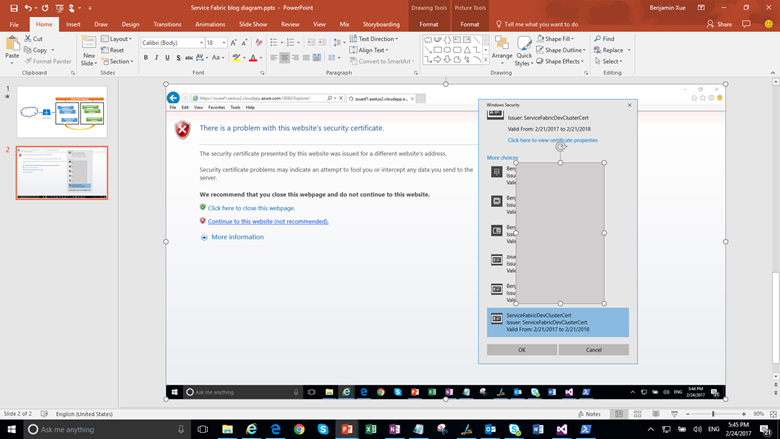
Open the browser and navigate to https://clustername.region.cloudapp.azure.com:19080/Explorer If you use a self-signed certificate, you can ignore the website security certificate warning. On the next screen, choose the same certificate that you uploaded to Azure Key Vault at Step 1.
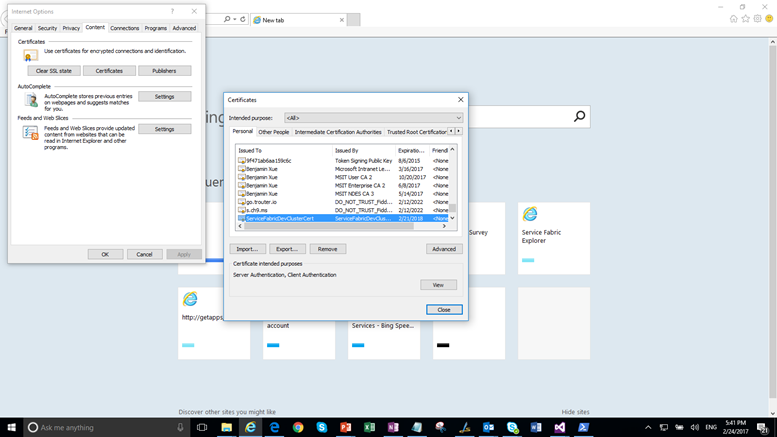
If you don’t see it on the list, as it happened to me because the certificate disappeared after initial use, open Internet Options in IE and import the pfx file you used at Step 1. Restart the process.
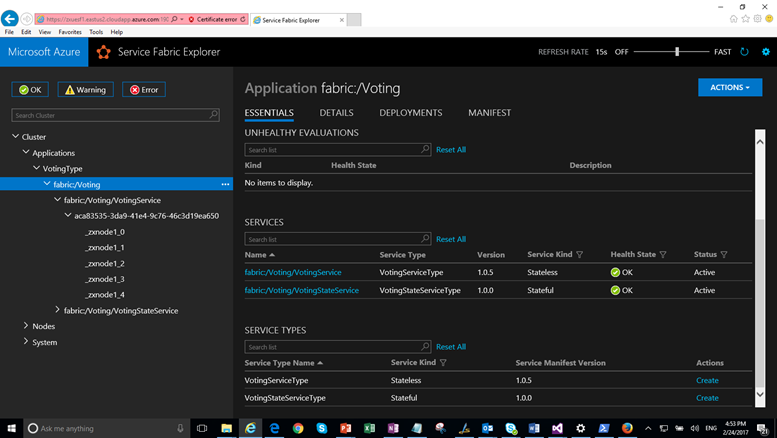
You should now be able to see the Service Fabric Explorer, as you have seen the local version.
Step 4 – Configure the cluster load balancer
With the local cluster, you can access the user interface as shown above by accessing https://localhost:34001/api/index.html which you can find from the node of the stateless service. Now that the app is deployed on the Service Fabric cluster on Azure, the services including the single page app are running behind the load balancer. If you use the public IP address of the cluster and the port 20002, e.g. https://<publicipaddress>:20002/api/index.html, which is made up of VMs in VM Scale Set, or the cluster address, https://clustername.region.cloudapp.azure.com:20002/api/index.html, you will quickly find that the web app is not accessible. The reason is that either port 80 or port 20002, which you find from Service Fabric Explorer, is not set up for the load balancer.
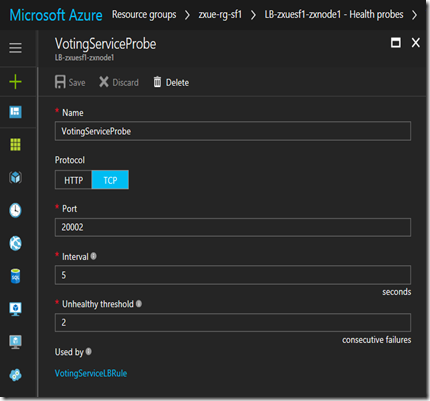
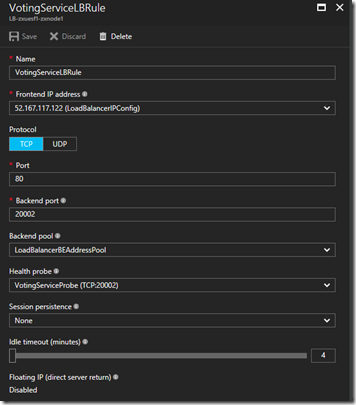
To address the port issue, go back to your Azure account and create two rules, one under Health Probes and one under Load balancing rules. The Health Probes rule uses TCP protocol to check the heath status of the node every 5 seconds. The Load balancing rule forwards the request from port 80 to a backend port 20002 which the stateless service is listening on. Choose LoadBalancerBEAddressPool for Backend pool, the newly created Health Probes rule for Health probe, and keep all default values for other fields. If you choose to enable Floating IP, the front port and backend port much match.
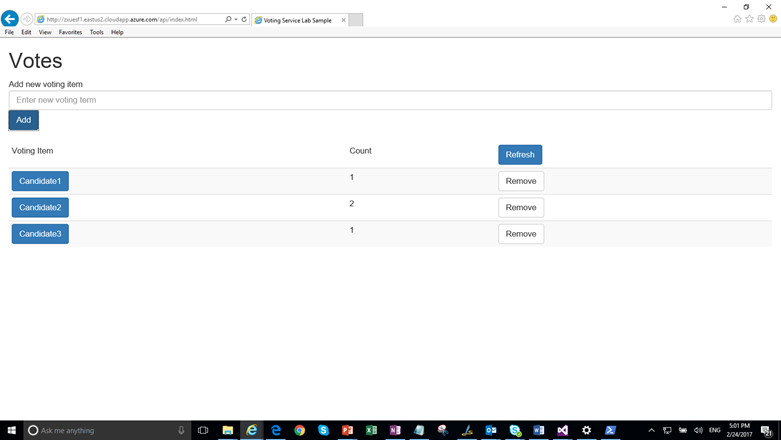
With that, you should be able to see the single page app. It is available via http, not https. You can secure the app using Azure AD.
