Azure Function - Provisioning and configuring our Azure Function infrastructure
In our earlier article, Azure Functions - Prepare for continuous delivery, we began our series of blog posts on using Azure Function with Visual Studio 2017. We continue the automation of the creation and update of our Azure infrastructure, also known as provisioning.
It’s important that we can recreate and configure our infrastructure in a fully automated manner, as well as deploy the code of our Function Azure with our CI/CD pipeline.
We’ll use the concept Infrastructure As Code (IaC) to describe our infrastructure an Azure ARM (Azure Resource Manager) template. For details refer to the product documentation and Thiago Almeida's video.
Let’s explore how we built our ARM template, discuss the challenges, how we tested locally, and how we used a PowerShell script.
Implementation of the ARM Template
To build an ARM template you have a few options:
- Start with the Template provided by Microsoft available here.
- Build your own template with Visual Studio. Start with an empty project and add Azure resources from the Visual Studio designer.
- Generate your ARM Template from an already existing resource in Azure.
We opted to start with an existing infrastructure, use Visual Studio to tweak the Template code, and test it from our local computer.
Step 1: Create the infrastructure "model"
Create an Azure environment with these resources:
- A resource group.
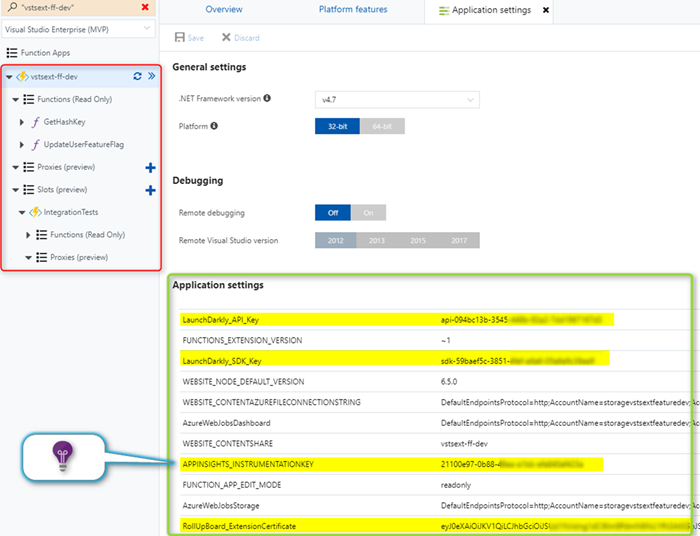
- An Azure Function app that will hold the Azure Function.
- An Integration Test slot in the Azure Function to host, as its name suggests, the integration tests.
- Configuration key AppSettings referenced by the code of the Function Azure.
- Application Insights resource group for our telemetry data.
Step 2: Generate the ARM Template corresponding
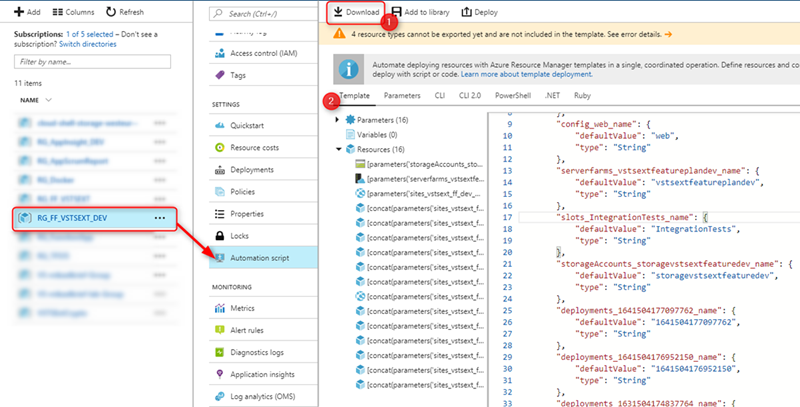
Once you’re happy with your Azure environment, generate and download its ARM template at the level of the Resource Group.
In the "Automation Script" resource group panel, we can either download the ARM template in a Zip (1) or display it (2).
Step 3: Set up the project Azure Resource Group in Visual Studio
Next, we’ll complete the solution we created with Visual Studio in Azure Functions - Prepare for continuous delivery.
- Add a new project of type Azure Resource Group.
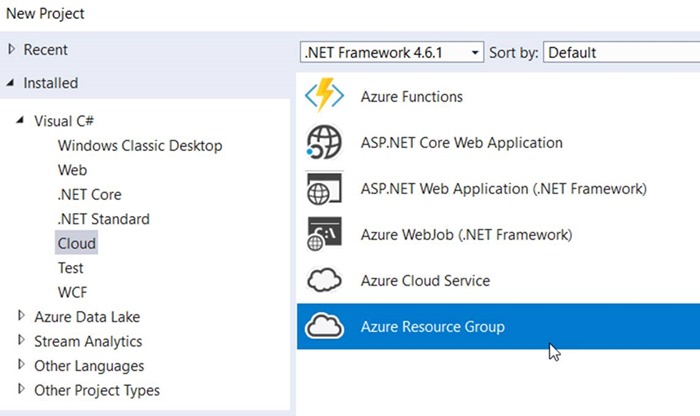
- Select a blank template.

- Copy-paste the content of the template.json and parameter.json files from the downloaded zip.
- The template.json file corresponds to the ARM template.
- The parameter.json file holds the input of our template parameters, which will be dynamic.
- We will use the Deploy - AzureResourceGroup.ps1 file in this project to test the deployment of this infrastructure for the local post. Don't remove it!
Step 4: Test the deployment from your local computer
From the Visual Studio interface, we can test the deployment of our infrastructure.
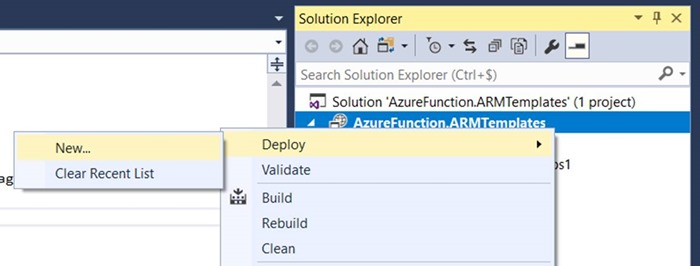
Visual Studio requests the information for the subscription in which we want to create our infrastructure, as well as the resource group to create or update information.
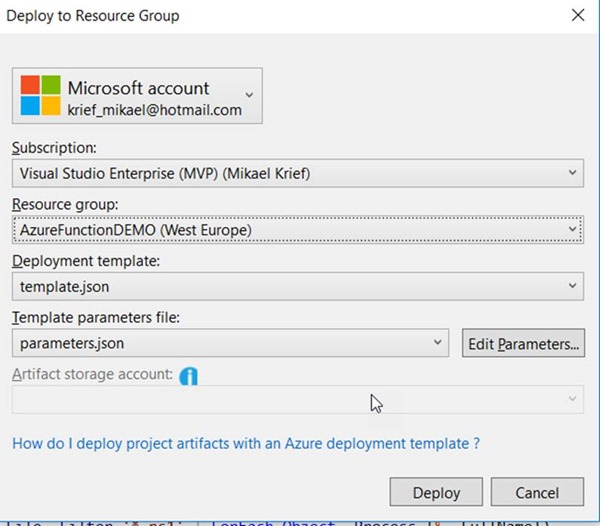
The deployment wizard prompts us to edit the input parameters.
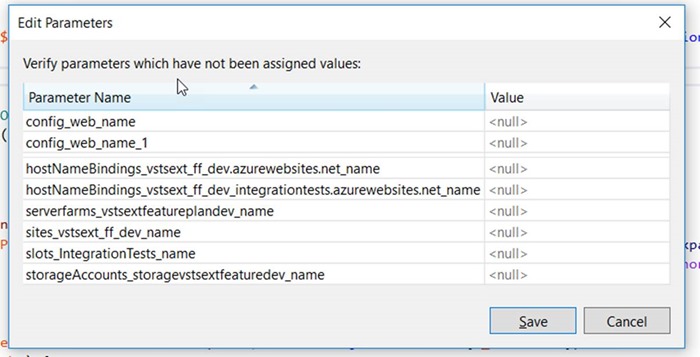
Tip #1: Rename parameters
As you can see, some of the parameters are very descriptive and verbose. Make them generic, so that the templates are re-usable by more than one project.
We renamed all parameters to make them generic, for example hostNameBindings_functionapp_name.
You’ll need to update both the template.json and the parameters.json file
Tip #2: Optimize the parameters
After renaming the parameters, you should review their values and ensure they are intuitive.
For example:
The value is a concatenation of the Azure Function App name and azurewebsite.net. It’s important to note that it’s the name of the Azure Function App. We optimized this parameter with a configurable Azure Function App name and set the default value, as shown.
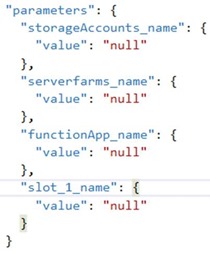
In this example, we will deduce the name of the hostname from the name of the entered Azure Function App parameter. Once optimized, change the parameters.json file:
The parameters define the name of the account storage, server farm, Azure Function App, and the slot used by the integration test.
To test your deployment:
- Click Edit Parameters and replace the null parameters with your test values.

- Click save, confirm the parameters in ARM template, and click deploy.
- If your ARM template is valid and the deployment goes smoothly, you’ll get this message:

In my first tests, I had to fix errors with the Slot description in the template.
Find the slots configuration at the end of the Json file:
Replace the last line with:
- Add the appSettings which were absent from the downloaded template. Here is a sample
- After these fixes, my ARM template was valid and deployed successfully to our Azure subscription.
You can also check you template and view a graphical structure of Azure architecture that will created by using this online tool https://armviz.io/
- Open local template Json file.

- Review the graph.
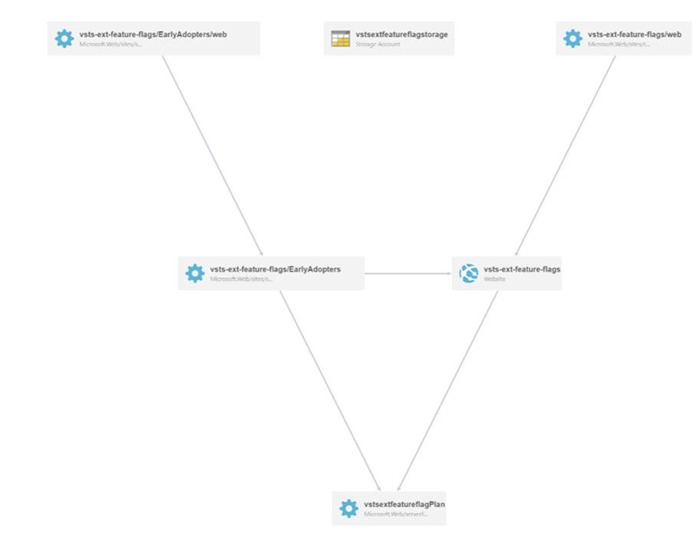
- Click on resource for view his associate Json code.
Configuration of the infrastructure
Next, we configure the infrastructure. Our app settings configuration keys of our Azure App Function must have different values depending on the environment. We planned for a development and a production environment, with different values per slot.
To update this configuration, regardless of our ARM template, we added a PowerShell UpdateAppSettings.ps1 script to our project. This script is easily maintainable, and it is not very complicated to add or remove keys
We also placed these keys into the ARM template parameters as explained in https://blogs.perficient.com/microsoft/2016/03/azure-arm-template-define-web-app-application-settings/.
After completing these steps, we have the following Visual Studio solution:
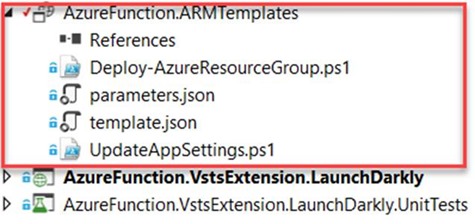
Note: The Deploy - AzureResourceGroup.ps1 CI/CD pipeline does not use the file. We keep it to test deployments from a local computer.
What’s next?
Just before to expose our CI/CD DevOps pipeline for Azure Function, in the next part of this blog post series, we’ll discuss how to raise the pipeline quality, by adding and automating integrations tests using Postman.
