Deliver amazing EMS demos, Part 2: Configure your demo environment

When I talk to partners that are building enterprise mobility practices, the common questions asked tend to center around two themes: setting up a demo environment for Enterprise Mobility + Security, and creating and conducting good EMS demos.
In this occasional blog series for Enterprise Mobility + Security Partners, I’ll share with you the resources you can use, and my tips and tricks, that will help you deliver powerful enterprise mobility demos to your customers
Read Part 1 of the EMS demo series
Build your demo guides
If you followed the steps in my “Build your demo environment” post, you now have an Office 365 and EM+S tenant up and running on the Microsoft Demos site. With your tenant up and running, there’s a bit more work needed to help you build an impactful demo.
- Sign in to the Microsoft Demos website
- On the left-hand navigation click the link that says “Demos”
- At the top of the “My Demo Resources” page, click the button labeled Create a Resource Collection
- Follow steps 1–3 as noted on the screen to name your demo, attach the demo, and assemble a collection of resources to help you deliver the demo
Name your demo. This does not have to match the name of the tenant you created, but I’ve found that matching names helps keep things organized if you plan to create several demo tenants.
Attach the tenant you will be using with this demo.
Assemble your demo resources. This third option is labeled “Select One or More to Add to Your Demo.” Your demo resources can include demo guide documents, videos, presentations, and click-through demos. Whatever you assemble won’t change what is installed in your actual tenant. The tool offers you the chance to choose from a variety of pre-configured scenarios and resources.
Tip: To see all of the available pre-configured scenarios and resources, scroll to the bottom of the screen and click “Load More.” You’ll need to do this a few times to get to the EMS-related content. I recommend selecting these EMS demos:
- EMS: Identity & Access Management
- EMS: Identity-driven Security
- EMS: Information Protection
- EMS: MAM without Enrollment
- EMS: Managed Mobile Productivity
Tip: Select a few Office-related demos and showcase the power of Office and EMS together. Even if you use only a few pieces of the demo, downloading and learning from things like “Excel on iPhone Demo Guide” or “Office on iPad Deep Dive Demo Guide” can enhance the overall presentation. There are quite a few to choose from, and I suggest choosing those that correspond to the device type you’ll be showing EMS on.
Now that you’ve selected your resources, go back to the top of the page and click Create Demo. You can come back and edit, add, or remove resources from your collection later.
Download your demo guides
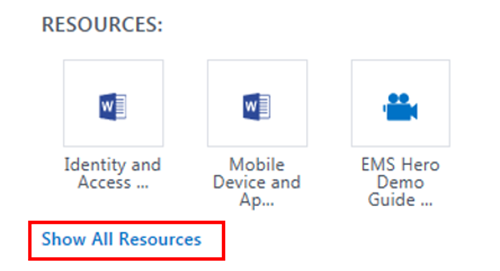
It will take a few minutes for the demo guides to be created. Once the process completes, you will see a summary page. Click the Show All Resources link.
Tip: Download the resources for offline access. You can log into the site and access the resources at any time, but I’ve found that it’s helpful to download them so that I can get to them while offline. To do this, right click on each file and select “Save Target As,” and save them to a local folder on your device.
Prep your tenant
The next step is to do some configuration that is unique to your tenant. The steps to follow are found in the appendix of each of the resource documents you downloaded. The configuration will walk you through things like SSO configuration, installing push notification certificates, etc. Taking the time to complete the steps is a great way to learn and make sure your demo is a high quality experience.
Tip: Have two devices you can use for client demos. Appendix 3 is focused on configuring your demo devices. I’ve found that it is best to have 2 devices when doing live demos. This allows me to have to different configurations and to be able to have a backup if needed. You can use a device you use for other purposes, but I recommend having it be a demo-only device. This also allows me to remote wipe the device via Microsoft Intune and factory reset for my next demo when needed.
Practice your demo
Now that configuration is complete, it’s time to practice your demo. Choose from the guides you downloaded. Read through the scenarios, and if possible, practice them a couple of times with a live audience. Don’t be afraid to make adjustments and changes based on your audience.
Tip: Watch demos delivered by others and learn from them. One thing that has helped me prepare for demos is watching and learning from others who deliver excellent demos. Here is one I’ve found to be helpful:
Thanks for tracking through this demo configuration process. In my next post, I’ll focus on some specific tips for various demo scenarios. If you want to chat about this, or any EMS topic, join the conversation over on Yammer.
Next up in this series
In part 3 in this series I’ll look at some specific tips and advanced EM+S features. You can find part 3 here.
Comments about this blog post, or questions about the topic? Let us know in the Enterprise Mobility + Security Yammer group.
Join the Enterprise Mobility + Security Partner Community
