R Server for HDInsight running on Microsoft Azure Cloud & Data Science Challenges
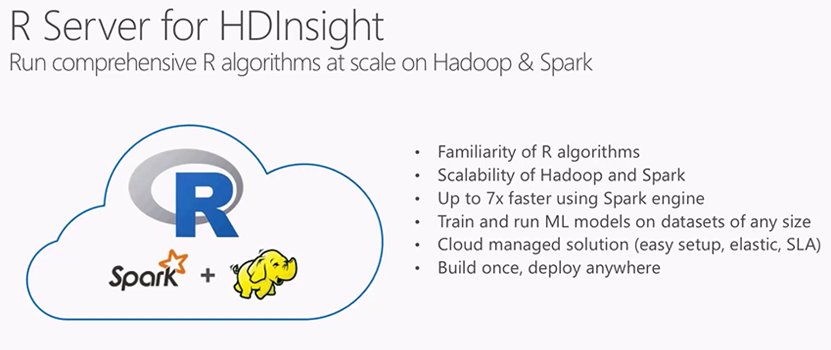
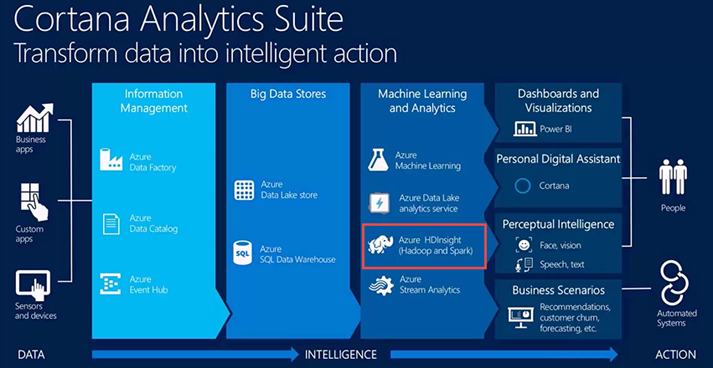
The premium tier offering for HDInsight includes R Server on HDInsight is now in preview on Microsoft Azure. Hadoop and Spark are now a key component of our Cortana Intelligence Suite R is decidedly the most popular statistical/data analysis language in use today.
R server is also available from Microsoft Imagine DreamSpark.com see https://blogs.msdn.microsoft.com/uk_faculty_connection/2016/01/06/microsoft-r-server-now-available-for-academics-and-students-via-dreamspark-big-data-statistics-predictive-modeling-and-machine-learning-capabilities/ this allows you to install R server to onpremise hardware or resources.
You can additionally run R Server VM we have a preconfigured Azure VMs for Windows and Linux https://azure.microsoft.com/en-us/marketplace/partners/revolution-analytics/revolution-r-enterprise/
However with the release of R server on HDInsight this is the quickest and simplest way of deploying R and HDinsight. The following is a short walkthrough of how to create a new R Server on HDInsight, then run an R script that demonstrates using Spark for distributed R computations in less that 60 mins
Prerequisites
An Azure subscription: Before you begin this tutorial, you must have an Azure subscription. See Get Azure free trial for more information or apply for an Azure Educator Grant $250 per month Azure Credit for Academics and $100 per month for each student enrolled on your course apply at https://aka.ms/azureforeducation
A Secure Shell (SSH) client: An SSH client is used to remotely connect to the HDInsight cluster and run commands directly on the cluster. Linux, Unix, and OS X systems provide an SSH client through the
sshcommand. For Windows systems, we recommend PuTTY.SSH keys (optional) : You can secure the SSH account used to connect to the cluster using either a password or a public key. Using a password is easier, and allows you to get started without having to create a public/private key pair; however, using a key is more secure.
The steps in this document assume that you are using a password. For information on how to create and use SSH keys with HDInsight, see the following documents:
Step1. Creating a HDInsight cluster
The steps in this document create an R Server on HDInsight using basic configuration information. For other cluster configuration settings (such as adding additional storage accounts, using an Azure Virtual Network, or creating a metastore for Hive,) see Create Linux-based HDInsight clusters.
Sign in to the Azure portal.
Select NEW, Data + Analytics, and then HDInsight.
Enter a name for the cluster in the Cluster Name field. If you have multiple Azure subscriptions, use the Subscription entry to select the one you want to use.
Select Select Cluster Type. On the Cluster Type blade, select the following options:
- Cluster Type: R Server on Spark
- Cluster Tier: Premium
Leave the other options at the default values, then use the Select button to save the cluster type. If you have an Azure Educator Grant you have $250 per month of credit as a educator and $100 per month for Students so the cost of $0.02 per hour should not be a concern
Select Resource Group to see a list of existing resource groups and then select the one to create the cluster in. Or, you can select Create New and then enter the name of the new resource group. A green check will appear to indicate that the new group name is available.
Use the Select button to save the resource group.
Select Credentials, then enter a Cluster Login Username and Cluster Login Password.
Enter an SSH Username and select Password, then enter the SSH Password to configure the SSH account. SSH is used to remotely connect to the cluster using a Secure Shell (SSH) client.
Use the Select button to save the credentials.
Select Data Source to select a data source for the cluster. Either select an existing storage account by selecting Select storage account and then selecting the account, or create a new account using the New link in the Select storage account section.
If you select New, you must enter a name for the new storage account. A green check will appear if the name is accepted.
The Default Container will default to the name of the cluster. Leave this as the value.
Select Location to select the region to create the storage account in.
Important:
Selecting the location for the default data source will also set the location of the HDInsight cluster. The cluster and default data source must be located in the same region.
Use the Select button to save the data source configuration.
Select Node Pricing Tiers to display information about the nodes that will be created for this cluster. Unless you know that you'll need a larger cluster, leave the number of worker nodes at the default of
4. The estimated cost of the cluster will be shown within the blade.Use the Select button to save the node pricing configuration.
On the New HDInsight Cluster blade, make sure that Pin to Startboard is selected, and then select Create. This will create the cluster and add a tile for it to the Startboard of your Azure Portal. The icon will indicate that the cluster is creating, and will change to display the HDInsight icon once creation has completed.
While creating
Creation complete
Step 2 Connect to the R Server edge node
Connect to R Server edge node of the HDInsight cluster using SSH:
ssh USERNAME@r-server.CLUSTERNAME-ssh.azurehdinsight.net
Note:
You can also find the R-Server.CLUSTERNAME-ssh.azurehdinsight.net address in the Azure portal by selecting your cluster, then All Settings, Apps, and RServer. This will display the SSH Endpoint information for the edge node.
If you used a password to secure your SSH user account, you will be prompted to enter it. If you used a public key, you may have to use the -i parameter to specify the matching private key. For example, ssh -i ~/.ssh/id_rsa USERNAME@RServer.CLUSTERNAME.ssh.azurehdinsight.net.
For more information on using SSH with Linux-based HDInsight, see the following articles:
Once connected, you will arrive at a prompt similar to the following.
username@ed00-myrser:~$
Step 3. Use the R console
From the SSH session, use the following command to start the R console.
RYou will see output similar to the following.
 R version 3.2.2 (2015-08-14) -- "Fire Safety"
Copyright (C) 2015 The R Foundation for Statistical Computing
Platform: x86_64-pc-linux-gnu (64-bit)

R is free software and comes with ABSOLUTELY NO WARRANTY.
You are welcome to redistribute it under certain conditions.
Type 'license()' or 'licence()' for distribution details.

Natural language support but running in an English locale

R is a collaborative project with many contributors.
Type 'contributors()' for more information and
'citation()' on how to cite R or R packages in publications.

Type 'demo()' for some demos, 'help()' for on-line help, or
'help.start()' for an HTML browser interface to help.
Type 'q()' to quit R.

Microsoft R Server version 8.0: an enhanced distribution of R
Microsoft packages Copyright (C) 2016 Microsoft Corporation

Type 'readme()' for release notes.

>
From the
>prompt, you can enter R code. R server includes packages that allow you to easily interact with Hadoop and run distributed computations. For example, use the following command to view the root of the default file system for the HDInsight cluster.rxHadoopListFiles("/")You can also use the WASB style addressing.
rxHadoopListFiles("wasb:///")
Step 4. Use a compute context
A compute context allows you to control whether computation will be performed locally on the edge node, or whether it will be distributed across the nodes in the HDInsight cluster.
From the R console, use the following to load example data into the default storage for HDInsight.
 # Set the NameNode and port for the cluster
myNameNode <- "default"
myPort <- 0
# Set the HDFS (WASB) location of example data
bigDataDirRoot <- "/example/data"
# Source for the data to load
source <- system.file("SampleData/AirlineDemoSmall.csv", package="RevoScaleR")
# Directory in bigDataDirRoot to load the data into
inputDir <- file.path(bigDataDirRoot,"AirlineDemoSmall")
# Make the directory
rxHadoopMakeDir(inputDir)
# Copy the data from source to input
rxHadoopCopyFromLocal(source, inputDir)
Next, let's create some Factors and define a data source so that we can work with the data.
 # Define the HDFS (WASB) file system
hdfsFS <- RxHdfsFileSystem(hostName=myNameNode,
                           port=myPort)
# Create Factors for the days of the week
colInfo <- list(DayOfWeek = list(type = "factor",
     levels = c("Monday",
                "Tuesday",
                "Wednesday",
                "Thursday",
                "Friday",
                "Saturday",
                "Sunday")))
# Define the data source
airDS <- RxTextData(file = inputDir,
                    missingValueString = "M",
                    colInfo  = colInfo,
                    fileSystem = hdfsFS)
Let's run a linear regression over the data using the local compute context.
 # Set a local compute context
rxSetComputeContext("local")
# Run a linear regression
system.time(
    modelLocal <- rxLinMod(ArrDelay~CRSDepTime+DayOfWeek,
                           data = airDS)
)
# Display a summary
summary(modelLocal)
You should see output that ends with lines similar to the following.
 Residual standard error: 40.39 on 582620 degrees of freedom
Multiple R-squared: 0.01465
Adjusted R-squared: 0.01464
F-statistic:  1238 on 7 and 582620 DF,  p-value: < 2.2e-16
Condition number: 10.6542
Next, let's run the same linear regression using the Spark context. The Spark context will distribute the processing over all the worker nodes in the HDInsight cluster.
 # Define the Spark compute context
mySparkCluster <- RxSpark(consoleOutput=TRUE)
# Set the compute context
rxSetComputeContext(mySparkCluster)
# Run a linear regression
system.time(
    modelSpark <- rxLinMod(ArrDelay~CRSDepTime+DayOfWeek, data = airDS)
)
# Display a summary
summary(modelSpark)
The output of Spark processing is written to the console because we set
consoleOutput=TRUE.Note:
You can also use MapReduce to distribute computation across cluster nodes. For more information on compute context, see Compute context options for R Server on HDInsight premium.
Step 5. Distribute R code to multiple nodes
With R Server you can easily take existing R code and run it across multiple nodes in the cluster by using rxExec. This is useful when doing a parameter sweep or simulations. The following is an example of how to use rxExec.
rxExec( function() {Sys.info()["nodename"]}, timesToRun = 4 )
If you are still using the Spark or MapReduce context, this will return the nodename value for the worker nodes that the code (Sys.info()["nodename"]) is ran on. For example, on a four node cluster, you may receive output similar to the following.
 $rxElem1
    nodename
"wn3-myrser"

$rxElem2
    nodename
"wn0-myrser"

$rxElem3
    nodename
"wn3-myrser"

$rxElem4
    nodename
"wn3-myrser"
Step 6. Install R packages
If you would like to install additional R packages on the edge node, you can use install.packages() directly from within the R console when connected to the egde node through SSH. However, if you need to install R packages on the worker nodes of the cluster, you must use a Script Action.
Script Actions are Bash scripts that are used to make configuration changes to the HDInsight cluster, or to install additional software. In this case, to install additional R packages. To install additional packages using a Script Action, use the following steps.
Important:
Using Script Actions to install additional R packages can only be used after the cluster has been created. It should not be used during cluster creation, as the script relies on R Server being completely installed and configured.
From the Azure portal, select your R Server on HDInsight cluster.
From the cluster blade, select All Settings, and then Script Actions. From the Script Actions blade, select Submit New to submit a new Script Action.
From the Submit script action blade, provide the following information.
- Name: A friendly name to used to identify this script
- Bash script URI: https://mrsactionscripts.blob.core.windows.net/rpackages-v01/InstallRPackages.sh
- Head: This should be unchecked
- Worker: This should be Checked
- Zookeeper: This should be Unchecked
- Parameters: The R packages to be installed. For example,
bitops stringr arules - Persist this script... : This should be Checked
Important:
If the R package(s) you install require system libraries to be added, then you must download the base script used here and add steps to install the system libraries. You must then upload the modified script to a public blob container in Azure storage and use the modified script to install the packages.
For more information on developing Script Actions, see Script Action development.
Select Create to run the script. Once the script completes, the R packages will be available on all worker nodes.
Next steps
Now that you understand how to create a new HDInsight cluster that includes R Server, and the basics of using the R console from an SSH session, use the following to discover other ways of working with R Server on HDInsight.
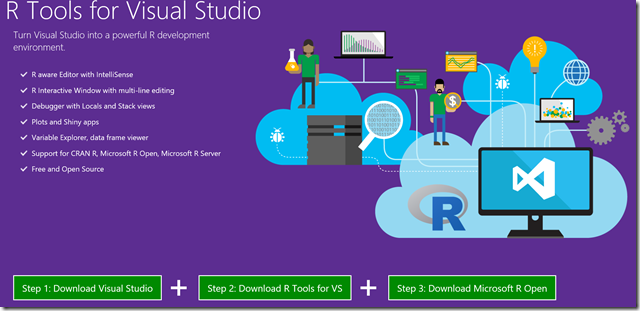
RTools for Visual Studio
RTools for Visual Studio, R Tools for Visual Studio brings together the power of R and Visual Studio in a convenient and easy to use plug-in that’s free and Open Source. When combined with Visual Studio Community Edition, you get a multi-lingual IDE that is perpetually free
Here are the exciting features of this preview release:
- Editor – complete editing experience for R scripts and functions, including detachable/tabbed windows, syntax highlighting, and much more.
- IntelliSense – (aka auto-completion) available in both the editor and the Interactive R window.
- R Interactive Window – work with the R console directly from within Visual Studio.
- History window – view, search, select previous commands and send to the Interactive window.
- Variable Explorer – drill into your R data structures and examine their values.
- Plotting – see all of your R plots in a Visual Studio tool window.
- Debugging – breakpoints, stepping, watch windows, call stacks and more.
- R Markdown – R Markdown/knitr support with export to Word and HTML.
- Git – source code control via Git and GitHub.
- Extensions – over 6,000 Extensions covering a wide spectrum from Data to Languages to Productivity.
- Help – use ? and ?? to view R documentation within Visual Studio.
- A polyglot IDE – VS supports R, Python, C++, C#, Node.js, SQL, etc. projects simultaneously.
For more details see https://www.visualstudio.com/en-us/features/rtvs-vs.aspx
Azure Resource Manager (ARM) Templates
If you're interested in automating the creation of R Server on HDInsight using Azure Resource Manager templates, see the following example templates.
- Create an R Server on HDInsight cluster using an SSH public key
- Create an R Server on HDInsight cluster using an SSH password
Both templates create a new HDInsight cluster and associated storage account, and can be used from the Azure CLI, Azure PowerShell, or the Azure Portal.
For generic information on using ARM templates, see Create Linux-based Hadoop clusters in HDInsight using ARM templates.
Competitions & Challenges
Now you have your R server ready you can start on your Data Science experiments we have also a set of data challenges and competitions the first competition is Decoding Brain Signals.
Each year, millions of people suffer brain-related disorders and injuries and as a result, many face a lifetime of impairment with limited treatment options. This competition is based on one of the greatest challenges in neuroscience today – how to interpret brain signals.
Building on the work of Dr. Kai J. Miller and other neuroscientists, the competition is designed to further our understanding of how our brain interprets electric signals. The medical community and ultimately, patients will benefit from your expertise in machine learning and data science to help decode these signals.
Through this competition, you will play a key role in bringing the next generation of care to patients through advancing neuroscience research. Build the most intelligent model and accurately predict the image shown to a person based on electric signals in the brain. The Grand Prize winner will get $3,000 cash, followed by a 2nd prize of $1,500 cash, and a 3rd prize of $500 cash.
Please see this keynote video from CVP Joseph Sirosh announcing this competition at the Strata conference.
See all the other competitions https://gallery.cortanaintelligence.com/browse/?categories=["5"]
Resources
Azure Machine Learning Blog https://blogs.technet.microsoft.com/machinelearning
Microsoft UK Data Science Technical Evangelists
Amy Nicholson https://blogs.technet.microsoft.com/amykatenicho/
Andrew Fryer https://blogs.technet.microsoft.com/andrew/


