Jupyter Notebooks in Azure Machine Learning Studio the perfect tool for Academics and Students
Azure ML Studio is a powerful canvas for the composition of machine learning experiments and their subsequent operationalization and consumption.
Azure ML Studio provides an easy to use, yet powerful, drag-drop style of creating experiments
A really cool feature now within Azure ML is the integration of Jupyter Notebooks, I really love Jupyter Notebooks as they provide
1. A really nice interface for quickly running code, visualizing data, exploring insights, and trying out ideas:
2. Are superb for academic documentation and submissions from student for projects, tasks or assignments


What's really nice about Jupyter Notebooks is that they run OS and modern browser.
The Notebooks at a high level, consist of two main types of “cells” which are clearly identified in the Notebook and perfect for submission as part of academic exercises.
The cells are clearly identified as
Markdown cells for documentation
Executable code cells.
After editing a cell, press Shift+Enter to run it:
Here an example of a Jupyter Notebook and the markdown

Jupyter Notebooks also provide special commands (“magics”) that act as macros:

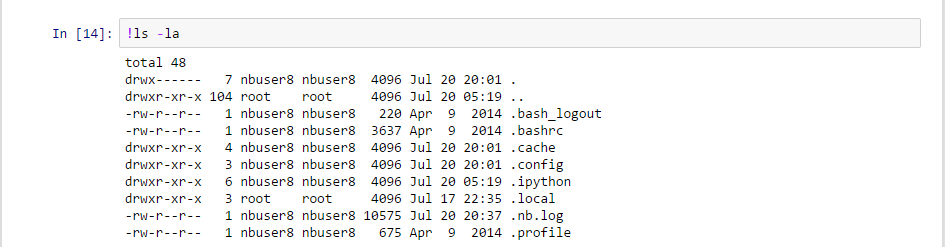
And also an escape character (“!”) to access the shell:
Integration with Azure Machine Learning Studio
Simply click +New, get a blank notebook, enter some Python, perhaps import some data from Azure blob storage and compute away:

Finding out more about your dataset
Simply select it, then choose to open it in a Notebook and explore away. Your dataset is automatically available as a Pandas dataframe:

Sometimes you need to check out a dataset in between phases.
There is now an easy way to do this, first, add a convert-to-csv node. Then right click on it and open in a Notebook.
Your data will be available as a Pandas dataframe as in the above case:

Currently you can add R and Python code modules in your experiments by editing them directly in the embedded editor.
While convenient for short snippets, it does not provide an execution environment.
You can use Notebooks to author and debug your modules and then paste them back into the experiment nodes instead.

Your notebooks are persisted in your workspace and can be used in subsequent sessions.
You can see a list of your notebooks by clicking on the Notebook tab. Notebooks can be renamed, deleted, copied, etc. from either the Studio or from Jupyter directly and both environments will sync up.
Azure ML Client SDK
Enumerating and exploring your datasets and experiments from within the notebook (or any IDE for that matter) is pretty easy:

You can actually slice, dice, and store the modified dataset back into Azure ML. These and similar functionality is available via the recently enhanced Azure ML Client SDK.
Additionally, you can use the Python Azure SDK to access a wide variety of services in Azure. These including operations such as Storage, Service Management, etc.:

Note: Both the Azure SDK and the Azure ML Client SDK are preinstalled for you.
Execution Environment
The Notebook environment currently supports Python 2 and Python 3 and R..
When you start up a Notebook, you have the full Anaconda 64-bit distro available to you. The full list of pkgs can be found here.
The most relevant ones are: numpy/scipy, pandas, matplotlib, scikit-learn.
For the curious, the Notebook service runs on Ubuntu 14.04.02 under Docker. Shell commands are available via the “!” escape character.
If you are inactive for more than one hour, your Notebook Server will be reclaimed.
Notebooks are check-pointed regularly and the latest saved version will appear in your Studio workspace. Y
ou can also manually click Save on the menu bar as well as download the Notebook to your local machine.
Jupyter and Data Science
Jupyter is one of the most important innovations in the data science and technical computing space in recent years. You now have full access to its power from any OS, from any modern browser directly from inside Azure ML Studio. You can choose whichever canvas makes the most sense at that particular moment. The two work together hand in hand to ensure a productive and delightful experience for you.
Notebooks are easy and fun to use – give it a try right now:
Go to https://studio.azureml.net and select “Get started”
Select Guest or, better yet, create an account and login so your Notebooks persist
Click on Datasets left-tab, then “Samples” on top, then “Movie Ratings”
At the bottom of the page, select “Open in Notebook”, Python 2
Note that your auth and conversion to dataframe code is set up for you
Paste in this code into a new cell:
 frame.describe()
 frame['Rating'].head(200).plot(figsize=(12,4))
- From the top Menu select “Run All”
You should see a summary of your data, plus a plot of the 1st 200 ratings:

Resources
The following links provide further information on Jupyter and Azure ML:
Jupyter
Jupyter: https://jupyter.org/
Notebook how-to: https://jupyter.readthedocs.org
Sample Notebooks: https://nbviewer.jupyter.org/
Azure ML
Azure ML Studio: https://studio.azureml.net
AzureML Client SDK: https://github.com/Azure/Azure-MachineLearning-ClientLibrary-Python
Azure Python SDK: https://azure-sdk-for-python.readthedocs.org/en/latest/
Python Tools for Visual Studio
Anaconda and key pkgs