Entity-Component System in Unity – a tutorial
Guest post by Sondre Agledahl: Microsoft Student Partner, Games programmer and CS student at UCL.
Object-orientated programming is dead! Long live ECS!
Entity-Component System is a powerful architectural pattern often used in game development. It’s in keeping with the general software architecture trend away from inheritance and object-orientated principles to a more data-driven approach to programming. ECS aims to make codebases as modular and memory-efficient as possible through a number of unique design principles, key of which is a clear separation between data and behaviour.
Unity’s recent talks have made it clear that they are embracing ECS and slowly rolling it out in favour of its old object-component model, so it is high time to familiarise oneself with this approach to writing code.
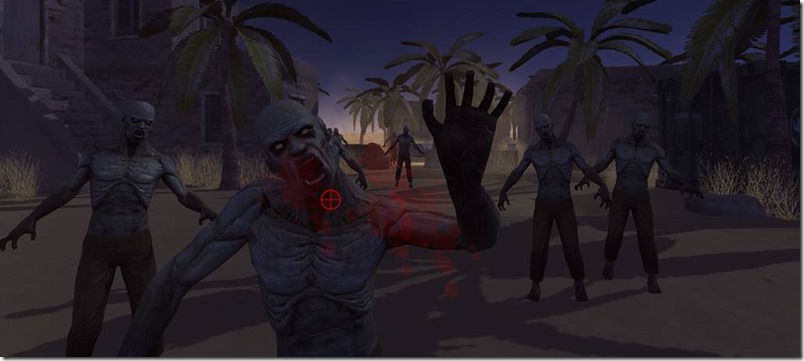
Before Unity’s official new structure is deployed, however, you will have ample opportunity to try out this system through numerous open-source ECS frameworks compatible with Unity. This 2-part tutorial explores the Svelto.ECS framework (actively maintained on GitHub by creator Sebastiano Mandalà), and will help you build a complete zombie survival shooter game (pictured below) using Svelto.ECS. Through the concepts you’ll explore by implementing this game, you should gather the experience to make your own ECS-based Unity games from scratch.
(This tutorial assumes familiarity with Unity’s standard MonoBehaviour structure. If you’ve already built a couple of simple games in Unity and have passing knowledge about its key features, you should be good to go.)
ECS – A primer
The core idea of ECS is contained in Entities, which are actually not altogether different from the basic GameObjects in Unity, as they are objects that define tangible things inside your game. These Entities are simply containers for the Components that are attached to them (such as positionComponent, healthComponent, movementComponent, etc.). Where this structure differs from Unity’s standard models (and OOP design generally), is that neither Entities nor Components have any behaviour defined on them – they contain no class methods, only dumb data as member variables.
Rather, all the behaviour that acts on Entities and their Components is contained inside Engines (also known in some ECS frameworks as Systems). Inside Engines, all of the methods that define how certain Entities should behave are executed. In this way, rather than having each object with a movement script executing its own movement function to move, in ECS a single MovementEngine acts on all Entities with MovementComponents to create the same result.
The final key concept found in Svelto.ECS is the idea of EntityViews. An EntityView is simply a wrapper around each Entity that Engines use to interact with different Entities in a polymorphic way. Several of these EntityView wrappers can be defined for each Entity depending on the different roles the Entity might play in each engine.
For a tangible example, in our game, the Player Entity plays several unrelated roles: Firstly, it needs to store data about player input created by the PlayerInput Engine to indicate where the player is aiming their gun. It also, however, needs to store a position for the ZombieMovement Engine to read to cause all Zombies to move towards the player’s position. These two roles do not (and really should not) need to interact whatsoever, which is why the Player Entity has two EntityViews (EV) defined: PlayerEV and ZombieDestinationEV. These two EntityViews, despite referring to the same Entity under the hood, each contain references only to those Components that are relevant to their one purpose.
The diagram below shows the structure of our game that we will cover in this tutorial.
If all of that sounds very abstract, then let’s get started making a game and make things a little more tangible. We’ll explain concepts in more detail as they become relevant.
Shooting guns and reading input
Download the project skeleton from GitHub and open it in Unity. This project includes a copy of Svelto.ECS (and its utility libraries Svelto.Tasks and Svelto.Common), as well as a half-finished game structure.
All Entities, Components and Engines necessary for the game have been defined already (according to the diagram above), but it’s up to us to write the Engines’ behaviour so they do what we want them to.
(Have a look around the project to get a feel for it if you’d like. Notice that Entities themselves are defined only in tiny little class definitions (EntityDescriptors), whereas their respective EntityViews are what define which Components each of them actually hold. You may also notice the mysterious Implementor classes, which we will cover later – though the astute reader can probably gather what purpose they serve with a little nosing around. If you’re curious about how all Entities and Engines are initialised, have a peek in the MainContext.cs file (which is attached to the GameContext GameObject in the Unity scene).)
Let’s begin by taking a look at the GunShootingEngine (Assets/Scripts/Engines/Player/GunShootingEngine.cs) in Visual Studio (or any code editor of your choice). As the name implies, this class will control the shooting behaviour of the Player’s gun. 
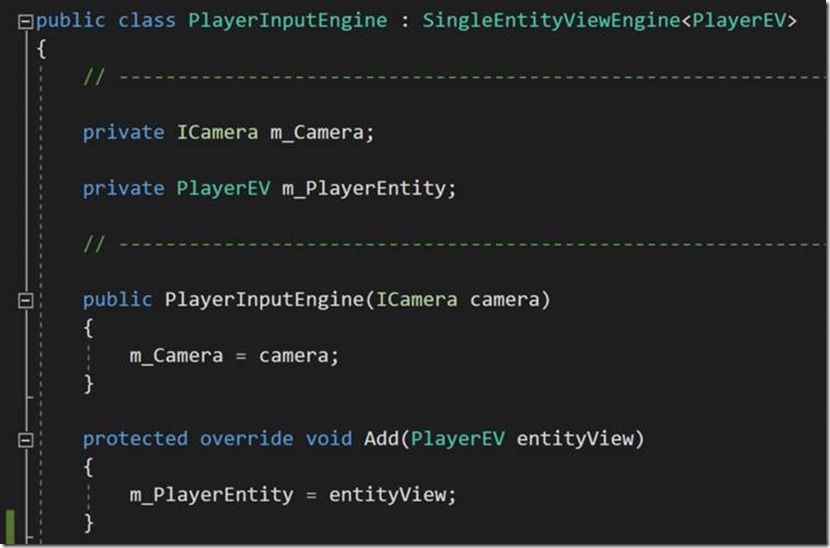
You’ll notice that GunShootingEngine is a “SingleEntityViewEngine” for the PlayerEV, which simply means it will receive a reference to PlayerEV when the game begins through its Add method (where you can see we’re storing the reference as a member variable for safekeeping).
GunShootingEngine is not, however, a MonoBehaviour, which means it will not have any Awake, Start or Update functions called automatically by Unity as we might be used to. How, then, are we going to ensure this Engine is updated every frame? With a coroutine.
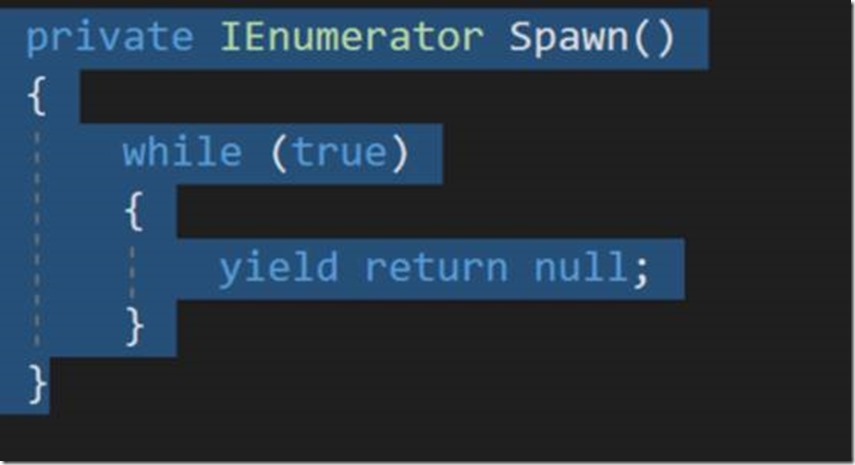
We’ll start by defining our coroutine in the usual way as a method that returns an IEnumerator. Every time this method updates, it will check to see whether the Player wants to fire their gun, so name it accordingly.
Inside our new coroutine, we will very simply loop forever, checking at every iteration whether the value of isFiring inside our PlayerEV’s inputComponent is set to true. Being wary of infinite loops, we remember to yield return null at the end of our loop to make sure it only continues its next iteration in the next frame.
If isFiring is indeed true, we will call a wishfully defined Shoot function – you can go ahead and define that now (as a simple void no-argument function), or simply let Visual Studio auto-generate it for you (move your cursor to your function call and press ALT+ENTER).
Before we implement our new function, let’s satisfy one likely point of curiosity: Where is the value of isFiring being set? A very good question we should address right away. Let’s hop over to PlayerInputEngine (Assets/Scripts/Engines/Player/PlayerInputEngine.cs) and make sure it’s doing what we want it to do before we proceed.
PlayerInputEngine is a SingleEntityViewEngine for the PlayerEV as well. The purpose of this engine will be to continuously read input from the Player’s mouse and store these as values in the PlayerEV’s inputComponent.
(You can have a look at the definition of the Player’s inputComponent (Assets/Scripts/Components/Player/PlayerInputComponent.cs) to get a sense of the values this engine will modify.)
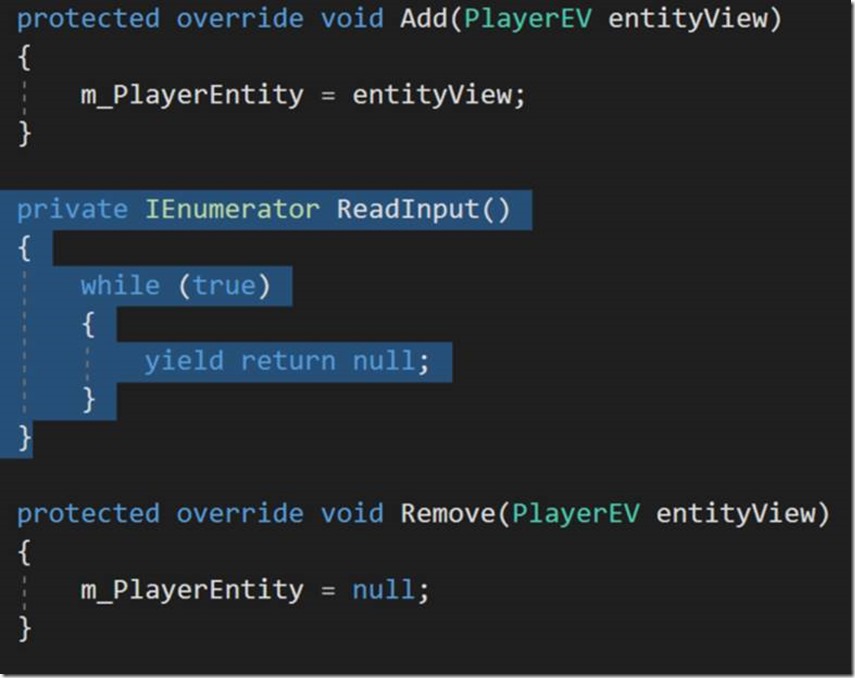
Let’s make a coroutine to do this input reading; as per usual, we’ll want an infinite loop inside it that yields at the end of each iteration.
There are three inputComponent values that we want to update here: aimPos (which is the screen space position of the mouse), isFiring (which is a boolean indicating whether the Player clicked their primary mouse button this frame) and aimRay (which will be a Unity Ray that points straight forward from the Player’s mouse position into world space).
For the first two, we’ll simply take Unity’s Input.Position and Input.GetButtonDown(“Fire1”) values and store them as-is. Then we’ll use a function of our member variable m_Camera (which is simply a wrapper around Unity’s camera utility functions), ScreenPointToRay , to convert the Player’s mouse position into a Ray for us to store.
Finally, we’ll call our coroutine as soon as the Engine boots up inside the Add function. Again, since our Engines are not MonoBehaviours, we don’t have access to Unity’s StartCoroutine function, but the Svelto.ECS utility library Svelto.Tasks lets us do exactly the same thing (in fact, even more efficiently!) by simply typing ReadInput().Run() .
With Player Input neatly sorted, let’s return to GunShootingEngine to complete it. now that we know we’re reading accurate input values.
Inside our Shoot function in GunShootingEngine, we want to do three things: Check whether the Ray from the Player’s mouse is touching a Collider object, check whether that object is a Zombie, and – if it is, decrement its health. We’ll also want to store a reference to the point of impact in a Vector3 for reasons that will become clear presently. Feel free to copy the code below, or implement it gradually as we go through it.
The m_RayCaster member object is just another wrapper around Unity’s RayCasting functionality, and its function GetRayHitTarget will return the Entity ID of the first Entity that was hit by the Player’s Ray, or -1 if nothing was hit.
If we did in fact hit something, we make use of our IEntityViewsDatabase property, which (as the name implies) is a database of all the EntityViews currently alive in the scene.
(Where did this property magically appear from? Notice that GunShootingEngine implements the eloquently named IQueryingEntityViewEngine interface. All engines that implement this interface will automatically have a reference to this database assigned to them when Svelto.ECS initialises. It will quickly become apparent that these databases are crucial for engines to function properly.)
With this EntityView database, we check to see whether the Entity we hit is a GunTargetEV using the TryQueryEntityView function.
(Recall from the diagram earlier that GunTargetEV is really just a synonym for the Zombie Entity. (Or, more accurately, GunTargetEV is one of the EntityViews that define what a Zombie is.))
If it is, we’ll access that GunTarget’s healthComponent, and decrease its currentHealth value by the damagePerShot value defined in our PlayerEV’s gunComponent (this is just a simple int value currently set to 1 that we can customise later). Finally, we’ll store the position of our impactPoint (the point where our bullet touched the Zombie) in the lastImpactPos value of our PlayerEV’s gunComponent.
Remembering to start our CheckForFire coroutine right after our PlayerEV reference has been assigned, we now have functioning gun shooting behaviour in our game. With a little bit of sound and visual effects we’ll be able to see the impact of this Engine.
Now, if you diligently copied the lines of code into Shoot from above, you might still be curious why the two variables we assigned to at the end of Shoot have a .value property attached at the end, and what this could be useful for. Rightfully so – let’s explore that right away.
Broadcasting messages and splattering blood
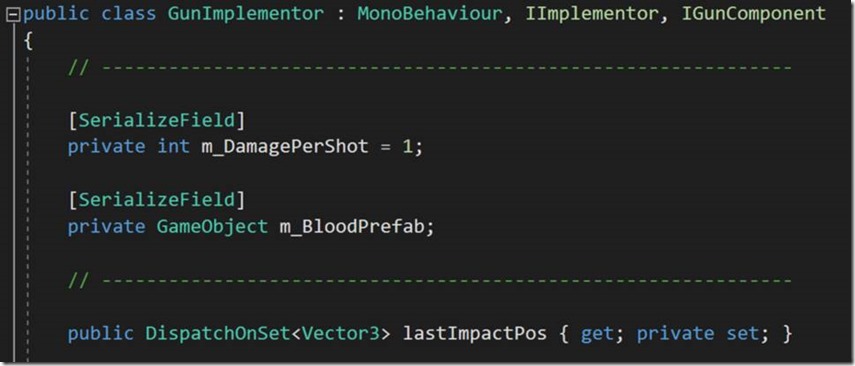
If you take a look at the definition of PlayerEV’s gunComponent (Assets/Scripts/Components/Player/GunComponent.cs), you’ll notice that lastImpactPos is not just a regular Vector3, but actually a “DispatchOnSet<Vector3>” .
This DispatchOnSet data type actually represents one of the primary means of engines communicating with each other in Svelto.ECS.
(There are actually several useful methods for communicating across classes in Svelto that are equally modular (and I would encourage you to try them out!), but for the sake of simplicity we will only use DispatchOnSet in this tutorial).
DispatchOnSet is a wrapper around a simple value-type variable, but is also a self-contained Observer-Listener object. Any class that can access a DispatchOnSet property can sign up callback functions to be notified whenever the value it refers to is changed.
So, in the case of our lastImpactPos variable, the moment we changed its value inside GunShootingEngine, every class that signed up to listen for that change would be immediately notified. At the moment, however, lastImpactPos has no subscribers, so let’s do something about that.
Navigate to the GunEffectsEngine (Assets/Engines/Player/GunEffectsEngine.cs). This engine, too, works on the single EntityView PlayerEV. Inside here we’re going to instantiate a simple blood splattering particle effect whenever the player’s gun successfully shoots a zombie.
Inside the Add function, right after we’ve been assigned a reference to PlayerEV, we’ll sign up to be notified of changes to lastImpactPos. To do this, simply access PlayerEV’s gunComponent, and call lastImpactPos’s NotifyOnValueSet function, passing in a wishfully titled callback function name.
Again, you can let Visual Studio auto-generate an appropriate function for this purpose (simply select the function name you passed in and hit ALT+ENTER).
As you’ll note from Visual Studio’s auto-generated parameters (which we can rename once we know what they refer to), this function will take in an int, which is the ID of the Entity that holds the value that was just changed, and the changed value itself (in this case, a Vector3).
If you recall from your look at the gunComponent earlier, it already contains a gunEffectPrefab variable (where this has been assigned we will cover in just a moment). Let’s retrieve that and instantiate it at the gun’s impact position.
We instantiate our prefab using the Build function of our member object m_GameObjectFactory.
(GameObjectFactory is (for our purposes, anyway) little more than a wrapper around Unity’s familiar Instantiate function that is passed in manually through GunEffectsEngine’s constructor– check out MainContext.cs to see where the construction of this object happens.)
With the prefab instantiated, we assign its position to the new bullet impact position that we just had passed in.
With that, we now have bullets in the game that splatter blood particles on impact (you can check and tweak the blood effect by inspecting the prefab (Assets/Prefabs/Blood.prefab)). Of course, until we have Zombies spawning, we have little to test this functionality against.
Before we proceed with developing our Zombie-spawning functionality, however, let’s take a moment to unwrap the final key piece of Svelto.ECS that we’ve only skimmed over up to this point: Implementors.
So far, we’ve accessed Components belonging to several different Entities, using them both to read constant data (such as damagePerShot and bloodEffectPrefab), and to edit data for other Engines to read (such as currentHealth and lastImpactPos).
If you’ve inspected the definitions of these Components, you’ll have seen that they are simply interfaces that declare the existence of these properties. This is another deliberate design decision to keep Svelto.ECS codebases as modular as possible, but it raises the immediate practical question – where are they implemented? Investigate the Assets/Scripts/Implementors folder (and its subfolders) to get a clear answer.
These Implementor classes provide specific class implementations of every Component in the game. While some of them (notably PlayerInputImplementor) are very straightforward classes that simply define the properties laid out in their interface, others (GunImplementor, and several of the Zombie Implementors which we’ll address in a moment) are subclasses of MonoBehaviour as well, and contain some interaction with Unity.
Implementors are where these traditional Unity interactions can take place (such as receiving a OnTriggerEnter callback or receiving a SerializeField property from the Unity Inspector).
(Notice, for example, that the bloodEffectPrefab we accessed in GunEffectsEngine is simply a serialised GameObject variable that has been dragged in from the Assets/Prefabs folder onto the GunImplementor MonoBehaviour script attached to the Player Camera object in our Unity scene.)
Implementors, in other words, are the bridge between Unity and Svelto.ECS, allowing the rest of the codebase to be (mostly) independent from how Unity works.
With that little aside, let’s return to our Engine development, with a mind towards getting Zombies spawning in the game.
Spawning zombies and making them move
If you’ve looked around our Unity scene, you’ll have seen there’s a ZombieSpawner object with a number of empty child transforms called SpawnPosition. These are the places we’ll want our Zombies to spawn from.
Open the ZombieSpawnerEngine (Assets/Scripts/Engines/Zombies/ZombieSpawnerEngine.cs), and you’ll the same basic structure as the other engines we’ve looked at.
(You can inspect the definition of the ZombieSpawnerEV, and its zombieSpawnerComponent to get an idea of the data we’ll be retrieving and manipulating here).
The purpose of this engine is very simply to spawn a new zombie entity every few seconds. Let’s create another coroutine to do this.
Inside this coroutine we’re going to loop infinitely, at every iteration picking a random spawn position from the spawnPosition field of our ZombieSpawnerEV’s spawnerComponent. Finally we’ll build that same component’s zombieToSpawn prefab similar to how we’ve done before, and place it at the randomly chosen spawn position.
(If you want to see how these spawn positions are retrieved, check out ZombieSpawnerImplementor. Incidentally, you may notice here that even though Components and their Implementors should ideally contain only data accessors, there are a few lines of behaviour code inside this class’s Awake function. These small snippets are sometimes necessary to keep implementation details encapsulated. It’s a fine balance.)
We’re not quite done, yet, however. As you’ll have gathered, a Zombie actually represents an Entity inside our ECS structure, and as such we want to make sure that we’re building a new ZombieEntity at the same time as its Unity GameObject is spawned.
We’ll achieve this by retrieving a list of all of our newly spawned Zombie’s Implementor classes (as these are all MonoBehaviours, they can be accessed with a simple GetComponents call). From there, we’ll use our EntityFactory member object to build a new Zombie entity, assigning it a unique Entity ID by simply retrieving its GameObject InstanceID.
With this new Zombie Entity built, we’ll grab its ID one more time and store it in the lastSpawnedID value of our ZombieSpawnerEV’s spawnerComponent. This lastSpawnedID variable is another DispatchOnSet property that allows us to implicitly alert other Engines that are interested in knowing about our newly spawned Zombie.
(Notice in the snippet above that we’re yielding to the next frame before we assign our lastSpawnedID value. This is deliberate, as it ensures that Svelto.ECS has completely finished building the new Zombie Entity before other Engines listening for lastSpawnedID start querying for it.)
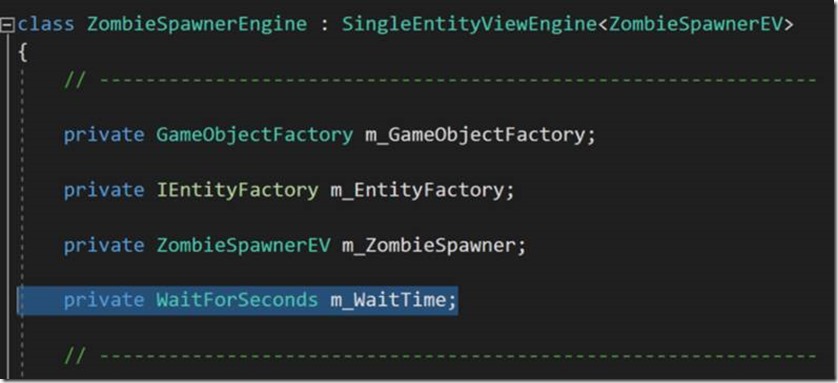
Finally, we’ll want to adjust our coroutine so that it only spawns a new Zombie every few seconds (certainly not every frame). Here we’ll make use of Unity’s handy WaitForSeconds object. We’ll assign it as a member variable, and construct it once our ZombieSpawnerEV reference has been added (in the Add function), using the secsBetweenSpawns property of our ZombieSpawnerEV’s spawnerComponent (a simple float value currently set to 3.0).
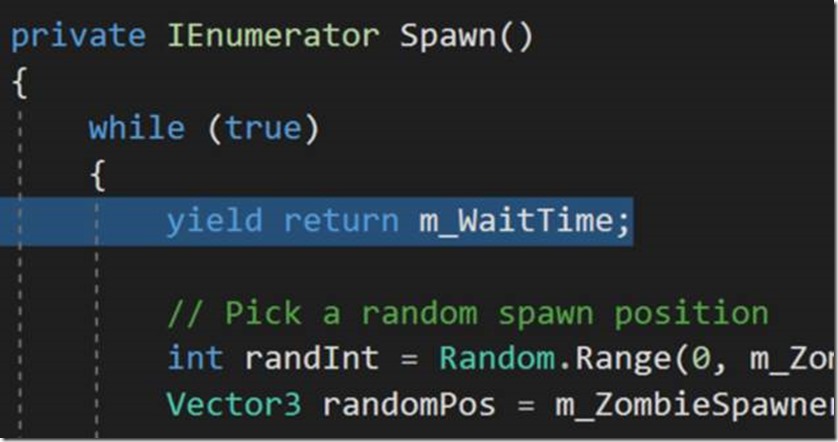
We can then yield return our new WaitForSeconds object at the start of every loop iteration, to ensure a few seconds’ delay between each spawn.
Finally, let’s run our coroutine at the end of the Add function.
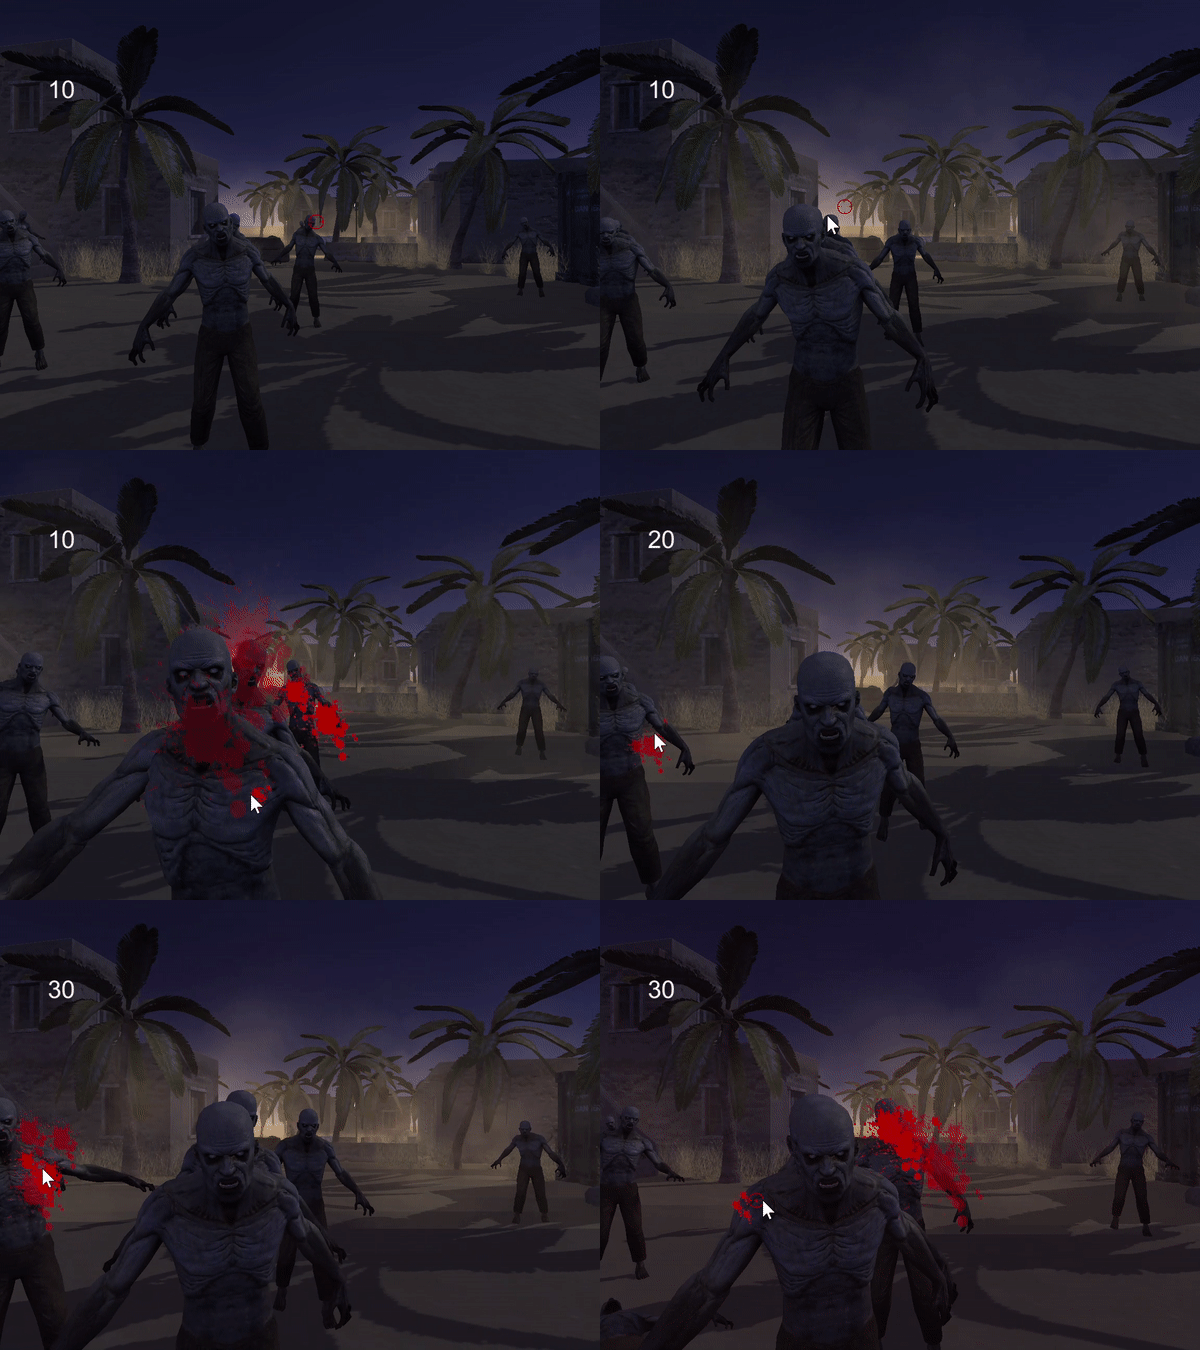
Try running the game in Unity play mode now, and you should indeed see Zombies spawning around the scene. Try to clicking on them with your mouse as well to test the Gun Engines we implemented earlier!
Besides looping a simple walking animation, however, these Zombies do not move, so once the novelty of firing at these rather boring enemies subsides, let’s by proceed by implementing their movement behaviour.
Open up the ZombieMovementEngine (Assets/Scripts/Engines/Zombies/ZombieMovementEngine.cs).
Inside its Add function, once our ZombieSpawnerEV reference has been assigned, we’ll sign up to changes to its lastSpawnedID. As before, let Visual Studio generate the corresponding callback function.
Inside this callback function, we’ll use our EntityViewsDB to retrieve a reference to the Zombie that was just spawned (using the ID passed in as the second argument to the function).
Next, we’ll access the Zombie’s movementComponent, and set navMeshEnabled to true to activate its Unity NavMeshAgent behaviour.
We want to assign the Player’s position as the NavMeshDestination of this Zombie so that the Zombie will move towards the Player. To do this, however, we need to retrieve a reference to the Player Entity.
Recall from the diagram earlier that the Player Entity is also defined through the ZombieDestinationEV for exactly this purpose. Because we happen to know that there will only ever be one such EntityView in our scene, we can just query for all ZombieDestinationEVs using our EntityViewsDB and grab the first one it returns.
With that done, we’ll simply grab the position from our ZombieDestinationEV’s positionComponent, and assign it as the navMeshDestination of our newly spawned Zombie.
Hit play in Unity now and you should see that the Zombies suddenly look more ominous when coming straight towards you. The illusion may be lost as you see them walk straight the camera, however. Let’s sort that out next.
Triggers and animations
We want our Zombies to stop moving once they’re within grabbing distance of the Player.
If you inspect the Unity scene, you’ll see that the Player Camera object has a Sphere Collider attached to it. The triggerComponent of each ZombieEV, meanwhile, has a DispatchOnSet<bool> property that will be set to true whenever a Zombie touches a Trigger Collider (check out ZombieTriggerImplementor to see exactly how this interfaces with the Unity collision system).
Back inside ZombieMovementEngine, then, let’s stop our Zombies’ movement the moment this trigger flag has been set.
We’ll start inside the callback function for a new Zombie spawn that we just wrote (here called OnZombieSpawn), signing up to be notified of changes to our Zombie’s triggeredAgainstTarget property (on its triggerComponent).
Inside the callback function we just assigned, we’ll simply retrieve a reference to the Zombie in question and disable its navMeshAgent property.
With these basic gameplay features in place, we’ll proceed to add a little more aliveness to our Zombies by triggering different animations in response to what’s happening in the game.
(If you select a Zombie GameObject in Unity and view the Animator window, you will see that its animation system has been set up to respond to two triggers, which we’ll be setting in ZombieAnimationEngine. You can also inspect the ZombieAnimationImplementor to see how the interaction between Svelto.ECS and the Unity animation happens.)
Open ZombieAnimationEngine (Assets/Scripts/Engines/Zombies/ZombieAnimationEngine.cs).
Here we’re going to do exactly the same thing we did in ZombieMovementEngine, by signing up a callback against our ZombieSpawnerEV’s lastSpawnedID property.
Inside this callback, we’ll sign up two additional callback functions – one for changes to the Zombie’s health (the currentHealth property of its healthComponent), and one for the Zombie triggering against the Player (the triggeredAgainstTarget property of its triggerComponent).
In the first of our new callback functions, we’ll check to see whether the Zombie’s current health (passed in as a parameter) is less than or equal to zero. If it is, we’ll retrieve a reference to the Zombie in question, and set the trigger property of its animationComponent to “deathTrigger”, activating its death animation.
Similarly, in the second callback function, we’ll set the same trigger value to “attackTrigger” to activate the Zombie’s attack animation once it’s touching the Player.
The final touch we’ll want to add here before we finish (as should become apparent with a little playtesting), is to disable each Zombie’s movement and trigger behaviour once their health has dropped to zero. Hop back to ZombieMovementEngine and make this final adjustment.
*
With that, your Zombies should now be aggressively chasing you down, yet fall over graciously when shot at enough times.
Hopefully this short tutorial has given you a sense of some of the key concepts underlying game development around ECS. In the next tutorial, we’ll expand our little game to include a GUI with a scoring system, some additional sound effects and a final game over condition.
Comments
- Anonymous
May 18, 2018
Excellent job explaining how to use the basics of Svelto.ECS! - Anonymous
November 14, 2018
ecs exampleshttps://youtu.be/KzFHG7PlTU8both hybrid and pure ecs - Anonymous
November 23, 2018
want to make physics movement and force rigidbody using unity ecs. Then check out this video.https://youtu.be/wCmz0tahRO0
