Setup SSRS on a single SharePoint server farm
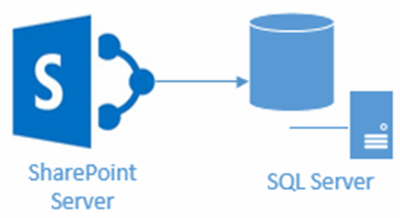
Installing SQL Server Reporting Services (SSRS) in a SharePoint environment requires several pre-installation steps before you can create the SharePoint service application. This post is focused on installing SSRS on a single SharePoint server farm. The topology would be resemble to the following:
NOTE: The SharePoint server contains all roles for the farm (service applications, central admin, search, web front end etc).
A high level overview of the steps to install SSRS on a single server farm are:
- On the SharePoint application server hosting the SQL Server Reporting Server Service, install the Reporting Services Feature and Add-In components.
- Create and configure the SQL Server Reporting Service Application in Central Admin.
Install Reporting Services Feature components
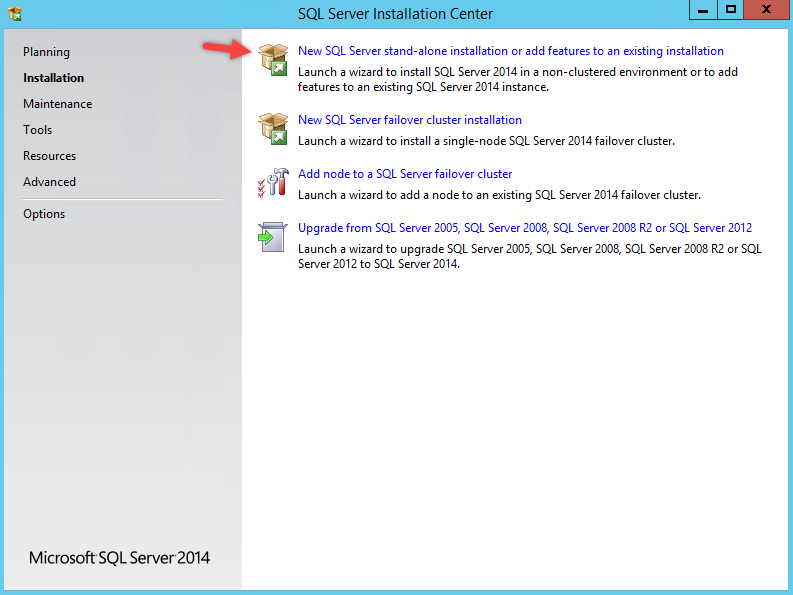
- On the SharePoint Server that is going to host the SQL Server Reporting Server Service application, locate the SQL Server media and launch the setup wizard as if you were installing SQL Server.
- Select the add features to an existing installation option.
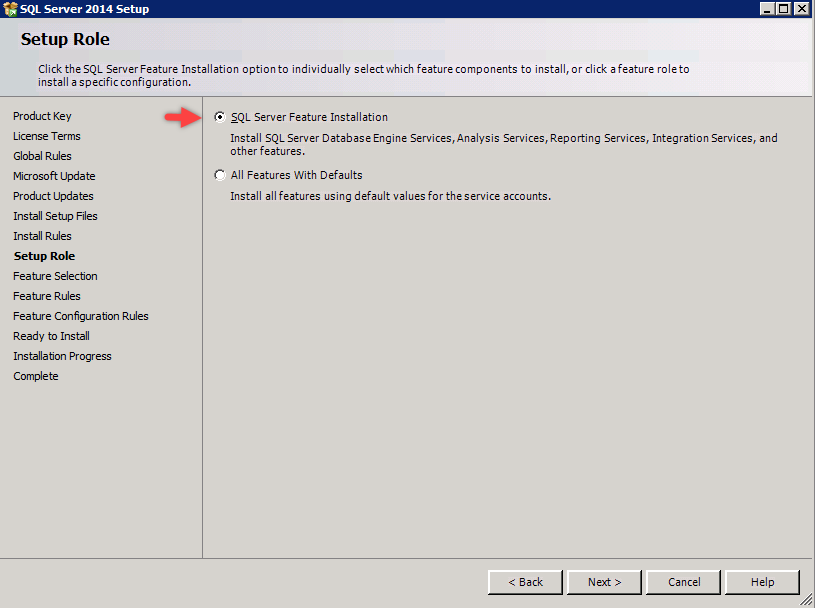
3. Select SQL Server Feature Installation to see the features to install.
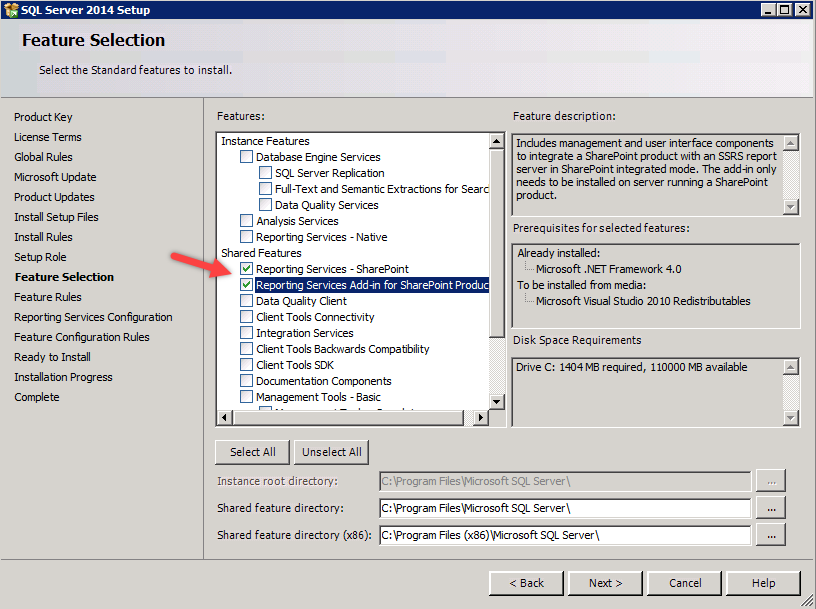
4. Select the 2 features shown below. As an option you can install the Management Tools so you can manage SQL Server from SharePoint but it's not required as part of the install.
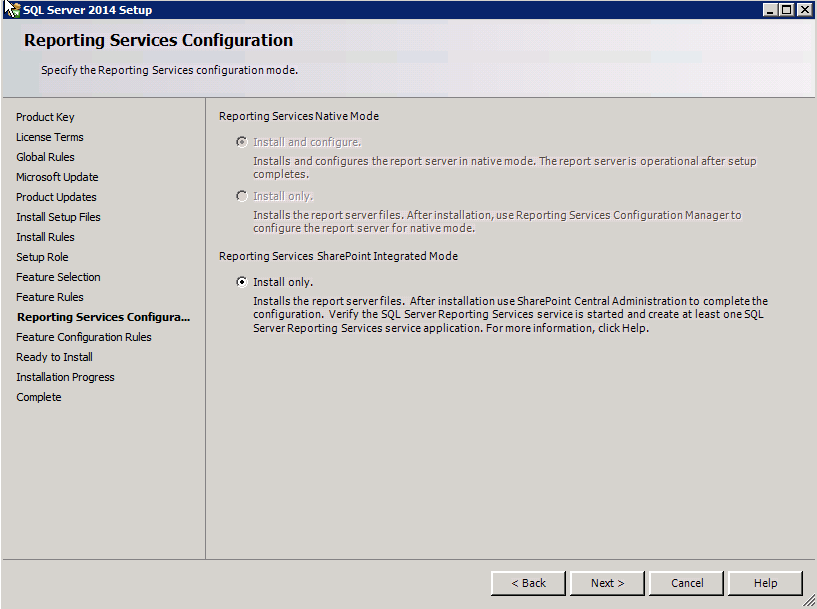
5. The only configuration option will be "Install Only" since this is not an actual SQL Server.
6. The next screen will list all the features that are going to be installed. This is read only and informational.
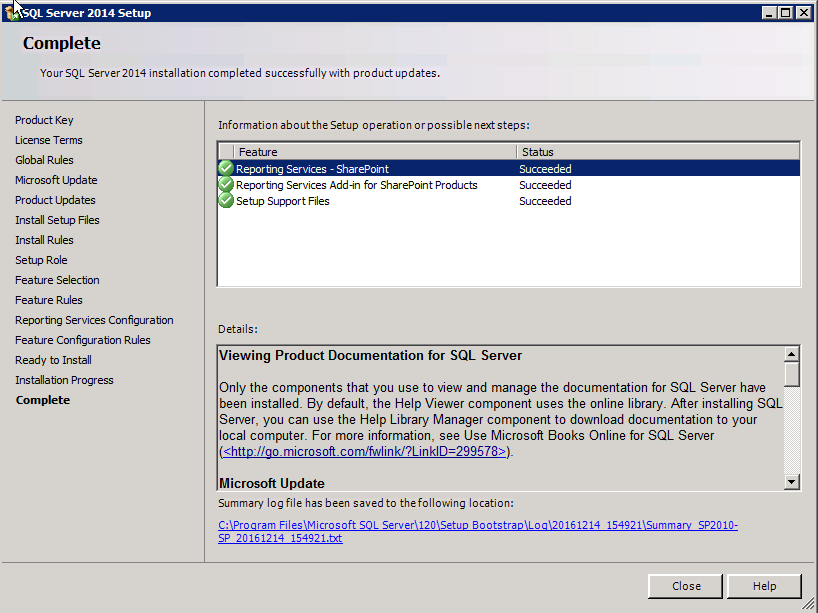
7. Once the installation is complete, you should see all features installed successfully.
Configure SharePoint
- Now that the SSRS binaries are installed on the SharePoint the necessary configuration components are available to SharePoint.
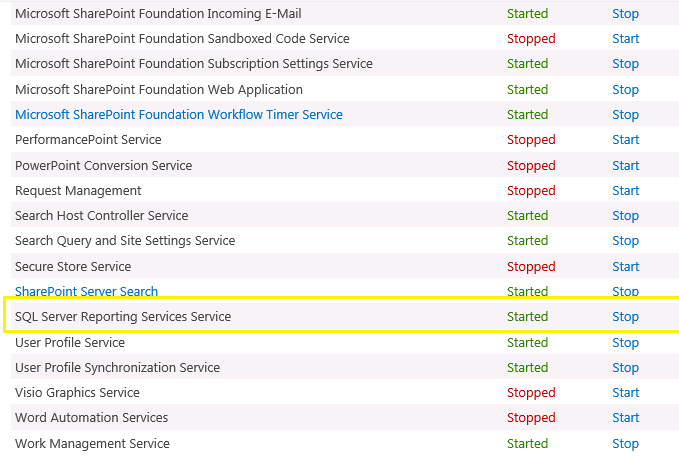
- Open Central Administration -> Manage Services on Server and make sure the SQL Server Reporting Services Service is started.
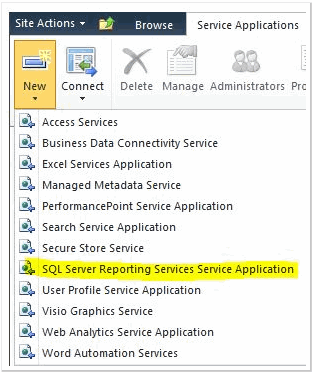
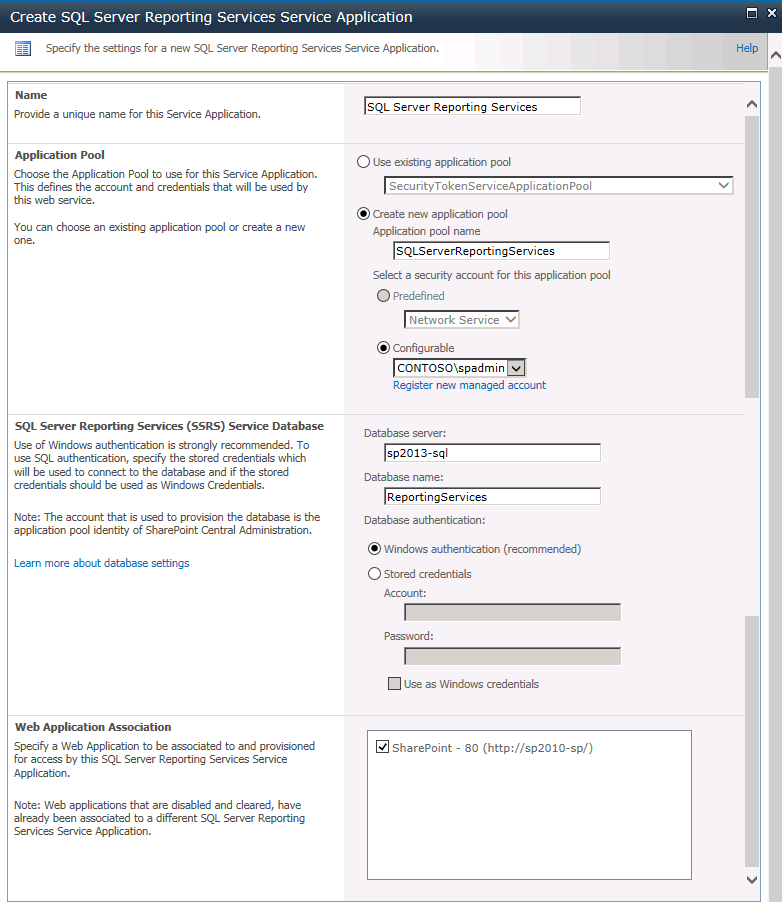
3. From Central Administration go to Manage Service Applications and select SQL Server Reporting Services Service Application from the New menu.
4. To create the service application, you'll need the following information.
NOTES:
- Name – this can be anything you want but make sure it’s descriptive enough for other administrators.
- Application Pool – it’s recommended that you create a new application pool for performance and security reasons. It’s also best to use a separate managed account for security and traceability when troubleshooting.
- Web Application Association – select what web apps you want to enable SSRS on.
5. SharePoint will confirm the service application was created successfully.
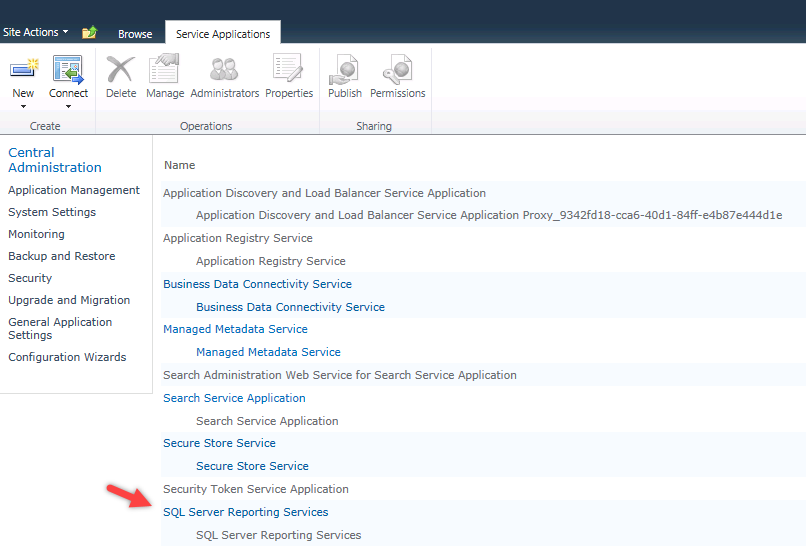
6. The service application will also appear in Central Admin.
From here you can modify the SSRS settings by selecting the service application and "Manage" in the ribbon.
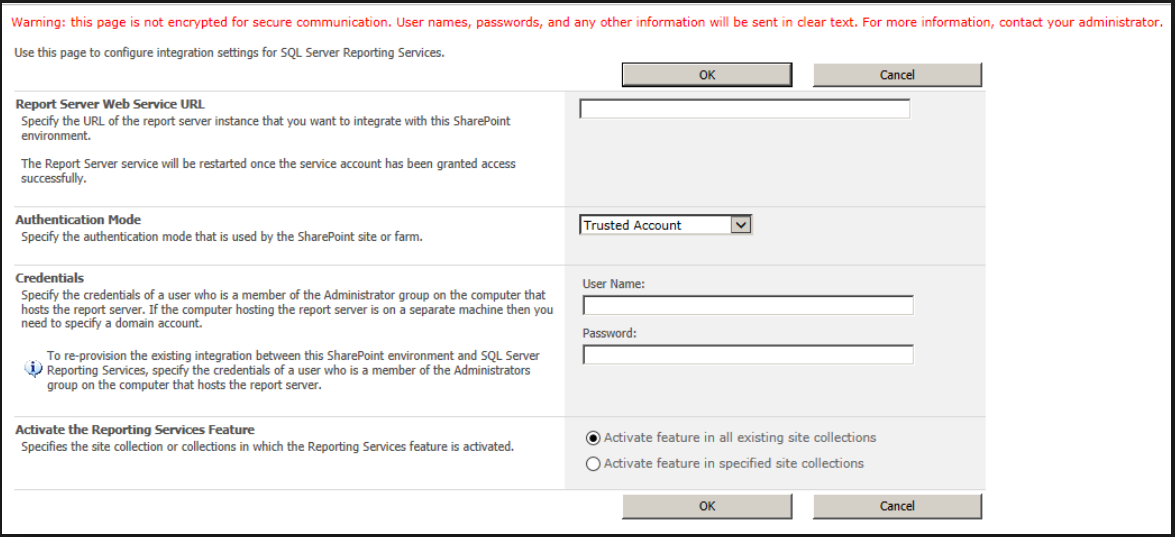
7. When setting the the authentication mode in SSRS Settings, if you are NOT running Kerberos be sure to select "Trusted Account", otherwise select Windows Authentication. When using the Trusted Account mode, SSRS will use the App Pool account for the web application.
