Construct 2 Exporting to Windows
Construct 2 is such a fabulous tool because it allows users to create cross-platform games without having to write any code. These are two immensely useful features. Not only can someone with no computer science or programming experience get started, they also publish to any platform they choose to. This is one of the big reasons I use it so heavily. I can teach game development platform agnostic and finish by showing how to publish to Windows and leverage some of the Windows Specific features at the end. Note that to open up the source code and prepare for publishing, you must have Visual Studio 2012 or higher (depending on your selected target export, 2012 for Windows 8 and Windows Phone 8 and 2013 for Windows Universal App). You can find info and download link for the fully featured and FREE Visual Studio Community here. That said, let’s take a look at how we export to Windows.
After you finish your game and are ready to export, choose File->Export Project or click the Export Project button in the toolbar at the top.
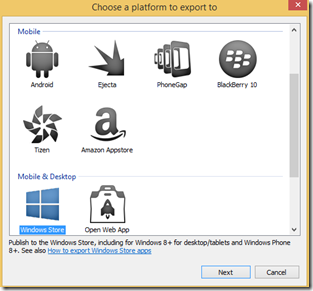
Then, choose Windows Store as the platform.
Then, choose a destination to export the files to. By default here, I am exporting the project to my desktop. Note that I am not changing the subfolder for imagines or project files. I additionally do not have the Minify Script checkbox selected. Minifying Script will make it very difficult for others to read your code, but I tend to make some changes in Visual Studio after exporting, so I want to be able to read the code myself. If you will not be editing any of the JS afterwards, feel free to select Minify Script.
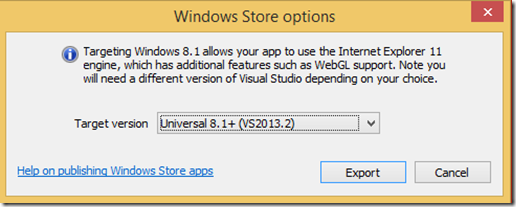
Next, click Export and then choose your Target version. Typically, I would recommend exporting to a Universal Project, which supports Windows 8.1 and Windows Phone 8.1, but if you are working on a project that is specific to Windows 8 or Windows Phone 8, you might want to choose one of those individually. This is up you.
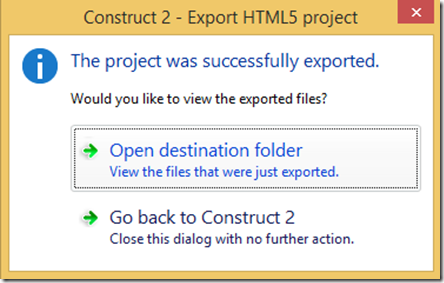
Next, click Export, and after a few seconds you should see a dialog box that gives you the option to Open Destination Folder to see your files.
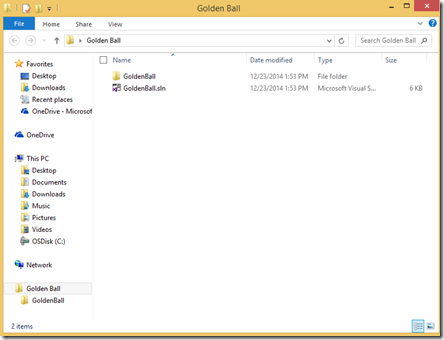
You can click that option or navigate to the directory you chose to find your files.
Notice the GoldeBall.sln file. This is the Visual Studio solution file that you would open up in Visual Studio to edit your project, make final changes, and prepare for final publishing. That’s it, that’s all it takes to export your project to Windows and find your Visual Studio solution file!
Comments
Anonymous
December 23, 2014
It sounds pretty cool - I try to find time to test it in the holidays :)Anonymous
December 23, 2014
Please do and let me know how it goes. Stay tuned as I will post about publishing as well!


