Creating a Linux VM on Azure with Multiple NIC's using PowerShell
Microsoft Azure offers some incredible features for both developers and IT pros to develop and configure their environments on azure seamlessly. However, there may be some cases where you would need to use PowerShell to resolve some of the more complex scenarios, and in this post, I will be sharing some PowerShell Commands to create a VM on Azure with Linux or Windows OS on it and it would have TWO Network Interface Cards (NIC) attached to it, also note that in this scenario I will be creating the VM in an Existing resource Group, an existing V-NET and an existing Subnet.
those of you who would need more insights on V-NET and Subnets on Microsoft Azure, Please follow the Link
Currently we cannot associate two NIC’s to an Existing VM, and so we need to create a brand new VM on Azure and then we would be associating NIC’s to it. The Azure Portal currently does not have the option to assign two NIC’s to a brand new VM as well so we would be taking help from PowerShell, so let’s Begin.
Step1: The First Step would be to have an active Azure subscription and PowerShell installed on your Machine. Now I am assuming that you have the subscription and PowerShell Installed on your Machine.
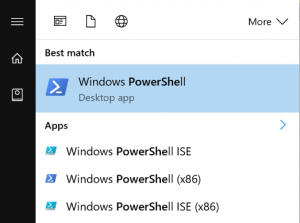
Step2: you Can run the command lets from the standard PowerShell console, or you can use PowerShell Integrated Scripting Environment (ISE), I would recommend to use ISE for your scripts so that you can save the scripts for your future references and it provides with the intellisense for your scripts so you should not go wrong with the spelling. If you are using window 8 or windows 10 for that matter, press start and start typing PowerShell.
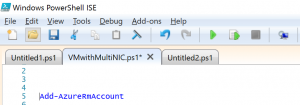
Select PowerShell ISE and type in the Command

This command is going to help you Login to you Azure Subscription.
Next, use the following command
$location="westeurope" $myresourceGroupName="mainRG" $myStorageAccountName="mylatestvmstorageaccount"
Get-AzureRmStorageAccountNameAvailability $myStorageAccountName
$myStorageAccount = New-AzureRmStorageAccount -ResourceGroupName $myresourceGroupName -Name $myStorageAccountName -SkuName "Standard_LRS" -Kind "Storage" -Location $location
In the Above command I am creating a variable by the name Locaiton and assigning “west Europe” as the desired Location. My Existing Resource group name in the Azure portal is called MainRG so in the resourceGroupName variable I am assigning it mainRG
Since I am going to create a new VM so I am going to assign a new storage account by the name mylatestvmstorageaccount.
The next command Get-AzureRmStorageAccountNameAvailability checks if the name that we are going to use for the storage is available and or its correct or not.
Next, we would be declaring another variable by the name MyStorageAccount in which we would be assigning a new StorageAccount by using “New-AzureRmStorageAccount” and assigning it other variables as well. Standard_LRS means Locally redundant storage, you can have it geo Redundant and read only Geo redundant as well.
Next, use the following Command.
$VNET = Get-AzureRmVirtualNetwork -Name 'Main_virtual_Network' -ResourceGroupName 'mainRG' $subnetID = (Get-AzureRmVirtualNetworkSubnetConfig -Name 'Main_virtual_Network_FrontEnd_subnet' -VirtualNetwork $VNET).Id
The Above Command Get-AzureRmVirtualNetwork gets the Virtual network by the name 'Main_virtual_Network' in the resource Group ‘mainRG’ and assigns it to variable VNET.
The next commands get the ID of the Subnet Named ‘Main_virtual_Network_FrontEnd_subnet’ with in the Virtual Network ‘'Main_virtual_Network’ and assigns the values to a variable subnetID
Next use the following commands to create two variable in which we would be assigning names of the NIC’s
$NIC1Name='FrontEndV2-NIC1' $NIC2Name='FrontEndV2-NIC2'
Next, use the following commands to create two Network Interface cards (NIC’s) in the above resource Groups and relevant Subnet
$myNIC = New-AzureRmNetworkInterface -Name $NIC1Name -ResourceGroupName $myresourceGroupName -Location $location -SubnetId $subnetID $myNIC2 = New-AzureRmNetworkInterface -Name $NIC2Name -ResourceGroupName $myresourceGroupName -Location $location -SubnetId $subnetID
Next, we are going to get the Credentials for the VM
$cred = Get-Credential -Message "Type the name and password of the local administrator account."
Now we are going to assign the Size of the VM, its Operating System, its Image, and attack the network Interface Cards we just created.
$myVM = New-AzureRmVMConfig -VMName "myVM" -VMSize "Standard_DS2_v2" $myVM = Set-AzureRmVMOperatingSystem -ComputerName "myLinuxVM" -Credential $cred -Linux -VM $myVM $myVM = Set-AzureRmVMSourceImage -VM $myVM -PublisherName "OpenLogic" -Offer "CentOS" -Skus "6.8" -Version "latest" $myVM = Add-AzureRmVMNetworkInterface -VM $myVM -Id $myNIC.Id -Primary $myVM = Add-AzureRmVMNetworkInterface -VM $myVM -Id $myNIC2.Id
Please note that the Size that we are going to choose is important, certain VM with lower specs are not capable of holding 2 NIC’s as we are going to choose "Standard_DS2_v2" as this VM size supports multiple NIC’s attached to it. Also we are choosing LINUX OS from OpenLogic, that is in the Gallery of the VM’s that are provided out of the box in Azure Portal.
Next, we are assigning the newly created NIC’s to the VM, please note the switch -Primary, this is important and you must assign an NIC to be primary for the VM.
Next, we would be assigning the Blob storage path for the disk of the VM and assigning the OS Disk size to be 127GB, and finally creating the VM itself.
$blobPath = "vhds/myOsDisk1.vhd" $osDiskUri = $myStorageAccount.PrimaryEndpoints.Blob.ToString() + $blobPath $vm = Set-AzureRmVMOSDisk -VM $myVM -Name "myOsDisk1" -VhdUri $osDiskUri -CreateOption fromImage $myVM.StorageProfile[0].OsDisk[0].DiskSizeGB =127 New-AzureRmVM -ResourceGroupName $myresourceGroupName -Location $location -VM $myVM
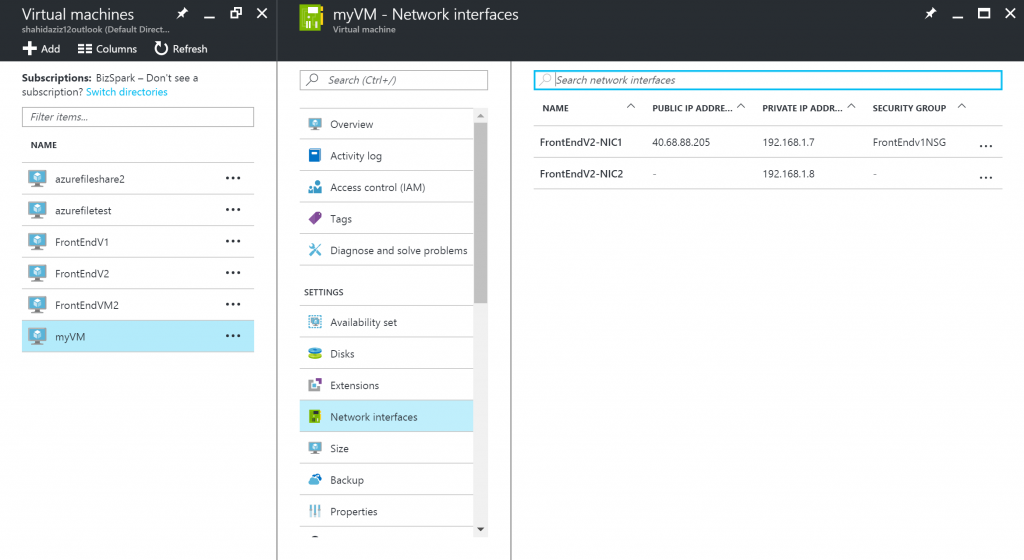
Once the command is executed, we are going to get a success message and we can verify that our newly created VM has TWO NIC’s attached to it by going to the portal.

