MS-FSU: A look from the Windows interface
It is not unusual for our group to receive a question regarding Constrained Delegation and Protocol Transition.
Even though the document (MS-SFU) does a great job in detailing the specification, not all implementers are familiar with the way in which Windows needs to be configured in order to be able to fulfill the requirements of the protocol. The reason is rather simple: many of the developers reading the documentation work on operating systems other than Windows.
Although I am sure I have seen some blogs and articles explaining this, I thought it could be a good idea to have these details in our blog since it could help implementers using the Open Specification set of documents.
I am not going to get into the details of the WHATs and WHYs because those details are covered by the document.
I will instead, make sure the HOWs for configuring a Windows system to work with these extensions are clear and complete.
How #1:
How to configure the authenticating user account to be able to be delegated?
- Open dsa.msc
- Locate the user account that will be used to access the front end service and open its properties
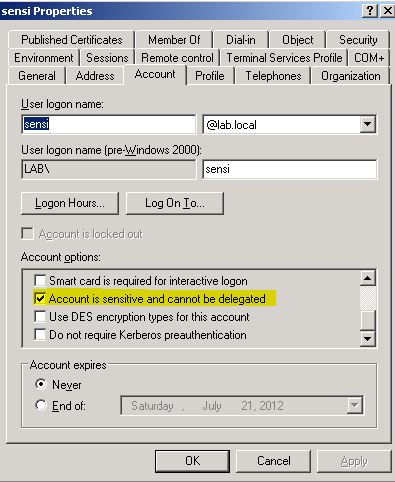
- If the “Account is sensitive and cannot be delegated” checkbox is check, then UNCHECK it
- Then commit the change clicking OK
(In this example, LAB\nonsensi is set to be delegated and LAB\sensi is set NOT to be delegated)
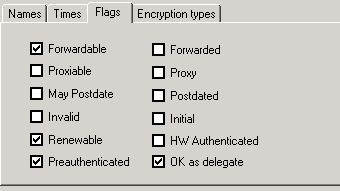
When the checkbox is unchecked, the FORWARDABLE flag ([RFC4120] section 2.6) is set in the TGS-REQ.
The TGS-REP will provide the ticket with the FORWARDABLE flag only if the rest of the settings are correct. If not, the ticket will not have the FORWARDABLE flag on and the delegation will fail.
How #2:
How to configure the middle tier?
- Open dsa.msc
- If you are running the service or application pool with a computer account (network service, local service or local system) then locate the computer account of the middle tier system and open its properties
- Then select the following options:


The left side shows the settings for delegation without Protocol Transition, the right side shows the settings for delegation with Protocol Transition.
- To confirm that the setting has been set correctly, use ADSIEDIT.MSC to look into the properties of the computer account:
- If you are running the service or application pool with a user account then locate the user account of the middle tier system and open its properties
- Select the delegation tab
If the delegation tab is not present, follow these steps:
If setspn.exe is not already in your server, you can download it from here: https://support.microsoft.com/kb/970536
From a command prompt run: setspn –A service/servername domainname\serviceaccountname
Where:
- “service” is the service name of the middle tier. In the example below is http
- “servername” is the netbios name of the server where the middle tier is running. In the example below is server3
- “domainname” is the netbios name of the domain. In the example below is LAB.
- “serviceaccountname” is the name of the user under which the middle tier service is running. In the example below is IISRepeat the command with all the same parameters but instead of using the netbios name for servername, use the full dns name. In the example below is server3.lab.local
Once the SPNs are created, the delegation tab will show up on the user account:
If the tab is still not showing, verify the SPNs creating with ADSIEDIT.MSC
Open ADSIEDIT.MSC
Expand the Domain node
Expand the domain where the account is hosted
Expand the Users container
Right click on the account and select Properties
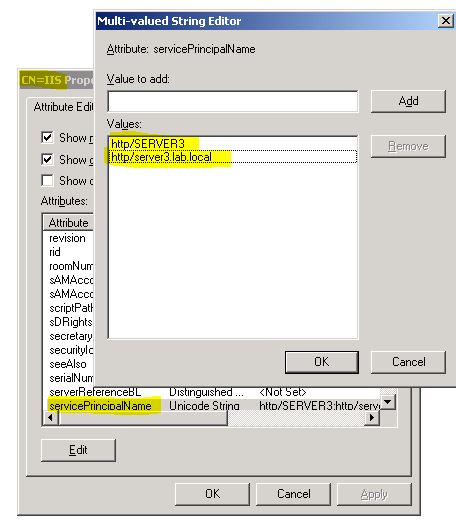
In the properties list, locate servicePrincipalName and double click on it
It should look similar to this:

If it doesn’t, then make sure to clean up the list and repeat the setspn process.
How #3
Is it working?
In this scenario, there is a webpage called test.hml hosted in Server1 that is served by an IIS server in Server3.
The applicaton pool in Server3 is running under the network service account.
The web page contains 2 pictures with different sets of local permissions.
User nonsensi has permissions on picture.jpg but does not have permissions on picture2.jpg
When accessing the webpage from a client computer using Internet Explorer, this is what he sees:

As we can see, the page has been served and the picture to which only sensi has permissions has not been displayed.
We can see that the user credentials were used to access the backend server:
And this was done because the ticket with nonsensi’s credentials was forwardable:
I truly hope that you find this article useful when working on implementing and testing your implementation with Windows.


