Windows Upgrade Analytics
One of the new management features of Windows 10 1607 is the Windows Upgrade Analytics Service which allows you to collect telemetry from Windows 10, Windows 7 and Windows 8.1 machines and have them uploaded to the cloud where they are analyzed for known issues.
The goal is to see if there are any compatibility issues with applications that can prevent you from upgrading to Windows 10.
Microsoft’s collects data during the upgrade process from machines that give us the permission to and that allows us to see possible issues with applications or drivers that can occur during an upgrade from Windows 7 or Windows 8.1 to Windows 10. With Windows Upgrade Analytics, which is currently in preview we are allowing you to upload application data if you choose and allow us to go through it and see if we find any possible applications that could affect your upgrade process to Windows 10. We go through the data and provide a nice table allowing you to see what we think you should consider.
Below is an example of data from one machine I used to test.
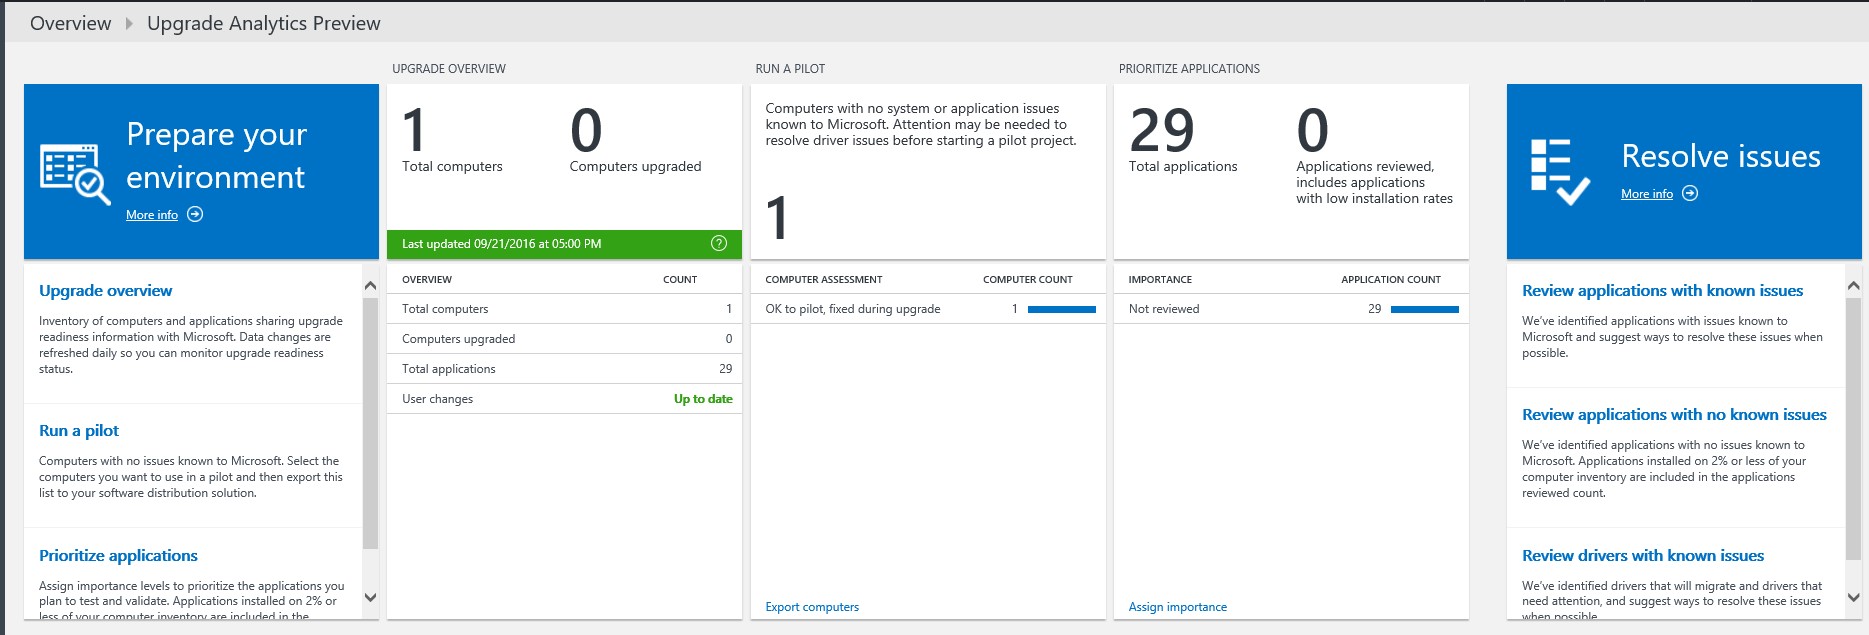
The analysis of the data is done in the Microsoft cloud which is called Azure as most of you know so you’ll need an Azure Tenant to do this. The service offering in Azure that does the actual analysis is called OMS which stands for operations management suite. Before you get concerned about costs this is a free offering which you don’t have to pay for right now.
Here’s what you need for this process:
- A Microsoft account to access the Microsoft cloud [Azure] - Free
- An Azure subscription tied to the Microsoft account – You can sign up for a Free Trial here. Keep in mind they require a credit card during the free trial sign up process to verify your identity but you don’t get charged unless you switch to a paid subscription.
- Operations Management Suite or OMS – You get the choice of adding one to your azure tenant for free
I walk you through creating number 1 and number 3 which can be done for free. Number 2 is also free but requires that you sign up for Azure which requires a credit card which won’t be charged and a phone number.
To sign up for Windows Upgrade Analytics navigate to this site
https://www.microsoft.com/en-us/WindowsForBusiness/upgrade-analytics
There’s a banner at the top that should say, “Sign up Now” and then there is the “Sign in” option in the top far right hand corner
The next step depends on what kind of relationship you currently have with Microsoft/Azure. The instructions I give assume scenario 1. If you don’t fall into that scenario skip to the part which is relevant to you in the instructions.
- I have no Microsoft or Azure AD Account and I’m not sure what that is:
Click Sign in and then click “Create an account” below to create a new Microsoft account. Log in with the newly created Microsoft account and click on “Sign up Now” and then fill out the “Create a new Workspace” form.
- I have a Microsoft Account or Azure AD account but I have no Azure Tenant:
Log in with the Microsoft account and click on “Sign up Now” and then fill out the “Create a new Workspace” form.
- I have an Azure AD Tenant I’m willing to use with no OMS Service running:
Click Sign up and log in with your Azure AD credentials you want to use. Use your current Tenant and create a new OMS workspace
- I have an Azure AD Tenant with OMS running:
Click sign up and Log in with your Azure AD credentials. Choose your OMS service and follow the instructions below to activate Windows Upgrade Analytics.
SCENARIO ONE:
Click on “Sign In” and then click on “create One” to start the account creation process.
![]()
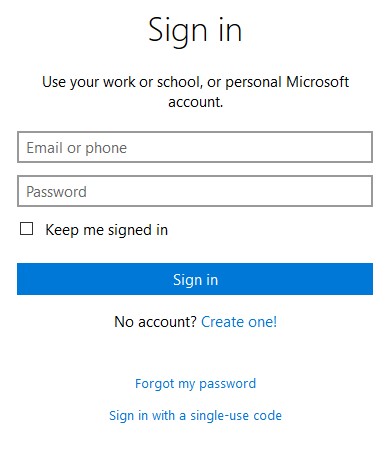
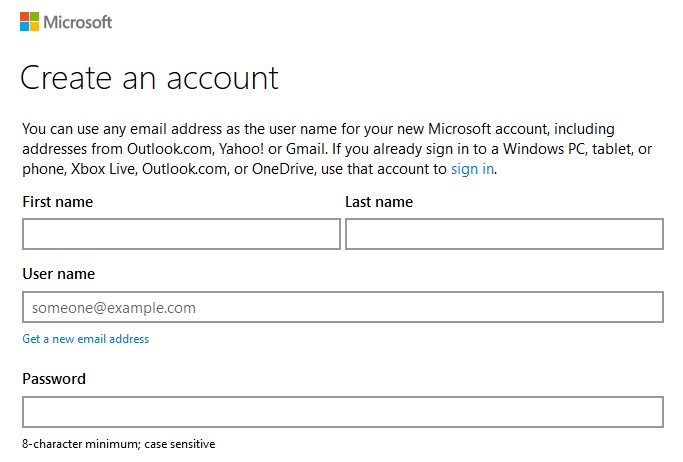
After I create the account I am now taken back to the page and I’m logged in as the Microsoft user I created. If that doesn’t happen for you simply go back to the page and click on “Sign In” and sign in with your newly created Microsoft Account.

Now I click on “Sign Up Now” and it brings me to this page where I sign in with the new account I just created
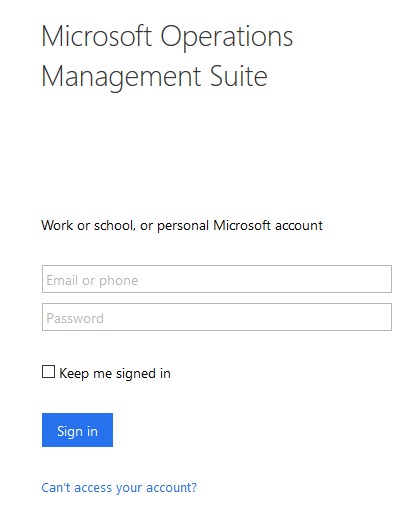
The first sign in was to sign in with a Microsoft or Azure AD account which means were a user in the online world of Microsoft. This last sign in is to sign OMS in Azure and create a workspace.
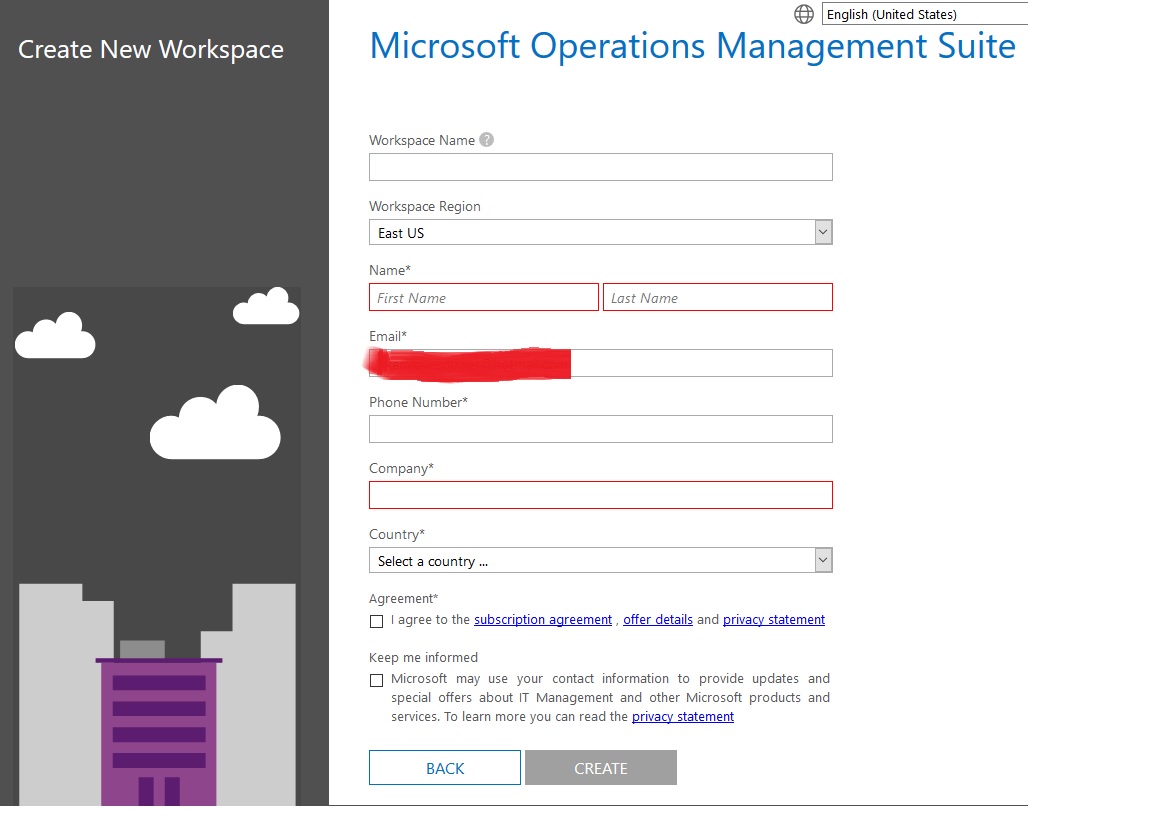
Fill out the information and then Click Create
If your Microsoft Account doesn't have an Azure Subscription associated with it [if you just created a new one, it doesn't] then you'll have to create an Azure Subscription to link to your Microsoft Account.
This is the screen you’ll see
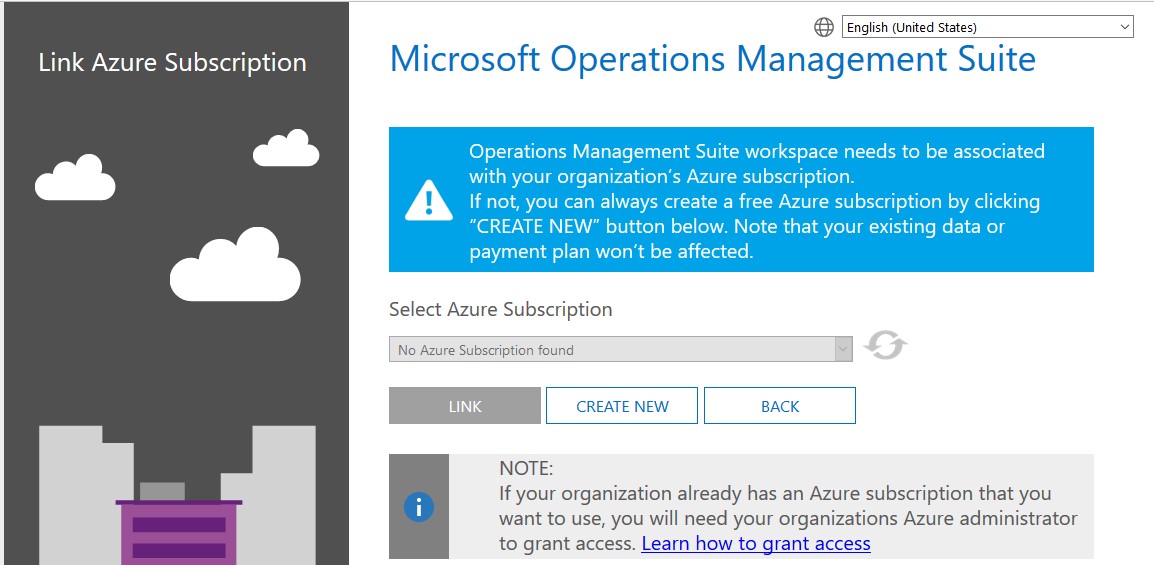
You need to click on “Create New” to create an Azure subscription which like I explained earlier has free trials. Make sure the Microsoft account you are using for OMS is the account you use when creating your azure tenant. I won’t go into creating an Azure tenant as the instructions are straight forward.
After you do that you can come back to this screen and continue.
SCENARIO 3 and 4:
Here you either create a new Azure Tenant/Subscription or you use one you already have. You can choose an Azure directory and then choose a subscription if you have multiple subscriptions.
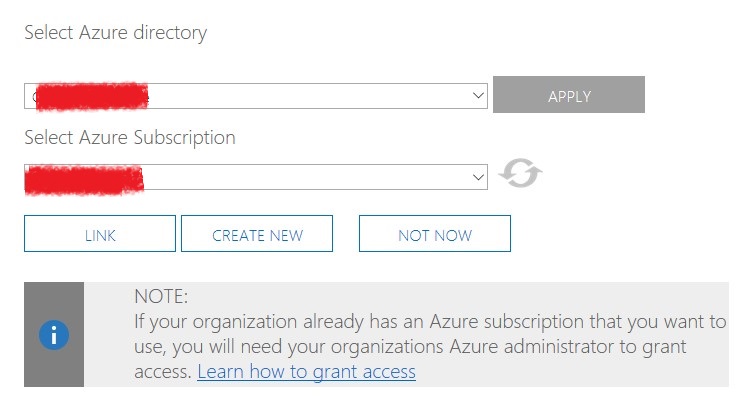
In my case I didn't have an azure OMS account so I had to create one. If you already have an Azure Tenant, then you don't need to create another one but You'll need to create an OMS workspace. If you have OMS, then your OMS workspace will be listed there and you can simply use that one or you can choose or create a new one.
After accepting agreements, you then get into the Microsoft Operations Management Suite
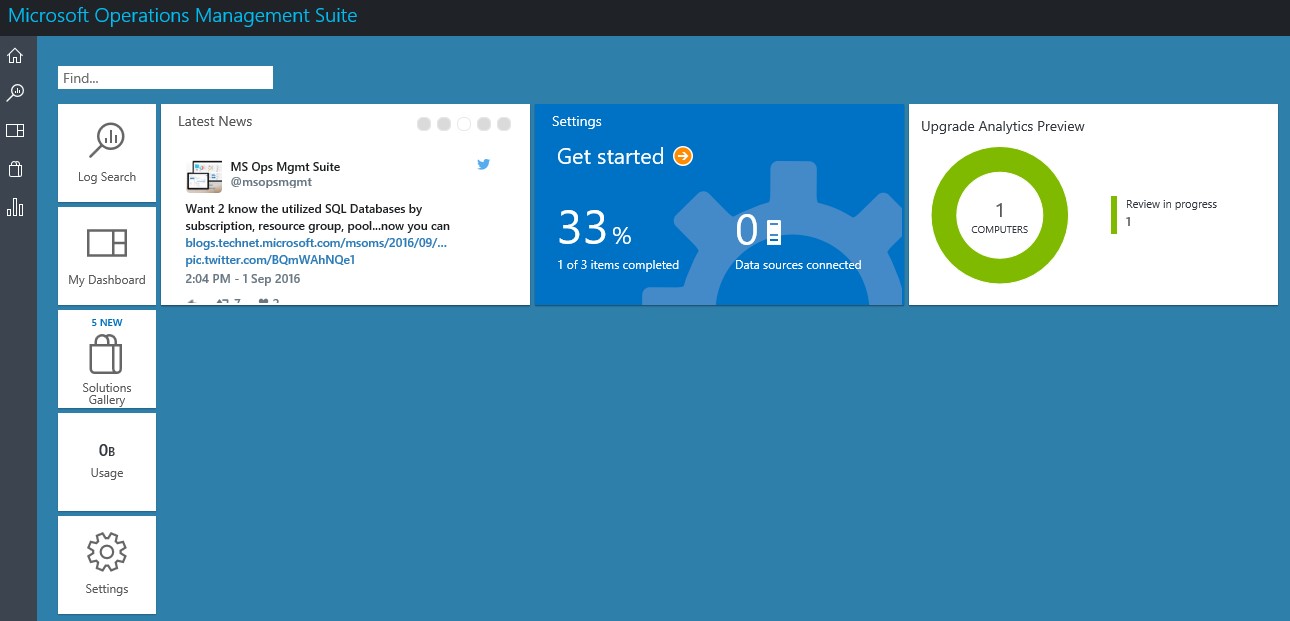
At this point you have an OMS Portal but you don't have it set up to collect any kind of data.
We need to go tell it what kind of data to collect
Click on Settings in the left bottom
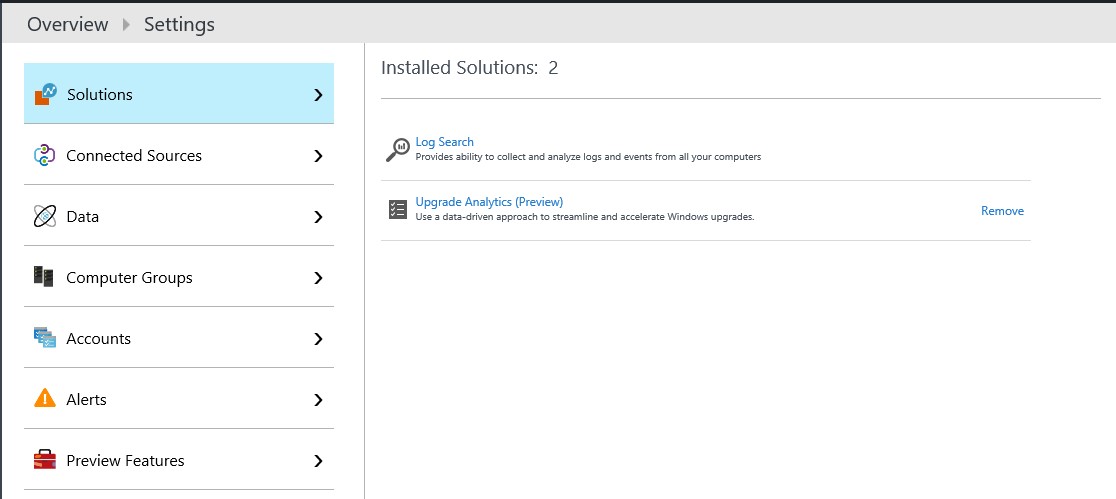
You should see Upgrade Analytics on the right side of your screen which tells you that you have an upgrade Analytics Preview license.
Click on "Connected Sources"
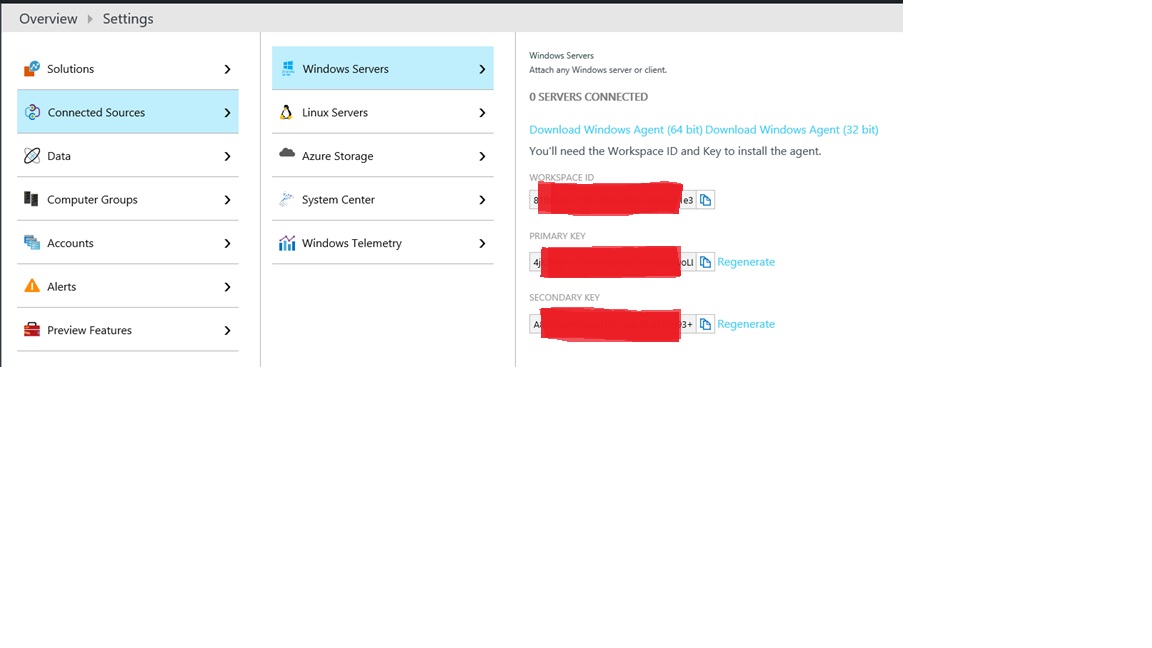
Then click on "Windows Telemetry" and click on subscribe in the bottom right corner

You should now be set up with a Commercial ID which is unique to your OMS workspace. This unique ID can be added to a Windows 7 or Windows 8.1 client machine and it allows them to direct the data they are uploading to the appropriate workspace. You should copy this key and keep it in a safe place.
I walk through details of setting up a Windows 8.1 machine to upload data below but if you want the full breakdown you can find it in this TechNet article
Setting up a Windows 8.1 Client Machine to upload data to the Workspace:
I did mine on a Windows 8.1 machine and I'm working to do one on a Windows 7 machine but the general principles are the same which you can see below.
For Windows 8.1 you must install KB 2976978 to get it to work correctly.
After I installed it I downloaded the Update Script from here https://www.microsoft.com/en-us/download/details.aspx?id=53327
The update script allows you to configure a machine to upload data and set the unique commercial ID of the OMS workspace you want to upload the data to.
Below are instructions for how to use the script:
DOWNLOAD AND CUSTOMIZE UPGRADE COMPLIANCE DEPLOYMENT SCRIPT
You can get the script from here https://www.microsoft.com/en-us/download/details.aspx?id=53327
You need to customize the scripts to work with your environment. You have to input your Commercial ID in the script to make it upload data to your environment. If you want insight into what the script does I’ve put the explanation below
The Upgrade Analytics deployment script does the following:
- Sets commercial ID key + CommercialDataOptIn + RequestAllAppraiserVersions keys.
- Verifies that user computers can send data to Microsoft.
- Checks whether the computer has a pending restart.
- Verifies that the latest version of KB package 10.0.x is installed (requires 10.0.14348 or subsequent releases).
- If enabled, turns on verbose mode for troubleshooting.
- Initiates the collection of the telemetry data that Microsoft needs to assess your organization’s upgrade readiness.
- If enabled, displays the script’s progress in a cmd window, providing you immediate visibility into issues (success or fail for each step) and/or writes to log file.
To get the run the Upgrade Analytics deployment script ready to run in your environment:
- Download the Upgrade Analytics deployment script and extract UpgradeAnalytics.zip. The files in the Diagnostics folder are necessary only if you plan to run the script in troubleshooting mode.
- Edit the following parameters in RunConfig.bat:
- Provide a storage location for log information. Example: %SystemDrive%\UADiagnostics
- You can store log information on a remote file share or a local directory. If the script is blocked from creating the log file for the given path, it creates the log files in the drive with the Windows directory. Input your commercial ID key.
- By default, the script sends log information to both the console and the log file. To change the default behavior, use one of the following options: logMode = 0 log to console only logMode = 1 log to file and console logMode = 2 log to file only
- For troubleshooting, set isVerboseLogging to $true to generate log information that can help with diagnosing issues. By default, isVerboseLogging is set to $false. Ensure the Diagnostics folder is installed in the same directory as the script to use this mode.
- Notify users if they need to restart their computers. By default, this is set to off.
- After you finish editing the parameters in RunConfig.bat, you are ready to run the script. Take note for production environments it needs to run in the SYSTEM context.
See below for changes I made to my own script:
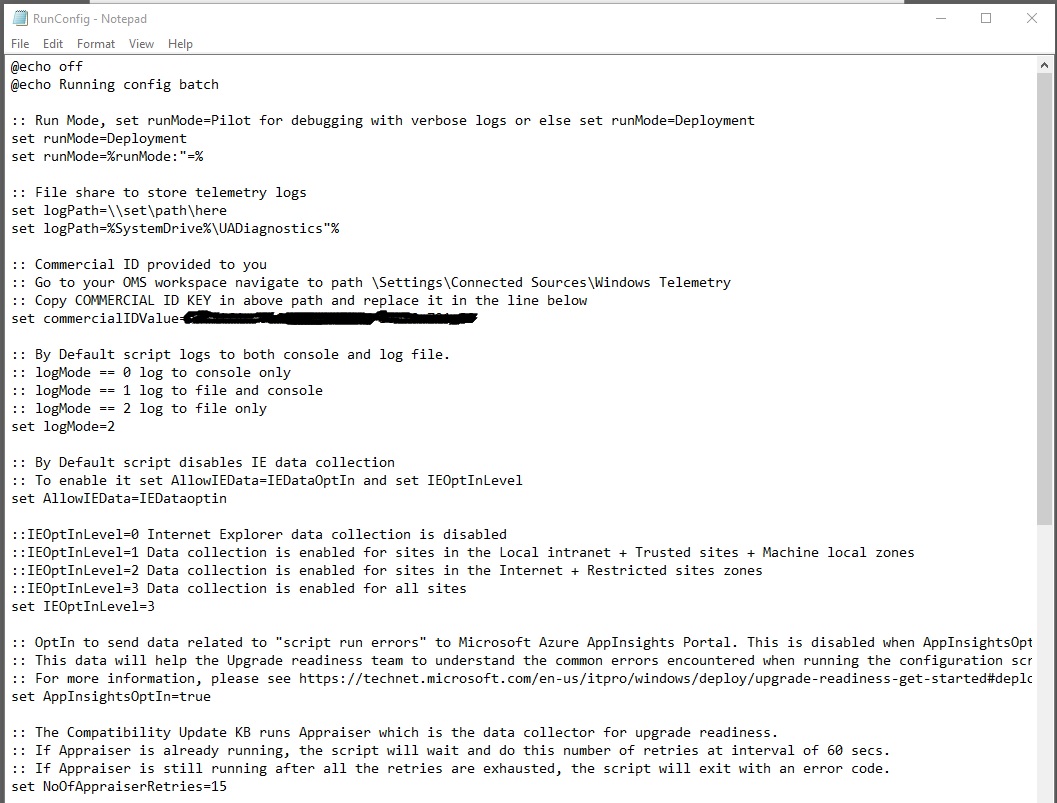
I basically set up my script to collect data and create a log just in case there are any failures.
I also allow it log sites my users visit since so I can start to build a list of internal sites my users visit and make sure they are compatible with Windows 10. I set up my script to log all sites visited including external sites but you can set yours up to log only internal sites.
You need to run the production script under the SYSTEM Account. There are many ways to do this but I personally chose to use Task Scheduler. Use what works for you but with task scheduler I can export a task and push it to multiple users.
Here’s a general summary of what I did
Created a task in task scheduler Configured it to run under the System Account Configured it to “Run with the Highest Privileges” Configured it to be a Windows 7 task Configured it to run every day at 2pm Pointed it to the script location
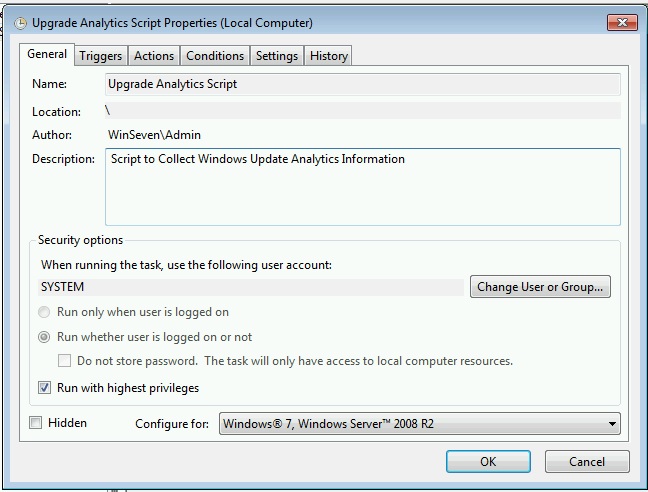
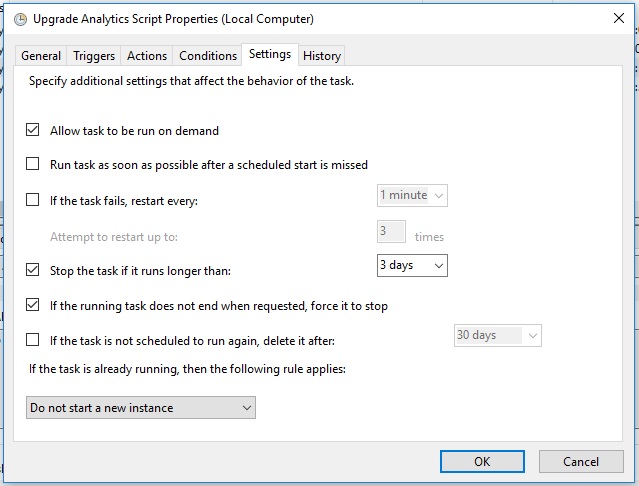
Everyone does thing differently but below are screenshots of the changes I made to my task. The most important thing you need to do is make sure you set the task to run in the SYSTEM account and make sure it runs with the highest privileges.
Breakdown:
Create a task by going to “Task Scheduler” and click on Create a task which is on the right.
Call it what you want and make sure, you change the “When running the task, use the following account” to “SYSTEM”
You need to change the Account that the task will run under to the System Account
Select “Run with the Highest Privileges” Click on “Change User or Group” Click on Advanced Click on Find Now Configure For: Windows 10
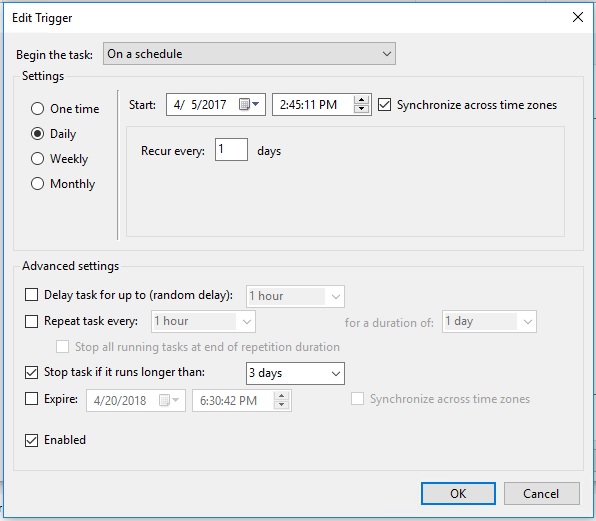
Set a Trigger: I set mine to run daily at 2pm, it’s up to you to choose what cadence you want.
The product group says that is no longer necessary to run the script every day to upload data as the telemetry service is now smart enough to send regular telemetry on any changes.
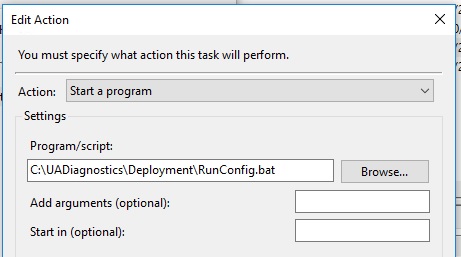
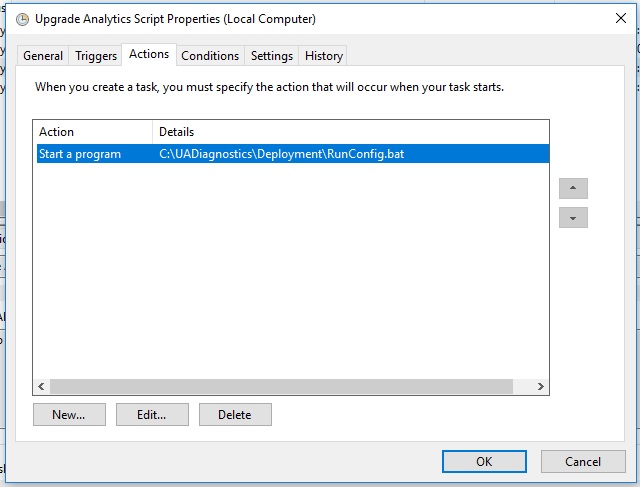
Under Actions leave it on “Start a Program” and navigate to the script using browse. Keep in mind it should be in a location every machine can reach so you might want to put it on a network share
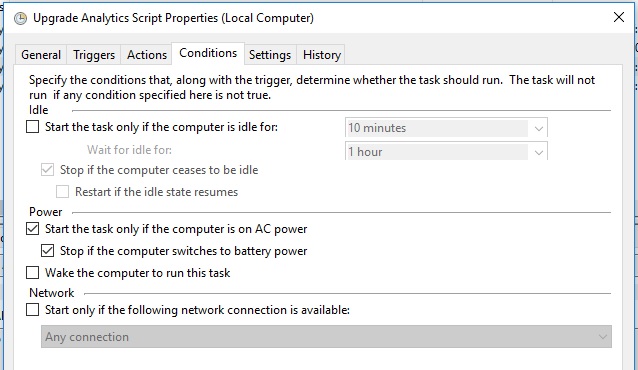
If you want to run this on laptops, then pay attention to the conditions tab. You might not want it to run on AC power.
Settings Tab: The big thing I did here was to allow the task to be run on demand, so I can test it to make sure it works
Since I chose to log data I can check the logs to see if the task runs when it should. What you want to see is “Script Finished Successfully”.
If you see anything else, then your script failed to complete

It takes approximately 48 hours but if your script runs successfully your data should eventually show up in the OMS portal
It takes about 24 - 48 hours for the data to show up in the portal but eventually I see this

I can now go in and look at the data collected on that machine and review it by simply clicking on the "Upgrade Analytics preview" tile

I can click on the different options and I clicked on "Not Reviewed" and then I can export it using the export option
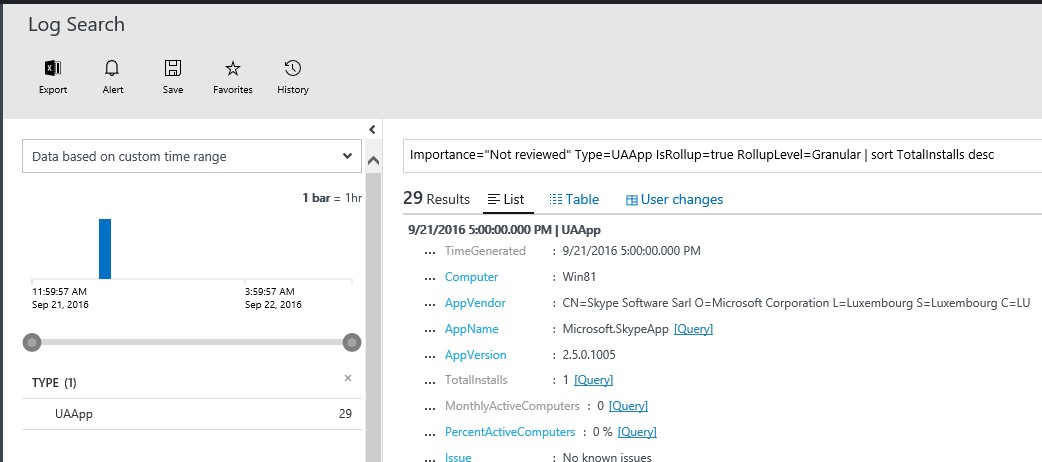
By default it exports it into an excel spreadsheet

Exported Excel Sheet

There’s a lot you can do with the tool which I haven’t covered but I hope you get an idea of how it works. If you are into OMS you can use the data collected just like you can use data from other sources and build reports.
I didn’t cover windows 10 in this talk but it can also collect data from windows 10. The big thing to note is that you must have Telemetry turned on to at least collect basic information from your machine using the policy under Computer Configuration > Administrative Templates > Windows Components > Data Collection and Preview Builds. You can read more about that here
Further Reading:
Upgrade Analytics Architecture
https://technet.microsoft.com/itpro/windows/deploy/upgrade-analytics-architecture 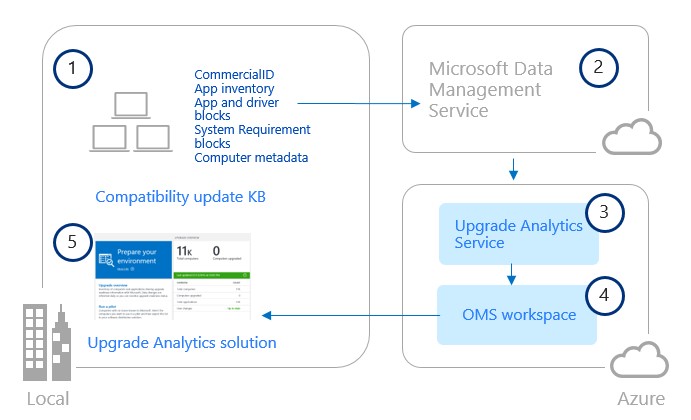
Upgrade Analytics requirements
Comments
- Anonymous
September 30, 2016
My Azure tenant free trial subscription does not shows up in "Select your Azure subscription" in SCEANRIAO #2. I created the Azure free trial subscription approximately 18 hours ago. How long do I have to wait for it show up in "Select your Azure subscription" in SCEANRIAO #2? Thanks!- Anonymous
September 30, 2016
Jim I created my Azure tenant so long ago I didn't have to deal with the wait period you are seeing so I don't have a specific answer. My question would be can you log into the Azure tenant at portal.azure.com tenant with the same account you are using to create your Windows Upgrade Analytics workspace?
- Anonymous