Visual Studio Team Services Release Management IIS Web Deployment vnext
Modern Lifecycle Development requires teams to be agile and work with a DevOps mindset. To realize that vision fully, it is paramount to have a robust release pipeline for managing the releases. Release Management vNext is a VSTS service that enables teams to automate the deployment of their applications in different environments and manage releases effectively with great traceability. RM vnext service makes it possible for teams to do continuous integration and continuous delivery with a sophisticated approval and configuration management workflow. RM vNext is in the Public Preview stage currently.
In this blog post, I will demonstrate using RM VNext for an OnPrem deployment using On Prem Build/Release Agents set up. We will be deploying a simple MVC application which will be packages as a zip file for Web Deploy deployment using OOB IIS Deployment Task. We will set up both Continuous Integration and Continuous Deployment for this sample application.
Create the ASP.NET Web Application
1- Create a Visual Studio VS 2013/2015 ASP.Net Web Application.
2- Once the project is created, check in the Solution into the appropriate VSTS Team project. It is assumed here that you have a VSTS project in place.
Create a Build Definition for the Project in VSTS
3.1 We need to go to the Build TAB.
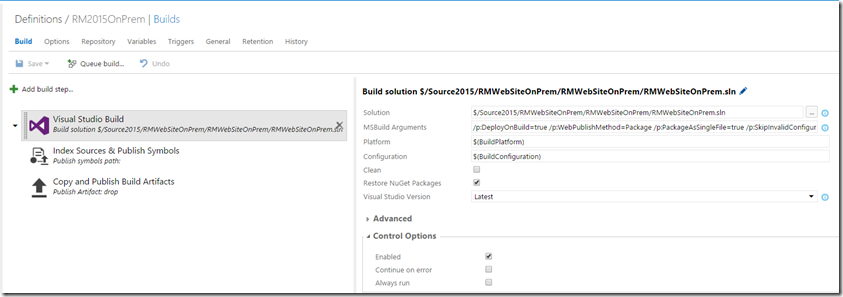
3.1 – Configure the Build Definition. I will be using Visual Studio Build for this example.
3.2- Set up the Repository for Build.
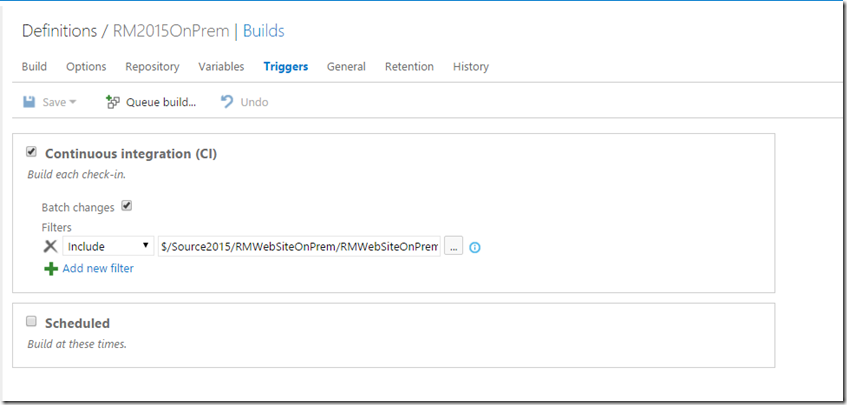
3.3- Set up the CI and Scheduled Build times if needed.
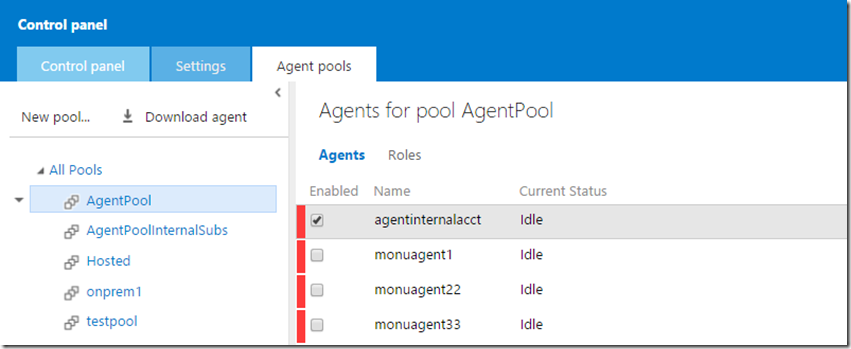
3.4- Set up the Agents for the Build. Agents for the build/release are setup through the Agent Pools Sub Tab within Control Panel. For more information you can go here - https://msdn.microsoft.com/Library/vs/alm/Build/overview
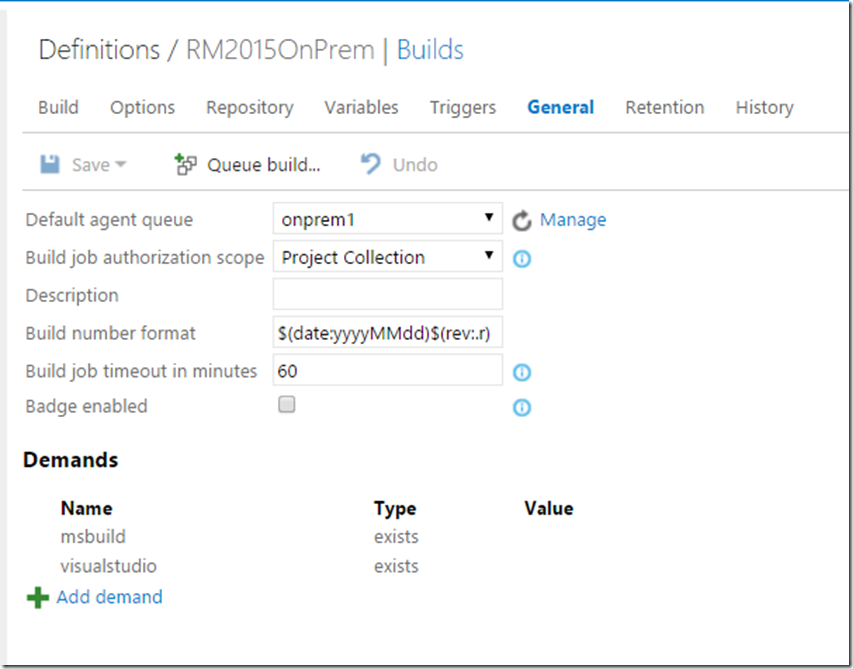
3.4.1 – Once you have build/release agents set up, you need to configure them for the Build using ‘General’ TAB.
3.5 – Set up the Index and Publish Symbols.
3.6 – Copy the Artifacts of the Build and Publish the Artifacts to Drop Location on the Server. This will be the location to later on pick the build artifacts for the Release.
3.7 – Queue up the Build.
3.8- Build should complete and artifacts should be available in the Drop Location on the server.
Create Release Definition
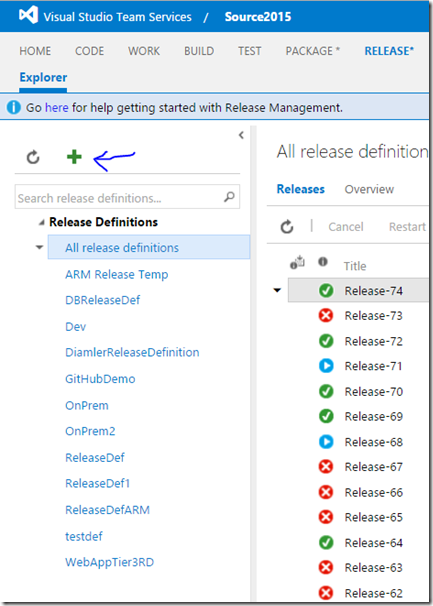
Next we will work on the Release part for Deploying the Application to an On Prem Environment using Release Management. We need to go to the Release TAB.
4.1- Create a Release Definition.
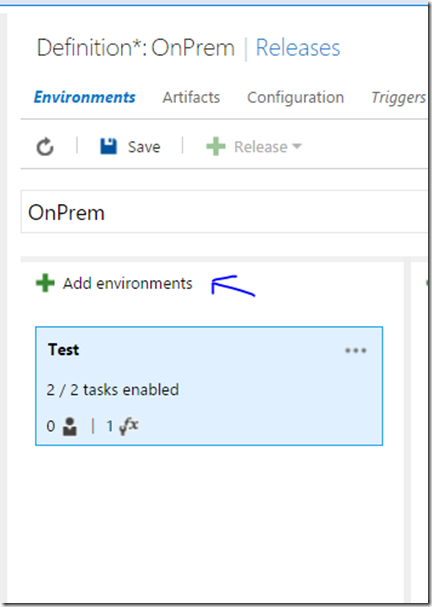
4.2- Configure Release Definition for an On Prem Deployment. Create Environment
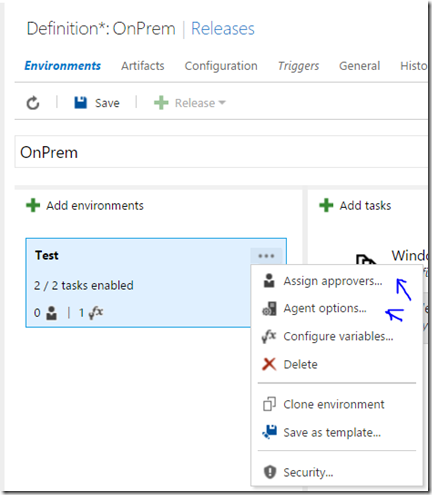
4.2.1 – Configure the Environment with the Approvers, release Agent.
There are options for Pre-Deployment and Post-Deployment Approval. Agent options allow you to configure the Agent for release. The agent you configured for Build can be used for Release as well. You can also use Configure Variables option for tokenization of certain configurations which are environment specific.
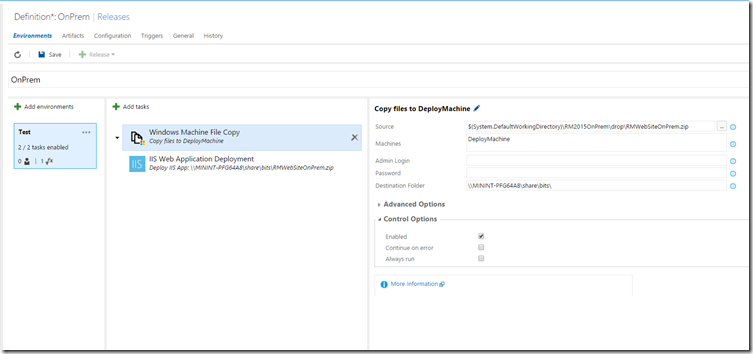
4.2.2 – Add Tasks to the Release Definition.
4.2.3 - Create a Windows Machine File Copy to copy the Build Artifacts to a //Share location on the On Prem Machine
Keeping in mind when working on Prem Deployment, the Build/Release Agent needs to be configured on an On Prem Machine so that they have clear line of sight to the servers which need to be deployed which are on Prem as well.
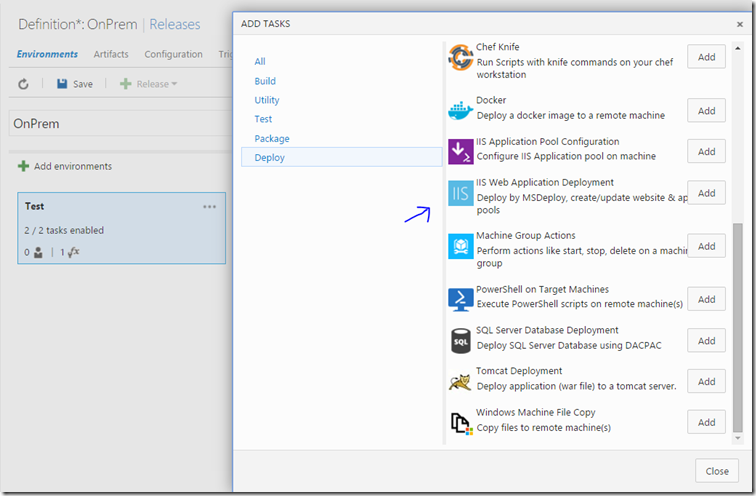
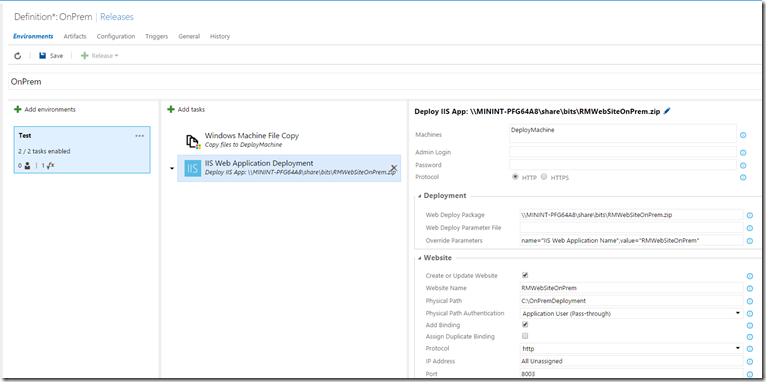
4.2.4 - Add an IIS Web Application Deployment task to do the On Prem Deployment
For enabling this, we need to create Deploy Machines which is a machine group which makes it easy to do the deployment. You can also specify the machines using the Machine IP’s or FQDN with ports but Machine group is recommended.
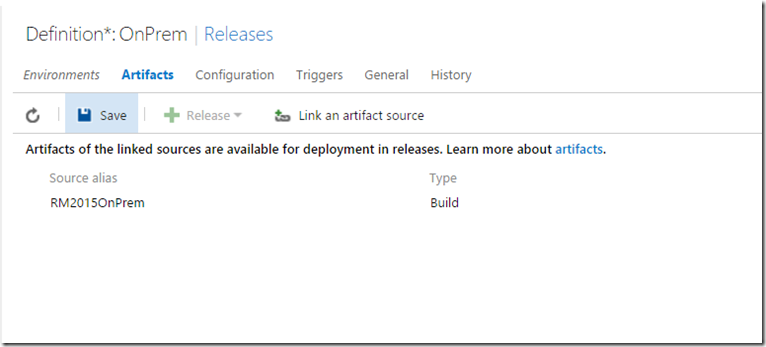
4.2.5 – We now link the Release to the Build Artifacts.
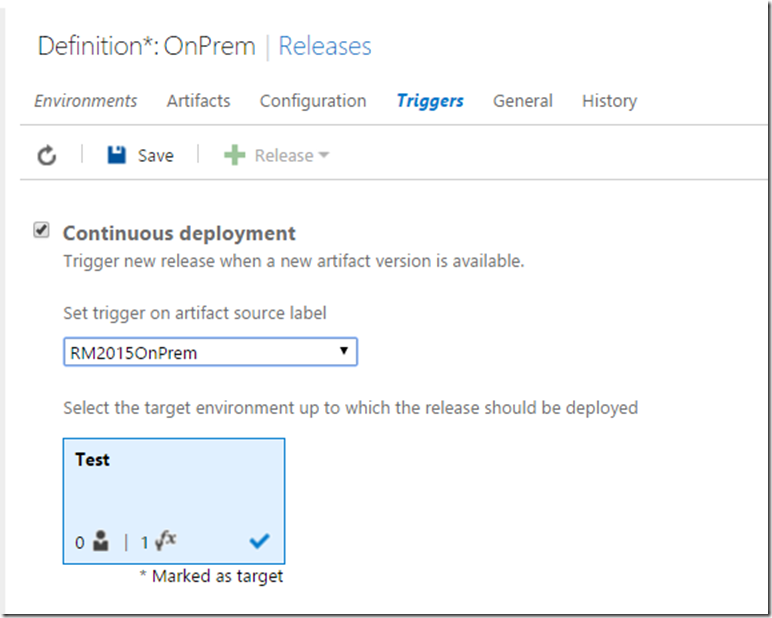
4.2.7 – If you need Continuous Deployment, you can check the CD check box and provide the Build Definition.
This will ensure Release to the environments when build is kicked off and completed.
4.2.8 – For creating the Machine Group Machines, we need to go to Test TAB and create a Machine Group under Machines sub TAB.
4.2.9 – The machine group has name of the machines and the WinRM port with credentials for accessing them.
4.2.10- Create a Release by specifying the Build and the Environment to be released to.
4.2.11 – On Prem Release is successful.
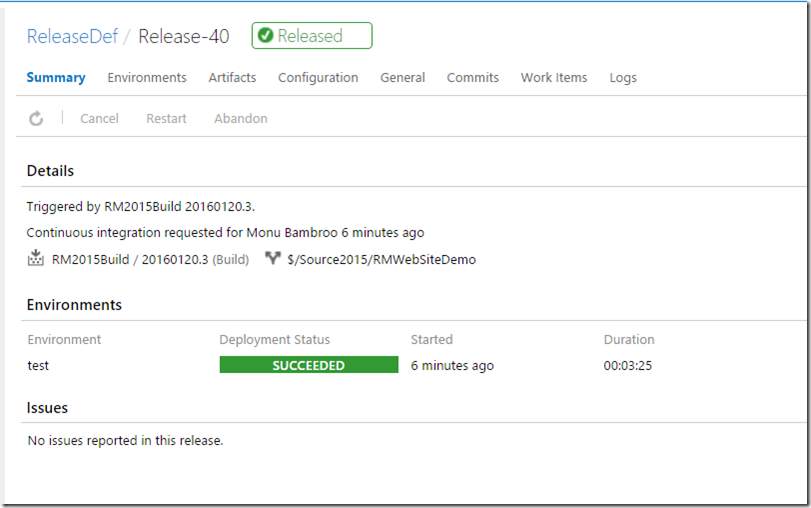
Here is how the Build and Release Summary reports look. Great insight into the Changesets, Associated Work Items, Test cases run, Code Coverage reports.
Build Summary Report
Release Summary Report
You can also check out https://msdn.microsoft.com/library/vs/alm/release/overview for more information. Happy Releasing using RM Vnext service
Comments
Anonymous
February 12, 2016
Hello, the IIS tasks are not available for me in VSTS. Is it necessary to download it?Anonymous
February 13, 2016
The comment has been removedAnonymous
February 14, 2016
Awesome. Thanks for the reply Monu!Anonymous
June 29, 2016
Great tutorial. However one question / suggestion: In point 3.1 you mention to configure the Visual Studio Build task. I can see in the screenshot that you have configured some parameters. However they are not all captured fully by the screenshot. Can you maybe give a complete list of all the needed parameters? Maybe possibly elaborate a bit more detailed about each of them as well (which is just easy for me, but I can also look each of them up).- Anonymous
November 10, 2016
Hi Maurits, Here is a good documentation on all the build variables and how to use them.https://www.visualstudio.com/en-us/docs/build/define/variables
- Anonymous
Anonymous
November 07, 2016
I thereI would also like to get an insight about the MSBuild parameters,please!- Anonymous
November 10, 2016
The comment has been removed
- Anonymous

