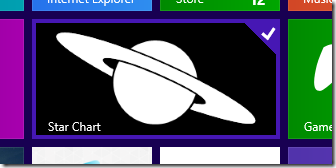
Windows 8 Style CheckBox/RadioButton in Windows Phone
I love the “checked” style in Windows 8.
Clean, slick, I just like the style. So I implemented it in Windows Phone as a style. The color in the style matches the phone theme, so it’s pretty flexible .
To get this style in your app, follow these steps.
1) Download the resource file that has these styles. (Available at the end of this post)
2) Open your project in Blend. (Yeah, you could open Visual Studio, but I’ll show you why you shouldn’t.)
3) Right-click on Resources folder (or whatever folder you want to add your resources) and click “Add Existing Item…”
4) Select the Win8_CheckBo_Radio_Styles.xaml file.
Now. If you did this in Blend, you may notice that your App.xaml has changed. Blend has added the following code to incorporate this new ResourceDictionary into your project and make these styles available to all pages:
 <ResourceDictionary.MergedDictionaries>
    <ResourceDictionary Source="Resources/Win8_CheckBox_Radio_Styles.xaml"/>
</ResourceDictionary.MergedDictionaries>
Visual Studio totally did not.
5) Now you can go to your Checkbox, right-click on it and select Edit Template –> Apply Resource –> ImageCheckBox
6) For your RadioButton, right-click and select Edit Template –> Apply Resource –> ImageRadioButton
And you should have your custom style applied. Need to update it? Right-click –> Edit Template –> Edit Current and you can jump right into the control to edit it
Win8_CheckBox_Radio_Styles.xaml
Comments
Anonymous
March 04, 2013
Hi Mattias, thanks for sharing such useful tips on WP8 I find your blog very informative especially if you think there is very limited source on this topicAnonymous
September 15, 2013
Hi. The style is great! How do you make different images as the background?


