1-Click Document Generation in CRM 2016 (Web and Mobile)
Formalized documents are a cornerstone of business dealings – from quotes and contracts to work orders and invoices. Leveraging CRM data to automatically generate these documents from standardized templates enhances productivity, reduces human error and ensures standardized communication across the company
In CRM 2016 you can 1-click generate documents for any end-user facing entity.
In this article we'll first take a look at how you can create a document based on one of the standard templates included in the sample data. Then we will see how you can create your own templates. The templates will be available for you to use in the web as well as the mobile app.
How to create a document based on a standard template
To see a list of available templates in Dynamics CRM 2016 navigate to Settings – Business - Templates 
Figure 1
Click Document Templates to open the "Available Templates View"
In the "Available Templates View" note there are a number of Microsoft Excel and Word templates, including a Word Template “Opportunity Summary” (1). We'll create a document based on this template.
If you open the template you see that the Associated Entity Type is Opportunity (1). This means that you can use this template from any Opportunity record
Lets navigate to Sales – Opportunities – My Open Opportunities (1) and open an Opportunity record, e.g. "Will be ordering a 110 items...." (2)
In the opportunity form click the More menu (1) – Word Templates (2) – Opportunity Summary (3)
Note – you can *create* a new template from this menu too
The document based on the templates downloads to your computer (1)
Open the document from the download location and notice the values from the opportunity is merged into the document, e.g. the Subject (1) and the Current Situation (2)
How to create your own template
You create templates using the XML Mapping Pane in Microsoft Word. To do that you download empty templates (Word documents( from CRM that has an XML attached (OpenXML) for CRM attributes and related entities. Then you insert controls into the Word document, and finally upload the template back into CRM. The uploaded templates can be used across the organisation or individuals.
Steps
- Navigate to any CRM entity OR Settings -> Templates -> Document TemplatesUse “New” to download a new blank template. This is your starting point
- Select between Word or Excel Templates
- You will get a file download. This is your base template
- When you open up Word, you need to enable XML Mapping pane under Developer Panel to start
- Once you’re done editing, upload back into CRM. This will create a “template” entity
- Now anyone with access to the template entity can generate a document in 1 click
Lets look at how to create a new Template with the Associated Entity Type = Lead.
To test it out create three tasks for one of your leads
We’ll create a simple Word template that lists the Lead's Topic (1) field as well as the three tasks (2-4) with their subjects and due dates
To create a new template navigate to Settings – Business – Templates and click New (1)
Select to create a Word template (1)
Pick the Lead entity to filter by (2)
Click Select Entity to display the "Select Entity" dialog
The relationships you select in the "Select Entity" dialog determine what entities and fields are available later when you define the Word template. Only select relationships you need to add CRM data to the Word template
Check the Lead-Task 1:N Relationship (1) enabling you to list the Lead’s three tasks as discussed earlier. Then click Download Template (2) to download the template to your computer
The template is downloaded (1)
You can find the downloaded template (1) in your designated Downloads folder on your file system. Note the name is auto generated from the entity type and timestamp.
Double-click the document to open the template in Word
At this point the template is empty (a blank document). What you need to do next is enable the Developer tab and then use the XML Mapping Pane to insert your CRM Lead fields into the template
To enable the Developer tab click File – Options – Customize Ribbon (1) – and check the Developer checkbox (2). Then click OK (3) to close the Word Option dialog and return to the Word Template
Click the now visible Developer tab (1) to display the Developer ribbon
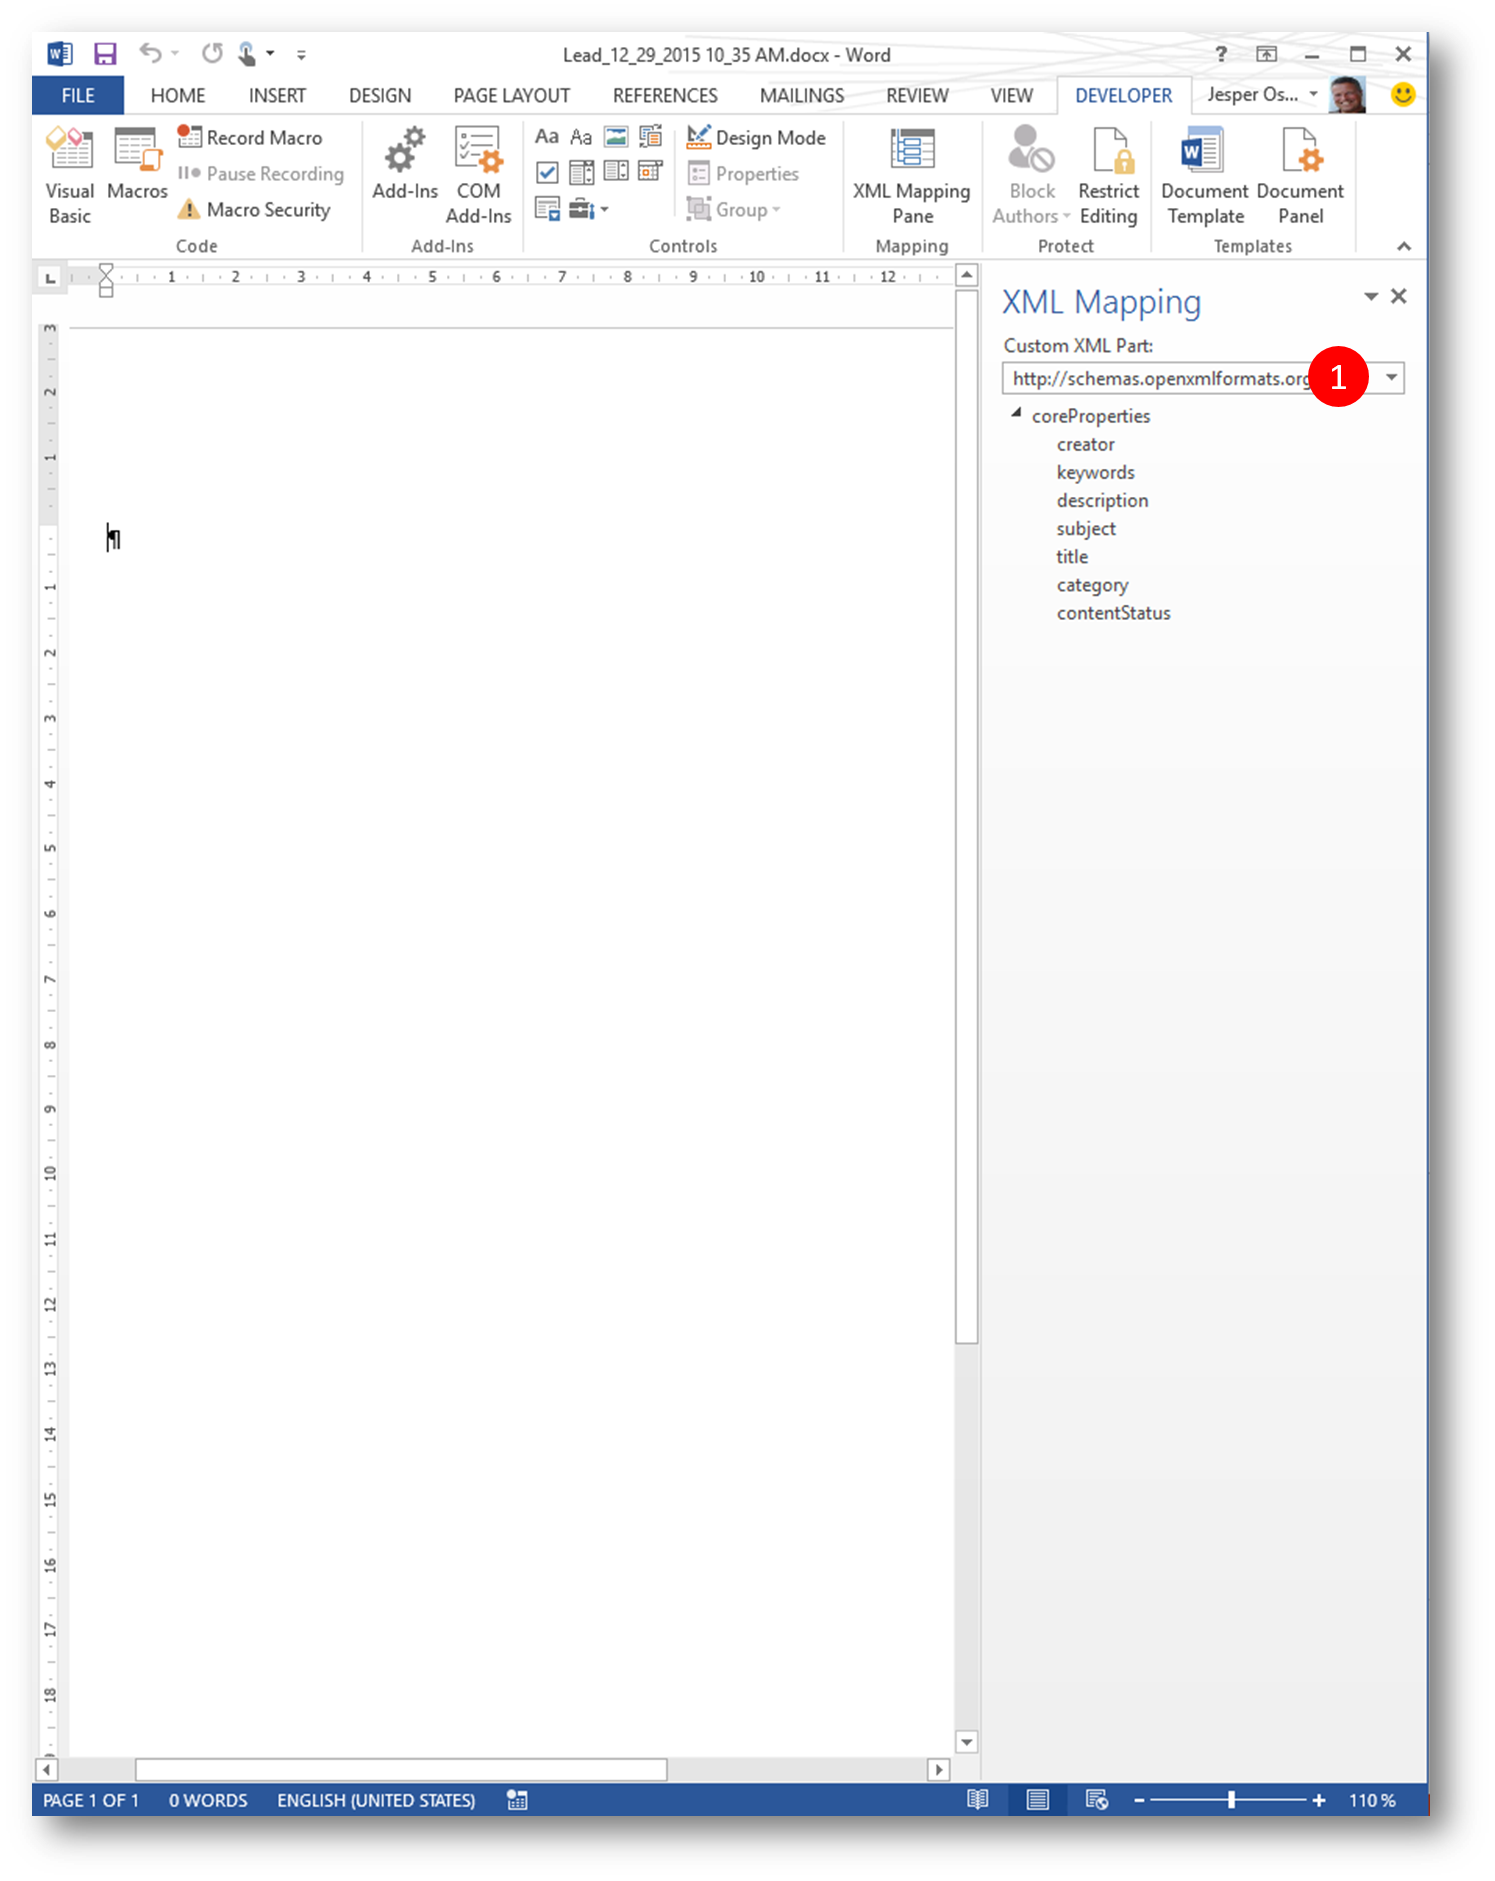
In the Developer ribbon click the XML Mapping Pane to display the XML Mapping Pane
Expand the "Custom XML Part" drop down (1)
And pick the schema urn:microsoft-crm……. (1) to show the Lead fields
The Lead fields is now available to you.
Start designing your template. E.g. type “For the lead:”
Then in the task pane right-click the subject field (1) – click Insert Content Control (2) – click Plain Text (3) to insert the subject field
The subject field inserted in the template (1)
Now in the task pane scroll down to "Lead_Tasks" (1) and expand the section to see the available task fields
Continue designing your template, e.g.. using the normal Word Table feature to insert a 2x2 table. Type headers, e.g. Subject and Due (1). The table will eventually be used to list the three tasks each in separate rows.
In the left cell in the lower row insert the subject field (1) and in the right cell insert the scheduledend field (2)
To make the last row a repeating row (there is three tasks in the lead), select last table row (1)
Then in the task pane right-click "Lead_Tasks" (2) – click Insert Content Control (3) – click Repeating (4)
The last row is now a repeating row.
Save the template with your desired name (1) in a location (2) you can remember (in this example perhaps use the name My_Lead_Tasks_Template_v1)
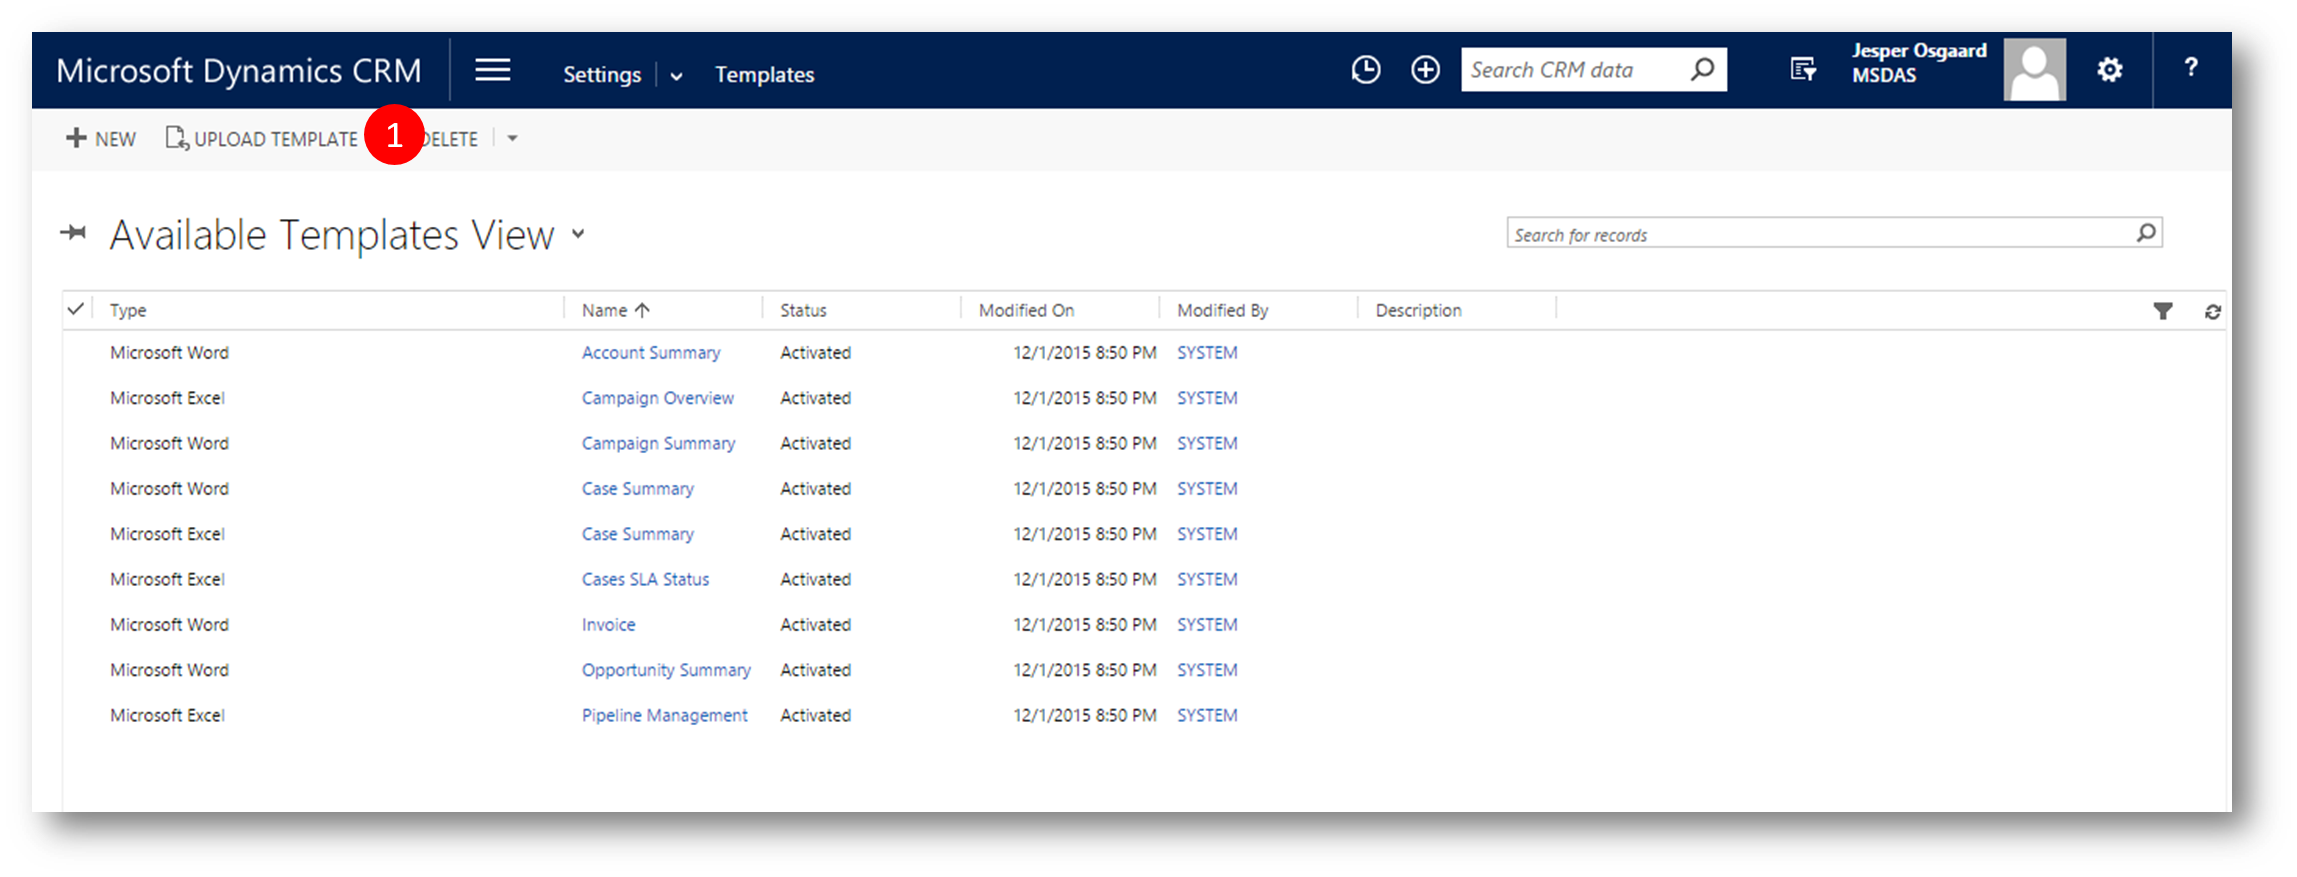
Back in CRM navigate to Settings – Business – Templates – Document Templates, and in the "Available Templates View" click Upload Template (1) to display the "Upload Template" dialog
Drag your template from the File System folder (1) to the "Upload Template" dialog (2)
Click Upload (1)
Note that the template is uploaded with the name you chose when saving in Word (1) and Associated Entity Type = Lead (2)
Back in the "Available Templates View" you see your new template listed with your name under Modified By (1)
To test your new template navigate to the "My Open Leads" view and click the lead you created with the three tasks (1)
Click the More menu (1) – click Word Templates (2) and then click My_Lead_Tasks_Template_v1 (3) or the name you chose to create and download the document
The document is downloaded (1). Open the document in Word.
Note that the Topic value is inserted after the colon in line #1 (1) and the three tasks are inserted in the table with their subjects and due dates (2-4)
Using the template in your CRM for Phones app
Open your app and navigate to Leads
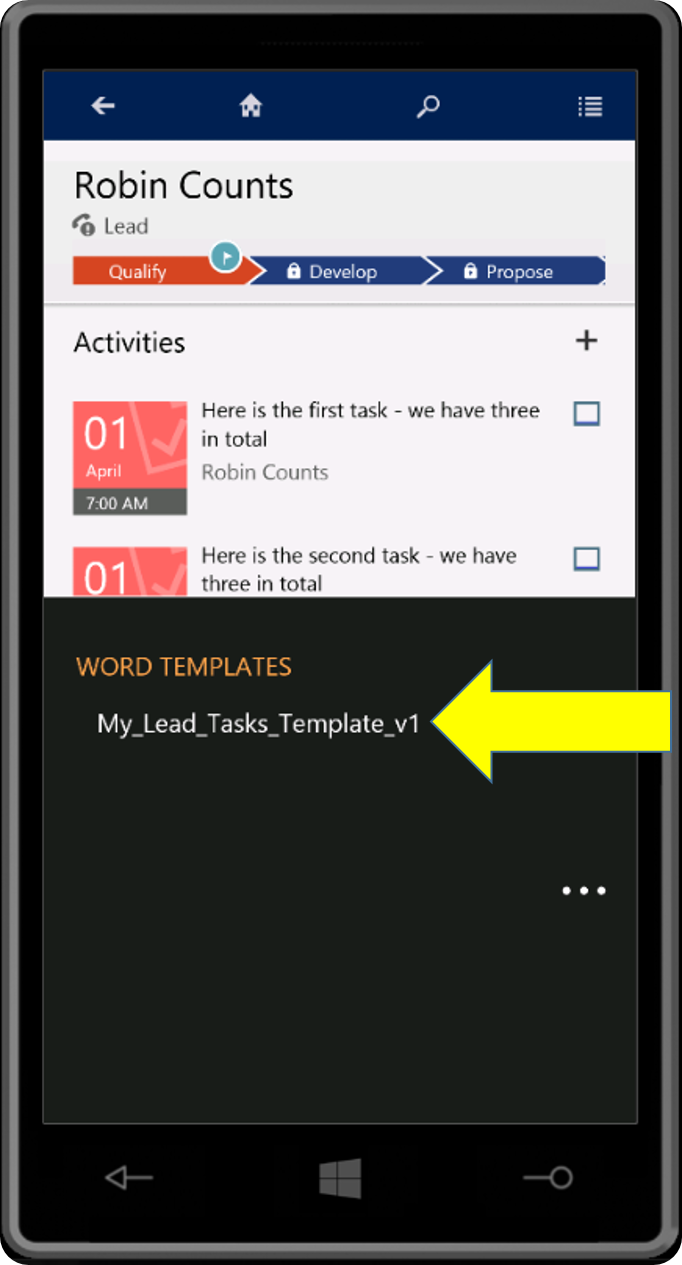
Open the lead and click the dots in the lower right corner to open the menu
Click your template
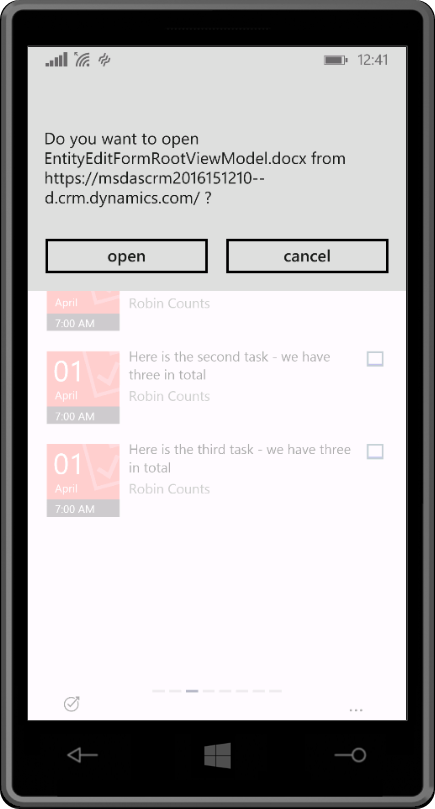
Confirm that you wish top open the document in Word Mobile
And voila - you are ready to edit the document
I hope you will enjoy and benefit from this new 1-click generate documents for any end-user facing entity feature.
Note
- Related Entities will be 1 level deep.
We will add support for more levels in future. Currently relationship selector only goes 1 level. Also note that lookup fields do not have support for fully accessing the lookup’s data yet beyond primary field - Org templates/personal templates
Similar to Excel we’re modelling security based on template record ownership. So you can have org level templates, or team/user level. Only admins can create org-level templates. Since its based on entity security, you can share/assign templates
See also
- Using Word templates in CRM - link


