Configuring Mac for Windows 8 and Windows Phone Development with VMware Fusion 5.02: Installing and Configuring (Part 1 of 3)
I have had quite a few people ask me for help configuring Windows 8 on a Mac so they can do Windows 8 and / or Windows Phone development. I worked with a few of my peers to document the steps for 5 different options – Boot Camp, Parallels, VMware Fusion, VirtualBox and Azure. I took the lead on creating the documentation for VMware Fusion 5.02. I decided to break this into 3 different posts to make it easier to consume based on the specific content needed.
Keith Mayer already has the Azure document posted on his blog.
Harold Wong
Installing and Configuring VMware Fusion 5.02
There are several choices available to you to run Windows 8 virtually on a Mac. This guide focuses on VMware Fusion 5, but you may also use Parallels or Oracle VirtualBox. The instructions below are a compressed set of steps to get up started with Windows 8 on VMware Fusion 5.02.
1. Have access to the Windows 8 ISO or create a bootable Windows 8 DVD from a Windows 8 ISO. If you will be doing Windows Phone development as well as Windows 8, then install the 64 bit edition of Windows 8. |
You will need to download or acquire Windows 8. You can download a free 90 days evaluation version of Windows 8 from the Evaluation Center. Please note that this version will expire and is not upgradeable.
You can also elect to purchase a fully licensed upgrade Windows 8 at retail. If you or your company happen to be MSDN subscribers, you can get the RTM version of Windows 8 from the MSDN Subscriber Downloads page.
To learn how to create a Windows 8 Bootable DVD check these Bing results. |
2. Download VMware Fusion 5 from https://www.vmware.com/products/fusion/overview.html. The 30-day trial can be found here: https://my.vmware.com/web/vmware/evalcenter?p=vmware-fusion5. |
|
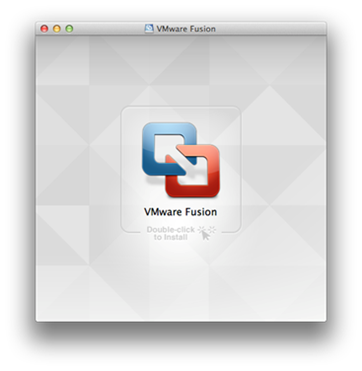
3. Run VMware Fusion and double-click to Install. |
|
4. If the following warning appears, click Open to continue. |
|
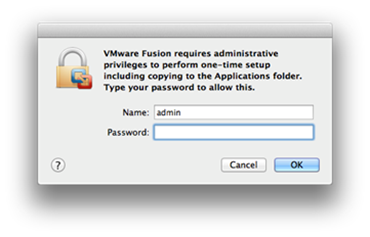
5. To install VMware Fusion, you will need to enter the username and password of an account with administrator privileges. |
|
6. When prompted with the option to help improve VMware Fusion click either No or Yes to continue.
|
|
7. Enter your User Name and Password to continue. |
|
8. Enter the license key that you purchased or the 30-day trial license key for VMware Fusion. Then click OK to continue. |
|
9. Once the installation completes, the VMware Fusion 5 start page will be displayed. Click Create New to create a new virtual machine. |
|
10. The New Virtual Machine Assistant will start. Insert the Windows 8 installation DVD or click Continue without disc if using the Windows 8 ISO image. |
|
11. In this example, I have chosen to Continue without disc. Click the drop-down arrow next to Choose a disc or disc image. Browse to and select the Windows 8 ISO image. |
|
12. After selecting your Windows 8 ISO image, click Continue. |
|
13. When presented with the option to configure Processors and Memory, select 2 processor cores and 2048 MB for memory settings. Expand Advanced options and check the option for Enable hypervisor applications in this virtual machine. |
|
14. Bring up the Settings for the new virtual machine. In the Other section, click Advanced. |
|
15. In the Advanced menu for Preferred virtualization engine, choose Intel VT-x with EPT from the drop-down list. Close the window. This is a crucial step to enable the Windows Phone emulator to run in the Virtual Machine. |
|
16. Open Finder. |
|
17. Navigate to Documents, Virtual Machines. |
|
18. Right-click on the newly created virtual machine and select Show Package Comments from the menu. |
|
19. The contents of the virtual machine package will be displayed. Select the file with the .vmx extension. |
|
20. Right-click the file, expand Open With and then select TextEdit. Scroll to the bottom of the file and enter the following new line: hypervisor.cpuid.v0 = “FALSE” Close and save the file. This is a crucial step to enable the Windows Phone emulator to run in the Virtual Machine. |
|
21. From the virtual machine library, start the new VM by clicking the Play symbol. |
|
22. Install Windows 8. |
Please see Part 2 of 3 |
23. Install Visual Studio 2012 tools. |
Please see Part 3 of 3 |


