Installing SQL Server 2012 : New in Data Quality Services (DQS)
With SQL Server 2012, the product launched the all new Data Quality Services aimed at providing a Knowledge based repository for managing the quality of large amount of data. This blog post talks about the installation steps and some of the tips and tricks for installing your DQS Component while performing SQL Server Install.
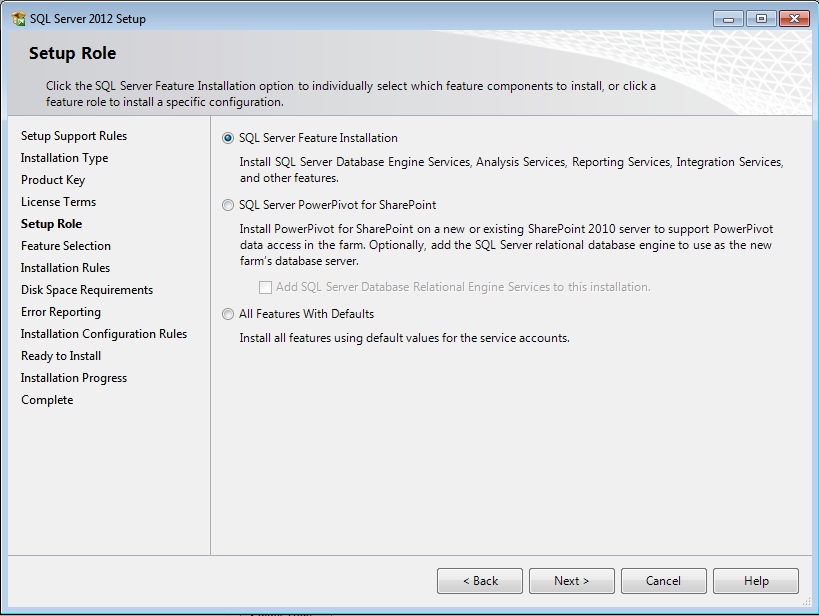
When you start the new installation, after a few screens of setup suport files and providing the key and accepting terms you get to see the below screen.
To install DQS you can either choose the first option to specify the features and components you want to install or you can select the last option which will install all the features. Note that while you can choose the second option and install a Database engine along with it, but that option does not provide you DQS component feature selection option.
If you want to install a PowerPivot instance installation on your machine and want to use that instance as the DQS server instead of the default instance for some reason, you will still have to install a default instance or a named instance (But not without a trick, check the end of blog for details) of DB engine using either the 1st or the 3rd option below. We will talk about this in detail a little later in the blog.
For now lets assume you choose the first option.
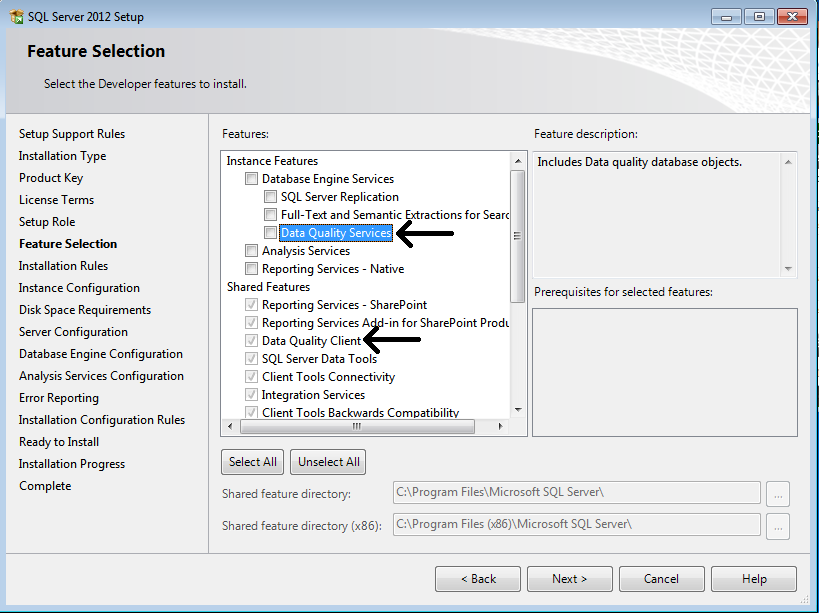
Next as you can see in the below screenshot the DQS Client comes as a shared component in the SQL Server Install media while the DQS services is listed under the DB engine feature. Choose both of them and then click thorough the next screens with the standard steps and complete the installation. Note that even though the installation is complete the DQS Server is not yet installed on your instance, the setup actually just copies the DQS files on the SQL path.
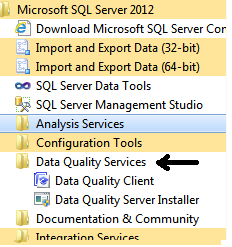
Once the installation is complete you will see the following new subfolder inside the Microsoft SQL Server 2012 Parent folder in the Start Menu. The subfolder contains two items, 1) the Client 2) Shortcut to Server installation file, if you click on the Client at this point and try to connect to the server engine you just installed, you will get an error saying DQS is not installed on this server.

To install the server click on the Data Quality Server Installer Item which will launch a command prompt executing the DQSInstaller.exe from the Binn path of SQL Server install location, with elevated permissions to install the DQS server components for you,this includes the installation of 3 DQS databases on your SQL Engine.
You can now connect to the DQS Server using the client.
All the steps mentioned above go fine if you are installing the DQS on the default instance of the SQL server without making any changes.
Lets say you now have 2 different requirements.
1. Installing the DQS on default instance of SQL server with a different Instance ID. Check the following post for the same.
2. Installing the DQS on a named instance or PowerPivot Instance of SQL Server. Check the following instance for the same.
The DQSInstaller does not yet provide any option to direct the install to a particualr server or instance...may be something which users may desire in future also it does not provide any configuration option for the installation, nor any GUI at this stage, another item to the desired list. Whether this type of installation is officaily supported or not is something to be checked.
Comments
- Anonymous
January 01, 2003
The comment has been removed

