빠른 시작: Azure Spring Apps에 앱 빌드 및 배포
참고 항목
기본, 표준 및 엔터프라이즈 계획은 2025년 3월 중순부터 사용되지 않으며 3년의 은퇴 기간이 있습니다. Azure Container Apps로 전환하는 것이 좋습니다. 자세한 내용은 Azure Spring Apps 사용 중지 공지 사항을 참조하세요.
표준 소비 및 전용 계획은 2024년 9월 30일부터 사용되지 않으며 6개월 후에 완전히 종료됩니다. Azure Container Apps로 전환하는 것이 좋습니다. 자세한 내용은 Azure Spring Apps 표준 사용량 및 전용 계획을 Azure Container Apps로 마이그레이션을 참조 하세요.
이 문서는 기본/표준 ❎ 엔터프라이즈에✅ 적용됩니다.
이 빠른 시작에서는 Azure CLI를 사용하여 Spring 애플리케이션을 빌드하고 Azure Spring Apps에 배포하는 방법을 설명합니다.
필수 조건
- 이 시리즈의 이전 빠른 시작을 완료합니다.
샘플 앱 다운로드
다음 단계를 사용하여 샘플 앱을 다운로드합니다. Azure Cloud Shell을 사용한 경우 로컬 명령 프롬프트로 전환합니다.
새 폴더를 만들고 샘플 앱 리포지토리를 복제합니다.
mkdir source-codecd source-codegit clone https://github.com/Azure-Samples/azure-spring-apps-samples리포지토리 디렉터리로 이동합니다.
cd azure-spring-apps-samples
PlanetWeatherProvider 배포
다음 단계를 사용하여 PlanetWeatherProvider 프로젝트를 배포합니다.
Azure Spring Apps 인스턴스에서
PlanetWeatherProvider프로젝트에 대한 앱을 만듭니다.az spring app create --name planet-weather-provider --runtime-version NetCore_31자동 서비스 등록을 사용하도록 설정하려면 프로젝트의 appsettings.json 파일에서
spring.application.name값과 동일한 이름을 앱에 지정해야 합니다."spring": { "application": { "name": "planet-weather-provider" } }이 명령을 실행하는 데 몇 분 정도 걸릴 수 있습니다.
디렉터리를
PlanetWeatherProvider프로젝트 폴더로 변경합니다.cd steeltoe-sample/src/planet-weather-provider배포할 이진 파일 및 .zip 파일을 만듭니다.
dotnet publish -c release -o ./publish팁
프로젝트 파일에는 이진 파일을 ./publish 폴더에 쓴 후 .zip 파일의 이진 파일을 패키징하는 다음 XML이 포함되어 있습니다.
<Target Name="Publish-Zip" AfterTargets="Publish">
  <ZipDirectory SourceDirectory="$(PublishDir)" DestinationFile="$(MSBuildProjectDirectory)/publish-deploy-planet.zip" Overwrite="true" />
</Target>
Azure에 프로젝트 배포
다음 명령을 실행하기 전에 명령 프롬프트가 프로젝트 폴더에 있는지 확인합니다.
az spring app deploy \ --name planet-weather-provider \ --runtime-version NetCore_31 \ --main-entry Microsoft.Azure.SpringCloud.Sample.PlanetWeatherProvider.dll \ --artifact-path ./publish-deploy-planet.zip--main-entry옵션은 .zip 파일의 루트 폴더에서 애플리케이션의 진입점을 포함하는 .dll 파일에 대한 상대 경로를 지정합니다. 서비스에서 .zip 파일이 업로드되면 모든 파일과 폴더를 추출한 다음, 지정한 .dll 파일의 진입점을 실행하려고 시도합니다.이 명령을 실행하는 데 몇 분 정도 걸릴 수 있습니다.
SolarSystemWeather 배포
다음 단계를 사용하여 SolarSystemWeather 프로젝트를 배포합니다.
프로젝트에 대해 Azure Spring Apps 인스턴스에서 다른 앱을 만듭니다.
az spring app create --name solar-system-weather --runtime-version NetCore_31solar-system-weather는SolarSystemWeather프로젝트의 appsettings.json 파일에 지정된 이름입니다.이 명령을 실행하는 데 몇 분 정도 걸릴 수 있습니다.
디렉터리를
SolarSystemWeather프로젝트로 변경합니다.cd ../solar-system-weather배포할 이진 파일 및 .zip 파일을 만듭니다.
dotnet publish -c release -o ./publishAzure에 프로젝트 배포
az spring app deploy \
    --name solar-system-weather \
    --runtime-version NetCore_31 \
    --main-entry Microsoft.Azure.SpringCloud.Sample.SolarSystemWeather.dll \
    --artifact-path ./publish-deploy-solar.zip
이 명령을 실행하는 데 몇 분 정도 걸릴 수 있습니다.
퍼블릭 엔드포인트 할당
애플리케이션을 테스트하기 전에 solar-system-weather 애플리케이션에 대한 HTTP GET 요청의 퍼블릭 엔드포인트를 가져옵니다.
다음 명령을 실행하여 엔드포인트를 할당합니다.
az spring app update --name solar-system-weather --assign-endpoint true다음 명령을 실행하여 엔드포인트의 URL을 가져옵니다.
Windows:
az spring app show --name solar-system-weather --output tableLinux:
az spring app show --name solar-system-weather | grep url
애플리케이션 테스트
애플리케이션을 테스트하려면 solar-system-weather 앱으로 HTTP GET 요청을 보냅니다. 브라우저에서 추가된 /weatherforecast를 사용하여 공용 URL로 이동합니다. 예: https://servicename-solar-system-weather.azuremicroservices.io/weatherforecast
출력은 JSON입니다.
[{"Key":"Mercury","Value":"very warm"},{"Key":"Venus","Value":"quite unpleasant"},{"Key":"Mars","Value":"very cool"},{"Key":"Saturn","Value":"a little bit sandy"}]
이 응답은 두 Spring 앱이 작동하고 있음을 보여 줍니다.
SolarSystemWeather 앱은 PlanetWeatherProvider 앱에서 검색된 데이터를 반환합니다.
이 문서에서는 Spring 애플리케이션을 빌드하고 Azure Spring Apps에 배포하는 방법을 설명합니다. Azure CLI, Maven 플러그 인 또는 IntelliJ를 사용할 수 있습니다. 이 문서에서는 각 대안에 대해 설명합니다.
필수 조건
- 이 시리즈의 이전 빠른 시작을 완료합니다.
- JDK 17
- Maven 3.0 이상
- Azure 구독 구독이 없는 경우 시작하기 전에 체험 계정을 만드세요.
- (선택 사항) Azure CLI 버전 2.45.0 이상. 다음 명령을 사용하여 Azure Spring Apps 확장을 설치합니다.
az extension add --name spring - 필요에 따라 Azure Toolkit for IntelliJ입니다.
로컬에서 Spring 애플리케이션 빌드
다음 명령을 사용하여 샘플 리포지토리를 복제하고 샘플 폴더로 이동한 다음, 프로젝트를 빌드합니다.
git clone https://github.com/azure-samples/spring-petclinic-microservices
cd spring-petclinic-microservices
mvn clean package -DskipTests -Denv=cloud
프로젝트를 컴파일하는 데 5~10분이 걸립니다. 프로젝트가 컴파일되면 해당 폴더에 각 서비스에 대한 개별 JAR 파일이 있어야 합니다.
Azure Spring Apps에서 앱 생성 및 배포
다음 단계에서 CLI를 사용하여 Azure Spring Apps에 앱을 만들고 배포합니다.
이전 빠른 시작에서 다음 명령을 실행하지 않은 경우 지금 실행하여 CLI 기본값을 설정합니다.
az configure --defaults group=<resource-group-name> spring=<service-name>PetClinic
api-gateway및customers-service에 대한 2개의 코어 Spring 애플리케이션을 만듭니다.az spring app create \ --name api-gateway \ --runtime-version Java_17 \ --instance-count 1 \ --memory 2Gi \ --assign-endpoint az spring app create \ --name customers-service \ --runtime-version Java_17 \ --instance-count 1 \ --memory 2Gi이전 단계에서 빌드된 JAR 파일을 배포합니다.
az spring app deploy \
    --name api-gateway \
    --artifact-path spring-petclinic-api-gateway/target/api-gateway-3.0.1.jar \
    --jvm-options="-Xms2048m -Xmx2048m"
az spring app deploy \
    --name customers-service \
    --artifact-path spring-petclinic-customers-service/target/customers-service-3.0.1.jar \
    --jvm-options="-Xms2048m -Xmx2048m"
다음 명령을 사용하여 배포 후 앱 상태를 쿼리합니다.
az spring app list --output table이 명령은 다음 예제와 유사한 출력을 생성합니다.
Name               Location    ResourceGroup    Production Deployment    Public Url                                           Provisioning Status    CPU    Memory    Running Instance    Registered Instance    Persistent Storage
-----------------  ----------  ---------------  -----------------------  ---------------------------------------------------  ---------------------  -----  --------  ------------------  ---------------------  --------------------
api-gateway        eastus      xxxxxx-sp         default                  https://<service name>-api-gateway.azuremicroservices.io   Succeeded              1      2         1/1                 1/1                    -
customers-service  eastus      <service name>         default                                                                       Succeeded              1      2         1/1                 1/1                    -
서비스 확인
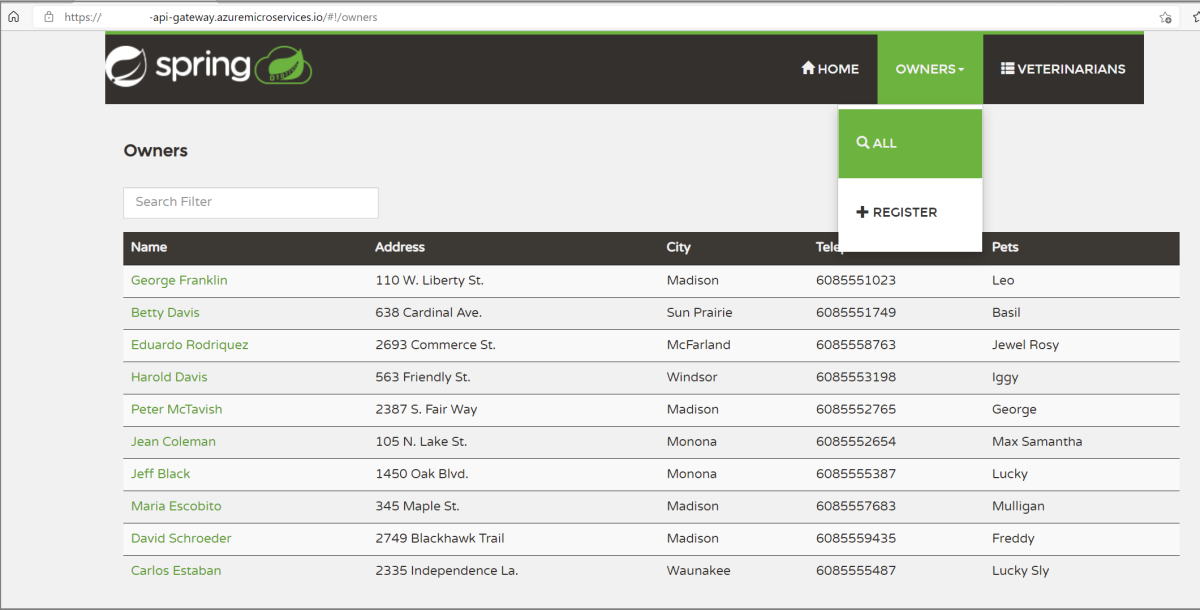
이전에 안내된 https://<service name>-api-gateway.azuremicroservices.io 형식의 공용 URL을 사용하여 브라우저에서 api-gateway 및 customers-service에 액세스합니다.
팁
배포 문제를 해결하려면 다음 명령을 사용하여 앱이 az spring app logs --name <app name> --follow를 실행할 때마다 로그 스트리밍을 실시간으로 가져올 수 있습니다.
추가 앱 배포
PetClinic 앱이 관리 서버, 방문 및 수의사 같은 모든 기능과 함께 작동하도록 하려면 다음 명령을 사용하여 다른 앱을 배포합니다.
az spring app create \
    --name admin-server \
    --runtime-version Java_17 \
    --instance-count 1 \
    --memory 2Gi \
    --assign-endpoint
az spring app create \
    --name vets-service \
    --runtime-version Java_17 \
    --instance-count 1 \
    --memory 2Gi
az spring app create \
    --name visits-service \
    --runtime-version Java_17 \
    --instance-count 1 \
    --memory 2Gi
az spring app deploy \
    --name admin-server \
    --runtime-version Java_17 \
    --artifact-path spring-petclinic-admin-server/target/admin-server-3.0.1.jar \
    --jvm-options="-Xms1536m -Xmx1536m"
az spring app deploy \
    --name vets-service \
    --runtime-version Java_17 \
    --artifact-path spring-petclinic-vets-service/target/vets-service-3.0.1.jar \
    --jvm-options="-Xms1536m -Xmx1536m"
az spring app deploy \
    --name visits-service \
    --runtime-version Java_17 \
    --artifact-path spring-petclinic-visits-service/target/visits-service-3.0.1.jar \
    --jvm-options="-Xms1536m -Xmx1536m"
리소스 정리
후속 빠른 시작 및 자습서를 계속 사용하려는 경우 이러한 리소스를 그대로 유지할 수 있습니다. 더 이상 필요 없으면 리소스 그룹을 삭제합니다. 그러면 리소스 그룹의 리소스가 삭제됩니다. Azure CLI를 사용하여 리소스 그룹을 삭제하려면 다음 명령을 사용합니다.
echo "Enter the Resource Group name:" &&
read resourceGroupName &&
az group delete --name $resourceGroupName &&
echo "Press [ENTER] to continue ..."


