Getting Started with Lottie-Windows
You probably have a JSON file that was exported from Adobe AfterEffects using the BodyMovin plugin. If not, you can find many from the fantastic community of Lottie designers and creators. Let’s bring these animations to your Windows applications with the following steps:
(Optional but Recommended) Install the Lottie Viewer application from the Store and validate that the JSON file — LottieLogo1.json in this example — works as expected. If there are any known issues due to unsupported AfterEffects features, the warning icon may light up and provide more context.
Install the Microsoft.UI.Xaml nuget package which contains the AnimatedVisualPlayer element. In your VisualStudio project:
- Go to the Nuget Package Manager by navigating to Project > Manage Nuget Packages.
- Check the Include prerelease box and search for “Microsoft.UI.Xaml” in nuget.org.
- Install the latest prerelease version of the nuget package available.
Modify your Page.xaml to include the namespace:
xmlns:muxc="using:Microsoft.UI.Xaml.Controls"Install the latest Microsoft.Toolkit.Uwp.UI.Lottie nuget package by following steps similar to those listed above. Modify your Page.xaml to include the namespace:
xmlns:lottie="using:Microsoft.Toolkit.Uwp.UI.Lottie"Add the JSON file to your project:
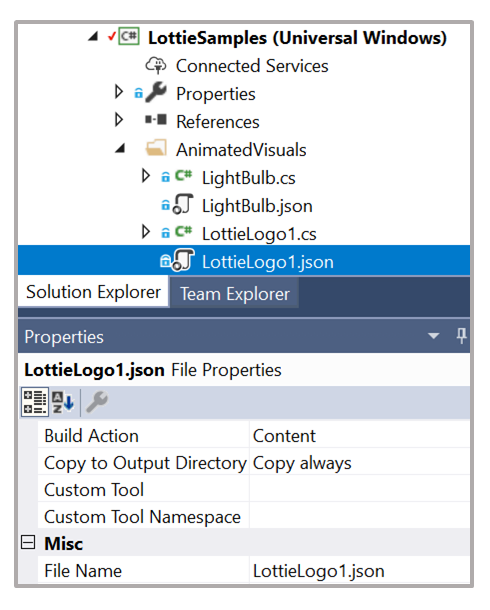
- Add LottieLogo1.json to the /AnimatedVisuals folder and include by right-clicking > Add > Existing Item.
- Set its Build Action to Content in the Properties window.

Instantiate the AnimatedVisualPlayer element and configure the LottieVisualSource to be consumed:
    <Border>
        <!--AnimatedVisualPlayer with AutoPlay-->
        <muxc:AnimatedVisualPlayer x:Name="LottiePlayer">
            <!--LottieVisualSource with JSON UriSource-->
            <lottie:LottieVisualSource x:Name="LottieJsonSource" UriSource="ms-appx:///AnimatedVisuals/LottieLogo1.json"/>
        </muxc:AnimatedVisualPlayer>
    </Border>
Since the AutoPlay property is set to True by default, the result will be this looping animation:

Resources
- Source code for sample: getting started with a JSON file
- The resulting page in the Lottie Samples application
- LottieVisualSource API reference
- Lottie Viewer application for previewing JSON files
- Help + feedback