WinUI 3 と Win32 相互運用機能を使用して C# .NET アプリを作成する
この記事では、プラットフォーム呼び出しサービス (PInvoke) を使用して、WinUI 3 と Win32 の相互運用機能を備えた基本的な C# .NET アプリケーションを構築する方法について説明します。
前提条件
基本的なマネージド C#/.NET アプリ
この例では、アプリ ウィンドウの場所とサイズを指定し、適切な DPI に合わせて変換とスケーリングを行い、ウィンドウの最小化と最大化のボタンを無効にします。最後に、現在のプロセスに対してクエリを実行し、現在のプロセスに読み込まれているモジュールの一覧を表示します。
初期テンプレート アプリケーションから、サンプル アプリケーションをビルドします (「前提条件」を参照してください)。 「Visual Studio での WinUI 3 テンプレート」も参照してください。
MainWindow.xaml ファイル
WinUI 3 では、XAML マークアップで Window クラスのインスタンスを作成できます。
XAML の Window クラスは、デスクトップ ウィンドウをサポートするために拡張され、UWP およびデスクトップ アプリ モデルで使用される低レベル ウィンドウの各実装を抽象化したものになりました。 具体的には、UWP の CoreWindow と Win32 のウィンドウ ハンドル (HWND) です。
次のコード例は初期テンプレート アプリの MainWindow.xaml ファイルを示し、アプリのルート要素として Window クラスを使用します。
<Window
    x:Class="WinUI_3_basic_win32_interop.MainWindow"
    xmlns="http://schemas.microsoft.com/winfx/2006/xaml/presentation"
    xmlns:x="http://schemas.microsoft.com/winfx/2006/xaml"
    xmlns:local="using:WinUI_3_basic_win32_interop"
    xmlns:d="http://schemas.microsoft.com/expression/blend/2008"
    xmlns:mc="http://schemas.openxmlformats.org/markup-compatibility/2006"
    mc:Ignorable="d">

    <StackPanel Orientation="Horizontal" HorizontalAlignment="Center" VerticalAlignment="Center">
        <Button x:Name="myButton" Click="myButton_Click">Click Me</Button>
    </StackPanel>
</Window>
構成
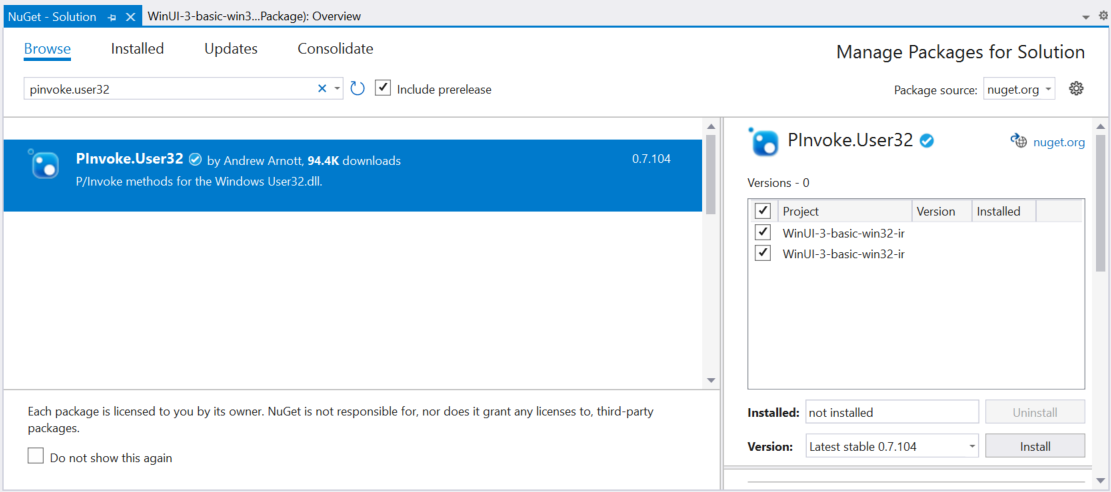
User32.dll で公開される Win32 API を呼び出すには、オープン ソースの PInvoke.User32 NuGet パッケージを VS プロジェクトに追加します (Visual Studio のメニューから、[ツール] -> [NuGet パッケージ マネージャー] -> [ソリューションの NuGet パッケージの管理] の順に選択して "Pinvoke.User32" を検索します)。 詳細については、「マネージド コードからのネイティブ関数の呼び出し」を参照してください。

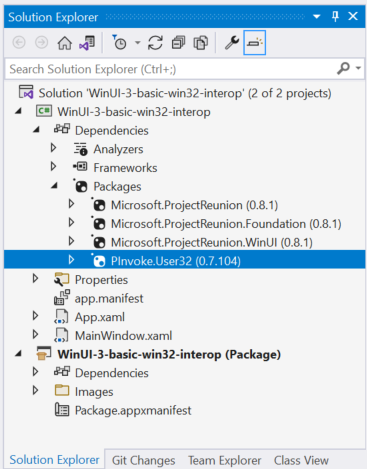
"PInvoke.User32 が選択されている NuGet パッケージ マネージャー。 "VS プロジェクトの Packages フォルダーをチェックして、インストールが正常に完了したことを確認します。

"PInvoke.User32 が選択されているソリューション エクスプローラー パッケージ。 "次に、アプリケーション プロジェクト ファイルをダブルクリック (または右クリックして [プロジェクト ファイルの編集] を選択) してテキスト エディターでファイルを開き、プロジェクト ファイルに "PInvoke.User32" の NuGet
PackageReferenceが含まれていることを確認します。<Project Sdk="Microsoft.NET.Sdk"> <PropertyGroup> <OutputType>WinExe</OutputType> <TargetFramework>net6.0-windows10.0.19041.0</TargetFramework> <TargetPlatformMinVersion>10.0.17763.0</TargetPlatformMinVersion> <RootNamespace>WinUI_3_basic_win32_interop</RootNamespace> <ApplicationManifest>app.manifest</ApplicationManifest> <Platforms>x86;x64;arm64</Platforms> <RuntimeIdentifiers>win10-x86;win10-x64;win10-arm64</RuntimeIdentifiers> <UseWinUI>true</UseWinUI> </PropertyGroup> <ItemGroup> <PackageReference Include="Microsoft.ProjectReunion" Version="0.8.1" /> <PackageReference Include="Microsoft.ProjectReunion.Foundation" Version="0.8.1" /> <PackageReference Include="Microsoft.ProjectReunion.WinUI" Version="0.8.1" /> <PackageReference Include="PInvoke.User32" Version="0.7.104" /> <Manifest Include="$(ApplicationManifest)" /> </ItemGroup> </Project>
コード
App.xaml.csの分離コード ファイルで、WindowNative.GetWindowHandle WinRT COM 相互運用機能メソッドを使用して ウィンドウのハンドルを取得します (「ウィンドウ ハンドルを取得する (HWND)」を参照してください)。このメソッドは、次に示すように、アプリの OnLaunched ハンドラーから呼び出されます。
/// <summary>
/// Invoked when the application is launched normally by the end user.  Other entry points
/// will be used such as when the application is launched to open a specific file.
/// </summary>
/// <param name="args">Details about the launch request and process.</param>
protected override void OnLaunched(Microsoft.UI.Xaml.LaunchActivatedEventArgs args)
{
    m_window = new MainWindow();

    var hwnd = WinRT.Interop.WindowNative.GetWindowHandle(m_window);

    SetWindowDetails(hwnd, 800, 600);

    m_window.Activate();
}
次に、
SetWindowDetailsメソッドを呼び出して、ウィンドウハンドルと優先ディメンションを渡します。using static PInvoke.User32;ディレクティブを忘れずに追加してください。この方法では:
- GetDpiForWindow を呼び出して、ウィンドウのドット/インチ (dpi) の値を取得します (Win32 では、実際のピクセルが使用されますが、WinUI 3 では有効ピクセルが使用されます)。 この dpi 値は、スケール ファクターを計算し、ウィンドウに指定された幅と高さに適用するために使用されます。
- 次に、SetWindowPos を呼び出して、ウィンドウの目的の場所を指定します。
- 最後に、SetWindowLong を呼び出して、"最小化" と "最大化" のボタンを無効にします。
private static void SetWindowDetails(IntPtr hwnd, int width, int height)
{
    var dpi = GetDpiForWindow(hwnd);
    float scalingFactor = (float)dpi / 96;
    width = (int)(width * scalingFactor);
    height = (int)(height * scalingFactor);

    _ = SetWindowPos(hwnd, SpecialWindowHandles.HWND_TOP,
                                0, 0, width, height,
                                SetWindowPosFlags.SWP_NOMOVE);
    _ = SetWindowLong(hwnd,
           WindowLongIndexFlags.GWL_STYLE,
           (SetWindowLongFlags)(GetWindowLong(hwnd,
              WindowLongIndexFlags.GWL_STYLE) &
              ~(int)SetWindowLongFlags.WS_MINIMIZEBOX &
              ~(int)SetWindowLongFlags.WS_MAXIMIZEBOX));
}
MainWindow.xaml ファイルで、ContentDialog と ScrollViewer を使用して、現在のプロセスに読み込まれたすべてのモジュールの一覧を表示します。
<StackPanel Orientation="Horizontal" HorizontalAlignment="Center" VerticalAlignment="Center">
    <Button x:Name="myButton" Click="myButton_Click">Display loaded modules</Button>

    <ContentDialog x:Name="contentDialog" CloseButtonText="Close">
        <ScrollViewer>
            <TextBlock x:Name="cdTextBlock" TextWrapping="Wrap" />
        </ScrollViewer>
    </ContentDialog>

</StackPanel>
次に、
MyButton_Clickイベント ハンドラーを次のコードに置き換えます。ここでは、GetCurrentProcess を呼び出して現在のプロセスへの参照を取得します。 次に、モジュールのコレクションを反復処理し、各 ProcessModule のファイル名を表示文字列に追加します。
private async void myButton_Click(object sender, RoutedEventArgs e)
{
    myButton.Content = "Clicked";

    var description = new System.Text.StringBuilder();
    var process = System.Diagnostics.Process.GetCurrentProcess();
    foreach (System.Diagnostics.ProcessModule module in process.Modules)
    {
        description.AppendLine(module.FileName);
    }

    cdTextBlock.Text = description.ToString();
    await contentDialog.ShowAsync();
}
アプリをコンパイルして実行します。
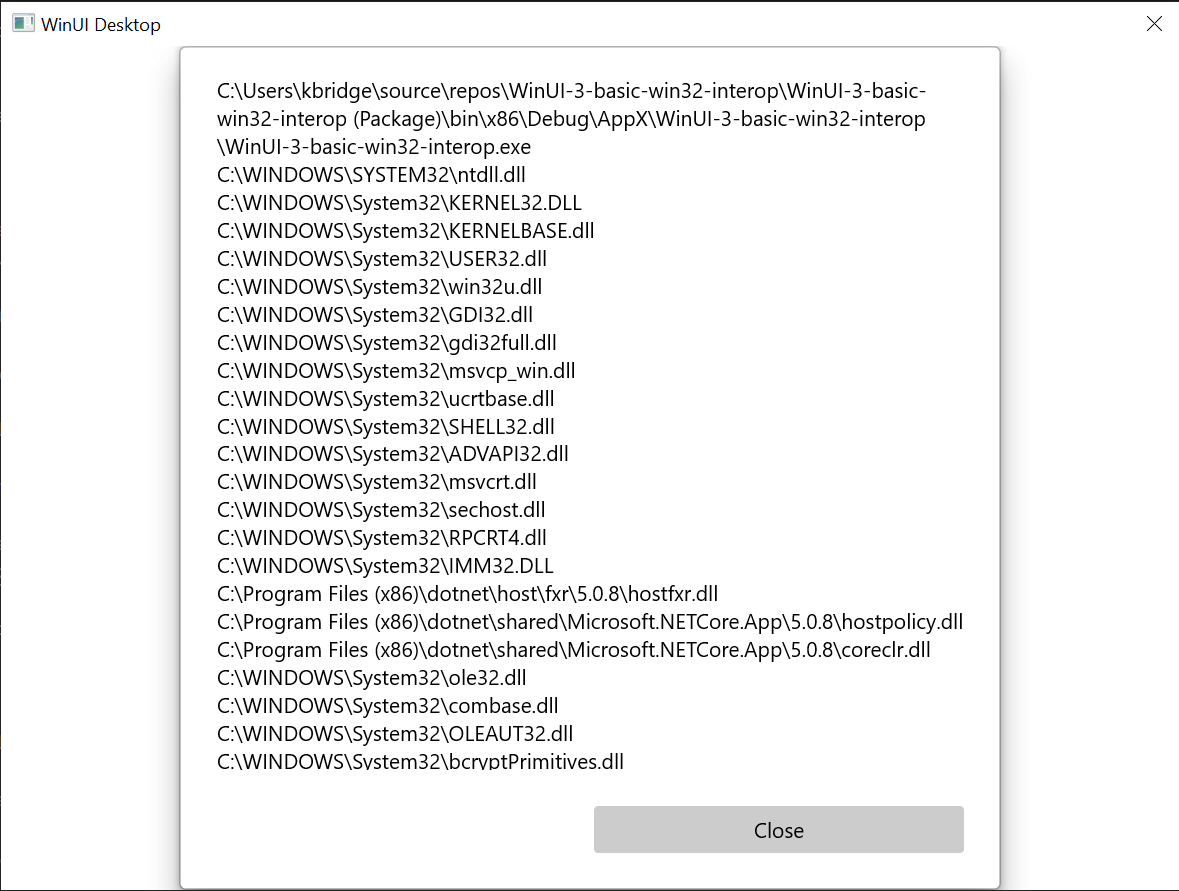
ウィンドウが表示されたら、[読み込まれたモジュールの表示] ボタンを選択します。

"このトピックで説明されている基本的な Win32 相互運用アプリケーション。 "
概要
このトピックでは、基になるウィンドウ実装 (この例では Win32 と HWND) へのアクセス方法、および WinRT API と共に Win32 API を使用する方法について説明しました。 ここでは、新しい WinUI 3 デスクトップ アプリを作成するときの、既存のデスクトップ アプリケーション コードを使用方法も示しています。
より広範なサンプルについては、Window App SDK サンプルの GitHub リポジトリにある AppWindow ギャラリーのサンプルを参照してください。
関連項目
Windows developer
